To grind welds with an angle grinder, first, wear safety gear like glasses, gloves, and ear protection. Choose the right disc based on your material. Position the grinder at a 20°-30° angle and use a steady back-and-forth motion, applying even pressure. Monitor the spark flow; ideally, it should travel 3-4 feet. If you encounter issues like excessive sparks or noise, check your technique. Stick around for more tips on achieving that perfect finish and maintaining your tool efficiently.
Essential Safety Gear and Precautions for Angle Grinding
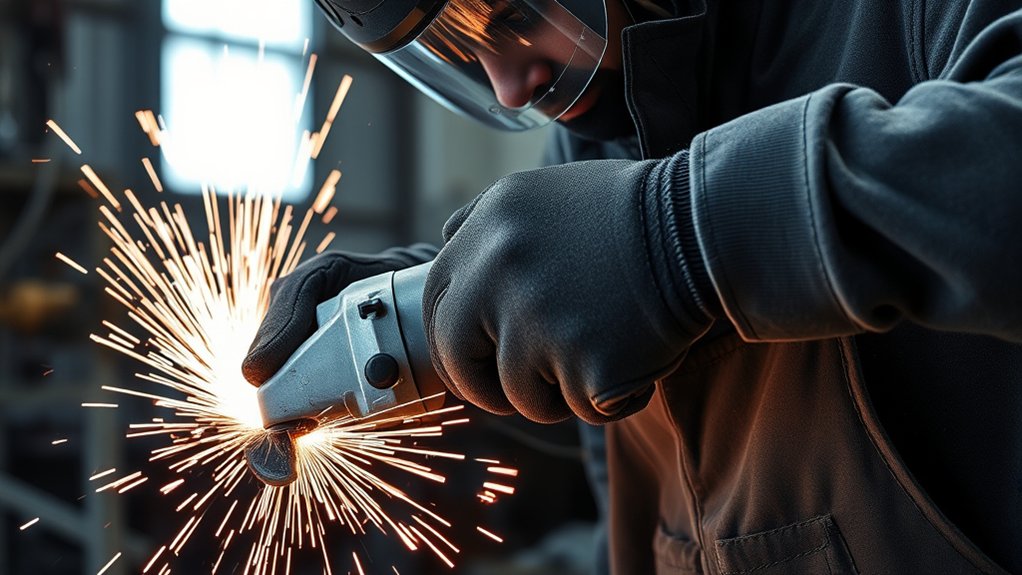
When grinding welds with an angle grinder, safety should be your top priority. Always wear appropriate personal protective equipment (PPE) to shield yourself from hazards. This includes safety glasses or face shields to protect your eyes from sparks and flying debris, gloves for hand protection, and hearing protection since noise levels can exceed 100 decibels. Don’t forget sturdy work boots to protect your feet from heavy materials and accidental drops.
Before starting, maintain a clean workspace free from flammable materials within a 30-foot radius. It’s essential to unplug the grinder or remove the battery before changing grinding discs or making adjustments. Regularly inspect your angle grinder’s guard and accessories for any signs of wear or damage. Prior to mounting grinding wheels, perform a ring test; a clear ringing sound indicates integrity, while a dull thud signals potential cracks. Prioritize these precautions for a safer grinding experience.
Choosing the Right Disc for Your Angle Grinder
Choosing the right disc for your angle grinder is essential for effective grinding and cutting. You’ll need to select a disc type based on the material you’re working with, such as cutting wheels for metal or diamond discs for masonry. Additionally, always check that the disc’s RPM rating exceeds your grinder’s maximum speed to guarantee safe operation.
Disc Type Selection
Selecting the right disc for your angle grinder can make a significant difference in your welding grind work. Understanding disc type selection is essential for peak performance. Here are some options to take into account:
- Cutting Wheels: Ideal for slicing through metal and steel.
- Grinding Wheels: Best for fast metal removal and shaping hard surfaces.
- Flap Discs: Perfect for finishing work, providing a finer surface texture with abrasive flaps.
- Diamond Cutting Discs: Designed for masonry tasks, effective on stone and concrete.
Ensure the disc you choose can handle high speeds and matches the material type for efficient grinding. For specialized applications, opt for discs tailored to high-strength steels to prevent overheating and maximize your results.
RPM Compatibility Check
Verifying your angle grinder and disc are RPM compatible is essential for safe and effective grinding operations. Start with an rpm compatibility check by reviewing the manufacturer’s specifications for the maximum RPM rating of both your angle grinder and the disc. The disc’s RPM rating must meet or exceed the grinder’s maximum RPM to prevent wheel failure and enhance safety. Using a disc with a lower RPM rating can lead to dangerous accidents and sudden breakage. Also, confirm that the disc’s design aligns with the grinder’s capabilities. Regularly inspect discs for wear and damage; even compatible RPM ratings can result in failure if the disc is compromised. Adhering to these guidelines will promote a safer grinding experience.
Step-By-Step Guide to Weld Grinding
Before you start grinding, make certain you’re wearing the appropriate safety gear to protect yourself from sparks and debris. Next, familiarize yourself with effective grinding techniques to optimize your results. Finally, pay attention to finishing touches that will enhance the overall quality of your weld work.
Safety Gear Requirements
When grinding welds with an angle grinder, wearing the appropriate safety gear is essential to protect yourself from potential hazards. Here’s what you need to guarantee your safety:
- Safety glasses or face shield: Protect your eyes from sparks and metal fragments.
- Hearing protection: Use earplugs or earmuffs, as angle grinders can exceed 100 decibels.
- Long sleeves and protective clothing: Wear these to shield your skin from hot metal debris.
- Dust mask or respirator: Protect your respiratory system from harmful dust particles.
Grinding Techniques Overview
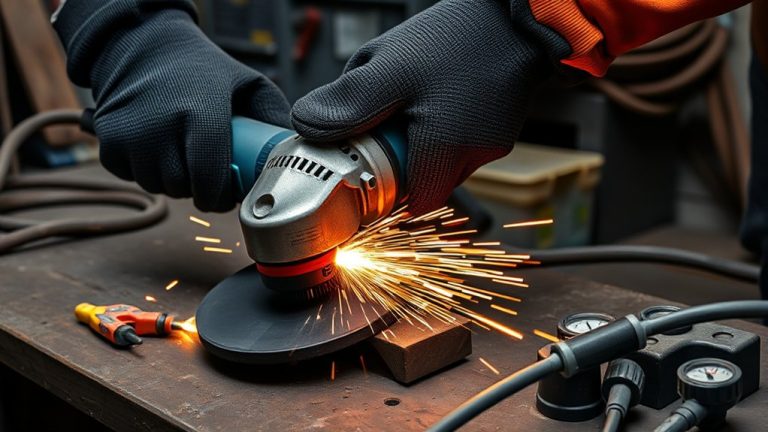
Start by selecting the right grinding disc for weld removal, as this choice greatly influences the efficiency and outcome of the process. Use an 80-grit R980 P Blaze disc for an aggressive cut rate while minimizing heat generation. Position the angle grinder at a 20°-30° angle to the work surface for effective grinding. While grinding, employ a steady, back-and-forth motion and apply enough pressure to let the tool do the work—this prevents gouging the metal. Monitor the spark flow; ideal sparks should travel 3-4 feet from the workpiece, indicating effective use of pressure. After initial weld removal, switch to a medium-grade non-woven disc for reconditioning before finishing with a final disc for a smooth, scratch-free surface.
Finishing Touches Essentials
Although achieving a flawless finish on your welds may seem challenging, following a systematic approach can simplify the process. Start with a Norton R980 P Blaze disc in grit 80 for aggressive weld removal, minimizing heat and scratch depth. Next, switch to Norton Vortex Rapid Prep Mini Discs in medium grade to recondition the weld, guaranteeing a smear-free finish. For a bright finish, use the Norton Rapid Blend NEX 2SF Mini Unitised disc, which effectively removes any remaining scratches.
- Always clean surfaces before applying the final disc.
- Change discs as needed to maintain efficiency.
- Use the right grinder wheel for each stage.
- Monitor your work to confirm ideal results.
Follow these steps for a professional look!
How to Get That Perfect Finish on Your Welds
Achieving a perfect finish on your welds requires careful attention to detail and the right tools. Start with a Norton R980 P Blaze disc in grit 80 for aggressive weld removal, minimizing heat generation and burn marks. Follow up with Norton Vortex Rapid Prep Mini Discs in medium grade, as they combine multiple grit sequences to cut your process time by 50% while guaranteeing a consistent smear-free finish. For a bright finish, use Norton Rapid Blend NEX 2SF Mini Unitised discs, guaranteeing all previous scratches are removed.
While grinding, maintain a steady hand and even pressure to avoid gouging the workpiece and sharp edges. Keep the tool moving to avoid creating uneven surfaces. Regularly inspect and replace your grinding discs to guarantee consistent material removal rates and better control. This methodical approach will help you achieve that smooth, professional appearance you desire.
Troubleshooting Common Grinding Issues
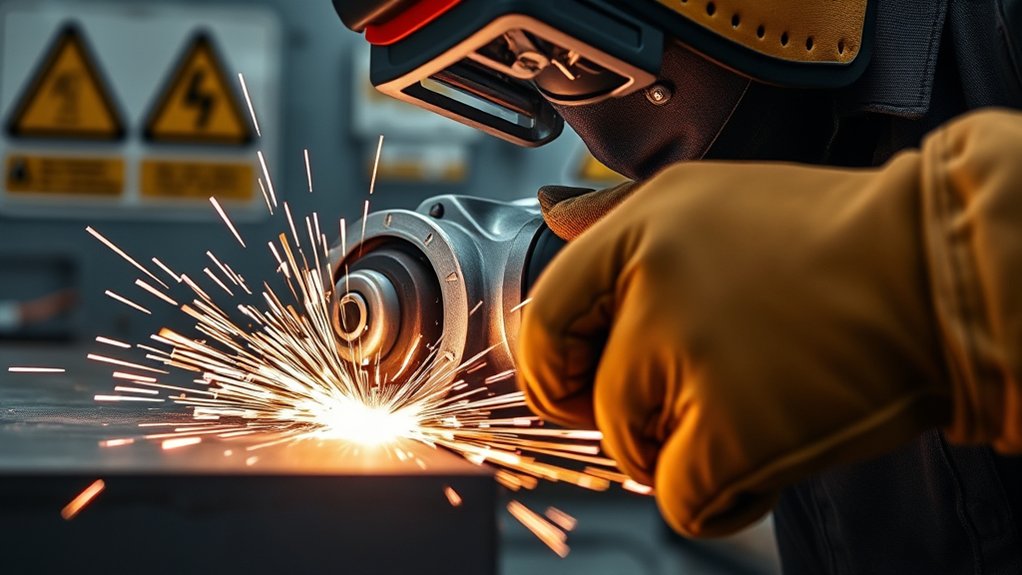
Even with the right techniques for finishing your welds, you might encounter common grinding issues that can affect your results. If you notice excessive sparks fly or hear a high-pitched noise, you may be applying too much pressure, causing wheel glazing and ineffective material removal.
Even with proper techniques, grinding issues like excessive sparks or high-pitched noises can indicate pressure problems affecting your results.
Here are some issues to pay attention to:
- If your grinder vibrates excessively, check the disc alignment and balance.
- Use the right tool; an incorrect disc type can slow down grinding or compromise safety.
- Perform a ring test on your wheel; cracks can lead to failure during use.
- If your grinding disc wears too quickly, adjust the grit or pressure to avoid overheating.
Maintenance Tips for Your Angle Grinder After Use
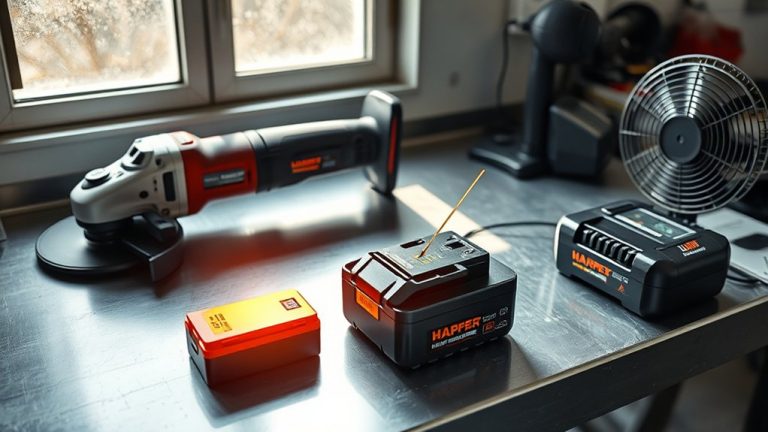
To keep your angle grinder in peak condition after each use, it is essential to follow a systematic maintenance routine. First, always unplug the tool to guarantee safety before you proceed. Use a brush or compressed air to remove dust and debris from the vents and housing; this prevents overheating and maintains performance, especially when operating at higher RPMs. Regularly inspect the power cord and switches for any signs of wear or damage to keep the tool safe and functional. If your model requires it, apply light machine oil to moving parts to reduce friction and help the grinder last longer. Finally, store the grinder in a dry, dust-free environment with the disc removed. This prevents any warping or damage to the attachments, making sure you’re ready for the next job with the right disc for the task ahead.
Frequently Asked Questions
How to Use Angle Grinder Step by Step?
To use an angle grinder, prioritize safety gear, select the right disc, grip firmly, and apply smooth motions for weld finishing. After grinding, maintain your tool and clean thoroughly for ideal metal preparation and surface smoothing.
What Is the Golden Rule in Welding?
The golden rule in welding is maintaining a clean surface. Prioritize joint preparation, select compatible welding materials, apply proper welding techniques, and follow safety precautions for effective equipment maintenance and successful finishing processes.
What Is the Step by Step Procedure in Using a Grinding Machine?
To master the grinding machine, select your material wisely, maintain your equipment, follow safety precautions, apply effective grinding techniques, and finish with finesse. Each step’s a dance toward precision and liberation in your craftsmanship.
Should You Push or Pull a Grinder?
You should push an angle grinder for better control and effective pressure. Pushing enhances surface finish while minimizing grinding safety risks. Pulling can lead to snagging, reducing control methods and potentially causing accidents during operation.
Conclusion
By following these steps, you’ll transform rough welds into smooth, polished seams that shine like a freshly minted coin. Remember, safety gear is your best friend, and choosing the right disc is essential for success. With practice, your technique will improve, making grinding feel as effortless as a breeze through the trees. Regular maintenance guarantees your angle grinder remains a reliable companion. Now, grab your gear and get to work—your welds are waiting for that perfect finish!