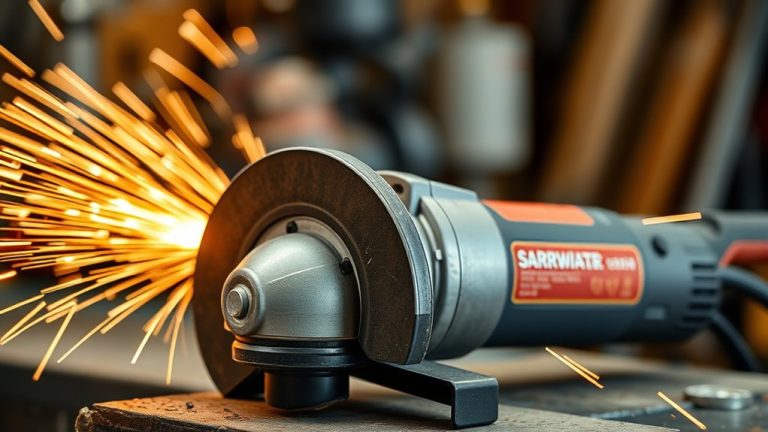
To change an angle grinder wheel, first unplug the tool and guarantee the wheel is cool. Press the wheel lock button, then use a spanner wrench to loosen the flange by turning it counter-clockwise. Replace the old wheel with the new one, checking for compatibility and damage before installing. Securely thread the flange back on. Always wear safety gear and maintain a clean workspace. Avoid common mistakes like forgetting to inspect the flange for a safer process. More tips follow.
What You Need to Know About Changing an Angle Grinder Wheel
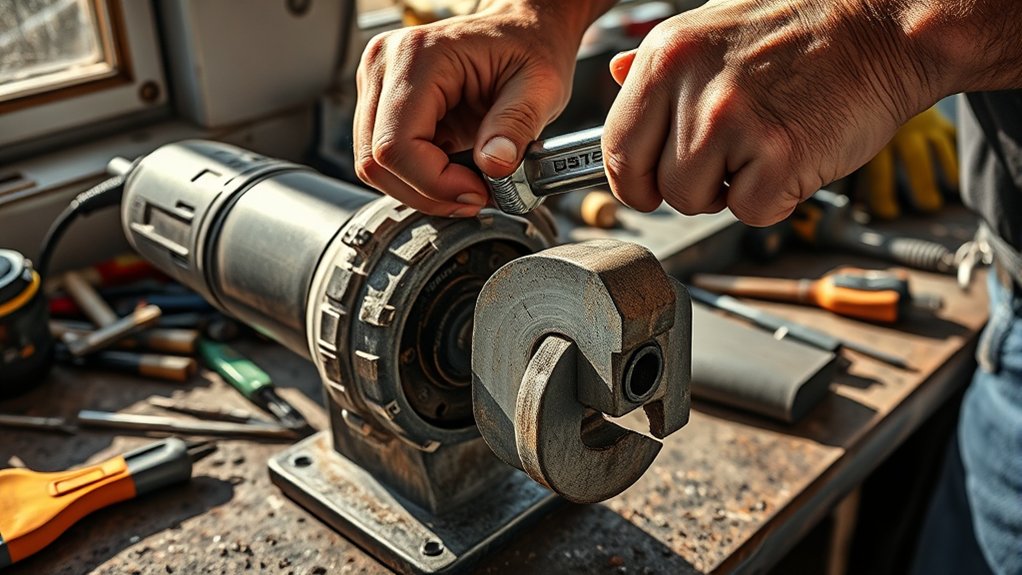
When you’re ready to change an angle grinder wheel, it’s important to understand the necessary steps and tools involved to guarantee a safe and effective process. Begin by making sure you have a spanner wrench or a Hilti Kwik-Lock flange at your disposal, along with safety gloves. Before attempting to loosen the flange, press the wheel lock button to secure the wheel in place. This vital step prevents accidents and guarantees stability during the process. When using a spanner wrench, insert the knobs into opposing holes on the flange and turn counter-clockwise to loosen it. Remember, hand-tightening the flange without a tool can compromise security, especially with thin abrasive wheels. Prioritizing safety precautions—like wearing gloves and confirming tool compatibility—is fundamental to avoid injuries. By following these guidelines, you empower yourself to change an angle grinder wheel efficiently and safely.
Tools You Need for Changing Your Angle Grinder Wheel
Changing an angle grinder wheel requires specific tools to guarantee a smooth and safe process. First, you’ll need an angle grinder itself, along with a new grinder wheel that’s compatible with your model. A spanner wrench is essential for loosening and tightening the flange that holds the wheel in place. Be sure to select the correct size spanner wrench for your grinder’s flange holes; using the wrong size can strip or damage them. If your grinder uses a Hilti Kwik-Lock flange, confirm its compatibility for a secure fit. Additionally, always wear gloves to protect your hands from sharp edges during the wheel change. Finally, set up a flat, stable work surface to ensure safety and prevent accidents while you work. Having these tools ready will streamline the process and enhance your overall experience.
Step-By-Step Guide: Changing Your Grinder Wheel With a Spanner Wrench
Before changing your grinder wheel, gather the necessary tools, including a spanner wrench and safety gear like goggles and gloves. It’s essential to prioritize safety by making certain the grinder is unplugged and the wheel is cool to the touch. Following these precautions will help prevent accidents and guarantee a smooth replacement process.
Tools Required For Replacement
To successfully change an angle grinder wheel, you’ll need three essential tools: the angle grinder itself, a spanner wrench, and a new grinding wheel. First, verify your angle grinder is unplugged. Locate the wheel lock button and press it down while rotating the wheel to lock it in place. Next, insert the spanner wrench knobs into the opposing holes on the flange to secure your grip. While maintaining pressure on the wheel lock, turn the spanner wrench counter-clockwise to loosen the flange and remove it by hand. After replacing the wheel, thread the flange back on securely, confirming the wheel stays in place. This methodical approach guarantees efficient operation of your angle grinder.
Safety Precautions To Consider
When replacing an angle grinder wheel, prioritizing safety is vital to prevent accidents and injuries. Start by wearing safety gloves and goggles to shield yourself from flying debris and sharp edges. Always make certain the angle grinder is unplugged or the battery is removed to avoid accidental activation during the process. Before installing the new wheel, inspect it for any damage; using a defective wheel can lead to breakage and serious injury. After installation, use a spanner wrench to securely tighten the flange, as proper tightening is essential for safe operation. Finally, maintain a clean and organized workspace, as it greatly reduces the risk of accidents while handling your tools. Stay vigilant and work safely.
Replace Your Grinder Wheel Without a Spanner Wrench
Replacing your angle grinder wheel without a spanner wrench is a straightforward process that requires just a few careful steps. Follow these methods to successfully replace an angle grinder wheel:
Replacing an angle grinder wheel without a spanner wrench is simple with a few careful steps.
- Press the wheel lock button to secure the wheel in place.
- Wear gloves for protection, then grip the wheel and turn it counterclockwise to release the flange.
- Once the flange is loose, remove it manually, avoiding excessive force.
- After swapping the old wheel for a new one, thread the flange back on by hand and tighten the wheel securely.
Be particularly cautious with thin abrasive cutting wheels, as they’re more susceptible to damage during the change. By following these steps, you’ll liberate yourself from needing a spanner wrench and guarantee your grinder is ready for the next task efficiently.
Easiest Way to Change Your Grinder Wheel

Changing your grinder wheel can be a quick process, especially if you use a Hilti Kwik-Lock flange. Start by pressing the wheel lock button on your angle grinder to secure the wheel. This prevents any movement while you work. Next, turn the Kwik-Lock flange counterclockwise by hand until it feels loose; you might encounter some spring tension just before it releases.
Once the old wheel is off, thread the new wheel onto the spindle. Verify it’s aligned properly, then reverse the process to secure it in place. There’s no need for a spanner wrench here, simplifying the entire procedure. Just hand-tighten the Kwik-Lock flange, making sure it’s snug but not over-tightened. This method allows for quick, tool-free wheel swaps, making it ideal for frequent changes. Embrace this efficient approach to liberate your workflow and enhance productivity.
Top 5 Mistakes to Avoid When Changing Your Grinder Wheel
While it may seem straightforward, several common mistakes can undermine the safety and effectiveness of changing your grinder wheel. Avoiding these pitfalls will guarantee a smooth process and safer operation.
- Failing to engage the wheel lock before changing the wheel can lead to injury, as the wheel might rotate unexpectedly.
- Not using a spanner wrench or the proper tool can cause over-tightening or make it difficult to loosen the flange.
- Forgetting to inspect the flange for wear or damage can result in failure during operation.
- Neglecting compatibility checks for the new wheel with your grinder’s specifications may lead to improper fitting.
Safety Tips for Changing Your Angle Grinder Wheel
Before you change your angle grinder wheel, make certain you’re wearing protective gear, including safety goggles, gloves, and a dust mask. Setting up a clean, organized workspace is also essential to prevent accidents and guarantee a smooth process. By prioritizing safety, you minimize risks and enhance your efficiency while working.
Wear Protective Gear
Safety is paramount when handling an angle grinder, especially during wheel changes. To protect yourself, don’t skip the essential gear:
- Safety goggles: Shield your eyes from flying debris.
- Heavy-duty gloves: Protect your hands from sharp edges and slips.
- Ear protection: Guard against the loud noise that can cause hearing damage.
- Dust mask: Prevent inhalation of fine particles generated during the process.
Ensure your clothing is fitted; loose items can get caught in the grinder, leading to serious accidents. By taking these precautions, you create a safer environment for changing the angle grinder wheel, allowing you to focus on the task at hand without unnecessary risks. Your safety matters, so gear up!
Ensure Proper Workspace Setup
After gearing up for the task, the next step is to confirm your workspace is set up correctly. A clean, well-lit area minimizes potential hazards, allowing you to focus on changing the wheel safely. Always wear appropriate personal protective equipment (PPE) like gloves, safety goggles, and a dust mask. Make sure the angle grinder is unplugged or its battery is removed to prevent accidental starts. Organize your tools and the new grinder wheel within easy reach to enhance efficiency. Here’s a quick checklist:
| Task | Importance | Notes |
|---|---|---|
| Clean workspace | Prevents accidents | Remove clutter and debris |
| Wear PPE | Protects against injuries | Include gloves and goggles |
| Unplug grinder | Eliminates accidental starts | Always check before working |
| Check for hazards | confirms safe environment | Look for flammable materials |
Angle Grinder Wheel Maintenance Tips
To guarantee your angle grinder operates safely and efficiently, regular maintenance of the grinding wheel is essential. Neglecting this can lead to unsafe conditions and diminished performance. Here are some key practices to follow:
Regular maintenance of your angle grinder’s wheel is crucial for safety and performance; neglect can lead to hazards and inefficiency.
- Regularly inspect the angle grinder wheel for cracks, chips, or excessive wear.
- Always make certain the wheel is compatible with the grinder’s RPM rating.
- Clean the grinder’s spindle and flange before installation to promote a secure fit.
- Replace grinding wheels that show signs of damage or have been used for extended periods.
Frequently Asked Questions
How to Replace a Wheel on an Angle Grinder?
To replace an angle grinder wheel, verify tool compatibility, press the lock button, and loosen the flange. Observe safety precautions, choose appropriate wheel types, and follow maintenance tips to secure a successful replacement.
How to Swap Angle Grinder Blade?
To swap your angle grinder blade, prioritize safety precautions. Lock the wheel, remove the old blade, and install the new one, ensuring it fits your wheel types and grinding techniques for ideal tool maintenance and performance.
How to Put a Disc on an Angle Grinder?
To put a disc on an angle grinder, guarantee safety, choose your disc type, and securely install it. Regular maintenance prevents common issues, so always check for tightness and wear before use to guarantee peak performance.
Which Way Does the Wheel Go on an Angle Grinder?
When installing, guarantee the wheel’s direction aligns counterclockwise. Prioritize safety precautions, follow installation tips carefully, and adhere to maintenance advice for peak performance. A correctly mounted wheel enhances efficiency and reduces risks during operation.
Conclusion
Changing your angle grinder wheel doesn’t have to be an intimidating task; think of it as changing a tire on a race car—precision and speed matter. By following the steps outlined and avoiding common mistakes, you’ll guarantee your tool remains efficient and safe. Remember, regular maintenance is key to extending the life of your grinder. With practice, you’ll master this skill and keep your projects running smoothly, like a well-oiled machine.