Changing an angle grinder wheel can feel risky if you rush the job. A loose disc, damaged flange, or wrong wheel can turn a simple swap into a serious safety problem. Use the steps below to unplug the grinder, lock the spindle, remove the old wheel, inspect the parts, and fit the new wheel with care.
What’s in This Article
- What You Need to Know About Changing an Angle Grinder Wheel
- Before You Begin Changing Your Angle Grinder Wheel
- Tools You Need for Changing Your Angle Grinder Wheel
- Step-By-Step Guide: Change Your Grinder Wheel With a Spanner Wrench
- Replace Your Grinder Wheel Without a Spanner Wrench
- Easiest Way to Change Your Grinder Wheel
- Top 5 Mistakes to Avoid When Changing Your Grinder Wheel
- Safety Tips for Changing Your Angle Grinder Wheel
- Angle Grinder Wheel Maintenance Tips
- Common Problems After Changing an Angle Grinder Wheel
- Frequently Asked Questions
- Conclusion
Quick Answer
Unplug the angle grinder or remove its battery before you touch the wheel. Press the wheel lock button, loosen the flange with the correct spanner wrench, swap the wheel, then tighten the flange securely. Always inspect the new wheel, flange, spindle, and guard before you run the tool.
Key Takeaways
- Disconnect the grinder from power before you change any wheel.
- Match the new wheel to your grinder size, arbor, speed rating, and job type.
- Use the wheel lock and the correct spanner wrench when your grinder requires one.
- Inspect the wheel, flange, spindle, and guard before you start the grinder.
- Run the grinder briefly in a safe direction after installation to check for wobble.
Estimated time: Most wheel changes take about 3 to 7 minutes when your tool is clean and the flange moves freely.
What You Need to Know About Changing an Angle Grinder Wheel
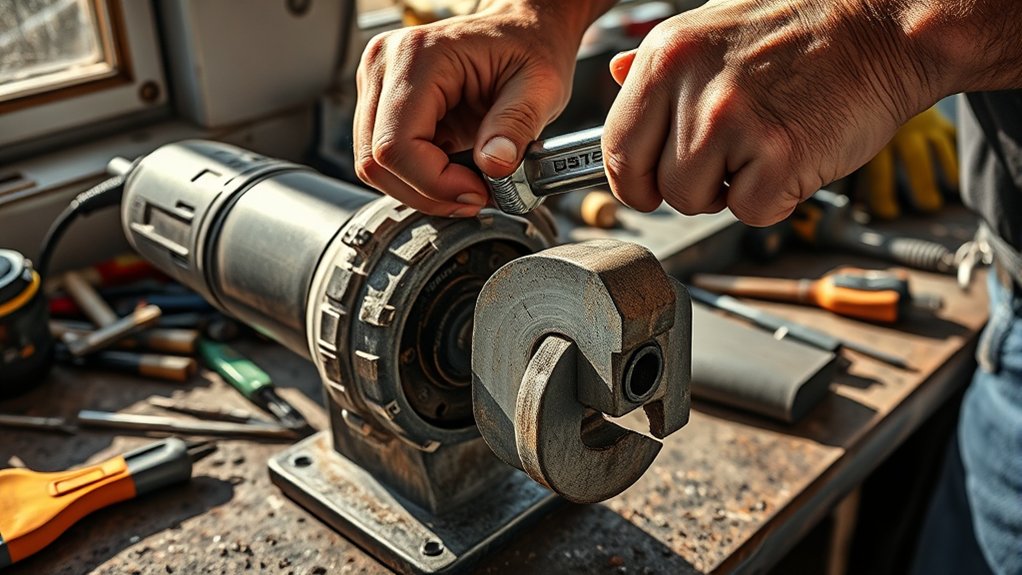
Before you change an angle grinder wheel, you need to know how the wheel mounts to the grinder. Most angle grinders use a spindle, an inner flange, an outer flange, and a guard. The flange holds the wheel tight, while the guard helps direct sparks and debris away from you.
Start by unplugging the grinder or removing the battery. Let the wheel cool if you used the tool. Then press the wheel lock button to stop the spindle from turning while you loosen the flange.
Use the correct spanner wrench for your grinder when the flange needs one. Insert the wrench pins into the flange holes and turn the flange counterclockwise on most standard setups. If your grinder uses a tool-free system, such as a Hilti Kwik-Lock flange, follow that flange style instead.
Never force a wheel onto a grinder. Check the wheel size, arbor hole, maximum revolutions per minute (RPM), and wheel type before you install it. A cutting disc, grinding wheel, flap disc, and wire wheel each serves a different job.
Before You Begin Changing Your Angle Grinder Wheel
Set up the job before you loosen any part of the grinder. This step helps you avoid dropped parts, damaged threads, and unsafe wheel installation.
- Unplug the cord or remove the battery.
- Let the wheel cool before you touch it.
- Put on safety goggles, gloves, and hearing protection.
- Place the grinder on a flat and stable surface.
- Check that the new wheel fits your grinder and guard.
- Inspect the wheel for cracks, chips, warping, or missing labels.
Warning: Do not install a cracked, chipped, oversized, or under-rated wheel because it can break during use.
Tools You Need for Changing Your Angle Grinder Wheel
Changing an angle grinder wheel requires only a few tools, but each one matters. Gather everything before you start so you don’t need to handle the grinder with loose parts still on the spindle.
- Angle grinder: Use the grinder that matches your wheel size and job.
- New grinder wheel: Choose the right disc type, size, arbor, and RPM rating.
- Spanner wrench: Use the wrench that fits the flange holes on your grinder.
- Safety gloves: Protect your hands from sharp wheel edges and hot parts.
- Safety goggles: Protect your eyes during inspection and later use.
- Clean cloth or brush: Remove dust from the spindle and flange faces.
If your grinder uses a Hilti Kwik-Lock flange or another tool-free flange, confirm that the flange fits your grinder and wheel. Do not mix flange parts from different tools unless the manufacturer allows it.
Products Worth Considering
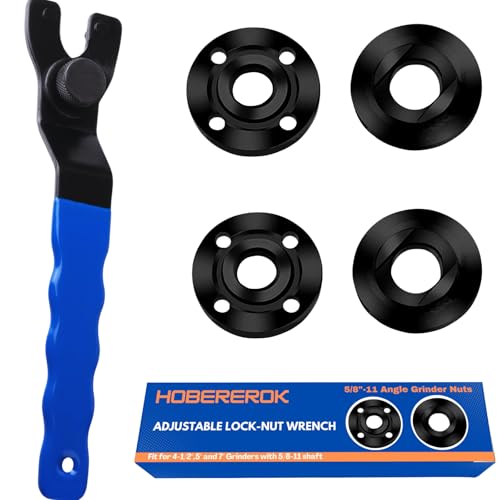
[ Universal Adjustable Angle Grinder Wrench & Nut Kit] Solve the problem of lost or missing wrenches. This versatile set includes 1 adjustable wrench that fits major brands like DeWalt, Milwaukee, and Makita, plus 4 replacement flange nuts (2 inner, 2 outer).. Perfect for DIY, workshops, and professional grinder parts replacement.

Material: Chisel Tool Steel
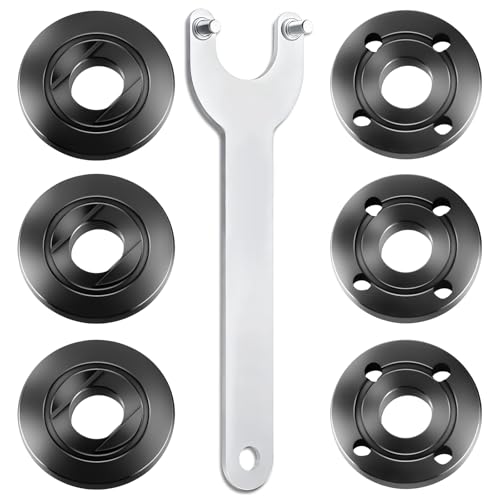
WHAT YOU GET: Includes 1 extended angle grinder wrench and 6 thickened-design flange nuts (3 inner nuts + 3 outer nuts), always have spare nuts to avoid downtime.
Step-By-Step Guide: Change Your Grinder Wheel With a Spanner Wrench
Use this method when your grinder has a standard flange that needs a spanner wrench. Move slowly, keep the grinder stable, and check every part before you restart the tool.
Products Worth Considering

【INCLUDE】Our angle grinder wrench kit include 1 angle grinder wrench, 3 inner angle grinder flange nuts, 3 outer angle grinder flange nuts. We have also provided you with a storage bag for easy carrying and storage.

[7PCS 5/8"-11 Angle Grinder Nut Wrench Replacement Kit] 1 piece angle grinder wrench and 6 angle grinder nuts (3 inner flange nuts, 3 outer flange nuts) for lock nut removal, wheel/disc replacement.Compatible with most arbor grinders and lock nuts, Perfect for home DIY, workshop projects, and professional grinder parts replacement
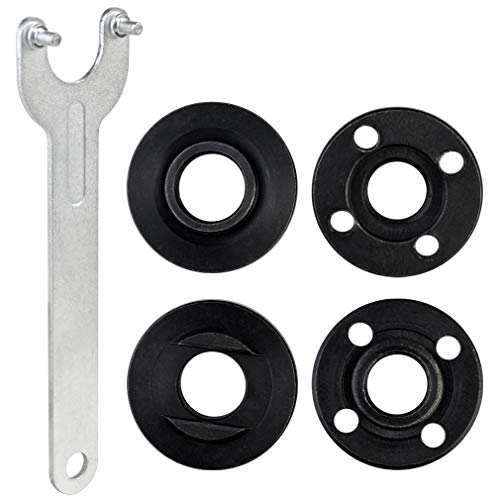
Complete Set Included: 1pcs angle grinder wrench, 2 pcs inner angle grinder flange nuts, 2 pcs outer angle grinder flange nuts. Non-original aftermarket parts, please check the size and compatibility before order
Tools Required for Replacement
You need the angle grinder, the correct spanner wrench, and a compatible new wheel. Keep your gloves and eye protection nearby. Use a clean cloth if dust or metal grit covers the spindle area.
Safety Precautions to Consider
Disconnect power before you start. Remove the battery on cordless grinders, or unplug the cord on corded grinders. Check the switch position before you reconnect the tool later.
Inspect the new wheel before installation. Look for cracks, chips, warped edges, water damage, or a missing speed label. Replace the wheel if anything looks wrong.
Spanner Wrench Replacement Steps
- Disconnect the grinder. Unplug the tool or remove the battery before you touch the wheel.
- Let the wheel cool. Wait until the old wheel feels safe to handle with gloves.
- Press the wheel lock. Hold the lock button and rotate the wheel until the spindle locks.
- Loosen the flange. Insert the spanner wrench into the flange holes and turn counterclockwise on most standard setups.
- Remove the old wheel. Lift the flange and wheel off the spindle without forcing them.
- Clean the mounting area. Wipe dust from the spindle, inner flange, and outer flange.
- Check the new wheel. Confirm the size, arbor, RPM rating, and wheel type match your grinder.
- Install the new wheel. Place the wheel flat on the inner flange and keep it centered.
- Tighten the flange. Thread the outer flange by hand first, then snug it with the spanner wrench if required.
- Test the grinder safely. Reconnect power and run the grinder away from your body for a short check.
Pro tip: Start the flange by hand first so you don’t cross-thread it on the spindle.
Replace Your Grinder Wheel Without a Spanner Wrench
You may need to replace your angle grinder wheel without a spanner wrench if the wrench is missing. This method can work on some grinders, but you must use care and avoid excess force.
Use a spanner wrench whenever possible because it gives you better control over the flange.
- Disconnect the grinder. Unplug it or remove the battery.
- Lock the spindle. Press the wheel lock button and rotate the wheel until it stops.
- Grip the wheel with gloves. Hold the wheel firmly without bending it.
- Loosen the flange carefully. Turn the wheel or flange counterclockwise on most standard setups.
- Remove the flange by hand. Stop if the flange feels stuck or damaged.
- Install the new wheel. Center it on the spindle and thread the flange back on.
Use extra care with thin abrasive cutting wheels. These discs can crack if you twist or bend them. If the flange will not move, use the correct wrench instead of forcing the wheel.
Easiest Way to Change Your Grinder Wheel

The easiest method uses a compatible tool-free flange, such as a Hilti Kwik-Lock flange. Press the wheel lock button to secure the spindle. Then turn the tool-free flange counterclockwise by hand until it loosens.
Remove the old wheel and inspect the spindle, inner flange, and guard. Place the new wheel on the spindle and make sure it sits flat. Then tighten the tool-free flange by hand until it feels snug.
Do not over-tighten the flange. The grinder will tighten many standard flanges during normal use, but the wheel must start securely seated. Run a short test before you begin cutting or grinding.
Top 5 Mistakes to Avoid When Changing Your Grinder Wheel
A wheel change looks simple, but small mistakes can affect safety and performance. Watch for these common errors before you start the grinder.
- Forgetting to disconnect power: A live tool can start by accident.
- Skipping the wheel lock: A moving spindle makes the flange harder to control.
- Using the wrong wheel: A mismatched size, arbor, or RPM rating can create serious risk.
- Ignoring flange damage: A worn or dirty flange can stop the wheel from sitting flat.
- Over-tightening the flange: Excess force can damage the wheel, flange, or spindle threads.
Safety Tips for Changing Your Angle Grinder Wheel
Before you change your angle grinder wheel, wear protective gear and clear the work area. Good setup reduces the chance of slips, cuts, and accidental starts. It also helps you spot wheel damage before use.
Wear Protective Gear
Use personal protective equipment (PPE) before you handle the grinder or wheel. Even a wheel change can expose you to sharp edges, dust, and loose debris.
- Safety goggles: Shield your eyes from dust and loose particles.
- Heavy-duty gloves: Protect your hands from sharp wheel edges.
- Ear protection: Protect your hearing when you test and use the grinder.
- Dust mask: Reduce dust exposure when the grinder or wheel carries fine debris.
Wear fitted clothing while you work. Loose sleeves, drawstrings, jewelry, and gloves with loose cuffs can catch on moving parts during use.
Ensure Proper Workspace Setup
Set the grinder on a clean, stable surface before you loosen the flange. Keep the new wheel, wrench, and safety gear within reach. Move flammable materials away from the area before you test the grinder.
| Task | Why It Matters | What to Check |
|---|---|---|
| Clean the workspace | Reduces slips and dropped parts | Remove clutter, dust, and loose debris |
| Wear PPE | Protects your eyes, hands, ears, and lungs | Use goggles, gloves, hearing protection, and a mask |
| Disconnect power | Prevents accidental starts | Unplug the cord or remove the battery |
| Check for hazards | Helps prevent fire and injury | Move flammable items and secure loose objects |
Angle Grinder Wheel Maintenance Tips
Regular maintenance helps your angle grinder run safer and smoother. It also helps the wheel sit flat when you change it. Build these checks into every wheel swap.
Clean parts and correct wheel fit matter as much as the wheel change itself.
- Inspect each wheel for cracks, chips, warping, and excess wear.
- Match the wheel’s RPM rating to the grinder before use.
- Clean the spindle and flange faces before you install a wheel.
- Replace wheels that show damage or uneven wear.
- Store spare wheels flat and dry so they do not warp or weaken.
Common Problems After Changing an Angle Grinder Wheel
If the grinder shakes after a wheel change, stop using it at once. Disconnect power and check whether the wheel sits flat on the inner flange. Also check for dirt, damaged flanges, or a wheel that does not match the grinder.
If the flange keeps loosening, check that you installed it in the correct direction for your wheel type. Some flanges have different sides for thin discs and thicker wheels. Check your grinder manual if the flange shape looks unclear.
If the wheel rubs the guard, do not run the tool. Confirm the wheel diameter fits the grinder and guard. Adjust or reinstall the guard only if your grinder manual allows it.
Frequently Asked Questions
How do you replace a wheel on an angle grinder?
Disconnect the grinder, press the wheel lock, and loosen the flange with the correct spanner wrench. Remove the old wheel, clean the mounting area, install the new wheel, and tighten the flange securely.
How do you swap an angle grinder blade?
Use the same basic method you use for a grinding wheel. Match the blade to the grinder size, arbor, RPM rating, guard, and job before you install it.
How do you put a disc on an angle grinder?
Place the disc flat on the inner flange with the correct side facing out if the disc label or manual gives a direction. Thread the outer flange by hand first, then tighten it with the correct method for your grinder.
Which way does the wheel go on an angle grinder?
Follow the arrow on the wheel label when the disc has one. If the wheel has no direction mark, install it according to the grinder manual and make sure it sits flat against the flange.
Can you change an angle grinder wheel without the wrench?
You can loosen some flanges by hand if they are not stuck, but the proper spanner wrench gives safer control. Use the wrench whenever your grinder design requires it.
Conclusion
A safe angle grinder wheel change starts with one simple rule: disconnect power before you touch the wheel. After that, match the new wheel to your grinder, inspect every part, and tighten the flange with care. Run a short test in a safe direction before you return to cutting or grinding. With a steady routine, you can change wheels faster while keeping your tool safer to use.


