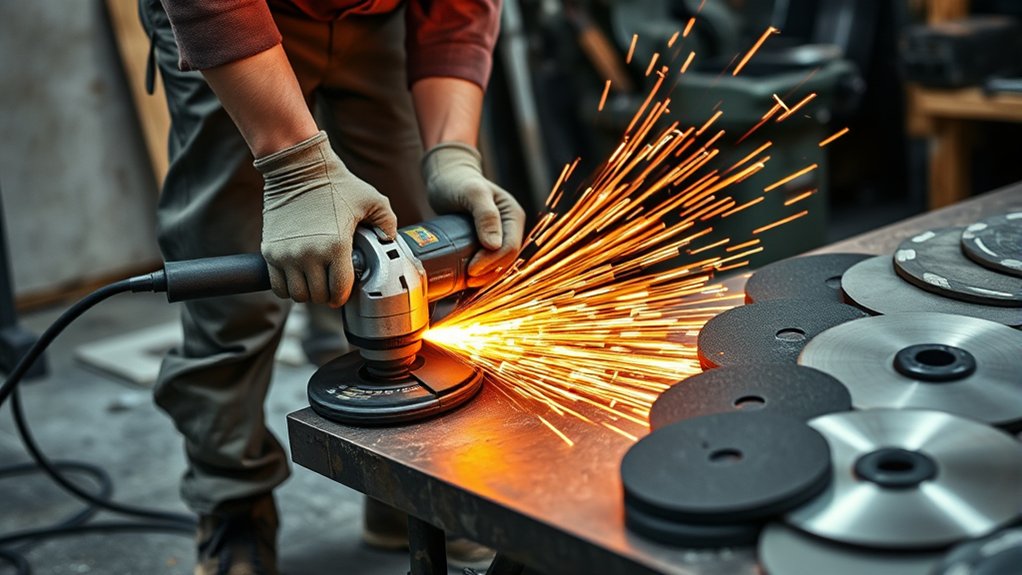
Angle grinder sparks can burn skin, damage your eyes, and ignite nearby materials if you stand in the wrong place. The safest position keeps your body out of the spark path, your feet stable, and both hands locked on the tool. This guide shows you how to set up, stand, grip, grind, and respond if something goes wrong.
Quick Answer
Stand slightly to the side of the angle grinder, not directly behind the wheel or in the spark stream. Keep both hands on the tool, place your feet shoulder-width apart, and aim sparks away from your body, other people, and anything that can burn.
Key Takeaways
- Wear eye, face, hand, hearing, foot, and respiratory protection before you start.
- Use both hands and keep your body out of the wheel path.
- Direct sparks away from your body, bystanders, cords, and flammable items.
- Choose a wheel that matches the job, material, grinder size, and speed rating.
- Stop the grinder and unplug it before you inspect, adjust, or change the wheel.
Safety First: Essential Angle Grinder Basics

Before you use an angle grinder, choose a tool that fits the job and the wheel you plan to use. Inspect the grinder, guard, cord, switch, and wheel before each use. Make sure the wheel sits tight, has no cracks, and matches the grinder’s rated speed.
Use the guard that came with the grinder, and set it so it helps block sparks and debris. Keep both hands on the tool, one on the main handle and one on the side handle. Hold the grinder firmly without forcing it into the work.
Clear your work area before you start. Move flammable materials, fuel, paper, rags, and loose dust away from the spark path. Keep bystanders out of the area so they do not get hit by sparks or flying debris.
Warning: Never use a cracked, chipped, or wrong-sized wheel because it can break apart at high speed.
Must-Have Safety Gear for Using an Angle Grinder
Angle grinders throw sparks, grit, and metal fragments at high speed. Wear the right personal protective equipment (PPE) before you plug in the tool. Your gear should protect your eyes, face, lungs, ears, hands, body, and feet.
Products Worth Considering

Industrial Grade Protection: Package includes 6 pairs clear safety goggles meet ANSI Z87.1 standards, designed for industrial, commercial, and housework. The lens are made of high-quality PC materials, which is anti scratch and high impact resistance, effectively blocks harmful UV rays.
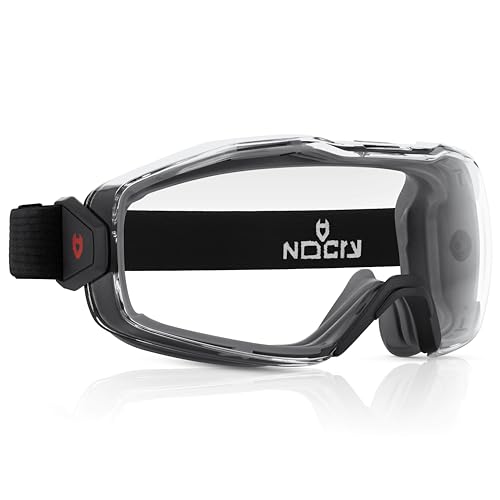
SMOOTH FIT OVER YOUR PRESCRIPTION EYEGLASSES — Want to wear your safety goggles over eyeglasses? These safety goggles fit most prescription eyewear, so you don't have to compromise on your sight. The soft TPR frame gasket with built-in slots creates a secure seal without squeezing your eye goggles or frames.

Industrial Grade Protection - MELASA protective goggles meet ANSI Z87.1 Safety Goggles Standards and CE EN166 certificate requirements, designed for industrial, commercial, and housework.
Eye Protection Essentials
Flying sparks and debris can cause serious eye injuries. Wear safety glasses or goggles that meet the ANSI Z87.1 impact standard. For better face protection, wear a full-face shield over your safety glasses.
Check your lenses before each job. Replace scratched, cracked, or loose eyewear because it can block your view or fail during use. Make sure your eye protection fits snugly and stays in place while you move.
Respiratory Gear Importance
Grinding can create dust, metal particles, paint residue, and other airborne hazards. Use a respirator or dust mask that fits the material and work area. For fine dust, choose an N95 or higher-rated respirator when the job calls for particle filtration.
Good ventilation helps reduce exposure, but it does not replace proper respiratory protection. Check the seal before you start, especially in tight or poorly ventilated spaces. Replace filters or disposable masks when they become dirty, damaged, or hard to breathe through.
Protective Clothing Recommendations
Wear long sleeves, durable pants, and flame-resistant clothing when sparks may hit your body. Avoid loose clothing, jewelry, and dangling cords because the wheel can catch them. Choose close-fitting gear that lets you move without pulling into the tool.
Use heavy-duty gloves that help protect your hands from sharp edges, heat, and sparks. Wear steel-toed boots or sturdy work boots to protect your feet from dropped metal and tools. Use earplugs or earmuffs because angle grinders can produce harmful noise.
Position Your Body for Optimal Control
Good body position gives you more control and helps keep sparks away from you. Stand slightly to the side of the workpiece, not directly in line with the wheel. Keep your face and chest out of the wheel path in case the grinder kicks back.
Set your feet shoulder-width apart and keep your knees slightly bent. This stance helps you absorb vibration and stay balanced. Keep the work at a comfortable height so you do not lean over the grinder.
Maintain Proper Stance
Start with your body angled away from the spark stream. Keep your weight balanced over both feet, and avoid reaching across the work. If you need to change direction, stop the grinder and reset your stance.
Clamp small workpieces instead of holding them by hand. A clamp gives you a safer work angle and frees both hands for the tool. It also helps stop the material from shifting during the cut or grind.
Grip Tool Firmly
Grip the angle grinder with both hands before the wheel touches the work. Place one hand on the main handle and the other on the side handle. This grip helps you control torque, vibration, and sudden movement.
- Use the side handle: Adjust it for your dominant hand and the direction of the work.
- Set your feet: Keep your feet shoulder-width apart so you can resist kickback.
- Angle your body: Stand out of the spark path and away from the wheel line.
Directing Sparks Safely
Angle grinder sparks should travel away from your body, bystanders, cords, and flammable materials. Before you start, look at where the sparks will go. Adjust your stance, guard, and workpiece so sparks move into a safe open area.
Use welding blankets, spark shields, or nonflammable barriers when the workspace needs extra protection. Keep the grinder cord behind you and out of the wheel path. Do not grind near fuel, solvents, sawdust, dry grass, or oily rags.
Pause often to check your position. Sparks can change direction when you move around the workpiece or change wheel angle. Reset your stance before you continue.
Choosing Wheels for Your Angle Grinder Projects
The right wheel helps the grinder work safely and cleanly. Match the wheel to the material, task, grinder size, and speed rating. Do not use a wheel unless its maximum revolutions per minute (RPM) rating meets or exceeds your grinder’s speed.
- Match the material: Use metal-rated wheels for steel and masonry-rated wheels for concrete or stone.
- Match the task: Use grinding wheels for grinding, cutting discs for cutting, wire wheels for cleaning, and sanding discs for surface work.
- Match the size: Use only wheel sizes approved for your grinder, such as common 4.5-inch wheels on many handheld grinders.
- Check the RPM rating: Use a wheel only if it can handle the grinder’s listed speed.
Pro tip: Keep separate wheels for cutting, grinding, sanding, and cleaning so you do not force one disc to do the wrong job.
Products Worth Considering

High performance aluminum oxide grain for long life and high material removal

High performance aluminum oxide grain for long life and high material removal of the grinding wheel

Avoid These Body Positioning Mistakes
Poor body position can send sparks into your face or put you in the path of kickback. Do not stand directly behind the wheel. Stand to the side and keep your upper body out of the grinder’s line of travel.
Do not lean over the workpiece or grind above shoulder height. Both positions reduce control and increase the chance that sparks or debris will hit you. Keep the work in front of you at a stable height whenever you can.
Do not hold small metal pieces with your free hand. The grinder can grab the work and pull it from your grip. Secure small parts with a clamp, vise, or workbench instead.
Tips for Maintaining Stability and Balance
Stable footing helps you guide the grinder without fighting it. Place your feet shoulder-width apart and keep your weight even. Move your feet instead of stretching when you need a new angle.
- Set a firm base: Stand on a dry, clear surface with no cords, scrap, or tools underfoot.
- Secure the workpiece: Clamp small parts so they cannot spin, slide, or chatter.
- Control the pressure: Let the wheel cut or grind without forcing the tool.
- Reset your posture: Stop and reposition when your arms, shoulders, or back feel strained.
How to Adjust Your Tool for Different Tasks

Each grinding task needs a different wheel, guard position, and grip angle. Unplug the grinder or remove the battery before you change wheels or adjust the guard. Check the wheel label, arbor size, and RPM rating before you restart.
| Task Type | Key Adjustments |
|---|---|
| Grinding | Choose a grinding wheel, set the guard, and use steady two-handed pressure. |
| Sanding | Choose a sanding disc, use light pressure, and keep the pad moving. |
| Cleaning | Choose a wire brush, position the guard, and direct debris away from you. |
| Cutting | Choose a cutting disc, keep the wheel straight, and avoid twisting in the cut. |
| Polishing | Choose a polishing pad and use a speed setting that matches the accessory. |
Start with the right accessory, then adjust the side handle for control. Set the guard to block sparks without touching the wheel. Make a test pass on scrap when the job allows it.
What to Do in Case of Accidents or Injuries?
Accidents can happen fast, so plan your response before you start grinding. Keep a first aid kit nearby and make sure you can reach the power switch quickly. If you work with others, tell them where to stand before the tool starts.
- Stop the grinder: Release the trigger, turn off the tool, and disconnect it from power.
- Check the injury: Clean minor cuts with soap and water, apply antiseptic, and cover the wound with a sterile bandage.
- Get emergency help: Call emergency services for eye injuries, deep cuts, heavy bleeding, burns, or embedded debris.
- Save the scene: Do not restart work until you find and correct the cause of the accident.
Safety Disclaimer: This article is for informational purposes only and does not replace hands-on safety training, manufacturer instructions, or professional guidance. Follow your tool manual, jobsite rules, and local safety requirements before using an angle grinder.
Frequently Asked Questions
Why Is My Angle Grinder Sparking?
Some sparking is normal when you grind or cut metal. Excessive sparking can come from a worn wheel, too much pressure, the wrong disc, or the wrong angle. Stop the tool and inspect the wheel, guard, and workpiece before you continue.
Which Direction Do Angle Grinders Spin?
Many angle grinders spin counterclockwise when viewed from the wheel side, but designs can vary. Check your grinder manual and watch the spark direction before you start cutting or grinding. Position your body so sparks travel away from you.
How to Stop Angle Grinder Sparks?
You usually cannot stop sparks when grinding metal, but you can control where they go. Aim sparks away from your body, cords, bystanders, and flammable items. Use shields, guards, and fire-safe barriers when sparks could reach nearby hazards.
What Is the Angle Grinder Spark Test?
A spark test uses the color, length, and shape of sparks to help identify certain metals. It requires skill, clear lighting, and strict safety controls. Do not use it as your only way to identify unknown material.
Conclusion
The safest angle grinder position keeps you stable, two-handed, and out of the spark and wheel path. Set up the work area first, choose the right wheel, and let the grinder do the work without forcing it. Stop and reset your stance any time your balance, grip, or spark direction changes. When you control your position, you control much more of the risk.
References
- Abrasive Wheel Machinery and Tools — Occupational Safety and Health Administration
- Eye Safety — National Institute for Occupational Safety and Health
- N95 Respirators and Surgical Masks — National Institute for Occupational Safety and Health
- Personal Protective Equipment — Occupational Safety and Health Administration


