How to Fix an Angle Grinder That Won’t Start
An angle grinder that won’t start can stop a job fast and create a safety risk if you rush the fix. Most startup problems come from the power supply, cord, switch, brushes, spindle lock, or a wheel that isn’t seated correctly. This guide walks you through safe checks, likely causes, step-by-step fixes, and signs that your grinder needs professional service.
Quick Answer
If your angle grinder won’t start, unplug it first, then check the outlet, plug, cord, switch, brushes, vents, spindle lock, and wheel installation. Start with the easiest checks before opening any part of the tool. Stop troubleshooting and contact a qualified repair technician if you see burnt parts, melted plastic, smoke, or exposed wires.
Key Takeaways
- Unplug the grinder before you inspect the cord, wheel, guard, brushes, or spindle lock.
- Check the outlet, breaker, plug, and power cord before you assume the tool has failed.
- Inspect the wheel and spindle lock because a jammed or misfitted part can stop startup.
- Clean blocked vents and let an overheated grinder cool before you try to run it again.
- Get professional help if the grinder shows electrical damage, burning smells, or repeated failures.
Common Electrical Issues That Prevent Startup
When your angle grinder won’t start, check the electrical path first. Plug the tool into a working outlet and make sure the plug sits firmly. A loose plug or dead outlet can make a good grinder seem broken.
Inspect the power cord from the plug to the tool body. Look for cuts, crushed spots, burn marks, or exposed wire. If you see cord damage, stop using the grinder until you replace the cord or have it repaired.
Check your circuit breaker, fuse, or ground-fault circuit interrupter (GFCI) outlet if the grinder has no power. A grinder can trip a weak circuit when it starts under load. Reset the breaker or outlet only after you remove the cause of the trip.
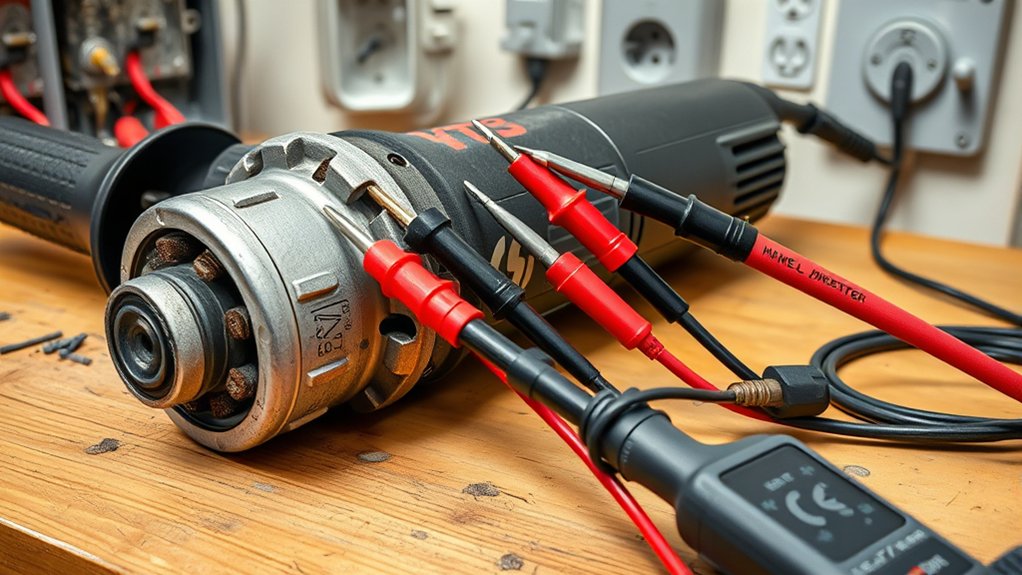
Test the power switch if the outlet and cord work. Use a multimeter only if you know how to test continuity safely. Replace a faulty switch with the correct part for your model, or ask a repair technician to do it.
Warning: Never use an angle grinder with a damaged cord, exposed wires, smoke, or a burning smell.
Products Worth Considering

【SUITABLE FOR A WIDE RANGE OF POWER TOOLS】Replacement power cords for drill bits, miter saws, chopper saws, table saws, sanders, grinders, grinders, vacuum cleaners, shop floor vacuum cleaners, kitchen appliances, lights, compressors, motors, and power tools.

HEAVY-DUTY REPLACEMENT POWER CORD – 9 ft SJTW power cord ideal for replacing worn or damaged cords on appliances, motors, and power tools to restore safe and reliable operation.

Specification: 18awg 2 prong replacement power cord. White / black stranded wire to stripped ends with adjustable strain relief.
Mechanical Failures: Diagnosing and Fixing Your Angle Grinder
Mechanical faults can also keep an angle grinder from starting or spinning. Start with the parts you can inspect without opening the motor housing. A jammed spindle lock, damaged flange, or poorly seated wheel can stop normal operation.
Spindle Lock Issues
Check the spindle lock button for cracks, sticking, or debris around the mechanism. The lock should engage only when you change the wheel. If it stays pressed or jammed, the grinder may not spin.
Turn the spindle by hand while the tool remains unplugged. It should move freely without grinding, binding, or scraping. If it feels locked, inspect the flange, spindle, and guard area for debris or damage.
Refer to your user manual before you remove parts around the spindle. Grinder designs vary by brand and model. If the spindle lock still sticks after cleaning, have a repair technician inspect it.
Wheel Installation Problems
A poorly installed wheel can create drag, wobble, or a lockup. Unplug the grinder, then confirm that the wheel matches the tool’s size, speed rating, and intended material. Never use a wheel with a lower revolutions per minute (RPM) rating than the grinder.
Inspect the wheel for cracks, chips, warping, or missing pieces. Replace damaged wheels instead of trying to run them. A cracked wheel can break apart at speed and cause serious injury.
Check the inner and outer flanges for dirt, burrs, or poor seating. Tighten the wheel according to the manual, then rotate it by hand. The wheel should spin without rubbing the guard or wobbling.
How to Diagnose Blade and Disc Performance Problems
Blade and disc problems can make a grinder seem weak, rough, or unsafe. Start by checking the wear pattern. Heavy wear on one side often points to poor alignment, too much pressure, or the wrong disc for the job.
Look for segment cracks, glazing, missing abrasive, or uneven edges. Replace any disc that shows severe cracks, warping, or missing material. Do not try to save a damaged wheel by running it slower.
Confirm that the disc matches the material you’re cutting or grinding. Masonry, metal, flap, cutoff, and diamond wheels serve different tasks. The wrong disc can wear fast, overheat, or bind in the workpiece.
Keep the disc square to the work surface when the task requires it. Poor angle control can cause uneven wear and rough cuts. Let the wheel do the work instead of forcing the grinder through the material.
Products Worth Considering

Ultra-Thin Design for Precision - Featuring an innovative X-teeth turbo mesh rim, wet saw for tile cutting ensures efficient and precise cutting with minimal chipping. The super thin design enhances the speed and smoothness of each cut, making it ideal for precise cuting in porcelain, ceramic, and granite.

Wide Application Range: It can cut metals, steel bars, stainless steel, marble, ceramic tiles, stones, and plastic pipes. With just this one saw blade, you can solve multiple cutting problems—it is not only convenient but also saves your expenses.

Fast & Efficient Cutting: Designed with a premium diamond grit and an advanced pressing technology, our segmented diamond blade increases cutting speed by up to 30%, making it perfect for fast and smooth cuts on concrete, granite, masonry, brick, and other hard materials
Critical Safety Checks Before Troubleshooting
Before you troubleshoot your angle grinder, slow down and check the basics. Most grinder injuries happen when a tool starts unexpectedly, a wheel breaks, or debris flies toward your face. Good safety checks protect you before you touch the problem.
Visual Inspection Checklist
Give the grinder a full visual check before you test it. Keep the plug out of the outlet while you inspect the tool. Focus on the parts that affect power, wheel control, and guarding.
- Inspect the power cord: Look for fraying, cuts, crushed insulation, or burn marks.
- Check the blade attachment: Confirm that the spindle, flanges, and wheel sit correctly.
- Secure the guard: Make sure the guard attaches firmly and covers the right part of the wheel.
- Confirm the disc type: Match the disc size, arbor, RPM rating, and material use to your grinder.
Power Source Verification
Verify the power source before you blame the grinder. Test the outlet with another tool or a proper electrical tester. If the outlet fails, check the breaker, fuse, or GFCI outlet.
Inspect any extension cord you use with the grinder. A thin, long, or damaged cord can reduce power and make the motor struggle. Use an extension cord rated for the grinder’s amperage and work area.
Make sure the plug fits tightly in the outlet. A loose connection can arc, heat up, or cut power during startup. Stop using any outlet that feels hot or sparks.
Personal Protective Equipment
Wear the right personal protective equipment (PPE) before you test or use the grinder. Eye, hand, ear, and lung protection matter because grinders throw sparks, dust, and sharp fragments. Check that your PPE fits and has no damage.
- Wear safety goggles or a face shield: Protect your eyes from sparks and flying debris.
- Use heavy-duty gloves: Protect your hands from sharp edges and hot metal.
- Wear hearing protection: Reduce exposure to loud grinding noise.
- Use a dust mask or respirator: Protect your lungs when grinding masonry, concrete, paint, or dusty material.
Step-by-Step Fixes for Angle Grinder Issues

Use a simple order of checks so you don’t miss an easy fix. Start with power, then move to external parts, heat, and wear items. Do not open the motor housing unless you have the skill and correct replacement parts.
- Unplug the grinder: Remove the plug from the outlet before you touch the wheel, guard, switch, or cord.
- Test the outlet: Plug in another tool or use a tester to confirm that the outlet works.
- Inspect the plug and cord: Look for cuts, heat marks, loose prongs, or exposed wire.
- Reset the breaker or GFCI: Restore power only after you confirm the tool and cord look safe.
- Check the switch: Test switch movement and continuity, or replace it if it fails.
- Inspect the spindle lock: Make sure the lock releases fully and the spindle turns by hand.
- Remove and reseat the wheel: Check the disc, flanges, arbor, and guard before you tighten it again.
- Clean the vents: Clear dust from intake and exhaust vents so the motor can cool.
- Let the grinder cool: Wait until the housing feels cool if the tool stopped during heavy work.
- Check the carbon brushes: Replace worn brushes if your model uses serviceable brushes and the manual allows it.
If the grinder still won’t start after these checks, the motor, armature, field coil, or internal wiring may have failed. Those repairs require more testing and the right parts. A repair shop can tell you whether repair costs make sense.
Pro tip: Take a photo before removing guards, flanges, or covers so you can put each part back correctly.
When to Stop and Get Professional Help
Stop troubleshooting if the grinder sparks heavily inside the housing, smells burnt, smokes, or trips the breaker again. These signs can point to motor, wiring, or switch failure. Running the tool again can make the damage worse.
Get professional repair if you see melted plastic, loose internal wires, a cracked housing, or damaged insulation. You should also seek help if the grinder makes a harsh grinding sound from the gearbox. A qualified technician can test the motor and gearbox safely.
Compare repair cost with replacement cost before you approve major work. Small fixes, such as brushes or a switch, may cost less than a new tool. A failed motor or gearbox can cost more than the grinder is worth.
Preventative Maintenance Tips to Avoid Future Problems
Regular care helps your angle grinder start reliably and last longer. Clean the tool after dusty work and check the wheel before each use. Small checks often prevent sudden failures.
- Clean the vents: Brush or blow dust from air vents so heat can leave the motor.
- Store discs correctly: Keep wheels dry, flat, and away from impact or moisture.
- Inspect power parts: Check cords, plugs, and switches before you start a job.
- Replace worn brushes: Change carbon brushes when they reach the wear limit in your manual.
- Follow cooling breaks: Let the grinder rest during long cuts or heavy grinding.
Use the grinder within its rated limits. Avoid forcing the wheel, twisting cutoff discs, or using the wrong accessory. Careful use reduces heat, wear, and electrical strain.
Frequently Asked Questions
How do you fix an angle grinder that is not turning on?
Unplug the grinder, then check the outlet, plug, cord, breaker, GFCI outlet, switch, spindle lock, wheel, vents, and brushes. Start with the power source because it takes the least time to rule out. If those checks fail, have a technician test the motor and internal wiring.
Why won’t my grinder turn on even though the outlet works?
The grinder may have a damaged cord, bad switch, worn brushes, jammed spindle lock, overheated motor, or internal electrical fault. Remove the wheel and inspect external parts while the tool stays unplugged. Stop if you see signs of burning, smoke, or damaged insulation.
What should you do if the grinder hums but does not spin?
Unplug it right away and check for a jammed wheel, stuck spindle lock, damaged flange, or debris near the guard. A humming motor can overheat fast if the wheel cannot turn. If the wheel spins freely by hand but the tool still hums, the motor or capacitor may need service.
What are common angle grinder problems?
Common grinder problems include damaged cords, faulty switches, worn carbon brushes, blocked vents, loose wheels, damaged guards, and jammed spindle locks. Overheating and dust buildup also cause many startup and performance issues. Regular inspection catches most of these problems early.
Can a bad disc stop an angle grinder from starting?
Yes, a cracked, warped, oversized, or poorly seated disc can bind against the guard or flange. That drag can stop the wheel from turning and strain the motor. Remove the disc, inspect it, and install a correct replacement before testing again.
Conclusion
An angle grinder that won’t start usually has a power, switch, wheel, spindle, brush, or heat problem. Work through the checks in a safe order, starting with the outlet and cord before you inspect moving parts. Replace damaged accessories and worn service parts as soon as you find them. If the tool shows electrical damage or keeps failing, stop using it and get expert repair. Careful troubleshooting keeps your grinder safer, smoother, and ready for the next job.


