You might not know that the “air” in air plasma does more than make plasma—it cools the arc, stabilizes the kerf, and blasts out molten metal. Yes, you need a compressor unless your cutter has one built in, but sizing it wrong leads to double-arcing, wet air issues, and burned consumables. The trick is matching CFM/SCFM and PSI, tank size, and duty cycle to your cutter and workflow—without wasting money or portability.
Why Plasma Cutters Require Compressed Air

Even before you strike an arc, a plasma cutter depends on compressed air to form and accelerate the plasma stream that actually does the cutting.
Even before you strike an arc, compressed air drives and shapes the cutting plasma stream.
You need a reliable compressed air source because the system uses that airflow to constrict and cool the arc, eject molten metal, and stabilize the kerf. Deliver clean dry air to protect the torch and consumables; moisture or oil causes double-arcing, erratic starts, and premature nozzle and electrode wear.
Match your air supply to the cutter’s demand—most units require roughly 3.5 to 10 CFM under load—so the arc doesn’t starve during continuous cuts.
Maintain pressure within the specified window, typically 70 to 100 PSI, to guarantee proper arc velocity and consistent dross control. Use a pressure regulator, plus filtration and drying, to keep pressure steady and contaminants out.
When airflow and pressure stay within spec, you’ll get faster pierces, smoother edges, fewer consumable changes, and longer machine life.
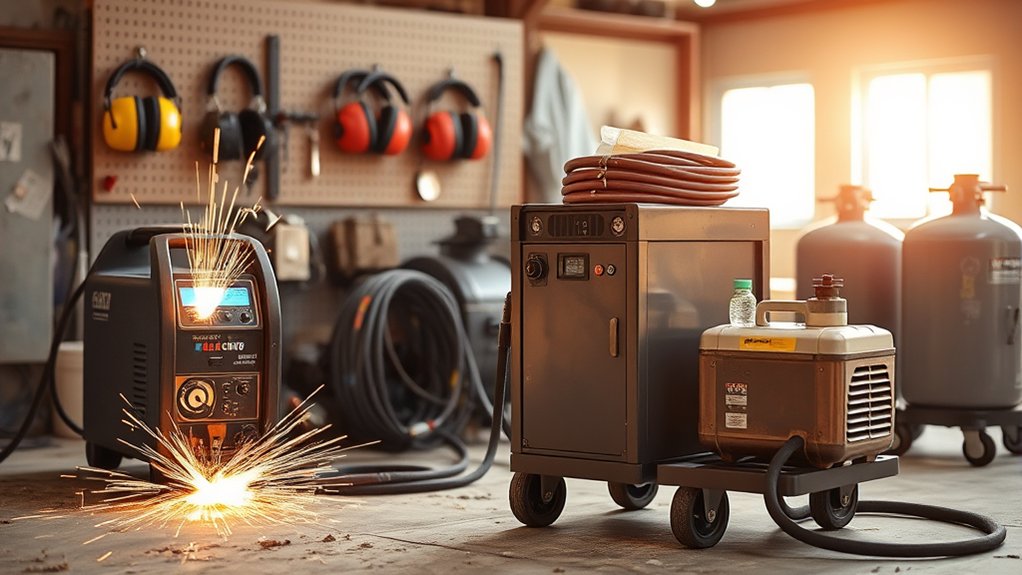
Built-In vs. External Compressors

With air quality and pressure now in focus, the next decision is where that air comes from: a built-in compressor or an external unit.
Built-in compressors prioritize portability and setup speed, but they deliver modest airflow. They’re fine for light-duty cutting and short runs. If your torch or tool specifies higher demand—say a plasma cutter needing around 3.5 CFM—many built-in compressors won’t keep up, leading to pressure drop, slower cutting, and premature consumable wear.
External compressors deliver more robust air supply and duty cycles, making them the right choice for heavy-duty work, thicker material, and longer cuts.
Match the compressor’s output and tank size to the job: 20–30 gallons suit intermittent light use; 60 gallons is a practical baseline for industrial or frequent cutting.
Prioritize clean, dry air—use filtration and drying on external compressors—to extend consumable life and maintain cut quality.
Choose based on portability needs versus sustained performance.
Understanding CFM, SCFM, and PSI

Before you size a compressor for your plasma cutter, separate three fundamentals: CFM, SCFM, and PSI. CFM is the actual airflow your air compressor delivers; SCFM is that airflow corrected to standard conditions (sea level, set temperature, and pressure) so you can compare specs across brands. PSI is the pressure driving the stream.
Plasma cutters need the right volume and pressure together—too little CFM starves the arc, while excessive PSI can erode consumables and destabilize cuts.
1) Define requirements: Check the cutter’s spec. Example: Hypertherm Powermax 30 calls for 3.5 CFM at 90 PSI; most units run efficiently around 40–70 PSI.
2) Compare like for like: Use SCFM for spec-to-spec comparisons. Expect real CFM to drop with heat, altitude, and line losses versus SCFM ratings.
3) Build headroom: Guarantee the air compressor’s CFM output exceeds the cutter’s demand by at least 1.5× to maintain steady airflow, protect consumables, and prevent pressure sag mid-cut.
Matching Compressor Output to Your Plasma Cutter
Sizing discipline starts by matching the compressor’s real output to your cutter’s demand, then adding margin.
Start with the cutter’s spec in CFM at PSI and ascertain the compressor can keep that requirement continuously. As a rule, target airflow output at least 1.5× the cutter’s consumption to stabilize pressure and flow under load.
Example: if your Hypertherm Powermax 30 needs 3.5 CFM at 90 PSI, select no less than about 5.3 CFM at 90 PSI. In practice, many succeed with 4 CFM, but the 1.5× buffer protects cut quality when line voltage sags, filters load, or hoses add restriction.
For a Cut60, aim for compressors delivering ≥6 CFM within 40–70 PSI, with clean, dry air.
Use a quality regulator: set the compressor near 90 PSI and regulate the cutter near 75 PSI.
Verify delivered CFM at your working pressure. If airflow or pressure dips during cutting, expect slower travel, rough kerfs, and consumable wear—adjust supply accordingly.
Tank Size and Duty Cycle Considerations
Once you’ve matched airflow and pressure, the tank becomes the time buffer that keeps that delivery steady under load.
Tank size directly influences duty cycle because it dictates how long the system can supply the cubic feet per minute the plasma cutters require before the pump must recover. For light to moderate cutting, an 8-gallon tank can work, but expect shorter continuous runs and more compressor cycling.
Tank size drives duty cycle: 8 gallons works lightly, but expect shorter runs and frequent cycling.
Stepping up to 20–30 gallons adds margin for extended cuts. Industrial duty often benefits from 60 gallons or more to minimize interruptions.
- Size to demand: A 50-amp unit typically needs at least 6 CFM at 40–70 PSI. Pick a tank that sustains that flow without rapid pressure sag.
- Target duty cycle: Larger tanks lengthen on-time and reduce motor heat, stabilizing arc quality on long passes.
- Plan for cut length: Smaller tanks cause frequent pauses on long seams; larger tanks enhance efficiency and reduce downtime.
Air Quality: Filtration, Dryers, and Aftercoolers
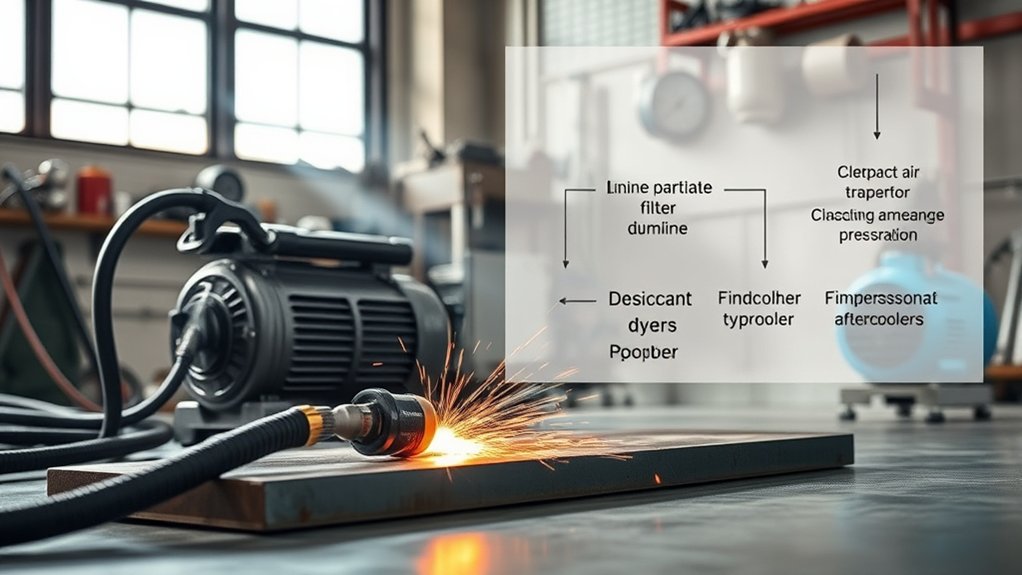
You need clean, dry air to protect consumables and keep cuts consistent, so start with staged filtration—particulate, coalescing, then final—installed as close to the plasma as practical.
Compare drying methods based on humidity and duty cycle: aftercooler plus separator for bulk moisture, refrigerated dryer for high humidity, and desiccant only when ultra‑dry air is required.
Match micron ratings and flow capacity to your torch’s SCFM to prevent pressure drop and moisture breakthrough.
Filtration Stages Explained
Even with the right compressor, air quality makes or breaks plasma cutting, so build a staged line that strips moisture, oil, and particulates before they reach the torch.
Effective filtration stages protect consumables, stabilize arc quality, and keep the plasma cutter performing consistently. Place filters close to the machine to minimize recontamination and pressure drop, and size them for your flow and duty cycle. Aftercoolers upstream help knock down moisture content before the filters work.
1) Particulate prefilter (5–10 μm): traps rust, scale, and dust to prevent loading downstream elements and regulators.
2) Coalescing filter (0.01–0.1 μm): removes aerosolized oil and fine water droplets that erode tips and swirl rings.
3) Final point-of-use filter/regulator: captures trace particulates, stabilizes pressure, and guarantees clean, dry air at the torch inlet.
Drying Methods Compared
With filtration stages set, the next limiter is moisture control, because saturated air still wrecks arc stability and consumables.
Start by placing your final air filter train as close to the plasma as possible. Coalescing elements with automatic drains strip liquid water and oil mist right before the torch, complementing upstream filtration systems.
Compare drying options by load and climate. Aftercoolers drop discharge temperature immediately after the compressor, condensing bulk moisture and easing the work downstream.
Refrigerated air dryers are the default in humid shops; they deliver a stable pressure dew point around 35–50°F, keeping lines dry under typical duty cycles. Use a coalescer after the dryer to catch carryover.
For intermittent cutting, this stack—aftercooler, refrigerated dryer, coalescing air filter—offers reliable, low-maintenance dryness.
Power, Phase, and Voltage Requirements
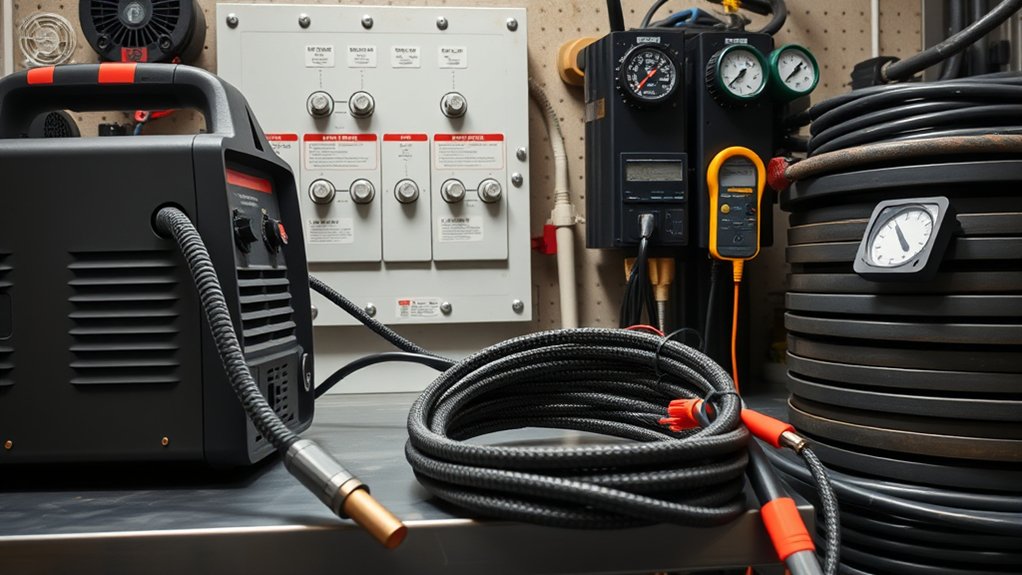
Before pairing a compressor to a plasma cutter, verify the cutter’s power, phase, and voltage so the support equipment matches. Your cutter’s input requirements dictate compressor selection: light-duty machines often run on 110V, while higher-output units commonly use 220V.
Match compressor voltage to the cutter to avoid inefficiency and component stress. If you switch sites, a dual‑voltage compressor adds flexibility. Align phase, too—single‑phase suits hobby and light fab; heavy-duty or continuous-duty setups benefit from dual-phase capability where available.
Finally, recognize that higher cutter power typically means higher CFM/PSI requirements from the compressor.
1) Verify electrical requirements
– Check the cutter’s nameplate: power, voltage, and phase. Select a compressor with identical voltage and compatible phase. Consider dual‑voltage models for mixed shops.
2) Size airflow to cutter demand
– Use the cutter’s rated CFM/PSI at duty cycle. Add ~20% margin for line losses and duty surge.
3) Plan circuit capacity
– Confirm dedicated breakers, wire gauge, and cord length support starting amperage for both machines.
Noise, Size, and Portability Trade-Offs
You should weigh decibel ratings—quiet units ~40 dB vs. budget models >60 dB—against your workspace tolerance and operating hours.
Match footprint to capacity: compact “pancake” units move easily but lack reserve air, while 20–60 gal tanks sustain cuts yet consume valuable floor space.
Balance mobility and stability by choosing portable single‑phase for hobby use, or heavier, more stable dual‑phase systems for industrial duty where power and longer cycles matter.
Decibel Ratings Matter
Although raw CFM and tank size often steal the spotlight, decibel ratings can make or break your compressor choice for plasma cutting. Quieter air compressors near 40 dB reduce fatigue and neighbor complaints; budget units often exceed 60 dB, raising noise levels and exposure risk.
Smaller, portable rigs typically bark louder than larger, stationary machines, so weigh portability against comfort and runtime.
- Target decibel ratings: Under 60 dB is conversation-level quiet; 60–70 dB is shop-normal; above 70 dB demands hearing protection, especially in long cuts or confined spaces.
- Match use-case: Residential garages benefit from low-noise models; jobsite mobility may justify a louder, lighter unit.
- Plan for duty cycle: Small, portable tanks cycle more, amplifying perceived noise—choose capacity that limits frequent restarts.
Footprint vs. Capacity
When space and mobility compete with runtime and output, the compressor’s footprint becomes a performance decision—not just convenience. A compact compressor saves floor space and moves easily, but its smaller tank and lower capacity shorten cutting windows and force frequent cycling.
Match CFM to your plasma cutter’s demand; if the compressor can’t sustain required airflow and pressure, arc quality suffers on longer cuts.
For moderate work, a 20–30 gallon tank stabilizes supply and reduces recovery pauses. Industrial duty favors 60 gallons to deliver continuous air without refilling.
Noise also tracks footprint: premium quiet units can hit ~40 dB—ideal for garages—while budget models often exceed 60 dB.
Balance footprint, tank size, and verified CFM to guarantee consistent performance without oversizing your setup.
Mobility vs. Stability
Some jobs demand wheels; others demand a wall plug and a big tank. In the mobility vs. stability debate, pick the air compressor that matches your cut profile and job site.
Portable units (4.5–8 gal) stay around 60 dB and move easily, but their smaller size of the tank and lower CFM mean pressure dips and frequent cycling on long cuts.
Stationary compressors (20–60 gal) deliver steady CFM and duty cycles for continuous work, at the cost of weight, footprint, and potentially higher noise.
- For occasional, short cuts, choose portability: small tank, lighter, quieter, quick setup.
- For production or thick plate, prioritize stability: larger tank, higher CFM, consistent arc quality.
- In tight neighborhoods or garages, check dB ratings; budget units can exceed 60 dB.
Budget and Buying Options: New vs. Used

Even on a tight budget, you can outfit a plasma cutter with a capable compressor by weighing new versus used options with clear performance targets.
A new air compressor in the $179–$199 range can meet light-duty needs, and retailers like Home Depot and Tractor Supply often discount models, improving value. New units typically deliver documented CFM ratings and pressure specifications, plus warranties and support that reduce downtime risk.
Used compressors can stretch dollars further, but you’ve got to verify fit and condition. Match the compressor’s sustained CFM at 90 PSI (or your torch’s spec) with at least 15–20% headroom, confirm max PSI meets the cutter’s requirement, and listen for bearing noise, check for tank rust, oil leaks, slow build times, and hot running.
Ask for a cold start demo and verify duty cycle and service history. If you can’t validate performance, the savings evaporate. Prioritize reliability; plasma cutting punishes marginal air systems.
Setup Tips: Regulators, Hoses, and Line Layouts

Set your regulator between the compressor and torch, running the compressor at 90 PSI and the plasma cutter at 75 PSI for stable flow.
Use quality hoses rated for system pressure—3/8” up to 75 ft, 1/2” for longer runs—and keep routes short with minimal fittings to limit pressure drop.
Route lines in straight, unobstructed paths, using copper piping where possible and placing a coalescing filter with auto-drain near the cutter.
Regulator Placement and Settings
For consistent cuts and stable airflow, mount the pressure regulator as close to the plasma cutter’s inlet as possible to minimize line pressure drop and lag.
This regulator placement stabilizes airflow, reduces response lag, and keeps pressure settings accurate at the torch. Feed the regulator with an air supply from the compressor set near 90 PSI, then set the cutter’s inlet between 40–70 PSI per your torch rating and material.
Match fittings to hose size to prevent leaks and restriction, and verify settings while the arc is flowing, not just static.
- Set compressor outlet: ~90 PSI; adjust cutter inlet: 40–70 PSI under flow.
- Use matching-diameter fittings to preserve airflow and avoid leaks.
- Recheck pressure settings periodically; compensate for temperature, humidity, or minor leaks.
Hose Diameter and Routing
A properly sized, well-routed air line preserves flow to the torch and keeps cut quality consistent. Choose hose diameter based on length: use 3/8” for air supply runs under 75 feet and 1/2” for longer lines to prevent flow restrictions. Match high‑quality fittings to the hose diameter; undersized couplers choke volume and create pressure drop at the torch.
Keep routing direct and short. Avoid sharp bends, tight coils, and kinks—each acts like an orifice, reducing delivered CFM. Secure hoses with wide-radius supports and minimize quick-connects and elbows.
Place the pressure regulator between the compressor and cutter, as close to the cutter as practical, to stabilize set pressure under load. Shorter, larger-bore lines maintain stable pressure and consistent arc performance.
Frequently Asked Questions
Do You Need a Compressor to Use a Plasma Cutter?
Yes—you need a compressor. For reliable plasma cutter operation, match compressor specifications to airflow requirements: typically 3.5–10 CFM at about 90 PSI, clean and dry. Adequate airflow directly impacts cutting thickness capabilities and prevents consumable damage.
How Much Air Pressure Do I Need to Run a Plasma Cutter?
Like tuning a guitar, you’ll target 70–90 PSI. You’ll match air pressure requirements to your model: small units ~80 PSI, larger ~115+. Regulate for plasma cutter efficiency, compressor size, leaks, and cutting speed to protect consumables.
Is a 6 Gallon Air Compressor Enough for a Plasma Cutter?
Usually, no. You’ll check Plasma cutter specifications, match Compressor power requirements and Air consumption rates. A 6-gallon tank often short-cycles and wets air. For continuous cuts, Ideal tank size is larger—think higher CFM and capacity.
What Is Needed to Run a Plasma Cutter?
You need a plasma cutter, suitable power, and clean, dry compressed air. Match air requirements (e.g., ~4 CFM @ 90 PSI), choose compressor types accordingly, size tank for cutting thickness, add filtration/regulation, and follow maintenance tips to protect consumables.
Conclusion
You can run a plasma cutter without thinking about air—until the cut stumbles, consumables burn, and slag won’t clear. The truth? You need clean, dry compressed air at the right SCFM and PSI, matched to your torch’s duty cycle and power. Whether you pick a built‑in unit or an external compressor, size it by output, not tank hype. Add proper regulation, filtration, and hose routing. Do that, and your cuts stay crisp. Skip it, and—well, you’ll see.