How to Fix a Shaky Workbench With Steel Bracing and Leveling Feet
A shaky workbench turns simple shop work into a safety problem. One small shift can make a clamp slip, move a jig, or ruin a clean weld. You can fix most bench wobble with steel bracing, anchor plates, careful welding, and adjustable leveling feet. This guide shows you how to turn a weak bench into a stable work surface without replacing the whole table.
What’s in This Article
- Why a Shaky Workbench Is Dangerous
- Design Goals for a Stable Workbench Retrofit
- Before You Begin
- Materials and Tools You Need
- Step-by-Step Fabrication and Assembly
- Welding Tips That Help Keep the Frame Square
- Assembly, Testing, and Proofing the Result
- Maintenance, Upgrades, and Uses
- Common Mistakes to Avoid
- Frequently Asked Questions
Quick Answer
You can fix a shaky workbench by adding steel anchor plates, triangular gussets, cross bracing, and adjustable leveling feet. These parts reduce racking, spread load through the frame, and help the bench sit flat on uneven floors. Measure first, tack the parts in place, weld with controlled heat, then test the bench before painting.
Key Takeaways
- Fix bench wobble by strengthening weak joints and adding braces that resist side movement.
- Use 6 mm or 8 mm steel plates for most small shop retrofit projects.
- Add adjustable leveling feet so the bench stays stable on uneven workshop floors.
- Tack weld first, check alignment, then finish weld in short controlled passes.
- Inspect welds, bolts, and feet often to keep the bench safe and solid.
🔧 Why a Shaky Workbench Is Dangerous
When a bench shifts during tack welding, grinding, drilling, or clamping, your work loses accuracy fast. A small vibration can move the part, loosen a clamp, or force you to reset a jig.
The risk grows when you use grinders, cutting discs, hot metal, or heavy vises. Unexpected movement can pull your hands toward the tool or make the workpiece jump.
Your goal should stay simple: strengthen the frame, stop side-to-side movement, reduce vibration, and level the bench. A retrofit lets you fix these problems without building a new table.
🧰 Design Goals for a Stable Workbench Retrofit
Start with clear goals before you cut steel. A focused plan keeps the build simple and helps you avoid adding weight where it doesn’t help.
- Stability: Stop lateral and vertical movement under normal workshop loads.
- Compatibility: Fit common frames made from 40×40 mm square tube, round tube, or thicker steel legs.
- Adjustability: Level the bench on uneven floors with adjustable feet or shims.
- Vibration damping: Reduce high-frequency vibration from grinders, sanders, and light hammer work.
- Ease of fabrication: Use standard steel and simple welds that a careful beginner can repeat.
- Modularity: Leave room for future upgrades like casters, shelves, vise mounts, or jig points.
The basic idea works well because it strengthens the weakest parts of the bench. Anchor plates tie the legs together, triangulation adds stiffness, and leveling feet create firm contact with the floor.
⏱️ Before You Begin
Estimated total time: Plan for 4 to 8 hours for a small or medium bench. Add more time if you need custom brackets, heavy paint removal, or complex feet.
Check your bench material before you weld. This guide fits steel benches best. If your bench uses wood, aluminum, or thin sheet metal, use bolted plates or a different reinforcement plan.
Warning: Wear eye, hand, hearing, and respiratory protection when you cut, grind, or weld steel.
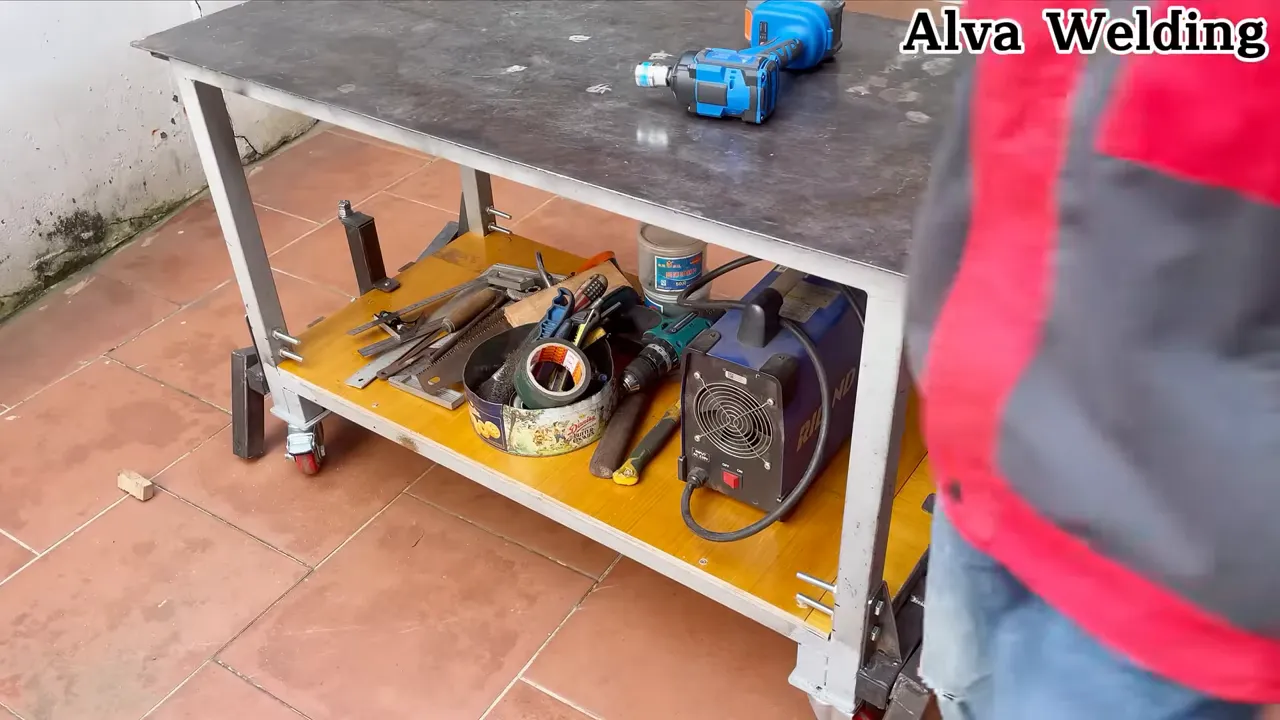
🛠️ Materials and Tools You Need
The right materials make the difference between a bench that feels better and a bench that stays solid. Use steel thick enough to resist flex without making the bench hard to move.
- 40×40 mm square steel tube and 40×20 mm unequal angle for reinforcement
- 6 mm and 8 mm flat steel plates for anchor plates and gussets
- High-tensile bolts, such as ISO property class 8.8 or 10.9, with washers and jam nuts (or nylon-insert locknuts) for adjustable feet
- Adjustable leveling feet with M12 threads
- Welding wire and shielding gas that match your welder and steel type
- Angle grinder, cutting disc, chop saw for metal, drill press, clamps, tape measure, and square
- Welding helmet, welding gloves, jacket, ear protection, and respiratory protection for grinding
Material size depends on your bench size and expected load. For a standard two-meter bench used for general fabrication, 6 mm plates and 40×40 mm tube give a strong balance of weight and stiffness.
Products Worth Considering
![M METERXITY 1-Pack 300mm 6063 Aluminum Round Tube, 37mm ID 40mm OD Seamless Aluminum Tubing for Construction/Machining/DIY Crafting, Metal Straight Pipe [1.46"x1.57"x12"]](https://m.media-amazon.com/images/I/31bWHgN1fWL._SL500_.jpg)
[Multipurpose Use] - Good for industrial applications such as construction, manufacturing, machining, and structural, providing reliability and versatility. This seamless aluminum pipe is also suited for outdoor gardening, DIY projects, wind chimes, architectural models, etc.

This fiber splice sleeve is build with Top Quality in Affordable price, They come Full preshrunk at two end and they can fit perfectly in the fiber enclosures. The sleeves shrink evenly with heat and form a clear uniform seal that makes it easy to visually confirm the splice alignment after shrinking
🔥 Step-by-Step Fabrication and Assembly
Work in stages so you can check fit and alignment as you go. Cut, clean, tack, check, weld, level, and test before you paint.
- Inspect the bench and plan the retrofit.
- Cut the anchor plates and gussets.
- Fit and tack the retrofit parts.
- Add triangulation and cross bracing.
- Weld the anchor plates and install leveling feet.
- Check alignment, test movement, and finish the steel.
Products Worth Considering

Package Including: You will receive 20Pcs M6x52mm Steel Molly Bolt Hollow Drive Wall Anchor Screws. Screw diameter is about 6mm/0.24inch, anchor length is about 52mm/2.04inch, they can fit for 3-12mm thick panel.

Universal Sleeve Anchors for Jomihoney Pad Eye Plate Ceiling Hooks: This expansion bolt is ideal for our [Large J Single Hook], [Large U Open Pad Eye Plate], [Large U Pad Eye Plate].

High quality construction: Concrete plate anchors are constructed from high quality steel with a green powder coat finish that not only increases visibility but also significantly increases their durability against environmental wear and tear
1. Evaluate the Bench and Plan the Retrofit
Start by checking the current bench frame. Look for rust, weak welds, loose joints, uneven legs, and thin sections that may not accept a strong weld.
Measure the distance between the legs and check the clearance to the floor. Decide whether you will weld the retrofit plates to the legs or clamp them with bolts.
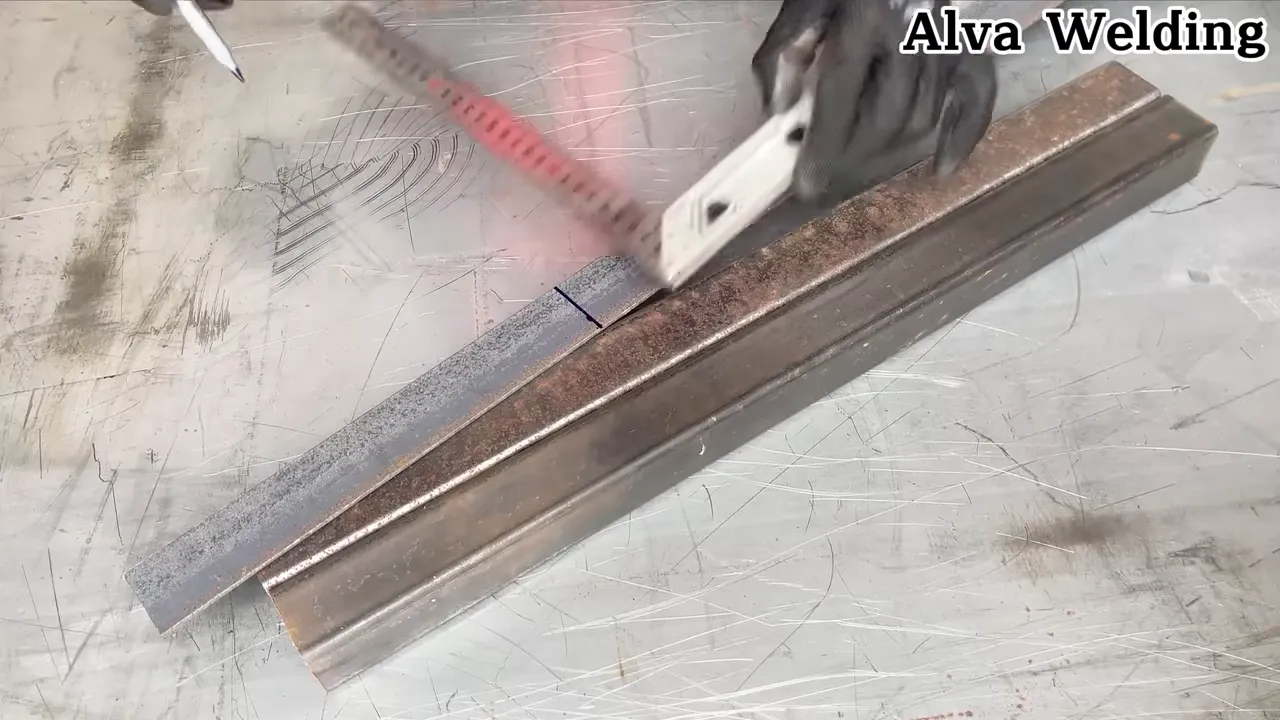
2. Cut Anchor Plates and Gussets
Cut 6 mm flat plates into rectangles that span the inside of each leg pair. These plates create a rigid link between legs and provide a strong surface for leveling feet or bolts.
Cut triangular gussets from 6 mm plate to reinforce corners where legs meet the tabletop supports. Keep edges square, then deburr each plate to reduce sharp edges and stress points.
If you use a chop saw for metal, take light passes and let parts air-cool between cuts. This helps limit heat distortion on thinner plate.
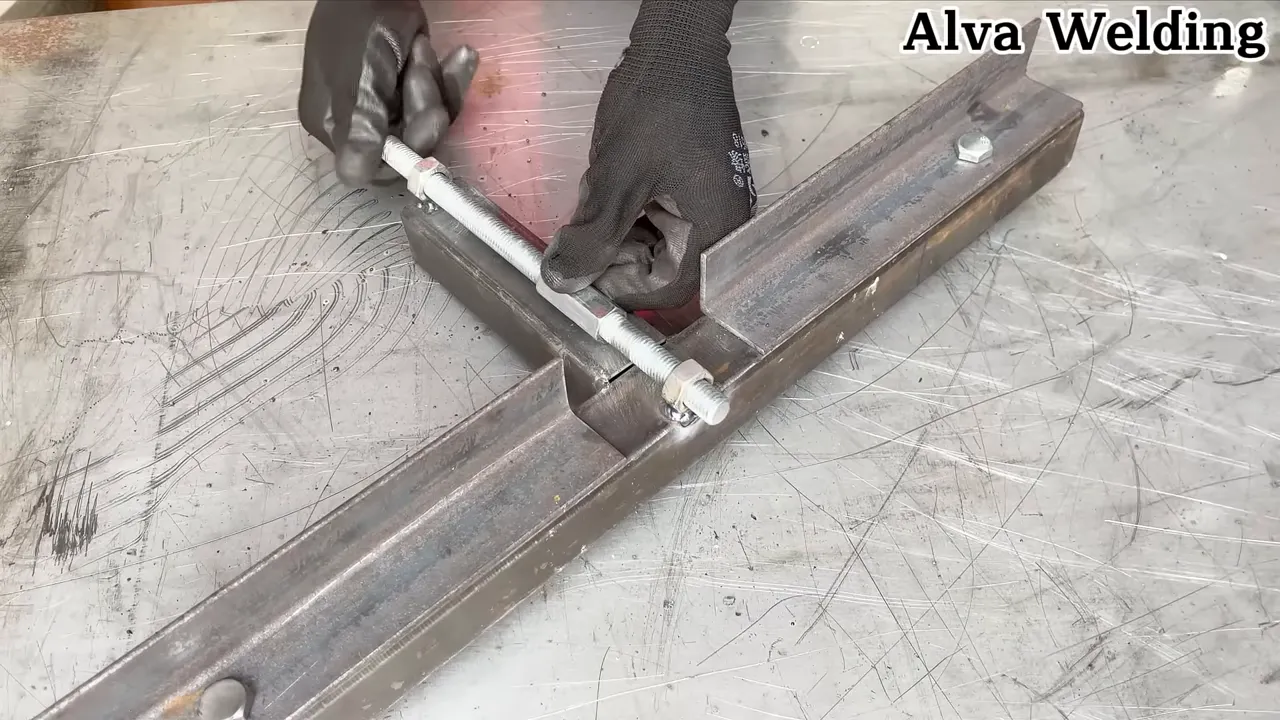
3. Fit and Tack the Retrofit Pieces
Dry-fit every part before you weld. Clamp the anchor plates to the frame, then use a square to check that the legs and plates sit straight.
Tack weld the plates in several spots before final welding. Tack welds hold alignment and reduce the chance that heat will pull the frame out of square.
Pro tip: Place tack welds on opposite sides in sequence so heat pulls the frame evenly.
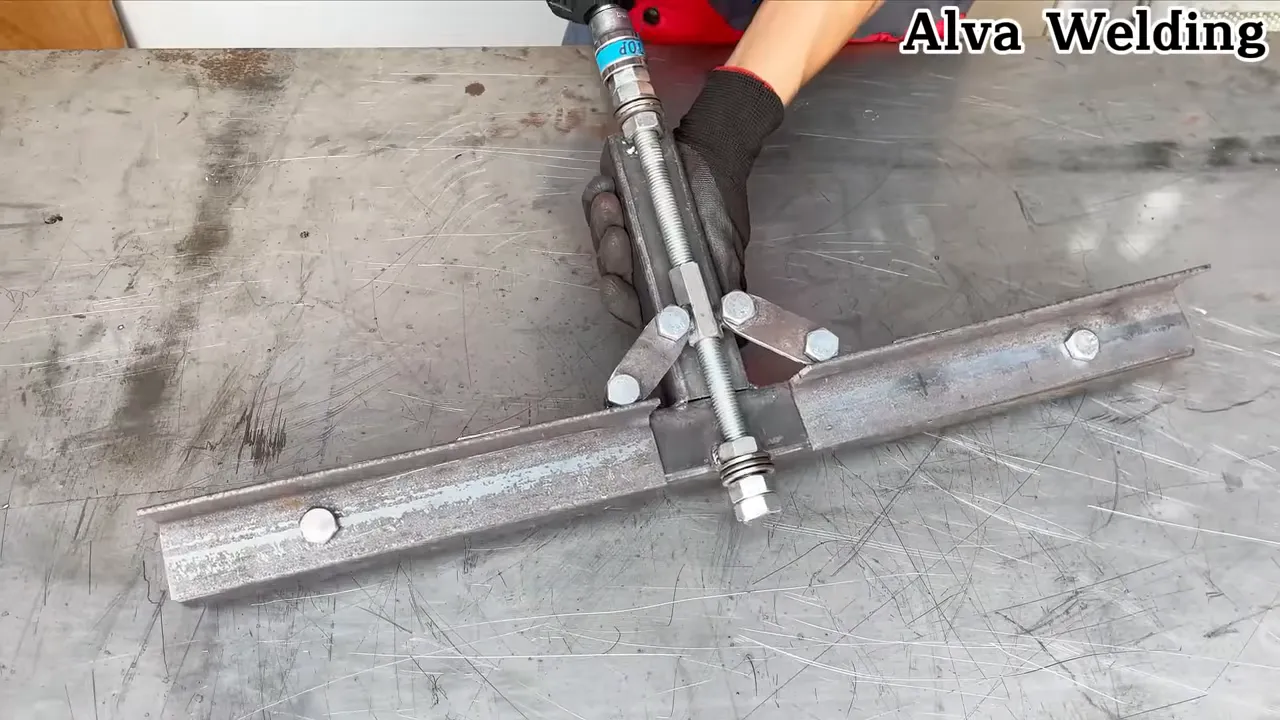
4. Add Triangulation and Cross Bracing
Triangulation gives the frame much more resistance against side movement. Weld triangular braces from angle iron between the legs and the table frame.
For front-to-back bracing, use flat bars welded diagonally to stop racking. For best stiffness use X-bracing (both diagonals) so the frame resists force in both directions.
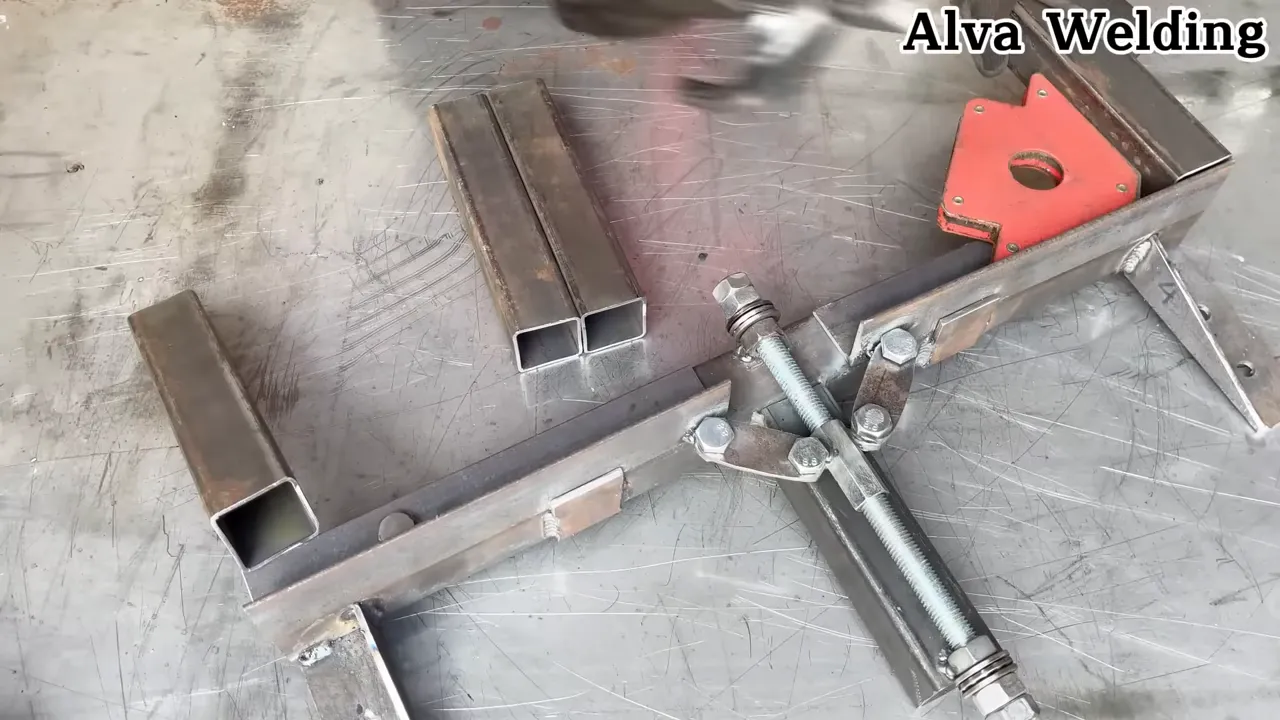
5. Weld Anchor Plates and Install Leveling Feet
After the parts sit square, finish the welds around the anchor plates. Grind only the spots that need cleanup because heavy grinding can remove useful weld metal.
Drill Ø13 mm clearance holes for M12 bolts (maintain edge distance ≥ 1.5× hole diameter). You can also weld an M12 nut/coupling nut under the plate and thread the leveling feet into that.
Use washers and jam nuts (or nylon-insert locknuts) to keep the adjustment stable. Adjust the leveling feet until the bench sits flat, then tighten the jam nuts against the plates.
6. Final Check and Finish
Check the tabletop level in both directions after welding and leveling. Push on the bench from several points and watch for micro-movement.
If the bench still rocks, add shim washers under low points or re-check each foot. After testing, apply rust-protective primer and paint so the steel resists shop grime and corrosion.
⚡ Welding Tips That Help Keep the Frame Square
Welding retrofit plates to an existing frame works best when you control fit-up and heat. Use short welds, clean steel, and frequent alignment checks.
- Tack first, weld later: Place 4–6 tacks per joint, alternating sides to balance heat and hold dimensions.
- Control heat: Use short weld passes and let the steel cool between passes.
- Use stitch welds: Make small welds spaced along the seam when thin plates may warp.
- Match the process to the steel: For mild steel, gas metal arc welding (MIG) with 0.8 mm wire works well for many small shop benches.
- Choose easy weld positions: Flat and horizontal welds give most beginners cleaner beads and better control.
- Grind with care: Remove sharp spots and spatter, but don’t grind away the strength of a fillet weld.
- Clean the weld area: Remove paint, rust, oil, and mill scale before welding.
Good welding depends on heat control and fit-up as much as torch time. If a part moves after tack welding, grind out the tack and reset the part before you make final welds.
✅ Assembly, Testing, and Proofing the Result
After you finish the retrofit, test the bench before you trust it with precise work. Load the bench with metal plates or tools, then apply steady side pressure at the far edge.
Next, mount a vise and strike a clamped piece with a hammer to mimic vibration from grinding or heavy fitting. A strong retrofit should reduce both visible movement and harsh vibration through the frame.
Try a few light tack welds or layout tasks on the bench after the test. Clamps should stay tight, parts should hold their position, and the bench should feel stable under normal hand pressure.
🔩 Maintenance, Upgrades, and Uses
A strong retrofit still needs routine checks. Vibration, moisture, and heavy use can loosen fasteners or expose weak points over time.
- Inspect welds: Check for cracks, rust, and signs of movement every few months.
- Re-tighten lock nuts: Check bolts and jam nuts after heavy grinding, hammering, or moving the bench.
- Add casters carefully: Use heavy-duty locking casters mounted to the anchor plates if you need mobility.
- Mount vises and jigs: Use the reinforced frame to support heavy vises, rollers, or fixtures.
- Improve sound damping: Add rubber or neoprene pads under fixtures when vibration matters.
These checks help the bench stay stable for years. They also give you a safe base for more tools and custom fixtures.
🚫 Common Mistakes to Avoid
Most failed bench retrofits come from rushed measurement, weak fit-up, or too much welding heat. Slow down during layout and tack every part before you commit to final welds.
- Skipping a floor-level check before adding leveling feet
- Using plates that flex under load
- Welding long beads on thin plate without cooling breaks
- Grinding away too much weld after final assembly
- Adding casters that don’t lock firmly enough for shop work
- Ignoring rust, cracked welds, or loose fasteners during maintenance
Note: If the bench frame uses very thin steel, bolted reinforcement may work better than welding.
❓ Frequently Asked Questions
How thick should the anchor plates be for a standard two-meter bench?
For a typical two-meter bench used for general fabrication, 6 mm steel plates give a good balance between stiffness and weight. If your bench will carry heavy machines or large vises, use 8 mm plates for more strength. Always match plate size to the expected load and frame design.
Can you attach the retrofit without welding if you do not have a welder?
Yes. You can use heavy-duty clamping plates and bolts to attach anchor plates to the bench legs. Use high-tensile metric fasteners such as ISO property class 10.9 or 8.8 for lighter loads, plus large washers and lock nuts. Check bolted joints often because they can allow micro-movement if they loosen.
Will adding plates and braces increase vibration from grinders?
No. Well-placed plates and triangulation reduce low-frequency movement and help control high-frequency vibration. For more vibration damping, place rubber or neoprene pads between the tabletop and mounted equipment.
What welding process and settings work best for thin plates?
For mild steel thin plates, MIG welding with 0.8 mm wire and moderate voltage often works well. Use short stitch welds and let the metal cool between passes. TIG can give clean results on thin material, but MIG is faster and more forgiving for many beginners.
How do you prevent plate warping during welding?
Use multiple small tack welds in an alternating pattern. Use stitch welding instead of long continuous beads, and let the steel cool between passes. Backstep welding can also help control heat expansion.
Are adjustable leveling feet necessary?
Adjustable leveling feet help a lot because many workshop floors are not flat. They let you tune the bench so tools, jigs, and workpieces sit predictably. They also reduce rocking during long work sessions.
Can you paint over welded areas right after welding?
Let welded areas cool first, then clean residue, dust, oil, and scale. Use a rust-inhibiting primer before the top coat. Paint can fail early if you apply it over hot or dirty metal.
How long does the whole project take from start to finish?
A planned retrofit on a small or medium bench often takes 4 to 8 hours. Cutting and tacking can take a few hours, while final welding and finishing take a few more. Add extra time if you are new to welding or need custom brackets.
Is this retrofit suitable for outdoor benches?
Yes, but outdoor benches need better corrosion protection. Use weather-resistant coatings, sealed weld areas, and corrosion-resistant hardware where possible. Inspect outdoor benches more often because moisture can attack welds and fasteners.
🎯 Final Thoughts and Next Steps
A shaky bench usually needs better bracing, better floor contact, and tighter joints. Before you replace the whole bench, measure the frame and decide where anchor plates, gussets, and leveling feet will help most.
Start with careful layout, tack every part, then weld in short passes to control heat. After the retrofit, test the bench with real shop pressure before you paint it.
A solid bench makes welding, grinding, clamping, and layout work safer and more accurate. Once your bench stops moving, your whole workshop feels easier to use.

