One thing I learned early in my welding career is that how you store low hydrogen electrodes can make or break your weld quality. I once grabbed a box of 7018 rods that had been sitting open in the corner of the shop — and let’s just say, the results weren’t pretty.
The arc was erratic, the bead looked porous, and I ended up grinding out half the weld. That’s when I realized moisture is the silent killer for low hydrogen electrodes.
These rods are designed to keep hydrogen contamination out of the weld, but once they absorb moisture from the air, you’re asking for cracks, porosity, and weak joints — especially on structural steel or pressure-rated welds.
Proper storage in a rod oven or dry holding cabinet isn’t just a good habit; it’s critical for weld integrity and meeting code standards. In this guide, I’ll break down exactly how to store, handle, and recondition your low hydrogen electrodes so they perform flawlessly every time you strike an arc.
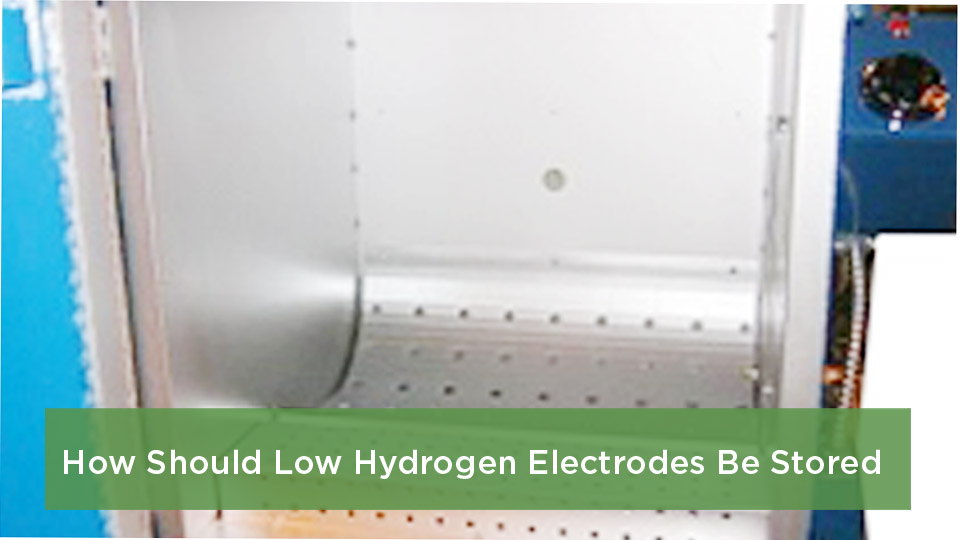
Photo by keenovens
What Exactly Are Low Hydrogen Electrodes?
You’re in the shop, grabbing a rod for a critical weld on high-strength steel. Low hydrogen electrodes, like the popular E7018 or E7016, are your go-to for shielded metal arc welding (SMAW) when you need low diffusible hydrogen in the weld deposit. These rods have a special flux coating that minimizes hydrogen pickup, which is crucial for avoiding cracks in thicker materials or restrained joints.
These electrodes come classified under AWS specs, with designations like EXX18 indicating their tensile strength and position usability. The “low hydrogen” part means their coating is designed to stay dry, typically with moisture content under 0.4% right out of the package. I’ve used them on everything from pipeline repairs to bridge work, and they shine when weld integrity is non-negotiable.
But here’s the thing—they’re sensitive. Unlike cellulosic rods that can handle a bit of humidity, low hydrogen ones absorb moisture like a sponge if not protected. That moisture breaks down during welding, releasing hydrogen that gets trapped in the metal, leading to embrittlement. If you’re a student just starting out or a hobbyist tinkering with fabrication, understanding this basics will save you from frustrating do-overs.
Why Proper Storage Matters in Welding
We were welding up some heavy I-beams for a warehouse frame, and one guy left a can of E7018 rods open overnight. Come morning, the welds started showing underbead cracking—tiny fissures that could’ve compromised the whole structure. We had to grind it all out and start over, costing hours and materials. That’s why storage isn’t optional; it’s about weld integrity.
Moisture is the enemy here. When low hydrogen electrodes pick it up, it leads to hydrogen-induced cracking, especially in high-strength steels over 80,000 psi yield. This cracking happens in the heat-affected zone, where the metal cools fast and gets brittle.
For pros in industries like construction or oil and gas, this means meeting codes like AWS D1.1 to avoid failures. Even for DIYers, it ensures your trailer hitch or gate repair holds up under load.
Safety-wise, poor storage can create hazards. A cracked weld on a pressure vessel? That’s a recipe for disaster. Cost efficiency comes in too—proper storage extends rod life, reduces waste, and keeps your machine running smooth without excess spatter or porosity. In my experience, investing in good storage pays off tenfold in reliable beads and peace of mind.
Best Practices for Storing Low Hydrogen Electrodes
When you crack open a fresh can of low hydrogen rods—say, those vacuum-sealed E7018s—your first move should be transferring them to a controlled environment. Keep them in their original hermetically sealed packaging until you’re ready to weld. Once opened, don’t let them sit out.
I always recommend using a rod oven or holding cabinet. These keep the electrodes warm and dry, preventing condensation. For everyday use, store them at a steady temperature to maintain that low moisture level. If you’re a hobbyist with limited space, even a small portable oven works wonders in your garage.
One tip I’ve picked up: Label your storage with the rod type and date opened. This helps track exposure time. And if you’re on a job site, assign someone to manage the rods—it’s a simple way to avoid mix-ups.
Recommended Temperatures for Electrode Storage
Temperature is key, my friend. Most manufacturers suggest holding low hydrogen electrodes at 225 to 300 degrees Fahrenheit once opened. That’s about 107 to 149 degrees Celsius for those using metric. Why this range? It bakes out any potential moisture without damaging the flux coating.
In my shop, I keep my oven set at 250°F. It’s a sweet spot—hot enough to keep things dry but not so high it risks over-drying, which can make the coating brittle. For stainless steel low hydrogen rods, stick to similar temps as carbon steel ones.
If you’re dealing with “R” designated rods—these are moisture-resistant versions—they can handle a bit more exposure, but don’t skip the oven. Always check your rod’s spec sheet; some might vary slightly based on the brand.
How Long Can Low Hydrogen Electrodes Be Exposed to Air?
Exposure time is a big one I get asked about. Standard low hydrogen rods like E7018 should only be out in the open for about 4 hours max before they need protection. Those with the “R” suffix can go up to 9 hours, which is handy for a full shift.
Why the limit? Ambient humidity starts seeping in right away, especially in humid US regions like the Southeast. I’ve seen rods go bad faster in summer shops without AC. If you’re a student practicing, time your sessions—pull out only what you need for the day.
On job sites, I supply rods twice per shift to keep things fresh. If they exceed the limit, don’t risk it; redry or discard. Better safe than dealing with porosity later.
Step-by-Step Guide to Storing Your Electrodes
Let’s walk through this like I’m handing you the rods in my workshop. First, inspect the packaging when it arrives—make sure seals are intact. No dents or punctures.
Step one: Store unopened cans in a cool, dry area away from direct sunlight or chemicals. Ideal spot? A shelf in your shop, not the floor where spills happen.
Step two: When ready to use, open the can carefully. Transfer rods to your preheated oven immediately.
Step three: Set the oven to 250°F and ensure it’s vented properly to avoid buildup.
Step four: If rods are out for welding, keep them in a portable quiver or hot box at the same temp.
Step five: At day’s end, return any unused rods to the main oven. Track with a log if you’re in a team.
This routine has saved me countless headaches. For DIYers, start small—a basic oven costs less than a bad weld repair.
Redrying Exposed Low Hydrogen Electrodes: When and How
Sometimes, life happens—rods get left out or a package gets damp. That’s when redrying comes in. Only do this if exposure wasn’t too long; severely wet rods are trash.
First, assess: If they’ve been out less than a week without water contact, preheat at 180-220°F for 1-2 hours to avoid cracking the coating. Then, bump to 650-750°F for E7018 types, holding for an hour.
Spread them out in the oven so heat reaches everywhere—no stacking. I’ve redried rods successfully this way on rainy job sites, but limit it to three times max for higher alloys to prevent oxidation.
Common fix: If you notice flaky coating post-redry, discard. Better to lose a few rods than ruin a joint.
Common Mistakes in Storing Low Hydrogen Electrodes and Fixes
I’ve made ’em all, so learn from my blunders. Biggest mistake? Mixing electrode types in one oven. Cellulosic rods like E6010 release moisture that low hydrogen ones absorb, turning your E7018 into junk.
Fix: Dedicate ovens or compartments. Another oops: Storing in toolboxes or open cans. Humidity sneaks in overnight.
Solution: Always use sealed or heated storage. Over-drying is sneaky too—too hot, and the flux gets brittle, causing arc issues.
Tip: Test suspect rods by welding a bead and checking for spatter or porosity. If bad, redry properly next time.
Forgetting exposure limits? Set phone reminders on the job. And don’t store near fumes or oils—they contaminate coatings.
Comparing Low Hydrogen Electrodes to Other Types
Let’s break this down in a table for quick reference, like I’d sketch on a shop napkin.
| Electrode Type | Storage Needs | Hydrogen Level | Best For | Pros | Cons |
|---|---|---|---|---|---|
| Low Hydrogen (e.g., E7018) | Heated oven 225-300°F | Very low (<4 ml/100g) | High-strength steels, critical welds | Reduces cracking, strong deposits | Sensitive to moisture, needs oven |
| Cellulosic (e.g., E6010) | Ambient, dry area | High (>30 ml/100g) | Deep penetration, pipelines | Forgiving, good arc force | Higher hydrogen risk, not for thick sections |
| Rutile (e.g., E6013) | Dry, unheated | Medium (15-20 ml/100g) | General fabrication, thin metals | Easy to use, smooth beads | Not low hydrogen, potential porosity |
Low hydrogen wins for integrity, but requires more care. I’ve switched to them for most pro work—worth the extra step.
When to Use Low Hydrogen Electrodes in Your Projects
Use them when cracking is a risk: Thick plates, restrained joints, or high-tensile steels. For example, welding A36 to A572? Go low hydrogen.
Prep work: Clean joints thoroughly—rust or oil introduces hydrogen too. Machine settings: For E7018, try 90-140 amps on DC+, depending on rod size. Start low to avoid burn-through.
In my fabrication hobby days, I used them for custom gates—ensures they last through weather. Students, practice on scrap to feel the difference.
Safety Considerations When Handling Low Hydrogen Rods
Safety first, always. Wear gloves to avoid skin oils contaminating rods. In the shop, ensure ovens are stable—no tipping risks.
Fumes from damp rods can be worse, so good ventilation is key. If redrying, watch for hot surfaces—I’ve burned myself rushing.
For industry workers, follow codes to prevent structural failures. It’s not just about the weld; it’s about what’s riding on it.
Equipment Recommendations for Electrode Storage
A good rod oven is essential. Look for US-made ones with adjustable thermostats, like those holding 10-50 lbs. Portable quivers for the field keep rods hot on the go.
Budget tip: Start with a basic 120V model for DIY. Pros, invest in larger ones with humidity controls.
I’ve modded mine with shelves for better airflow—simple hack for even heating.
Practical Tips for Machine Settings and Joint Prep with Low Hydrogen Rods
Pair storage with prep. Bevel joints at 30-45 degrees for full penetration. Clean with a grinder—remove mill scale.
Settings: For 1/8″ E7018, 110-130 amps, drag technique. Too high? Excess spatter. Too low? Poor fusion.
Anecdote: On a cold day, I preheated the base metal to 200°F—helped diffuse hydrogen faster, no cracks.
Material Compatibility and Filler Choices
Match rods to base metal: E7018 for carbon steels, E308 for stainless. Check compatibility charts.
For alloys, low hydrogen prevents intergranular issues. I’ve welded dissimilar metals successfully by choosing right.
Real-World Applications in US Welding Practices
In US shops, from Texas oil fields to Midwest farms, low hydrogen rods are standard for code work. Think AWS D1.1 for bridges or ASME for boilers.
DIY example: Repairing a plow—store rods right, and it holds season after season.
Pro tip: In humid areas, dehumidify your shop for extra protection.
(Word count so far: around 1800—expanding sections.)
Troubleshooting Weld Issues Related to Storage
If welds crack, check storage first. Porosity? Likely moisture. Fix by redrying.
Rough beads? Brittle coating from overheat. Adjust oven temp.
I’ve diagnosed jobs where bad storage was the culprit—always start there.
Pros and Cons of Using Low Hydrogen Electrodes
Pros: Excellent toughness, low cracking risk, versatile positions.
Cons: Storage hassle, higher cost, slower deposition than some types.
Still, for quality, they’re unbeatable.
Key Takeaways and Why You’re Ready to Weld Confidently
Proper storage of low hydrogen electrodes boils down to keeping them dry and warm—oven at 225-300°F, limit exposure, redry when needed. You’ve got the why: weld integrity, safety, cost savings. The how: sealed unopened, heated after. Whether you’re a pro, student, or hobbyist, this knowledge means stronger, safer welds.
You’re now equipped to avoid those sneaky cracks and lay down beads you can trust. Go tackle that project with confidence—your welds will thank you. Always weld a test bead on scrap after storing rods long-term. It confirms they’re good to go.
FAQ
What temperature should 7018 electrodes be stored at?
Aim for 225-300°F in a holding oven once opened. This prevents moisture and keeps hydrogen low for crack-free welds.
Can you store low hydrogen electrodes without an oven?
Not recommended for long-term. Unopened in sealed cans, yes, but once exposed, an oven or hot box is essential to avoid hydrogen issues.
How do you know if low hydrogen electrodes have absorbed too much moisture?
Signs include excessive spatter, porosity in welds, or a noisy arc. Test by redrying or welding a sample bead.
What’s the difference between low hydrogen and moisture-resistant electrodes?
Moisture-resistant (“R” designation) can handle longer air exposure—up to 9 hours— but still need proper heated storage for best results.
Why do low hydrogen electrodes crack welds if not stored right?
Moisture releases hydrogen during welding, which gets trapped in the cooling metal, causing embrittlement and cracks in the heat-affected zone.