To safely change a shielding gas cylinder on a welder, turn off the machine, disconnect power, and back the regulator out to relieve pressure. Wear gloves and goggles, close the cylinder valve, then remove the empty bottle and cap it. Hand-thread the regulator onto the new cylinder, snug it securely, and reattach the safety chains. Check all connections with soapy water for leaks before you weld again, and you’ll catch the finer details ahead.
How To Prep the Welder for a Bottle Change?
Before you change the gas cylinder, turn the welder off and disconnect it from the power source so it can’t activate by accident.
Then make sure you’ve put on gloves and goggles before you do anything else. These protections help you work with confidence and keep your hands and eyes safe while you prepare for the change.
Next, back the regulator all the way out to relieve pressure in the system. This step reduces force on the fittings and helps you avoid unnecessary risk.
After that, check that the safety chains are undone and clear of the cylinder so they won’t trap or obstruct your movement.
Finally, position the regulator in a secure, clean place where it won’t get damaged or contaminated.
When you prep the welder this way, you take control of the process, protect your equipment, and create a safer path for the bottle change.
Products Worth Considering

Measures Type-11 pieces Welding gauge key chain for measuring fillet leg length and throat.The values that can be measured in inch are:1” 1/2” 1/4” 3/4” 1/8” 3/8”...
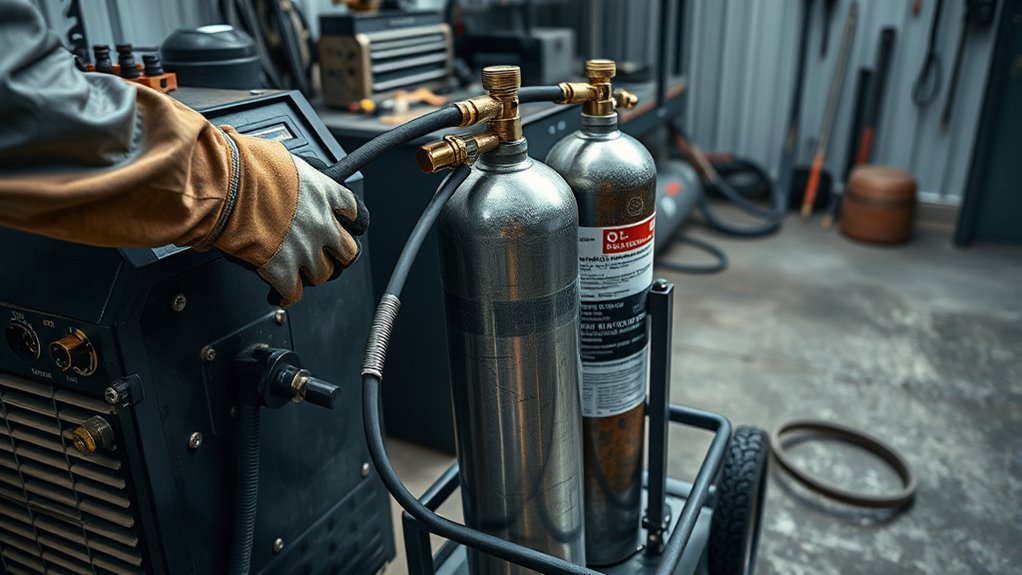
How To Remove the Empty Shielding Gas Cylinder?
Start by making sure the regulator is backed all the way out, then close the cylinder valve by turning it clockwise so you don’t damage the setup during removal.
Put on your safety equipment and check that you’ve got clear footing before you move.
Next, use a wrench or channel locks to pop the regulator free while leaving the hose attached; set it down in a secure spot where it can’t get knocked over.
Undo the safety chains that hold the bottle in place, then lift the empty cylinder straight out with control.
Handle different gas types with care, since labels matter for correct cylinder storage and safe transport.
Once the bottle’s out, replace the protective cap immediately to guard the valve during movement.
Reattach the chains after the new cylinder is in place, and keep your workspace organized so you stay in command and avoid preventable hazards. Additionally, ensure proper ventilation in the work area to mitigate exposure to harmful fumes during the process.
How To Install the Regulator on the New Bottle?
Set the regulator safely aside from the empty bottle, then line it up with the new cylinder and thread it onto the valve by hand first. Keep it supported so you don’t nick the stem or strain the fittings.
Use regulator alignment tips: match the threads cleanly, hold the body square, and stop if it feels cross-threaded. Once it seats, follow wrench usage guidelines and snug it with a proper wrench only until it’s secure—never muscle it down.
Excess force can warp parts and ruin brass component care, so protect the brass fittings from galling and damage. Before you finish, confirm the safety chains are reattached to the new cylinder so the setup stays stable and free from unnecessary risk.
Additionally, ensure that the new cylinder meets the recommended generator size to avoid potential issues with gas supply during operation.
With the regulator locked in place, your gas supply is ready for the next step, and you’ve kept the changeover controlled, confident, and safe.
Products Worth Considering

Compatible with CGA-580 tanks: Easily attach this Gas Pressure Regulator/Flowmeter to your Argon, Helium, and CO2 tanks with its CGA-580 inlet connector

BEST WELDS 900-W1013 - Tank Wrenches, Steel, 8.5" for Regulators, Torches

WIDE APPLICATION: It easily connects to Argon, Helium, and Argon/CO₂ mixed gas tanks via the CGA-580 inlet nut. No additional adapters are required. Featuring superior airtight and leak-proof performance, it achieves stable and sealed gas supply with minimal gas loss. This regulator is ideal for MIG/TIG welding, chemical processing, general industrial use, and electronics industry applications.
How To Check for Shielding Gas Leaks?
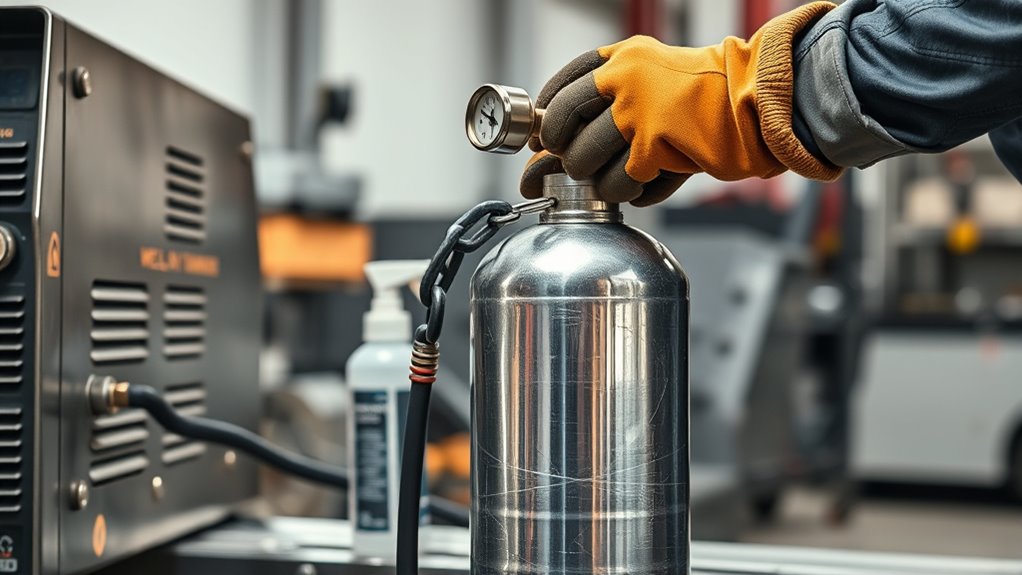
With the bottle and regulator installed, check every shielding gas connection for leaks before you weld. Use leak detection methods that keep you free from hidden hazards. Brush soapy water on the machine connection, regulator connection, and bottle connection, then watch for bubbles. Listen for any hissing that may signal escaping gas. Gently tug the hoses and fittings to confirm they’re secure. These gas safety precautions help you protect your work, your gear, and your space. Ensuring proper ventilation for fumes is crucial when working with gas to maintain a safe environment.
| Check point | What you do | What it means |
|---|---|---|
| Machine connection | Apply soapy water | Bubbles mean a leak |
| Regulator connection | Listen closely | Hissing means gas loss |
| Bottle connection | Tug fittings gently | Movement means looseness |
If you spot a leak, stop and correct it before proceeding. Make this part of your equipment maintenance tips every time you change a cylinder. A clean, sealed system lets you weld with confidence and control.
What Final Safety Checks Should You Make?
Before you power up the welder, give every connection one last inspection to make sure it’s secure and leak-free. Check the machine, regulator, and bottle fittings with your eyes and hands, and confirm each one is properly tightened.
Reattach the safety chains to the gas cylinder so it can’t tip or fall during transport. Spray soapy water on the regulator and bottle connections, then watch for bubbles that signal a leak. Listen closely for any hissing; if you hear it, stop and correct the problem before you proceed.
Make sure the regulator is cinched down firmly, but don’t overtighten it or you could damage the brass parts. These final safety protocols protect you, your workspace, and your equipment.
Taking a moment for disciplined equipment maintenance keeps your setup reliable and lets you work with confidence, control, and freedom.
Frequently Asked Questions
What Is the First Thing You Should Do When Replacing a LPG Cylinder?
You should close the LPG cylinder valve first, turning it right. Then relieve pressure, check safety precautions, and watch for any gas leak. Remove the regulator, undo chains, and secure cylinder storage with the cap.
What’s the Hardest Thing to Weld?
Titanium’s like a stubborn dragon at your torch. You’ll need careful welding techniques, respect material properties, and strong equipment maintenance to defeat it. Its reactivity demands an inert shield, or you’ll ruin the weld.
How to Change Argon Gas Cylinder?
You’ll shut the valve, back off the regulator, remove it, swap in the argon cylinder, reattach carefully, open slowly, and test leaks. Practice argon cylinder safety, proper gas cylinder storage, and matching welding gas types.
How Long Will a 20 Cf Argon Tank Last?
A 20 Cf argon tank usually lasts 3-5 hours, or about 1.33 hours at 15 CFH. Watch your cylinder pressure gauge, follow safe handling practices, and adjust flow to extend argon tank lifespan.
Conclusion
Changing a shielding gas cylinder is simple, but it demands care. One moment you’re handling a heavy, high-pressure bottle; the next, you’re making precise, safe connections that protect your welds and your workspace. Before you strike an arc, double-check the valve, regulator, and hose, then listen for leaks and look for damage. If anything seems off, stop and fix it. A careful change keeps you safe, your equipment ready, and your welds clean.


