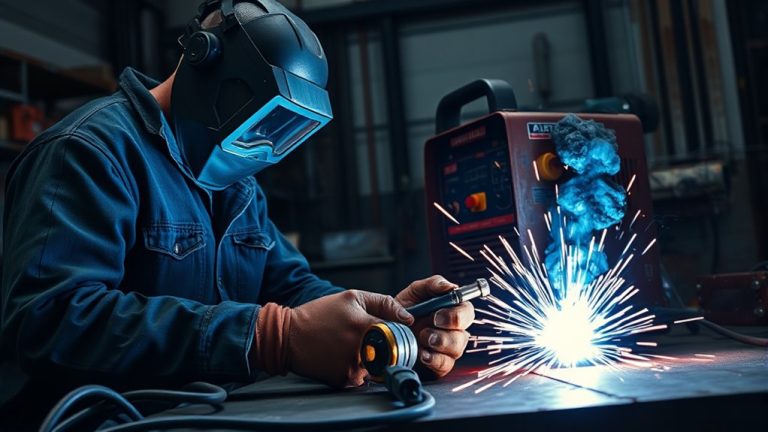
Learning how to use a MIG welder starts with safety, clean metal, correct setup, and steady torch control. Put on a welding helmet, MIG gloves, flame-resistant clothing, and leather boots before you strike an arc. Clean the joint to bare metal, clamp the pieces firmly, match the wire and shielding gas to the material, then test your voltage, wire feed speed, and gas flow on scrap before welding the real part.
Quick Answer
To use a MIG welder, wear proper PPE, clean and clamp the metal, install the right wire, set the correct polarity, connect shielding gas if using solid wire, and tune voltage and wire feed speed on scrap. Hold the gun about 3/8 inch from the work, angle it slightly, and move steadily.
Key Takeaways
- Clean, bare metal and a solid work clamp solve many beginner MIG welding problems.
- Set shielding gas by flow, usually CFH or LPM, not by guessing from pressure alone.
- Solid-wire MIG commonly uses DCEP, but flux-cored wire polarity can vary, so check the wire label and machine manual.
- Use your welder’s chart as a starting point, then test voltage and wire feed speed on matching scrap.
- A steady torch angle, short stickout, and consistent travel speed create cleaner beads with less spatter.
At a Glance
| Time Required | 30 to 60 minutes for setup and first practice beads |
| Difficulty | Beginner, if you follow safety steps and practice on scrap first |
| Tools Needed | MIG welder, wire, shielding gas or flux-cored wire, welding helmet, gloves, jacket, boots, clamps, grinder or flap disc, wire brush, pliers, and scrap metal |
| Cost | Low if you already own the welder; expect extra cost for wire, gas, tips, nozzles, and safety gear |
Warning: Welding can burn skin, injure eyes, start fires, create electric shock hazards, and produce harmful fumes. Wear proper PPE, keep combustibles away, use adequate ventilation, and never weld on closed containers, unknown coatings, or confined spaces unless you are trained and the space is properly tested and controlled.
What Is MIG Welding?
MIG welding, also called gas metal arc welding, uses a continuous wire electrode and an electric arc to melt the wire and base metal together. The result is a welded joint that can be strong, clean, and fast when the machine is set correctly.
In standard solid-wire MIG welding, shielding gas flows through the gun to protect the molten weld pool from oxygen and nitrogen in the air. A common mild-steel setup uses solid ER70S-6 wire with an argon and carbon dioxide blend, while some welders use straight CO2 for deeper penetration and lower gas cost.
Flux-cored wire is different. Some flux-cored wires do not need a gas bottle because the wire makes its own shielding during welding. Others are dual-shield wires that still need external gas. Always match the wire, gas, and polarity to the label on the wire spool and your welder’s manual.
Because MIG welding is easier to learn than many manual welding processes, it is a practical starting point for small fabrication, repair work, automotive projects, shop fixtures, and basic metal practice. Understanding electrode selection is crucial for achieving better weld quality and penetration.
Put on MIG Safety Gear
Before you weld, put on an auto-darkening helmet, MIG-rated leather gloves, flame-resistant clothing, and leather boots. Welding produces bright arc light, hot spatter, and fumes, so normal sunglasses, thin work gloves, sneakers, and synthetic clothes are not enough.
Use eye and face protection that meets OSHA-recognized standards, such as ANSI Z87.1, and choose a lens shade that fits the welding current. OSHA lists minimum protective shade numbers for gas metal arc welding and flux-cored arc welding by amperage in its eye and face protection standard.
Keep a suitable fire extinguisher nearby. Also remove or shield flammable materials before welding. OSHA’s hot-work rules call for fire-extinguishing equipment to be ready for instant use and describe extra fire-watch precautions when combustibles are within 35 feet of the welding area. Additionally, verify that your work area is free from flammable materials to minimize fire risks while welding.
Helmet and Eye Protection
Slip on an auto-darkening welding helmet before you strike an arc. Check that the helmet covers your face and neck, the shell is not cracked, and the lens darkens correctly when the arc starts.
Set the shade according to the helmet instructions and the amperage you are using. If the arc looks painfully bright, stop and adjust the shade before continuing. If the puddle is too dark to see, start darker and move lighter without going below the minimum shade recommended for the process.
Wear safety glasses under the helmet. They help protect your eyes when you chip, brush, grind, or lift the hood between welds. Keep the lens clean and free from scratches so you can see the puddle clearly.
Gloves, Jacket, and Boots
Wear MIG-rated leather gloves that protect your hands from spatter while still letting you control the gun. Choose a leather or flame-resistant cotton jacket that covers your arms and torso. Avoid polyester, nylon, or loose synthetic clothing because sparks can melt or ignite it.
Use leather boots that cover your ankles. Keep pant legs over the boots, not tucked inside, so sparks cannot fall into them. Close loose cuffs, remove dangling jewelry, and keep long hair secured.
- Helmet: auto-darkening, correct shade, clean lens
- Gloves: MIG-rated leather with enough dexterity
- Jacket: flame-resistant, snug, and long-sleeved
- Boots: leather, closed-toe, and ankle-covering
- Workspace: dry floor, clear path, no flammables nearby
Clean and Clamp the Metal
Start by cleaning both metal surfaces with a flap disc, grinder, sanding disc, or wire brush. Remove paint, rust, oil, mill scale, and dirt from the weld area. Clean metal gives you better electrical conductivity, better arc stability, and fewer defects.
Also clean the area where the work clamp connects. A poor work clamp can cause sputtering, inconsistent heat, and weak fusion. OSHA’s arc welding rules say the work lead should be firmly attached and machine connections should be checked before starting work.
Next, use C-clamps, locking pliers, or magnetic welding squares to secure the workpieces firmly. Strong clamping keeps the joint from moving as the metal heats and shrinks. It also helps you keep a consistent gap and alignment.
Take a moment to sight the joint from several angles before you weld. If the pieces are twisted, uneven, or loose, the bead will not fix the fit-up. Good preparation lets you focus on the puddle instead of fighting the parts. Additionally, remember that proper electrical conductivity is crucial for achieving a strong weld.
Pro Tip: Clean at least 1/2 inch on both sides of the joint and clamp the work lead to bare metal, not paint, rust, or a thin tack tab.
Set Up Your MIG Welder
Before you set up your MIG welder, put on your safety gear, clear the bench, check ventilation, and make sure the floor is dry. Place the welder where the cable and gun can reach the work without pulling tight.
Install the correct wire spool, drive roller, liner, and contact tip for your wire diameter. Tighten the drive-roll tension enough to feed smoothly, but not so tight that it crushes the wire. Trim the wire end cleanly before feeding it through the gun.
If you are using solid MIG wire, connect the shielding gas cylinder, open the valve slowly, and set gas flow with the flowmeter. For light-duty MIG welding, about 20 CFH is a common starting point. Increase slightly if drafts or a long nozzle distance are causing porosity, but do not waste gas by turning the flow too high. Additionally, ensure proper gas flow adjustment for optimal weld quality.
Safety Gear and Workspace
Protect yourself and prepare your workspace before you strike an arc. Keep your MIG welder in a dry, clean, organized space so you can move freely and avoid tripping on leads or tools.
- Make sure the area has adequate ventilation.
- Use local exhaust or fume extraction when welding indoors for long periods.
- Clear or shield combustibles within the welding area.
- Place a suitable fire extinguisher within reach.
- Keep bystanders away from the arc or protect them with welding screens.
- Do not weld in wet gloves, wet clothing, or standing water.
OSHA requires adequate ventilation for welding and cutting, and mechanical ventilation may be required in small rooms, low-ceiling rooms, confined spaces, or areas with poor cross ventilation. Never use oxygen for ventilation.
Wire, Gas, and Settings
Choose the correct wire diameter and wire type for the material. For mild steel, common beginner wire sizes include 0.023 inch, 0.030 inch, and 0.035 inch, depending on metal thickness and welder capacity. Match the contact tip and drive roller to the wire size.
For solid mild-steel MIG wire, a 75% argon and 25% CO2 shielding gas blend is a common starting point for cleaner welds and lower spatter. Straight CO2 can also work on steel, but it may run hotter and create more spatter. For aluminum, use the correct aluminum wire and pure argon, usually with a spool gun or push-pull setup if your machine requires it.
Set voltage and wire feed speed from the chart inside your welder or from the manual. The chart is only a starting point. Run a bead on scrap of the same thickness, then tune the settings until the arc sounds steady and the bead wets into both sides of the joint.
Choose the Right Wire and Gas
Start by matching the wire and shielding gas to the metal you are welding. Do not choose wire only by diameter. The wire type, base metal, gas, polarity, and transfer mode all affect the weld.
Match your wire, gas, polarity, and base metal before welding. A clean bead starts before you pull the trigger.
| Material | Common Wire | Common Gas | Beginner Note |
| Mild steel | ER70S-6 solid wire | 75/25 argon/CO2 or CO2 | Best starting point for most garage MIG practice |
| Outdoor steel repair | Self-shielded flux-cored wire | No external gas for self-shielded wire | Useful when wind would blow shielding gas away |
| Stainless steel | Stainless MIG wire matched to grade | Stainless-specific shielding gas | Check the wire maker’s recommendation |
| Aluminum | 4043 or 5356 aluminum wire | 100% argon | Often needs a spool gun or push-pull gun |
If you are working outdoors, use flux-cored wire when wind could blow away shielding gas. Before you feed wire, make sure the correct drive roller is installed so the MIG wire runs smoothly. Additionally, using a 0.035-inch flux core welding wire can help on thicker or outdoor steel jobs when it matches your machine and wire requirements.
- Match metal to wire.
- Use gas only when the wire type requires it.
- Use smaller wire on thin metal.
- Choose flux-cored wire outside when wind is a problem.
- Check polarity before welding.
Note: Solid-wire MIG often uses DCEP, but self-shielded flux-cored wire may require different polarity. Always check the wire label and welder manual before welding.
Dial In Voltage and Wire Speed
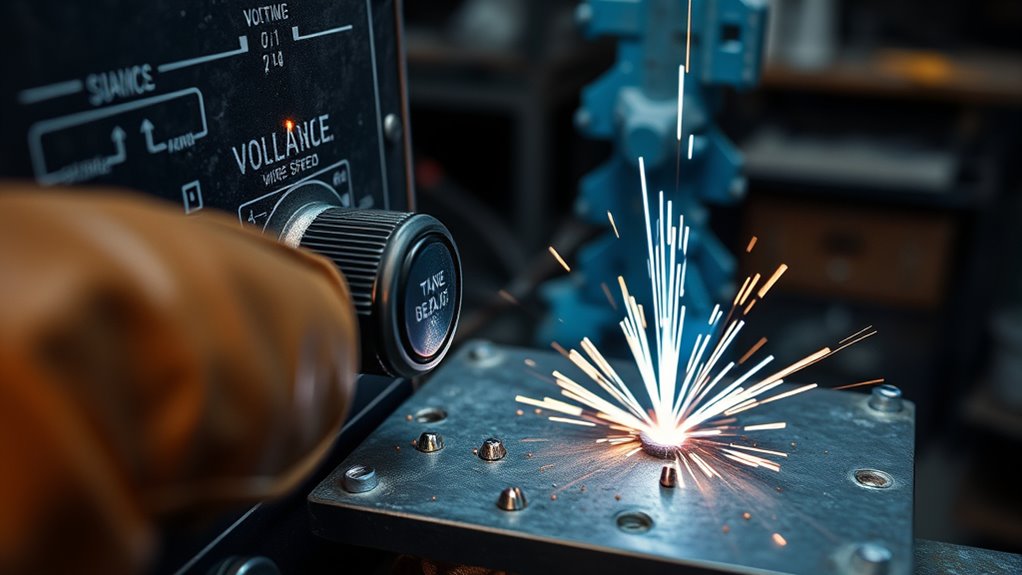
Match your voltage to the metal thickness first, using your welder’s chart as the starting range. Then set the wire feed speed to work with that voltage so you get a stable arc and even penetration. Test the settings on scrap of the same material, then fine-tune both controls until the bead looks consistent and clean. Additionally, ensure you understand the effects of improper settings to avoid issues like burn-through or weak welds.
Matching Voltage to Metal
Voltage affects bead shape, puddle fluidity, and how well the weld wets into the base metal. Thin material needs lower heat to avoid burn-through. Thicker stock needs more heat so the weld fuses into both pieces.
Use the chart inside the welder door or the machine manual for the correct starting point. If your machine uses lettered voltage taps instead of exact volts, start with the recommended tap for the material thickness and wire size.
- Start with the machine chart, not guesswork.
- Use lower heat for thin sheet metal.
- Increase heat for thicker steel only after testing.
- Listen for a steady, crisp arc.
- Watch for burn-through, undercut, or a bead sitting on top.
Set Wire Feed Speed
Wire feed speed controls how fast filler wire enters the puddle. Too much wire feed can make the wire stub into the plate and create spatter. Too little wire feed can cause a hissy arc, poor fill, and weak fusion.
Use this table only as a beginner guide. Your machine, wire size, joint type, and gas can change the best setting.
| Material | Starting Approach | What to Watch |
| Thin steel | Lower voltage and wire speed | Burn-through, warping, and too much heat |
| Mid-thickness steel | Chart setting, then small changes | Smooth arc and even tie-in at both edges |
| Thicker steel | Higher heat within machine capacity | Cold lap, poor penetration, or oversized bead |
Keep wire feed speed aligned with travel speed. If you move too slowly, the bead can pile up. If you move too fast, the bead can become narrow and weak.
Test and Fine-Tune
Start with the voltage and wire speed recommended for your material thickness and wire size. Then weld a short bead on scrap that matches the real part.
Raise or lower voltage in small steps until the puddle wets into the metal without undercut or burn-through. Adjust wire feed speed until the arc sounds steady and the bead fills the joint without stubbing or hissing.
After each test bead, let the metal cool, brush the bead, and inspect it. Good practice beats guessing. These welding processes reward patience, and your goal is solid weld penetration without burning through the base metal.
- Start with the chart.
- Test on matching scrap.
- Tune one setting at a time.
- Check bead shape after each pass.
- Write down the setting that works.
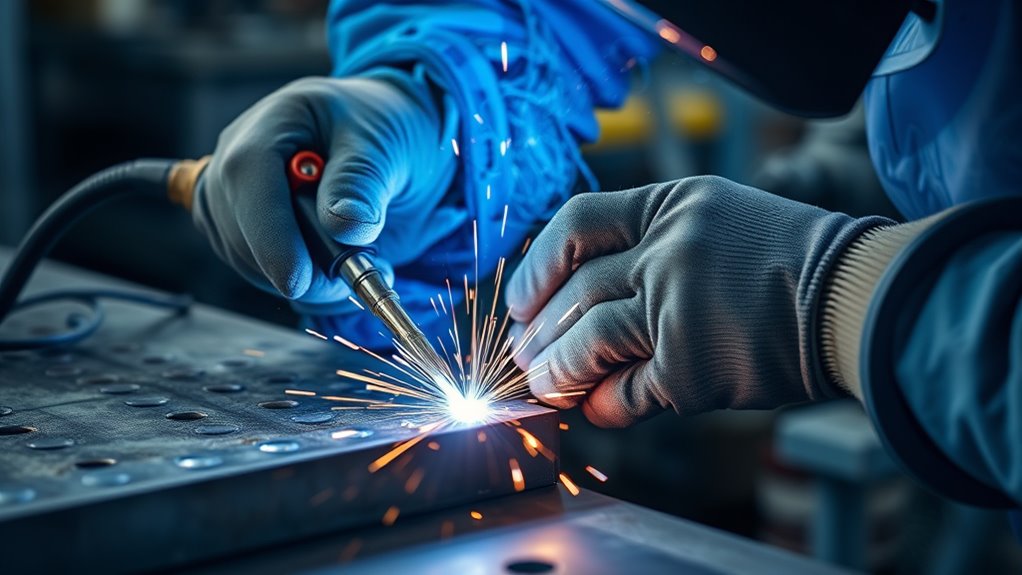
Hold the MIG Torch Correctly
Grip the MIG torch with both hands so you can keep it steady and in control. Use one hand to hold and guide the gun while the other supports your wrist or forearm. Rest your arms when possible so your travel speed stays smooth.
With your welding helmet and personal protective equipment on, keep the wire stickout short and consistent. A typical beginner target is about 3/8 inch from the contact tip to the work, though your process and machine may call for a different distance.
Angle the torch about 10 to 15 degrees in the direction of travel for many flat or horizontal MIG welds. Keep the work angle matched to the joint. For a butt joint, the gun is usually close to 90 degrees across the joint. For a fillet weld, aim into the corner so both pieces heat evenly.
Move in a steady motion, straight and deliberate, to build a consistent weld bead and avoid burning holes. If you travel too fast, the weld may be narrow with poor fusion. If you travel too slowly, the bead may pile up and overheat the metal. Remember, maintaining correct polarity is essential for achieving a stable arc and high-quality welds.
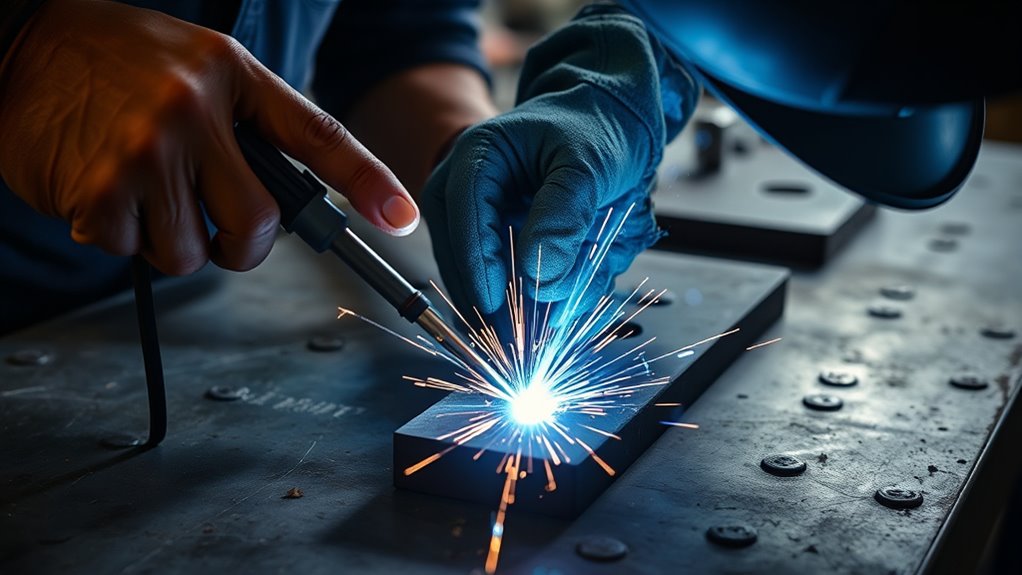
Practice Your First Weld Bead
Grab some scrap metal and make your first practice bead there. Do not start on the real project. Scrap lets you learn the sound of the arc, the feel of the gun, and the pace needed to form a clean bead.
Put on your welding helmet, then use the welder to lay a short straight line. Keep the MIG gun about 3/8 inch from the workpiece, move at a steady pace, and guide it straight so heat spreads evenly.
Watch the leading edge of the puddle, not only the bright arc. The puddle tells you whether both pieces are melting into the joint. Listen to the arc as well. A smooth, steady sound usually means your voltage and wire feed speed are close.
- Practice straight beads first.
- Then practice tack welds.
- Move to lap joints after you can run straight beads.
- Practice fillet welds once your hand is steady.
- Brush and inspect every bead before changing settings.
Remember that proper fillet weld sizing is essential for ensuring the integrity of your welds, especially as you begin to tackle more complex projects.
Take your time. Each pass teaches you more, and every controlled bead builds the skill to weld with confidence.
Fix Common MIG Welding Mistakes
When a weld goes wrong, correct the basics first: clean the metal, confirm the work clamp is on bare metal, check polarity, set gas flow correctly, and keep your stickout steady. If the arc sputters, you may be too far away, moving too fast, using poor ground contact, or running the wrong wire speed.
| Mistake | Likely Cause | Fix |
| Porosity | Dirty metal, poor gas coverage, wind, or long stickout | Clean the joint, check gas flow, block drafts, and shorten stickout |
| Excess spatter | Wire speed, voltage, polarity, or gas mismatch | Confirm polarity, tune settings, and use the correct gas or wire |
| Burn-through | Too much heat or moving too slowly | Lower voltage, increase travel speed, or use stitch welds |
| Cold lap | Too little heat or moving too fast | Increase heat within chart range and slow down slightly |
| Wire stubbing | Wire feed too fast or voltage too low | Reduce wire speed slightly or raise voltage one step |
Too much wire feed speed can create excessive spatter. Too little can leave a cold, weak welded joint. Keep your torch angle stable and watch the puddle wet smoothly into both sides of the joint. If the bead grows too wide, lower your heat input or move a little faster. Small corrections give you cleaner control and stronger results. Remember that ensuring proper gas flow is essential for preventing issues like porosity in your welds.
Clean and Maintain Your Welder
A clean, well-kept wire welder runs smoother and gives you more consistent welds. After each session, clean the welding gun, contact tip, and nozzle so spatter does not block gas coverage or hurt welding quality.
Inspect the work clamp, cables, gun lead, and all connections before you start. Look for cracked insulation, loose fittings, crushed liner areas, and worn contact tips. OSHA says damaged cables with exposed conductors should be replaced, and shielding gas leaks should not be present.
Keep up with routine maintenance by checking drive rollers and replacing them when they are worn, so wire feeding stays steady. Make sure the gas cylinder is secured upright, the hose has no leaks, and every connection is tight enough for proper flow.
Store your machine in a dry, dust-free place to protect it from corrosion and dirt. Regular checks on drive rolls ensure smooth wire feeding and prevent issues.
- Wipe down the gun after welding.
- Clean spatter from the nozzle.
- Replace worn contact tips.
- Check clamps and cables.
- Test gas connections.
- Inspect rollers for wear.
- Keep the unit dry.
This simple care helps you weld with confidence and stay focused on the work ahead.
Frequently Asked Questions
How easy is it to use a MIG welder for beginners?
A MIG welder is one of the easier welding machines for beginners because the wire feeds automatically and the arc is simple to start. You still need proper PPE, clean metal, correct settings, and practice. Most beginners should start with flat practice beads on mild steel before trying repairs or structural work.
What is the golden rule in welding?
The golden rule is to prepare the joint before you weld. Clean the metal, fit the pieces correctly, clamp them firmly, attach the work clamp to bare metal, and test your settings on scrap. Good preparation prevents many problems that settings alone cannot fix.
Do you touch the wire to the metal when MIG welding?
No. The wire does not need to be pressed into the metal before welding. Hold a short, steady stickout, pull the trigger, and let the arc form between the wire and the workpiece. A typical beginner stickout is about 3/8 inch, but your machine and wire may call for a slightly different distance.
How do you set up a MIG welder for the first time?
Install the correct wire, drive roller, and contact tip. Set the polarity for the wire type. Connect shielding gas if the wire needs it, then set gas flow with the flowmeter. Attach the work clamp to clean metal, set voltage and wire feed speed from the chart, and test on scrap before welding the real part.
What gas flow should I use for MIG welding?
For light-duty solid-wire MIG welding, about 20 CFH is a common starting point. You may need small adjustments for nozzle size, cup distance, drafts, or the joint shape. Do not treat gas flow as a simple psi setting. Use the flowmeter and check your welder and regulator instructions.
Why does my MIG weld have holes or porosity?
Porosity usually comes from contamination or poor shielding. Clean the metal, remove oil and paint, check for gas leaks, confirm the gas is on, keep the nozzle close enough, and block wind or drafts. If you are using flux-cored wire, check whether it needs gas and whether the polarity is correct.
Conclusion
Getting started with a wire welder can feel intimidating, but the process becomes easier when you follow the same order every time: protect yourself, clean the metal, clamp the joint, choose the right wire and gas, set the machine from the chart, and test on scrap. Keep your safety gear on, watch the puddle, and adjust one setting at a time. If your weld looks uneven, do not guess. Check the basics first. Clean your machine, practice often, and each bead will teach you how to weld better.
Sources
- OSHA 1910.133 Eye and Face Protection — supports welding helmet, shade, and ANSI Z87.1 guidance.
- OSHA 1910.252 Welding, Cutting, and Brazing General Requirements — supports fire prevention, combustible-material clearance, fire watch, and ventilation guidance.
- OSHA 1910.254 Arc Welding and Cutting — supports work-lead checks, gas leak checks, manufacturer instructions, and equipment maintenance.
- MillerWelds MIG Welding Tips and Techniques for Beginners — supports MIG process basics, DCEP, stickout, gas flow, machine settings, and torch technique.