Start by inspecting the rusted floor for hidden damage, then trace the repair area with a cardboard template and transfer it to 16-gauge sheet metal. Cut the patch slightly oversize, shape any ribs or flanges, and test-fit it until the contour matches. Weld it in with short stitch welds to avoid warping, then grind the seams smooth. Finish with seam sealer and rust protection so the repair lasts, and there’s more to know about getting it right.
Inspect the Rusted Floor Area
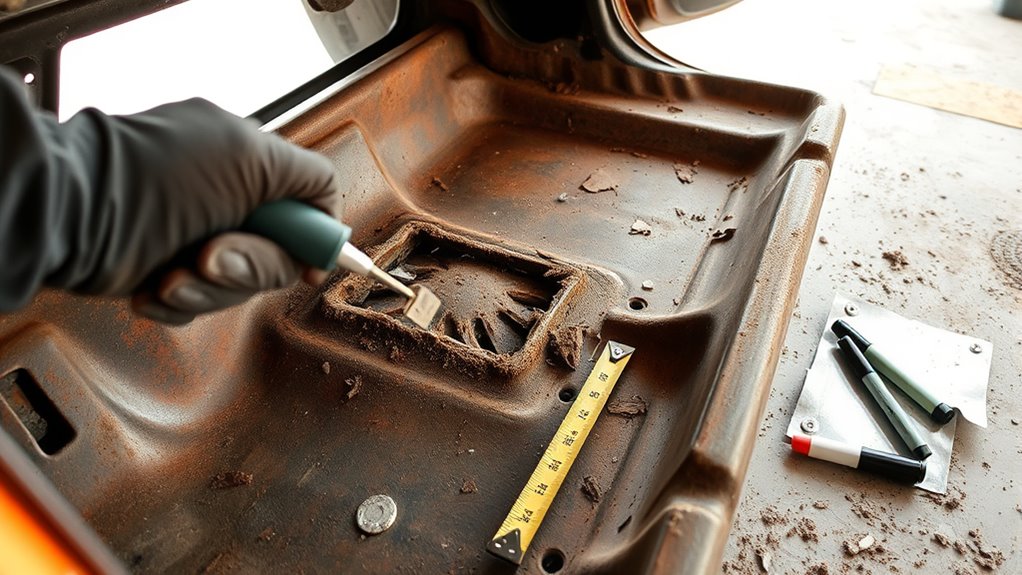
Before you cut anything, thoroughly inspect the rusted floor area for hidden damage, especially in crevices where water can collect.
You’ll need to inspect the rusted floor pan from above and below, because corrosion often travels farther than it shows. Use crushed glass media blasting to strip scale and expose weak steel, old filler, and poor prior repairs.
Check the toeboard panels, cowl, and trunk for moisture traps that feed rust and spread it. If the surrounding sheet isn’t sound metal, stop; patch fabrication on compromised structure only weakens the repair.
Check the toeboard, cowl, and trunk for moisture traps; if the surrounding sheet is weak, stop.
Mark every damaged edge so you can separate rot from usable structure and plan replacement panels only where the metal is truly gone.
Additionally, ensure thorough cleaning of aluminum before any welding to avoid porosity in welds.
Keep your focus on clean, solid boundaries. That’s how you reclaim the floor instead of chasing decay.
Measure and Trace the Patch
Measure the damaged floor pan carefully from several points, since rusted areas are rarely perfectly uniform. You’ll need to measure length, width, and any curves, then trace the boundary with a straight edge and marker. Keep your line clean and leave about 1 to 1.5 inches for overlap so the patch has room for secure fitment.
- Check both sides of the opening for distortion.
- Make a cardboard template before touching sheet metal.
- Mark the template clearly so you can revise it fast.
- Transfer the template to 16-gauge steel with the outline visible.
Once you’ve got the shape on a template, test its fit against the floor pan and make small adjustments before final work. This step keeps you in control, reduces waste, and helps you build a patch that matches the opening without surrendering precision to guesswork. Additionally, ensure that the welds you will use on the patch adhere to the maximum fillet weld size based on the thinner plate thickness to maintain structural integrity.
Cut and Shape the Sheet Metal
Trace your template onto 16-gauge sheet metal, then cut the blank with a cutting wheel or plasma cutter for a clean, accurate edge. Shape the rib and match the floor contour by forming the panel gradually, checking fit as you go. Add flanges to the edges so the patch mates tightly with the existing metal and welds in place cleanly. Using a plasma cutter ensures precise, clean cuts that enhance the overall quality of your patch.
Products Worth Considering
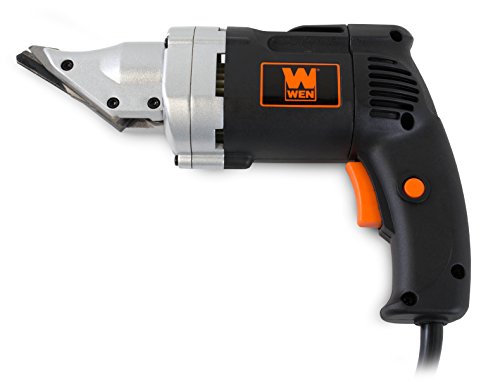
Pressure sensitive trigger cuts anywhere from 0 to 2500 strokes per minute

Easy and fast to cut 14 gauge material and creates a precision, burr free edge

Cuts Up To 18 Ga. Material Including But Not Limited To - Sheet metal, corrugated sheet metal, duct, asphalt shingles, steel mesh, vinyl siding, wire, plastics, cardboard and rubber
Trace And Cut Blank
Cut the blank from your template by transferring the cardboard or poster-board pattern onto 16-gauge steel, leaving a little extra around the perimeter for final trimming. Trace cleanly so your sheet metal matches the repair area and supports a tight fit before welding.
Mark the outside line, then cut slowly with a wheel or plasma tool to follow every curve.
- Clamp the template to stop movement.
- Trace the outline with a fine marker.
- Cut just outside the line.
- Grind the edge until it fits.
Keep the blank flat, check it against the floor pan, and trim where needed. You’re freeing the repair from guesswork, so every adjustment should serve accuracy, strength, and a smooth weld-ready edge.
Shape Rib And Flange
With the blank cut slightly small, you can now shape the rib and add any needed flange so the patch will mate cleanly with the existing floor structure.
Put the sheet metal on a wooden dolly and use a wooden mallet to shape rib detail without stretching the panel. Work gradually, following the original floor curve.
Form flanges where the patch needs overlap or support, keeping bends crisp and consistent. After each pass, test fit the patch against the existing floor, checking edge contact, rib alignment, and clearance.
Trim only when necessary, because a small blank gives you room to tune the fit. Keep the panel controlled and free, so your repair locks in solidly and the new floor section works as one with the old structure.
Test-Fit the Floor Pan Patch
Before you cut the old floor pan, lay the new patch over the damaged area and check the fit for size, alignment, and contour. Use your measure tape and a Sharpie to mark the patch edges, keeping 1 to 1.5 inches extra for joining to sound metal. Then test-fit it again.
- Set the patch on the opening and compare all edges.
- Use self-tapping screws to secure it temporarily.
- Check that the contours match the ribs and curves.
- Trim small amounts, then refit until it sits snug.
Repeat this process until the patch follows the original floor shape without overlapping the old metal. Don’t force the fit; let the sheet guide you.
A clean test-fit now saves time later and helps you build a solid repair with control and precision, especially when using proper rod selection for your welding projects.
Weld the Patch Without Warping
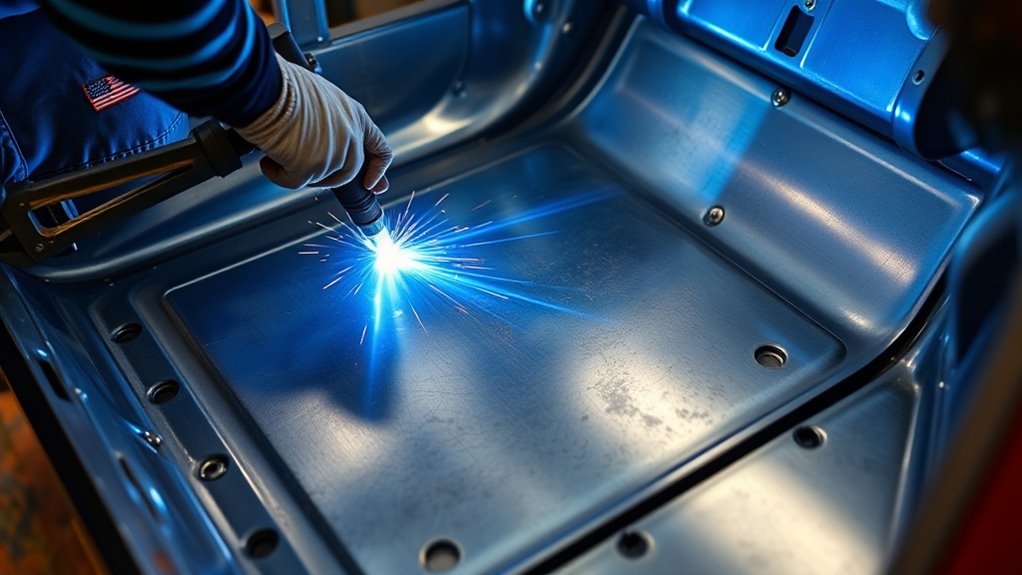
Use stitch welds in short bursts, then move to a different spot so the panel can cool. Keep alternating weld locations to spread heat evenly and reduce distortion. Set your MIG low and let each section cool before you add the next tack. Additionally, ensure you are wearing appropriate PPE, including safety goggles to protect yourself from sparks and flying debris while welding.
Products Worth Considering

Auto-Darken Design- Auto-darkening Welding Goggles are made of PC material, which is strong, shockproof and unbreakable. They automatically darken to the appropriate level when they sense extreme light when an arc is struck, and it returns to the light state when welding stops. It also features anti-ultraviolet, infrared radiation, anti-glare.

Strong & Durable Design: Thanks to their tough polycarbonate wraparound construction, these anti-fog safety goggles offer superior protection from both direct and peripheral threats.

Stitch Weld In Short Bursts
Tack the floor pan patch in short stitch welds, spacing each burst about 2–3 inches apart so you don’t dump too much heat into the panel and warp it.
Keep each stitch weld tight and controlled, using short bursts on thin sheet metal to limit heat buildup and protect structural integrity. Strip the patch and surrounding panel to bare metal before you strike an arc, so you get clean fusion and no contamination.
- Set your MIG low, around 15–20 volts.
- Weld a few inches at a time.
- Move to another spot on the seam.
- Refill any gaps after the first pass.
You’re building a solid, freed panel, not cooking the metal.
Alternate Welds To Cool
Once you’ve got the patch stitched in short bursts, keep the heat under control by jumping around the seam instead of welding in one spot. Use stitch welding, then move a few inches before the next spot weld so the new panel can cool. Set your MIG welding low, about 15-20 volts, and run .023 wire for tighter control. Good heat management keeps the floor pan flat and rust free.
| Move | Purpose | Result |
|---|---|---|
| Weld here | Short stitch | Less heat |
| Skip ahead | Alternate location | Cooling time |
| Lower volts | Control input | Less warp |
| .023 wire | Finer feed | Cleaner bead |
| Scrap test | Practice first | Better technique |
Practice on scrap until your rhythm stays steady. Then finish the seam with confidence and keep the metal liberated from distortion.
Apply Seam Sealer and Rust Protection
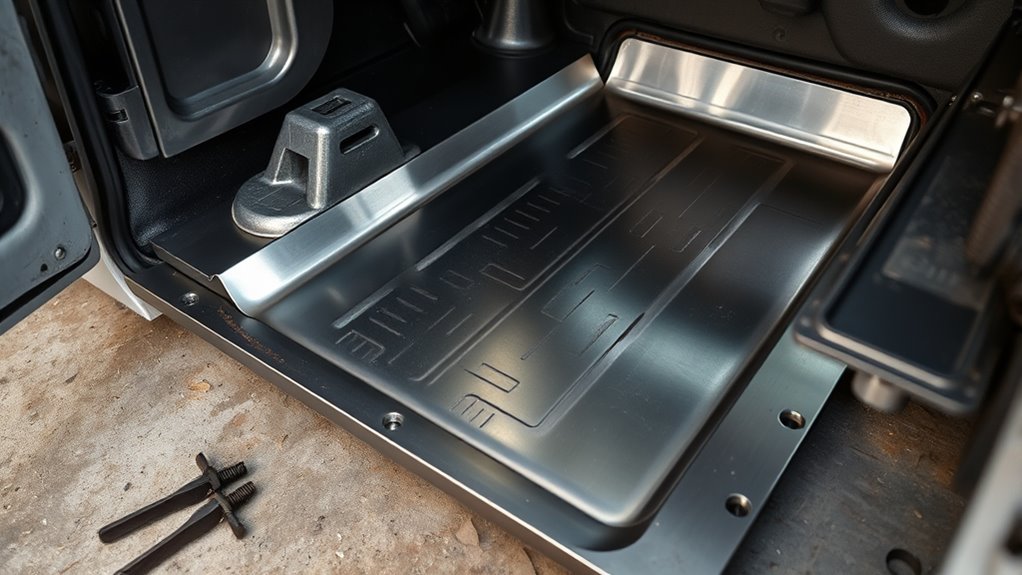
After you finish welding the floor pan patch, apply seam sealer to both sides of the panel to block moisture and help prevent rust.
Use a urethane seam sealer for a flexible moisture barrier that moves with the body and resists vibration. Before you seal, clean every joint and remove any weld-thru primer from the bonding area so the sealer grabs tight and lasts.
Then coat the perimeter with rust protection to slow corrosion.
- Tool the seam sealer into each weld line.
- Cover the underside and top side.
- Apply rust-inhibiting primer or POR15 around the patch.
- Inspect the seam regularly for wear or leaks.
This extra layer keeps water out and strengthens the repair.
If you catch damage early, you can reseal it before corrosion spreads and compromise the floor again.
Frequently Asked Questions
What Thickness Metal Is Used for Floor Pans?
You’ll usually use 16-gauge steel for floor materials; 20- or 22-gauge can work for lighter repairs. Match the metal gauge, use rust prevention, gather tools required, follow installation techniques, and observe safety precautions.
How to Patch Sheet Metal Without Welding?
You can patch sheet metal without welding like a bridge of trust: clean, cut, and bond. Use metal patching techniques, adhesive bonding options, sheet metal preparation, cutting tools overview, patching safety tips, corrosion prevention methods.
How to Patch a Sheet Metal Hole?
You patch a sheet metal hole by cleaning it, cutting a fit patch, and bonding or welding it with sheet metal tools. Use metal patching techniques, best adhesives, DIY repair tips, metal cutting safety, and corrosion prevention methods.
How to Attach Two Pieces of Sheet Metal Together?
You attach two pieces of sheet metal by aligning them, then using mechanical fasteners or welds; choose adhesive types for metal bonding, seal seams, and add rust prevention through proven repair techniques.
Conclusion
By replacing a rusted floor pan yourself, you can save substantial labor costs and extend your vehicle’s life. A properly fitted, welded, and sealed patch restores structural strength and keeps moisture out. In fact, body shops often charge hundreds to thousands for floor pan repairs, depending on rust severity. If you inspect carefully, shape the patch accurately, and protect the metal well, you’ll get a durable repair that lasts and reduces future corrosion.


