To perform a break test on a weld, first verify your samples are clean and properly prepared. Use a robust testing jig aligned for even load distribution and apply force with a hydraulic jack. After the test, analyze broken samples for root penetration depth and any defects like porosity or cold welds. Document your findings for compliance and improvement. By following these steps, you’ll enhance weld quality and structural integrity, leading you to deeper insights on effective inspection methods.
Weld Testing: Why It Matters

Weld testing is essential for guaranteeing the strength and integrity of welded structures. By employing methods like break tests, you can evaluate the quality of your welds, particularly fillet welds, which comprise about 99% of all construction welds. It’s critical to assess deep penetration into the root of the weld, as this greatly affects strength; the ideal penetration is represented by a theoretical 45-degree triangle. During visual inspections, you’ll focus on root penetration quality and identify defects such as porosity or cold welds, which can undermine structural integrity. Following standardized procedures, like those from AWS, guarantees consistency and reliability in your assessments. Ignoring these essential evaluations can leave you vulnerable to failures in your projects. By understanding the importance of weld testing, you empower yourself to create safer, more reliable structures while liberating your craft from potential pitfalls. Additionally, achieving certification from organizations like AWS can significantly enhance your job prospects and expertise in welding.
Key Preparation Steps for Effective Weld Testing
To guarantee effective weld testing, it’s crucial to meticulously prepare your samples before conducting any assessments. Adhering to a pre-test checklist helps guarantee that you meet welding material specifications and apply proper edge preparation techniques. Here’s what you should focus on:
Meticulous sample preparation is essential for effective weld testing and adherence to material specifications.
- Use 3/8 inch thick material to maintain consistency.
- Clean edges and faces thoroughly to prevent defects during welding.
- Conduct a thorough visual inspection of weld penetration into the base material.
- Utilize runoff tabs during the break test to evaluate surface fusion quality.
- Assess broken samples for root penetration and porosity post-test to gauge weld strength.
- Proper arc length control can significantly enhance the quality of your welds during the testing process.
Setting Up Your Testing Jig
After preparing your samples for effective weld testing, the next step involves setting up your testing jig. Confirm that the jig is robust and securely fastened to maintain jig stability, preventing any movement during the break test. Align the welded sample so that the weld sits at the center of the loading area, facilitating proper load distribution for accurate results. Utilize a hydraulic jack to apply a controlled load on the weld; this method provides consistent force application and allows for precise measurement of break strength. Make sure there’s sufficient clearance around the sample, accommodating any debris or movement during testing. Finally, regularly calibrate your testing jig and hydraulic equipment to confirm they meet required standards, which is critical for a thorough evaluation of weld quality. A well-set jig will enhance your testing reliability, empowering you to assess weld integrity effectively. Additionally, ensure that your testing equipment can handle surge requirements to maintain stability throughout the testing process.
Products Worth Considering

GRYVOZE Hydraulic Pressure Test Kit - Includes 5 Hydraulic Test Gauges, 12 Test Couplings, 14 Tee Connectors, 1 Carter Quick Connector, 5 Test Hoses, and a Portable Storage Case.
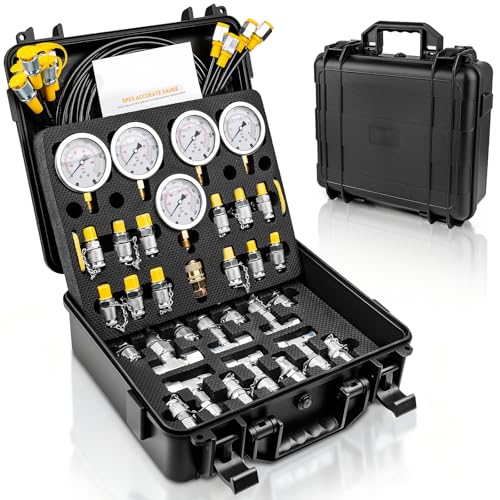
WIDE COMPATIBILITY: Works with most excavator brands and hydraulic machinery. Suitable for construction, mining, industrial, marine, and petroleum applications

Precise Reading Gauge: Five pressure gauges provides five measuring ranges: 0-10bar/150psi, 0-100bar/1500psi, 0-250bar/4000psi, 0-400bar/6000psi, 0-600bar/10000psi. The clear and precise scale ensures accurate pressure measurement, and there are two units on the scale, both efficient and convenient.
How to Execute a Break Test

To execute a break test effectively, start by preparing your samples with proper edge cleaning and the specified thickness. You’ll need a testing jig and a hydraulic jack to apply a controlled force until the weld fails. After the test, analyze the broken samples for key indicators of weld integrity and document your findings for compliance assessment. Additionally, ensure that your weld size adheres to maximum fillet weld size guidelines to maintain structural integrity during testing.
Preparation Steps Required
Performing a break test requires meticulous preparation to secure accurate results and reliable assessments of weld integrity. Follow these essential steps:
- Select a 3/8 inch thick material, making sure it meets your material selection criteria.
- Thoroughly clean all edges and faces to implement effective contamination prevention techniques.
- Conduct a weld joint inspection to verify adequate penetration into the base material, vital for strength.
- Utilize runoff tabs on the test sample to assess weld integrity without compromising the main joint.
- Set up a hydraulic jack with a properly aligned testing jig to guarantee consistent force application during the break test.
Testing Equipment Needed
When executing a break test on a weld, you’ll need specific testing equipment to guarantee accurate and reliable results. Key components include a hydraulic jack for controlled force application, a testing jig to securely hold the sample, and appropriately selected sample materials, ideally 3/8 inch thick. Proper testing force calibration is essential for valid outcomes.
Here’s a summary of the equipment needed:
| Equipment Type | Purpose | Key Consideration |
|---|---|---|
| Hydraulic Jack | Apply controlled force | Ensure calibration accuracy |
| Testing Jig | Hold sample securely | Prevent measurement errors |
| Sample Material | 3/8 inch thick for reliability | Follow standard preparation |
Proper preparation and careful inspection of the weld are vital for obtaining meaningful results.
Analyzing Break Test Results
Analyzing break test results begins immediately after the test, where careful examination of the fractured sample reveals critical insights into the weld’s performance. You’ll want to focus on key factors that indicate weld quality and identify potential failure modes.
Consider these aspects during your visual inspection:
- Root penetration: Assess the depth and consistency.
- Porosity: Look for voids that weaken the weld.
- Cold welds: Identify areas lacking proper fusion.
- Fracture paths: Note any areas of least resistance.
- Surface cleanliness: Verify materials were properly prepared pre-weld.
Recording these observations will help you pinpoint weaknesses and improve future welds, ultimately enhancing structural integrity.
What to Look for When Analyzing Weld Breaks?
When analyzing weld breaks, start by evaluating root penetration quality, as good penetration is essential for weld strength. Next, examine the fractured surface for signs of porosity, which can greatly weaken the weld. Additionally, consider the impact of surface contamination on weld integrity, as it can introduce gases that lead to porosity. These factors will provide valuable insights into the weld’s integrity and guide your future welding practices.
Root Penetration Quality
Root penetration quality is essential in determining the overall strength and reliability of a weld. When performing a root quality assessment, focus on the following:
- Verify the penetration meets the theoretical 45-degree triangle standard.
- Look for good fusion at the root; inadequate penetration can create weak spots.
- Check for cold welds and non-fusion areas that may weaken the weld.
- Conduct fusion integrity checks to confirm the absence of defects.
- Examine the break’s visual appearance; a clean break indicates good surface fusion.
Utilizing effective penetration evaluation techniques will help you identify critical issues, guaranteeing your welds meet the necessary standards for strength and reliability. Prioritize these assessments for best outcomes in your welding projects.
Presence of Porosity
In evaluating weld integrity, the presence of porosity plays a significant role in determining strength and reliability. Micro porosity manifests as small voids or bubbles within the weld metal, indicating poor fusion, which can weaken the structure. During your inspection, look for cold welds and non-fusion areas that compromise overall integrity. Effective inspection methods include visual checks, especially on painted surfaces where paint may not adhere well, revealing porous areas. To mitigate porosity causes, employ prevention techniques such as ensuring good root penetration and proper welding parameters. Identifying these defects early is vital for maintaining structural strength and safety, so remain vigilant during your assessments.
Troubleshooting Common Weld Testing Problems
Although performing a break test is essential for evaluating weld strength, various issues can arise that compromise the results. To navigate these problems effectively, consider the following troubleshooting steps:
- Verify the testing jig is properly aligned; misalignment can distort your findings.
- Check for adequate penetration into the base material; insufficient root penetration leads to weak points that may fail prematurely.
- Inspect for surface cleanliness before welding; contaminants can introduce defects like porosity or cold welds.
- Use a hydraulic jack with an appropriate load capacity; uneven force application may skew results.
- Document any visual defects post-test, like non-fusion areas or micro porosity, to provide insights into weld quality. Additionally, ensure proper cleaning and beveling of joints prior to welding to enhance the integrity of the weld.
Frequently Asked Questions
How to Perform a Destructive Test on a Weld?
To perform a destructive test on a weld, you’ll assess weld integrity through fracture mechanics, ensuring compliance with testing standards. Apply force until failure, then analyze the fracture for defects and penetration quality.
How to Do a Nick Break Test in Welding?
Think of a sculptor chiseling marble; precision is key. For a nick break test, guarantee proper test preparation, calibrate your equipment, and assess weld quality by examining the fracture surface for flaws post-bend.
What Is the Hardest Welding Test to Pass?
The hardest welding test to pass is often the AWS D1.1 certification. It demands precise technique and strong weld quality, adhering to rigorous testing standards that challenge even experienced welders to excel under pressure.
What Are the 4 Methods of Testing After Welding?
You’ve got four methods for post-weld evaluation: visual inspection techniques, destructive testing, hammer tests, and runoff tabs. Each guarantees weld quality assurance by identifying defects, confirming penetration, and evaluating overall structural integrity effectively.
Conclusion
In summary, mastering the break test is essential for ensuring weld integrity. For instance, a manufacturer found cracks in a structural weld during testing, prompting a redesign that improved load-bearing capacity. By consistently applying the break test, you can identify weaknesses early and enhance the reliability of your welds. Remember, thorough analysis of break patterns will guide you in troubleshooting and refining your welding techniques, ultimately leading to safer and more durable structures.


