To reinforce a weak weld joint on your car, first, inspect for cracks, discoloration, and movement. Clean the area thoroughly using a wire brush or grinder to remove contaminants. Choose a MIG or TIG welder based on material type and thickness, then re-weld using proper techniques for strength. Grinding edges smooth can help reduce stress. Finally, apply a protective coating to prevent rust. You can explore more techniques and tools to guarantee a lasting repair.
Why Reinforcing Welds Is Crucial for Vehicle Safety
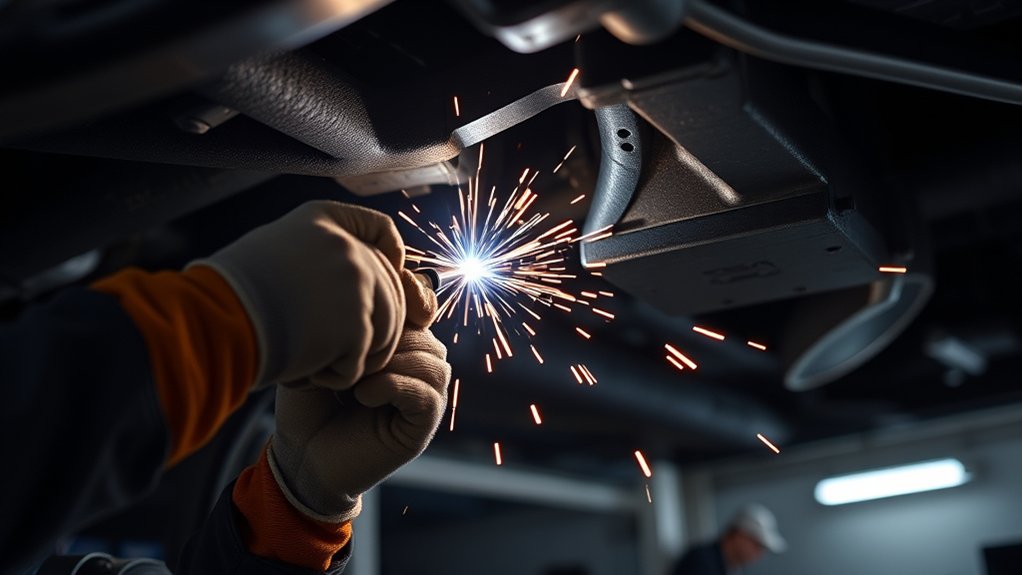
When you consider the safety of your vehicle, reinforcing welds is crucial because weak joints can lead to catastrophic structural failures. A properly reinforced weld joint can bear higher loads, greatly reducing the risk of fatigue cracks that develop over time. The National Highway Traffic Safety Administration (NHTSA) highlights that nearly 40% of vehicle recalls stem from structural integrity issues, underscoring the essential need for strong welds. Reinforcing welds enhances overall durability, especially in high-stress areas like the chassis, making sure your vehicle performs at its best. Regular inspections and reinforcements of weld joints not only prevent costly repairs but also guarantee compliance with safety regulations. This proactive approach protects both passengers and drivers, empowering you to take charge of your vehicle’s integrity. Ultimately, reinforcing welds is a crucial step toward achieving a safe, reliable driving experience. Additionally, understanding nuclear welding techniques can provide valuable insights into the importance of precision and quality in all welding applications.
Identifying Weak Welds: Signs to Look For
Weak welds can jeopardize your vehicle’s safety and performance, so it’s essential to know what to look for. Here are some signs that indicate a weak weld:
| Sign | Description | Action Needed |
|---|---|---|
| Visible Cracks or Gaps | Cracks along the weld line | Inspect and consider reinforcing |
| Discoloration or Spatter | Unusual color or excessive debris | Evaluate welding technique |
| Rust or Corrosion | Moisture damage near the weld area | Clean and assess integrity |
| Movement or Flexing | Structural instability under load | Test load capacity |
| Deformation or Warping | Distortion in surrounding metal | Check weld quality |
It’s crucial to address these issues promptly, as welding over rust can lead to porosity and weakened joints.
Tools You Need for Reinforcing Welds
After identifying weak welds, it’s time to gather the right tools for reinforcing them effectively. The correct tools will guarantee a robust repair, enhancing structural integrity. Here’s a list of essential tools you need for reinforcing welds:
- MIG Welder: A reliable MIG welder is vital for its ease of use and versatility across various materials and positions.
- Wire Brush or Angle Grinder: Use these to clean the weld area thoroughly, eliminating rust, paint, and contaminants that could weaken your new weld.
- Tapered Strengthening Plates: These should match or exceed the original joint’s thickness to effectively distribute stress.
- Plug Welding Tool: Investing in a quality tool allows you to create additional attachment points, boosting joint strength without sacrificing flexibility.
Additionally, consider a MIG welder with three-mode setup for optimal performance across different welding types. With these tools at your disposal, you’re set to reinforce those weak welds with confidence.
Products Worth Considering

【3-IN-1 FLUX CORE WELDER】 – The AZZUNO 135amp welder machine supports Gasless Flux-Core MIG, Lift TIG, and Stick (MMA) welding, delivering versatile performance in a compact design. Powered by 110V input, it runs .030"/.035"/.040" flux-cored wire and E6013 electrodes, making it a reliable choice for home DIY, repair, and light fabrication projects. (Lift TIG torch not included.)
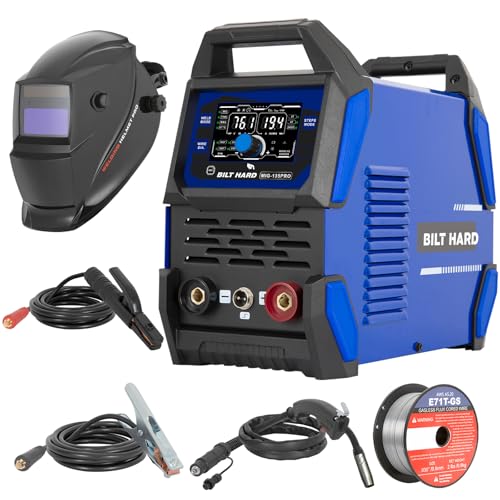
The BILT HARD 135Amp MIG 110V welding equipment offers 3 modes: Flux Core MIG, Lift TIG (TIG torch Not Included in the machine), Stick welding, and supports 2T/4T/Spot trigger modes adapt to quick fixes, long seams, or spot welding, ensuring high-quality and reliable results in any manufacturing process.

3-in-1 Multi-Process Welder: The BILT HARD 135Amp MIG 110V welding equipment offers 3 modes: Flux Core MIG, Lift TIG (TIG torch Not Included in the machine), Stick welding, and supports 2T/4T/Spot trigger modes adapt to quick fixes, long seams, or spot welding, ensuring high-quality and reliable results in any manufacturing process.
Cleaning Steps for Stronger Bonds
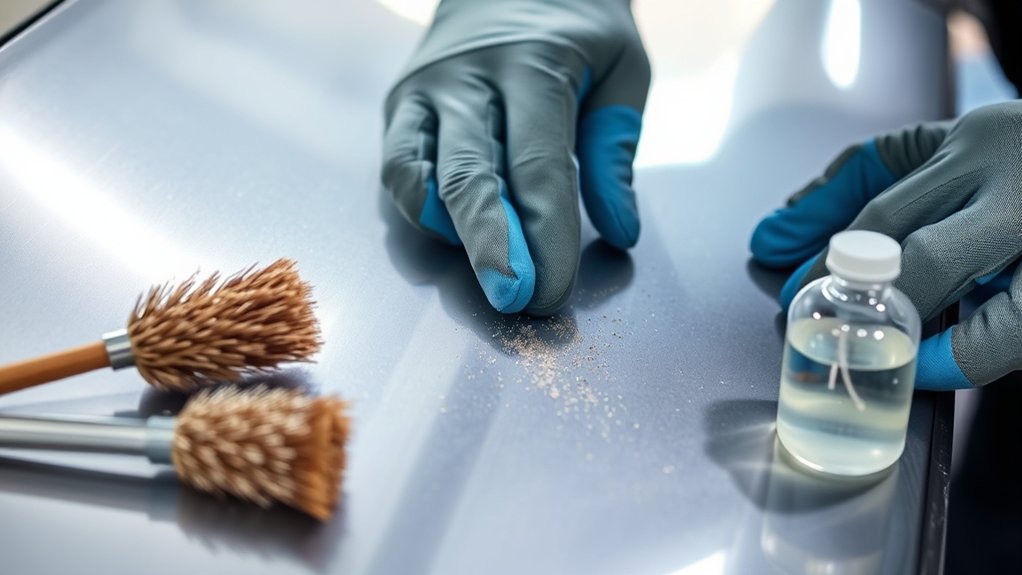
To achieve a strong weld bond, start by using essential cleaning tools like a Scotch-Brite belt to eliminate contaminants. Effective surface preparation is vital; guarantee both sides of the material are clean and free from rust, paint, and debris. Implement contamination prevention techniques, such as marking areas for focused cleaning and considering a weld-thru primer for added protection. Additionally, ensure that all surfaces are free from mill scale to promote better fusion during the welding process.
Essential Cleaning Tools
Cleaning the weld areas effectively is essential for achieving a strong bond, and having the right tools makes all the difference. Start by ensuring you create a clean surface, free from contaminants. Here are four essential cleaning tools:
- Scotch-Brite belt: Use this for gentle cleaning to remove contaminants without damaging the surface.
- Wire brush: Ideal for scrubbing away rust and debris, ensuring a thorough clean.
- Degreaser: Apply to eliminate oils and grease that could compromise weld quality.
- Marker: Use to mark areas on parts, distinguishing between scrap and salvageable sections.
Thoroughly clean both sides of the material, double-checking for missed spots, to guarantee the integrity of your weld joint.
Effective Surface Preparation
Proper surface preparation is essential for achieving a strong weld joint. Start by thoroughly cleaning all surfaces to be welded, using a Scotch-Brite belt to gently remove rust, paint, and contaminants. Aim for bare metal, especially in cavity areas, as this enhances the bond’s quality. Double-check cleaned areas to confirm you haven’t missed any spots; even minor contamination can lead to poor weld quality and weak joints. Use appropriate cleaning methods to avoid paint contamination, which can compromise the weld’s structural integrity. Finally, mark the areas on parts to differentiate between scrap and save, guaranteeing efficient and accurate repairs during the welding process. Effective surface preparation is your foundation for a successful weld.
Contamination Prevention Techniques
One effective way to prevent contamination during the welding process is to maintain a clean workspace. By following these contamination prevention techniques, you’ll enhance the quality of your welds:
- Clean the Work Area: Secure parts to the bench and remove any seam sealer to expose welds adequately.
- Use a Scotch-Brite Belt: Gently clean both sides of the material, making sure they’re free from contaminants.
- Mark Parts: Differentiate between scrap and save areas to target specific weld locations for repair.
- Double-Check Cleanliness: Verify no spots are missed, as any remaining contaminants can compromise weld integrity.
Consider applying a weld-thru primer for corrosion protection, but remember to expose bare metal in the weld zones for maximum adhesion.
Grinding Techniques to Reinforce Weak Welds
Evaluating and reinforcing weak welds starts with effective grinding techniques. First, assess the joint for cracks or poor penetration to gauge the necessary reinforcement. Choosing the right tools is essential; use a flap disc or grinding wheel suited to the material thickness. This guarantees you effectively remove weak weld material without damaging the base metal. Always ensure you’re using grinder-rated accessories to maintain safety during the grinding process.
| Step | Description |
|---|---|
| 1. Assess Joint | Inspect for cracks and poor penetration. |
| 2. Choose Tools | Select flap disc or grinding wheel for thickness. |
| 3. Grind Weld | Smooth the weld bead and taper edges to reduce stress. |
| 4. Clean Area | Remove debris and contaminants thoroughly. |
| 5. Re-Weld | Apply new weld using proper techniques. |
After grinding, clean the area meticulously to avoid quality issues in the new weld. Reinforcing weak welds is vital for maintaining structural integrity.
How to Choose Between MIG and TIG Welding?
When choosing between MIG and TIG welding, consider the specific application and the desired aesthetic outcome. MIG welding excels with thicker materials and offers quicker results, while TIG welding provides precision for intricate designs and thinner sections. Your choice will impact not just the strength of the weld, but also its visual appeal and overall quality. Additionally, understanding material thickness and properties is crucial in determining the appropriate method for specific tasks.
Products Worth Considering

Crafted with precision, our steel plates are laser-cut, offering unparalleled edge smoothness and dimensional accuracy compared to stamped and sheared parts.
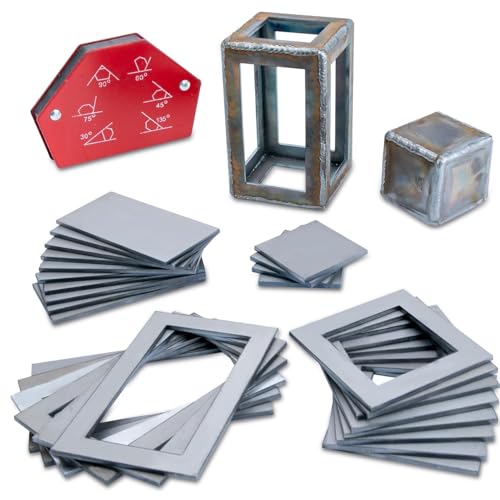
Richly Packed Welding Kit: This kit includes 10 pieces of 3x2-inch plates, 10 pieces of 2x2-inch plates, 10 pieces of 5x3-inch plates, and 10 pieces of 4x2-inch plates. You can weld them into basic 3x3x3-inch and 2x2x2-inch cubes, or create rectangular shapes like a 5x3x3-inch box or a 4x2x2-inch box. Perfect for beginners looking to enhance their welding skills.

Set includes:3pcs Back cup, 20 collets, 8pcs collet body, 25pcs Alumina gas cup/ nozzle, 2 gasket
Welding Applications
Choosing between MIG and TIG welding can greatly impact your automotive project’s outcome. The decision hinges on several factors:
- Material Type: Use a TIG welder for aluminum and stainless steel; MIG is ideal for mild steel.
- Material Thickness: MIG welding suits thicker materials, while TIG excels with thinner sections.
- Weld Quality: TIG welding offers cleaner, more polished welds, perfect for aesthetic applications.
- Skill Level: MIG is easier for beginners, allowing quick assembly; TIG requires more precision and control.
Aesthetic Considerations
Aesthetic considerations play an essential role in selecting between MIG and TIG welding for automotive projects. If you’re focusing on visible areas of your car, TIG welding’s superior heat control delivers cleaner, more aesthetically pleasing welds, creating a solid bond without warping. While MIG welding excels with thicker materials and quicker production, TIG is your best bet for thinner materials and non-ferrous metals like aluminum, common in modern designs. Keep in mind that TIG requires more skill, impacting both the quality and appearance of the weld. Although it may result in higher costs due to longer welding times and training, the investment can be worth it for high-end restorations that demand a flawless finish.
Now That You’Ve Primed, Let’s Dive Into Welding
Now that you’ve primed the surface, it’s time to focus on welding techniques that guarantee a robust bond. Following these steps will help you achieve a strong weld joint:
- Clean Thoroughly: Confirm both surfaces are free of contaminants to allow maximum penetration.
- Use a MIG Welder: This is ideal for quick repairs, but maintain the original joint design to prevent new stress points.
- Add Tapered Plates: Reinforcing the joint with tapered strengthening plates on both sides will help distribute stress evenly and enhance durability.
- Opt for Plug Welds: Instead of continuous seams, plug welds provide flexibility and improve stress distribution in the repair area.
Always verify that your welding techniques align with OEM specifications. This compliance confirms the integrity of your weld and the overall repair. Following these guidelines will lead to a reliable and durable joint. Additionally, ensure that you are using the correct flux core wire for optimal results.
How to Inspect Your Weld and Add Protective Coatings?
How can you guarantee the integrity of your welds after completion? Start by thoroughly inspecting weld joints for cracks, undercutting, or incomplete fusion. These signs indicate potential weaknesses that need addressing. A hammer test can also be useful; lightly tap the weld area—if you hear a solid sound, it’s strong, but a dull thud suggests issues.
Once you’re satisfied with the inspection, apply a protective coating like epoxy primer to the cleaned welds. This step is essential to prevent rust and corrosion, enhancing durability. Make sure the weld area is free from contaminants to guarantee proper adhesion and effectiveness of the coating. Additionally, ensure that you are wearing appropriate protective clothing to safeguard against sparks and heat during the inspection process.
Lastly, regularly check and touch up the coatings, especially in areas exposed to moisture and road debris. Consistent maintenance will help maintain the integrity of your welds over time, ensuring they perform as intended.
Frequently Asked Questions
How to Strengthen Welded Joints?
To strengthen welded joints, use tapered plates to minimize stress, apply reinforcing plates matching the main member’s thickness, and prefer plug welds for flexibility. Confirm all welds are continuous to enhance structural integrity and safety.
Can a Bad Weld Still Be Strong?
Yes, a bad weld can still exhibit strength, with studies showing that 70% of welds maintain some load-bearing capacity. However, its reliability decreases considerably, emphasizing the importance of weld quality in structural applications.
What May Be Done to Reinforce Welds on a Lap Joint?
To reinforce welds on a lap joint, use tapered plates to evenly distribute stress, apply continuous welds for strength, implement plug welds at key points, and inspect weld materials for rust before reinforcement.
Can You Stick Weld in Automotive?
Yes, you can stick weld in automotive applications. This welding technique excels in thicker materials and challenging access areas, but make certain you choose the right electrode and prepare surfaces properly for ideal results.
Conclusion
Reinforcing weak welds isn’t just about strength; it’s about safety, reliability, and longevity. By identifying issues, preparing surfaces, and choosing the right welding technique, you’re not only enhancing structural integrity but also ensuring peace of mind. Inspecting your work and applying protective coatings further safeguards against future wear. Remember, a well-reinforced weld today means a safer drive tomorrow, a more durable vehicle, and the confidence that comes from knowing you’ve done the job right.


