You can remove spot welds by cleaning the panel, marking each weld, and center-punching the locations so the bit won’t wander. Drill the weld with a sharp spot-weld cutter, starting with a small pilot hole, and keep the tool square to the surface. For stubborn welds, use a die grinder, seam buster, or chisel with light control. Work carefully on UHSS and protect flanges for clean reassembly, where the finer details become useful.
Choose the Right Spot Weld Tools
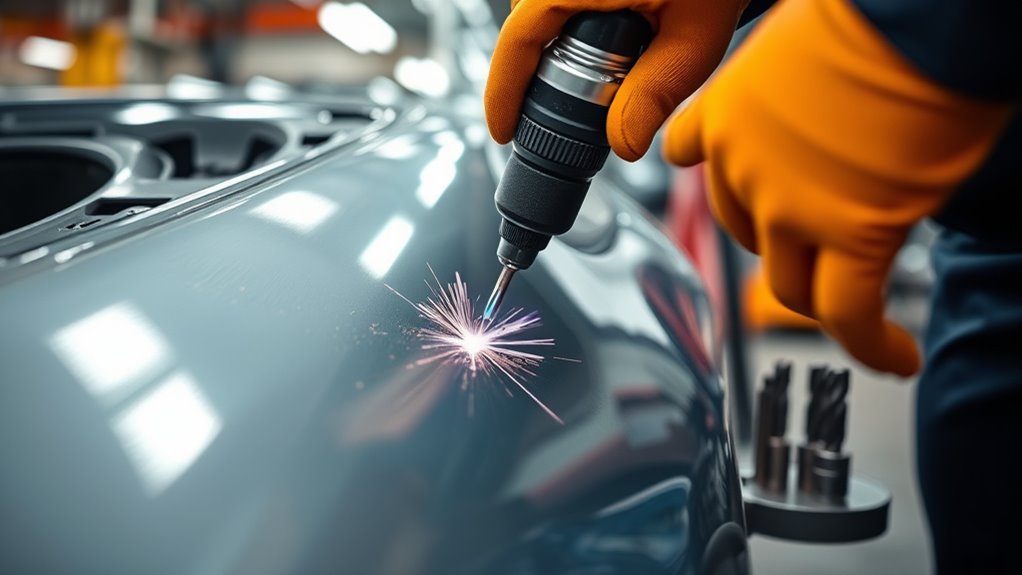
To remove spot welds cleanly, you need the right tool for the job: a sharp spot weld drill is ideal for precise removal, especially when you start with a small pilot hole of about 2 mm to help the bit center and bite properly.
A sharp spot weld drill, started with a 2 mm pilot hole, removes welds cleanly and precisely.
You should choose spot weld drills with a sharp central point, because they cut the weld without chewing up the panel around it.
For faster work on several welds, a high-speed die grinder with carbide bits can rough-cut quickly, but keep it controlled so you don’t overcut.
Spot weld chisels also help you separate panels while preserving the top sheet, which gives you more freedom to work without unnecessary damage.
Buy quality tools from reputable brands, like Mac Tools, so your gear stays durable and reliable under pressure.
When you match the tool to the task, you work cleaner, faster, and with more control. Additionally, ensuring that all zinc residues are removed before welding will help maintain weld integrity.
Products Worth Considering

Durable Material : The preferred material used was top-quality steel which has excellent thermal resistance.The cutting blade has a diameter of 3/8 inches, and the arbor is of standard 1/4 inch size.

Durable HSS Construction: Our spot weld cutter set is made of HSS for better durability and wear resistance. The double-sided blades ensure long-term use and consistent performance, making it the ideal tool of choice for metal cutting

[APPLICATION]: Use this spot weld drill bit to separate spot welds and resistance spot welding panels without distorting the sheet metal.
Mark and Clean Every Weld
Before you drill or grind, clean the area around each spot weld thoroughly to remove paint and e-coat, which improves visibility and helps protect the surrounding panels. Use a scraper, abrasive pad, or solvent so the spot weld area is bare metal and easy to inspect.
Then mark and clean every weld with a paint marker or scribe, placing a clear dot at each location you plan to remove. Accurate marking lets you work with precision and keeps your hands free from guesswork.
Keep notes on weld position, spacing, and any unusual factory patterns so you can stay organized as you move across the panel. If you need extra control, lightly center-punch the mark to guide your tool without drifting.
When grinding, watch for a slight blue color change in the metal; that shows you’re reaching the weld efficiently. This careful prep gives you the control and freedom to remove spot welds cleanly. Additionally, ensure proper weld sizing to maintain the integrity of the surrounding metal during the removal process.
Drill Spot Welds Without Damaging Panels
Set the spot weld drill on each marked weld and let its sharp central point bite into the metal without wandering into the surrounding panel. To drill spot welds cleanly, keep your marks visible and align the tip exactly on center. Use a 2mm pilot hole when needed; it helps the cutter engage fast and stay true. Start at high speed with firm pressure so you penetrate the weld face, then reduce speed once the bit seats. That gives you control and keeps the cutting edges sharp longer. Lubricate the bit regularly to cut friction and heat, so the tool stays effective and your panel stays free. This technique is similar to maintaining proper stick-out length for optimal results in welding.
| Step | Purpose |
|---|---|
| Pilot hole | Improves accuracy |
| High speed start | Penetrates the weld |
| Lower speed finish | Preserves control |
Work methodically, keep the drill square, and let precision free the panel without collateral damage.
Products Worth Considering

SPOT WELD CUTTER KIT: Double-Sided 3/8" & 5/16" Heavy Duty High Speed Rotary Metal Cutting Blade Made From High-Quality High-Speed Steel. The hardness of the cutting edge is up to 63-66 HRC. The cutting edge is sharper, and the piercing ability is better.

Product Content: You will receive a sufficient quantity of spot weld drill bits, a set to easily handle common automotive and metalworking needs.

DURABLE - Double-Sided 3/8" Heavy Duty High Speed Rotary Metal Cutting Blade Made From High-Quality High-Speed Steel.
Use a Grinder on Stubborn Spot Welds
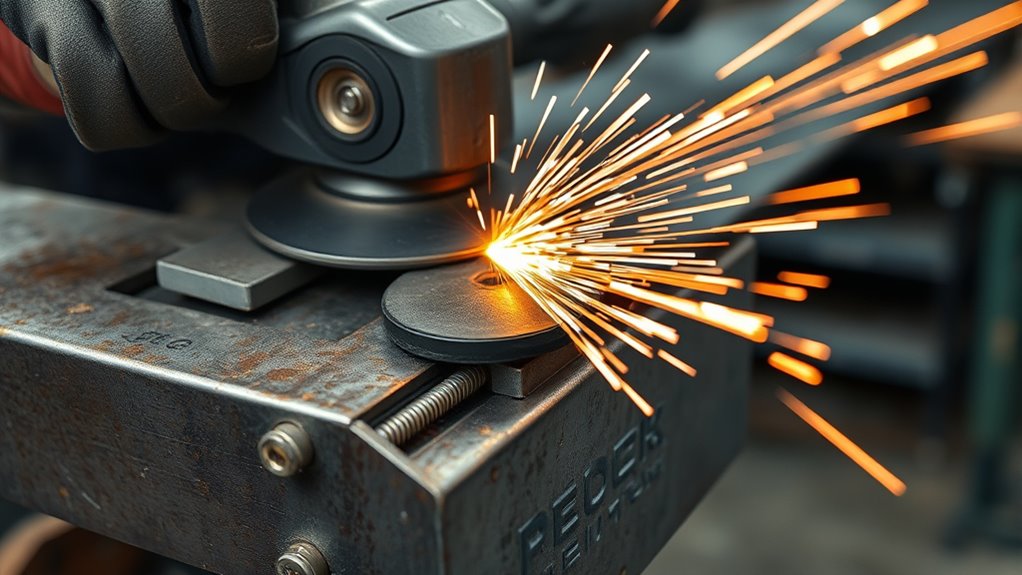
For stubborn spot welds, use a 3/16 cut-off wheel and grind only until you’ve removed about 90% of the weld. Keep a steady hand and apply consistent pressure so you penetrate the weld without tearing the surrounding metal. Cut gradually, check your progress often, and clear away shavings to protect adjacent panels and maintain accuracy. Remember to ensure correct polarity for flux core welding to avoid issues when re-welding or repairing the area.
Grinding Stubborn Welds
When spot welds won’t release cleanly, use a grinder with a 3/16 cut-off wheel to remove them, since it’ll handle most stubborn welds efficiently.
While grinding stubborn welds, cut gradually and keep the wheel centered on the weld nugget. Use steady pressure and a controlled hand so you don’t gouge the panel or tear excess metal.
Let the tool work at a consistent pace; forcing it only raises heat and increases distortion. Watch the color of the metal as you grind, because overheating can warp the sheet.
Once you’ve removed the visible weld, inspect the spot closely for remaining material. If you still see attachment points, slip in a chisel and separate the panels with controlled leverage.
This precise method keeps you in command.
Protecting Surrounding Metal
Protect the surrounding metal by marking each weld location before you start. Then use a grinder with a 3/16 cut-off wheel to work stubborn spot welds with controlled, gradual passes.
Keep the tool flat and let the wheel shave the weld, not the panel, so you’re protecting surrounding metal while freeing the joint. Cut slowly, pause often, and watch for heat; too much pressure can warp adjacent sheet metal and compromise fit.
After the weld breaks, switch to a belt sander to level burrs and clean the edge. Check your progress against the marked points and adjust your angle if the cut drifts.
This disciplined method gives you precise removal, preserves the panel, and keeps the path clear for a clean, liberated installation.
Separate Panels With a Seam Buster
A seam buster lets you separate welded panels cleanly without damaging the surrounding metal, so it’s ideal when you want to preserve the top panel. You position the seam buster at the weld joint, slip its blade between the panels, and tap it forward in controlled increments.
Before you start, locate each spot weld so you work only where the metal is joined. That precision helps you avoid unnecessary distortion and keeps the panel’s shape intact. Unlike harsher methods, a seam buster reduces the chance of bending, gouging, or warping the sheet metal, giving you cleaner separation and more control.
Use steady pressure, check progress often, and move along the joint methodically. For the best result, pair the seam buster with spot weld drilling so you fully release the panels while keeping both surfaces in strong condition. This approach gives you freedom from damage and leaves the repair area ready for the next step. Additionally, always ensure you’re wearing appropriate PPE to protect yourself from potential hazards during the process.
Chisel Spot Welds Free When Needed
Slip a spot weld chisel under the joint to free panels without damaging the underlying metal. You can chisel spot welds free when needed by setting the blade at a 45-degree angle and applying controlled pressure.
Work from the edge of each weld first, then move toward the center so you don’t force the panel or distort the seam. If the bond stays stubborn, tap the chisel lightly with a hammer to break it loose without overloading the metal.
Keep your strokes short and deliberate so the separation stays clean and precise.
- Place the chisel at the weld edge.
- Push with steady, gentle pressure.
- Tap lightly only if the weld resists.
Wear goggles and gloves to guard against shards and debris. With careful technique, you’ll free the panel cleanly and keep the surrounding material intact, ready for the next step in your repair. Additionally, ensure the metal is free of light-to-medium surface rust to maintain the integrity of the weld area.
Handle Ultra-High-Strength Steel Carefully
Ultra-high-strength steel (UHSS) demands specialized tools and a controlled drilling approach because standard bits can dull quickly and damage the panel. You’ll get better results with high-speed drill bits made for UHSS, not general-purpose bits.
Start with a 2 mm pilot hole to center the cut, improve accuracy, and reduce tearing or distortion. Keep your feed steady and light; don’t force the bit. Excess pressure raises heat, shortens tool life, and can make the weld harder to release.
Don’t chase the job with high speed drilling, either. Use only enough speed to cut cleanly, then back off if the bit starts squealing or wandering.
Watch the weld closely as you work. A blue color change tells you the steel has reached the right cutting temperature and your tool is working effectively. Additionally, ensure that you are using the correct gas pressure needs for the amperage to maintain optimal cutting performance. Treat UHSS as the engineered armor it is, and you’ll free the panel with control, not damage.
Protect Quarter Panel Lips and Edges
Mark each weld location before you drill so you can target the fastener precisely and avoid excess damage at the quarter panel edge. Grind only as much as needed, and keep the tool flat and controlled so you don’t thin or gouge the lip. Protect the panel edges throughout the cut, then check for distortion before you move on. Additionally, ensure you clean surfaces thoroughly to prevent contamination that could affect the quality of your welds.
Mark Welds Carefully
Carefully identify each spot weld with a marker so you can drill or grind each location accurately, and apply painter’s tape around the quarter panel lips and edges to protect the surrounding metal from accidental damage.
When you mark welds carefully, you keep control and preserve the panel’s freedom from avoidable scars.
- Use a fine marker to label every weld in a clear, systematic pattern.
- Add a small center punch dimple on each mark if you want the drill bit to stay planted and resist slippage.
- Recheck marked areas as you work, watching for wear, tape lift, or missed welds.
This method helps you track progress, protect the body lines, and remove metal with precision.
Clean layout and disciplined marking let you work efficiently without sacrificing the integrity of the quarter panel.
Grind With Control
Use a grinder with a 3/16 cut-off wheel so you can control the grinding depth and protect the quarter panel lips and edges as you remove each spot weld.
If you prefer, use a die grinder for tighter access, but keep the tool moving with steady, even pressure. Cut only until the weld thins, then stop and inspect the spot visually. A pilot hole helps guide the wheel and reduces slip, giving you cleaner control.
Work one weld at a time, and don’t rush between sections. By grinding gradually, you limit heat buildup and lower the risk of warping the panel.
Precision gives you freedom: you remove the weld without sacrificing the surrounding metal, and you keep the panel ready for the next step.
Save Panel Edges
To save the quarter panel lips and edges, start by marking each weld location clearly so you can work only where needed and avoid drifting into the surrounding metal. When removing spot welds, choose control over force so you keep the panel free and intact. Use a spot weld chisel or seam buster to separate the layers cleanly, then finish stubborn spots with an 11/32 drill bit if needed.
- Cut from the backside whenever possible to protect visible edges.
- Keep grinders and drills moving with light pressure, not aggression.
- Stop as soon as the weld releases to prevent lip damage.
You’re not trapped by sloppy cuts; you can preserve the quarter panel edge and still strip the welds efficiently for a clean reattachment later.
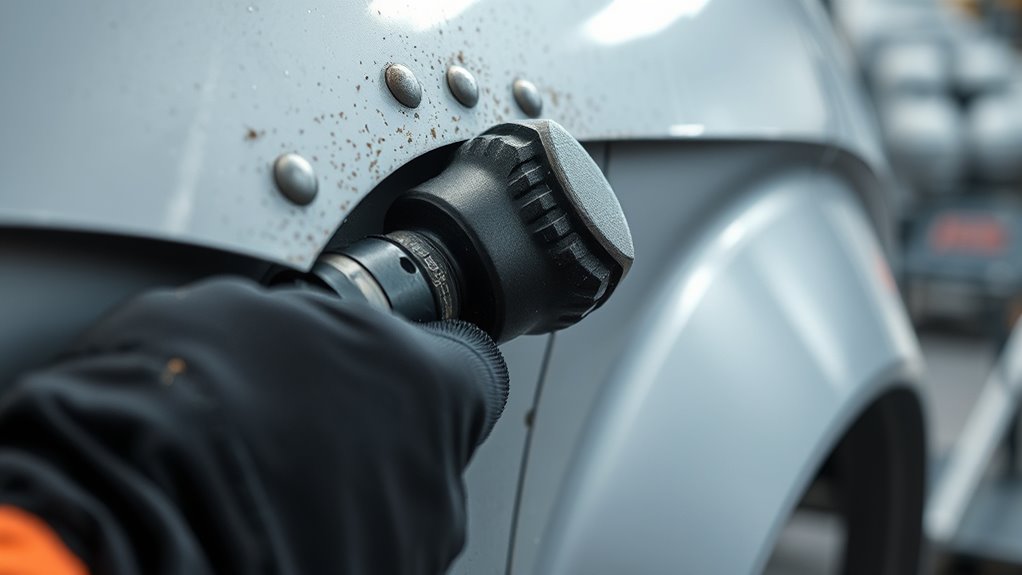
Dress the Metal for Reassembly
Grind or power-file the area with the correct grit to smooth rough edges left after the spot welds are removed, then clean off every remnant and bit of debris from the mating surfaces.
You need to dress the metal for reassembly so the replacement panel sits true and the joint can carry load without compromise.
Check both flanges for flatness; if you find distortion, correct it now with controlled hammer-and-dolly work or careful filing.
Check both flanges for flatness, and correct any distortion now with careful hammer-and-dolly work or filing.
Test-fit the new panel against the original structure, and verify gaps, reveal lines, and reference points before you commit to attachment. Any mismatch you leave here will fight you later.
Once the fit is right, apply a rust inhibitor or weld-through primer to every exposed edge and surface that will be joined.
Keep contaminants off the metal, because residue can weaken welds or adhesives.
Proper cleaning ensures a strong bond and the freedom to move forward with confidence.
Clean, flat, protected surfaces give you a strong bond and the freedom to move forward with confidence.
Frequently Asked Questions
What Is the Easiest Way to Remove Spot Welds?
You’ll remove Spot Welds easiest with a sharp spot weld drill and a 2mm pilot hole; it bites cleanly, reduces damage, and lets you separate panels fast. Use a chisel to finish stubborn spots.
How to Remove Welding Spots?
You remove welding spots by marking them, drilling a 2mm pilot hole, then using a spot-weld drill with lubricant. Grind only until the weld blues, or use a seam buster for clean separation.
What Is the Best Tool for Removing Welds?
You’ll get the best Weld Removal with a spot weld drill for precision, or a 3/16 cut-off wheel for speed. Use a chisel to finish cleanly, and you won’t damage surrounding metal.
What Size Drill Bit to Drill Out Spot Welds?
You’ll typically use a 5/16-inch drill bit for Drill Selection: it cuts cleanly, holds strength, and releases welds; a pilot hole helps, while 11/32-inch only suits stubborn spots.
Conclusion
By the time you finish, you should have cleanly separated the panels with minimal distortion and preserved the surrounding metal for reassembly. Spot weld removal often accounts for a large share of collision repair labor, and technicians spend up to 30% of their time on metal preparation and panel fitting. Use the right tools, stay controlled, and inspect every cut. If you work carefully now, you’ll save time, reduce filler work, and get a stronger final fit.


