A 70 amp stick welder can feel stubborn when you first strike an arc. The rod may freeze to the work, thin steel can burn through, and a bead that looks acceptable may still lack fusion. The machine can still make useful light-duty welds when you match the electrode to its real output, prepare the joint carefully, and stay within its duty cycle.
This guide shows you how to weld with a 70 amp stick welder in a safe, practical way. You’ll learn how to check the machine, choose a compatible rod, set the amperage and polarity, run a controlled bead, inspect the weld, and recognize jobs that need a larger power source.
Quick Answer
To weld with a 70 amp stick welder, clean the steel to bright metal, attach the work clamp to clean steel, and use an electrode whose package range includes 70 amps. Start with a 5/64-inch E6013 or a compatible 3/32-inch E6011, hold a short arc, and run straight, steady beads on scrap first.
Key Takeaways
- Choose the rod from the manufacturer’s stated current range, not from diameter alone.
- A 5/64-inch E6013 is usually a more realistic match than a 3/32-inch E6013 on a true 70 amp machine.
- Clean metal, a solid work-clamp connection, a short arc, and steady travel matter more as available amperage drops.
- Use tacks, stringer beads, and cooling pauses to control heat on light-gauge steel.
- Do not use a small hobby welder for critical structural, vehicle-suspension, lifting, pressure, or overhead load-bearing repairs.
At a Glance
| Time Required | 20 to 40 minutes for setup and initial practice |
| Difficulty | Beginner to intermediate; low-output arc starts need practice |
| Tools Needed | Welder, compatible electrodes, helmet, safety glasses, leather gloves, flame-resistant clothing, clamps, chipping hammer, wire brush, and grinder |
| Cost | Low for rods and cleaning supplies if you already own the welder and complete PPE |
What’s in This Article
- Understanding Your 70 Amp Stick Welder
- Choosing the Right Rods for Low-Amp Stick Welding
- Setting Up Your Workspace for Safe and Effective Welding
- Step-by-Step Guide to Welding with Your 70 Amp Stick Welder
- Common Mistakes Beginners Make and How to Fix Them
- Advanced Tips for Stronger Welds on Limited Amps
- Safety Considerations Every Welder Must Know
- Real-World Applications for 70 Amp Stick Welding
- Frequently Asked Questions
- Final Thoughts on 70 Amp Stick Welding
- Sources
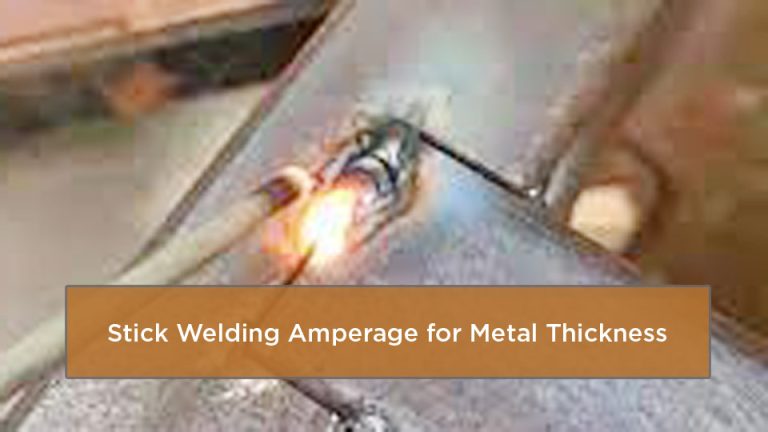
Image by Reddit
Understanding Your 70 Amp Stick Welder
A 70 amp stick welder gives you a compact way to handle practice beads, small brackets, light repairs, and simple shop projects. Many machines in this class use a household-voltage input, but the input voltage, required circuit, output type, and plug vary by model. Read the nameplate and manual instead of assuming every 70 amp machine works the same way.
Stick welding, also called shielded metal arc welding or SMAW, does not need an external shielding-gas cylinder. The electrode’s flux coating creates protective gases and slag while the metal core and base metal melt into the joint. That makes the setup compact and helps the process tolerate outdoor air movement better than gas-shielded MIG or TIG.
What Makes a 70 Amp Welder Work
The 70 amp rating usually describes the machine’s maximum welding output, not the current it can deliver continuously. Some small welders provide a variable dial, while others offer only stepped settings. The available polarity, open-circuit voltage, and arc characteristics can also determine whether a particular electrode starts and stays lit.
Low amperage limits how quickly you can melt the electrode and how much heat reaches the joint. When the rod demands more current than the machine can provide, it may stick, sputter, repeatedly lose the arc, or leave a tall bead with poor toe fusion. The bead can look tidy after slag removal and still be weak underneath.
Check Output, Polarity, and Duty Cycle
Before buying rods, check whether your machine supplies AC, DC electrode positive, DC electrode negative, or a fixed output you cannot change. Then match that output to the polarity printed on the electrode package. A rod that runs well on one type of power may start poorly or not run correctly on another.
Also check the duty-cycle rating. Duty cycle is the allowed arc-on time in a 10-minute period at a stated output. For example, a label that says 20% at 70 amps allows two minutes of welding followed by enough cooling time to complete that 10-minute cycle. Never bypass a thermal shutdown or keep welding after the machine overheats.
Note: “70 amp” alone does not tell you the input-circuit requirement, duty cycle, polarity, or electrode compatibility. The machine manual and electrode package take priority over any general chart.
When to Reach for Your 70 Amp Machine
Use a 70 amp stick welder for practice coupons, small brackets, plant stands, light gates, garden projects, simple fixtures, and non-critical repairs on mild steel. It can also be useful for small outdoor jobs because the electrode carries its own shielding system.
Do not treat it as a replacement for a larger welder on thick plate, long production beads, or code-governed work. Avoid critical structural welds, trailers, steering or suspension parts, lifting devices, pressure vessels, roll cages, and anything that could injure people if the weld fails unless a qualified professional designs, performs, and inspects the work.
Choosing the Right Rods for Low-Amp Stick Welding
Electrode choice can make or break your results with a 70 amp welder. A large rod or an incompatible coating may need more current or a different arc characteristic than the machine can supply. A smaller, compatible electrode gives the arc a better chance to start and stay stable.
How to Read a Stick Electrode Classification
For common mild-steel electrodes, the first two digits in E6011 or E6013 indicate a minimum tensile-strength classification of 60,000 psi for deposited weld metal under the applicable test standard. The third digit identifies welding positions, and the final digit relates to the coating and usable current or polarity. The classification does not give you a universal amperage setting, so you still need the package data.
Best Rod Types for 70 Amps
E6013 is a practical starting choice on clean mild steel when you can find a diameter whose listed range fits your welder. It has a smooth arc, a neat bead profile, and manageable slag, but it does not compensate for poor cleaning or inadequate fusion.
E6011 has a more forceful, digging arc and can tolerate minor surface contamination better than E6013. That does not make it safe to weld through paint, grease, galvanizing, or unknown coatings. Remove contaminants and coatings first, then use E6011 when its polarity and current range match the machine.
Use E7018 only when the exact product, diameter, polarity, storage requirements, and power-source recommendations match your welder. Low-hydrogen electrodes need proper storage, and many small low-output machines do not start or hold them reliably. For most beginners using a basic 70 amp unit, E6013 or E6011 is the more realistic learning path.
Ideal Rod Sizes and Starting Ranges
The table below uses manufacturer data as examples, not universal settings. Electrode formulations differ by brand, and the usable setting changes with polarity, position, joint design, and the machine’s actual output. Always follow the range printed on your rod package.
| Rod Type | Diameter | Example Manufacturer Range | Fit for a 70 Amp Welder | Best Use | Main Limitation |
|---|---|---|---|---|---|
| E6013 | 5/64 in. | 45–75 A DC or 50–80 A AC | Usually the best match when available | Clean mild steel, short beads, light fabrication | Less penetrating than E6011 and sensitive to poor joint cleaning |
| E6013 | 3/32 in. | 70–105 A DC or 75–115 A AC | Marginal; only the bottom of some ranges reaches 70 A | Clean steel when the machine can sustain the arc | May stick or run cold on a true 70 A maximum output |
| E6011 | 3/32 in. | 40–80 A DC or 40–90 A AC | Often compatible if polarity and arc characteristics match | Repairs and joints needing a more forceful arc | More spatter and a less beginner-friendly puddle |
| E7018 | 3/32 in. | Check the exact product package | Use only when the manufacturer and welder manual support it | Qualified low-hydrogen procedures | Storage, polarity, open-circuit voltage, and arc-start demands |
Lincoln Electric’s E6013 product data lists 5/64-inch operating ranges that include 70 amps, while its 3/32-inch E6013 range begins at or above the top of many small machines. Its E6011 product data lists a broader 3/32-inch range. Other brands may publish different values.
Some manufacturers sell 1/16-inch electrodes, and they can suit very low output when the package range includes your setting. Availability and ranges vary, so do not assume every 1/16-inch E6011 or E6013 uses the same amperage.
A rod that is too demanding can stick like glue at low amps. If it keeps freezing to the plate after you confirm clean metal, a solid work-clamp connection, and correct polarity, move to a smaller compatible diameter rather than forcing the arc.
Matching Rods to Your Materials
These common electrodes are intended mainly for compatible carbon and mild steels. Do not assume they are suitable for cast iron, stainless steel, aluminum, hardened steel, or unknown alloys. Identify the base metal before welding and use a filler metal and procedure designed for it.
For clean mild steel, E6013 gives you a smooth learning arc. For a repair on imperfect but properly cleaned steel, E6011 can provide stronger arc force. Remove paint, rust scale, oil, grease, plating, and mill scale from the weld zone and from the work-clamp contact point whenever practical.
Pro Tip: Keep general-purpose rods in a clean, dry, sealed container and follow the manufacturer’s storage instructions. If a rod’s coating is cracked, wet, oily, or visibly damaged, do not use it for a sound weld.
Setting Up Your Workspace for Safe and Effective Welding
Good setup gives you safer welds and cleaner results. Clear the area, inspect the machine, prepare the metal, and arrange your body position before you strike an arc. A few minutes of preparation can prevent poor fusion, burns, electric shock, and fires.
What You’ll Need Before You Begin
Gather your safety gear and tools before you energize the welder. Keep the tools close enough to use without reaching over hot metal, but far enough from sparks and slag.
- 70 amp stick welder with an undamaged electrode holder, work lead, and work clamp
- Electrodes whose diameter, current range, and polarity match the machine
- Welding helmet with a suitable filter shade
- Safety glasses with side protection under the helmet
- Dry leather welding gloves and flame-resistant clothing
- High-top leather work boots without exposed synthetic fabric
- Chipping hammer and wire brush
- Angle grinder or flap disc for cleaning and joint preparation
- Clamps or magnets to hold the joint
- Suitable fire extinguisher and, when needed, a trained fire watch
- Local exhaust ventilation or another effective fume-control method
- Clean mild-steel scrap for test beads
Do not wear polyester, nylon, or other meltable clothing near the arc. Cover exposed skin, button pockets and cuffs, and remove lighters or matches from your clothing. Wear hearing protection when grinding or when the work creates hazardous noise.
Preparing Your Metal and Joints
Clean the joint to sound bare metal. Remove grease before grinding so you do not spread it across the surface, then remove paint, rust, scale, and plating from the weld area. Dirty metal can cause porosity, unstable starts, slag inclusions, and weak fusion.
Fit-up matters too. Clamp the parts so they cannot move, keep the gap appropriate for the rod and joint, and tack the assembly before the final bead. On light 1/8-inch mild steel, a small bevel may help a low-output machine reach the root, but it also makes burn-through easier. Practice the same joint on scrap first.
Power and Work-Clamp Tips
Use an input circuit that matches the welder’s nameplate and manual. Shared circuits, weak receptacles, and long undersized extension cords can create voltage drop, poor arc performance, overheating, and breaker trips. Use no extension cord unless the manual permits it; when one is necessary, use the shortest cord with the conductor size and rating the manufacturer specifies.
Attach the work clamp directly to clean bare metal on the workpiece or welding table, as close to the joint as practical. Although people often call it a “ground clamp,” it is the welding-circuit work connection, not a substitute for proper equipment grounding. A loose or contaminated connection can make the arc sputter, stick, or stop.
Warning: Never weld in rain, while standing in water, with wet gloves, or on a wet workpiece. Keep the power source dry and inspect the electrode holder, leads, plug, and insulation before every use.
Step-by-Step Guide to Welding with Your 70 Amp Stick Welder
Estimated total time: Plan on 20 to 40 minutes for setup and practice before your first usable bead. Your first few welds may take longer because arc starts, travel speed, and electrode feeding need practice.
Put on all PPE, clear the area, and place clean scrap steel on a stable welding surface. Start with flat-position practice beads before you weld a real joint. Low-amp stick welding rewards preparation and consistency more than force.
Step 1: Inspect the Machine and Identify the Metal
Unplug or switch off the welder while you inspect the holder, leads, clamp, plug, and case. Confirm the machine’s input requirement, output type, duty cycle, and available settings. Identify the base metal and remove any coating whose composition you do not know.
Do not weld a sealed container, wheel, tank, drum, pipe, or vessel that may contain pressure, fuel, vapor, or residue. Do not proceed on an unknown alloy or critical component just because the parts look like mild steel.
Step 2: Choose and Insert the Rod
Choose an electrode whose package range includes your machine’s output and whose polarity matches the welder. For clean mild steel, a 5/64-inch E6013 is a sensible starting point when available. A compatible 3/32-inch E6011 may also run at 70 amps, but its arc is more forceful.
Insert the bare end firmly into the electrode holder. Keep the flux coating intact and make sure the holder jaws grip the metal end, not the coated section.
Step 3: Attach the Work Clamp and Set the Current
Clamp the work lead to bright metal near the weld. Set the polarity required by the rod, then begin within the package’s stated range. On a machine that tops out at 70 amps, you may have little adjustment room, so a test bead is essential.
Run a short bead on scrap of the same material and thickness. If the rod repeatedly sticks or the arc goes out while you hold a correct arc length, confirm the connection and polarity before changing rods. If the puddle becomes excessively fluid, spatter rises sharply, or the electrode glows, the setting may be too high for that rod and joint.
Step 4: Strike the Arc
Lower your helmet, then tap the rod or scratch it across the steel like a match. As soon as the arc starts, lift the tip only enough to keep it burning. A useful starting point is an arc no longer than the electrode’s metal core diameter.
If the rod sticks, twist or rock the holder gently to release it. If it does not break free at once, switch off the output before removing it. Do not yank the cable or touch the hot rod with a bare hand.
Step 5: Run the Bead
For a flat bead, hold the electrode roughly perpendicular to the joint from side to side, then tilt the top about 5 to 15 degrees in the direction of travel. Use a drag or backhand motion and feed the rod toward the puddle as it gets shorter.
Watch the leading edge of the puddle rather than the bright arc. Move steadily enough to keep the bead uniform and the arc in the front portion of the pool. On thin material, use a straight stringer bead instead of a wide weave. Miller’s stick-welding technique guide also recommends a short arc, a 5- to 15-degree drag angle for flat welding, and straight beads on thinner material.
If the puddle grows too wide or the edge starts to collapse, stop and let the metal cool. If the bead stays tall and narrow without blending into both toes, check for low current, fast travel, poor cleaning, or material that is beyond the machine’s capacity.
Step 6: Restart and Finish the Bead
When you need a new rod, chip and brush the end of the previous bead. Restart slightly ahead of the crater, move back into it long enough to remelt the end, then continue forward. This reduces the chance of a cold restart or slag trapped at the tie-in.
At the end of the bead, pause just long enough to fill the crater without overheating the joint. Break the arc by moving back briefly and lifting away, or use the finish method recommended for your electrode.
Step 7: Clean and Inspect the Weld
Let the weld cool enough for safe handling, then wear safety glasses while you chip the slag and brush the bead clean. Look for cracks, pinholes, undercut, slag inclusions, missed edges, excessive buildup, and areas that failed to fuse into the base metal.
A visually even bead is not proof of structural strength. Practice on scrap, cut or break non-critical test coupons when appropriate, and seek qualified inspection for consequential work. For thicker light-duty joints, multiple passes may help only when the first pass has sound root fusion and every pass is cleaned fully.
A smooth bead is not automatically a strong bead. Fusion at the root and both toes matters more than surface appearance.
Common Mistakes Beginners Make and How to Fix Them
Small stick welders show mistakes quickly. Most problems come from an incompatible rod, damp or damaged electrodes, dirty metal, a poor work connection, incorrect polarity, an arc that is too long, or material that needs more output than the machine can provide. Fix one variable at a time.
Sticking Rods and Poor Starts
Rods often stick when the current is too low for the electrode, the rod is too demanding, the work connection is poor, or the strike is slow. Confirm the rod’s range and polarity, clean the clamp location, and use a quick tap or scratch. Once the arc starts, keep it short without burying the coating in the puddle.
Excessive Spatter or Porosity
Spatter can come from a long arc, excessive current, the wrong angle, unstable input voltage, or a forceful rod that your technique does not yet control. Porosity appears as holes or cavities and can result from contamination, damp electrodes, or an overly long arc. Remove the defective metal completely, correct the cause, and reweld on clean steel.
Warping or Burn-Through on Thin Metal
Burn-through happens when light-gauge steel receives more heat than the joint can carry away. Use the smallest compatible rod, make short stringer beads or spaced tacks, move to another area, and allow cooling between welds. Keep gaps tight and avoid lingering in one spot.
Tack the part before the final weld so it keeps its shape. Move around the assembly rather than running one long bead from end to end. Very thin automotive sheet is usually easier to control with a suitable MIG or TIG setup than with a basic 70 amp stick welder.
Undercut or Lack of Fusion
Undercut leaves a groove along the weld toe. Excessive current, a long arc, poor angle, or fast travel can cause it. Lack of fusion leaves deposited metal sitting on the joint without bonding properly. Clean the joint, correct the angle and travel speed, shorten the arc, and verify that the rod and material fall within the machine’s capacity.
Quick Troubleshooting Table
| Symptom | Likely Causes | What to Change First |
|---|---|---|
| Rod sticks immediately | Current too low, rod too large, poor work connection, wrong polarity | Clean and tighten the clamp, confirm polarity, then try a smaller compatible rod |
| Arc keeps going out | Current too low, arc too long, weak input voltage, damaged coating | Shorten the arc and verify the input circuit and electrode range |
| Heavy spatter | Long arc, excess current, poor angle, contamination | Shorten the arc and clean the joint |
| Tall narrow bead | Low heat, fast travel, poor fusion | Slow slightly, verify current, and inspect whether the stock is too thick |
| Wide flat bead or undercut | High heat, slow travel, long arc | Travel faster or use a smaller compatible rod |
| Pinholes after slag removal | Damp rod, dirty metal, long arc | Use dry sound electrodes and grind back to clean metal |
Advanced Tips for Stronger Welds on Limited Amps
Once your starts and beads become steady, focus on heat placement, fit-up, and repeatability. A 70 amp welder gives you little reserve, so technique can improve a suitable joint but cannot make the machine appropriate for material or service beyond its limits.
Fine-Tuning Settings for Different Positions
Practice flat welds first. Vertical and overhead positions are harder because gravity pulls on the puddle and many procedures use lower current than flat welding. Use a short arc, small puddle, and brief controlled movements. Do not learn overhead welding above your body with a hobby project; train on a safely positioned practice plate with complete protective clothing.
Multi-Pass Techniques for Thicker Materials
For light 1/8-inch mild steel, a bevel and more than one pass can improve access to the root when the joint design allows it. Run a small root pass, remove every trace of slag, inspect it, and then add a cover pass. Keep each bead narrow enough that the low-output arc can reach both toes.
Multiple passes do not repair a cold root or turn a 70 amp machine into a high-output welder. If the first bead sits on top, the arc repeatedly dies, or the joint cannot reach sound fusion, stop and move to a more capable machine and an appropriate procedure.
Combining Stick Welding with Other Processes
You can tack a suitable part with stick welding and finish it with MIG when both processes, fillers, and procedures are compatible. Stick remains useful outdoors because it does not depend on an external gas shield. MIG usually gives easier heat control on thin sheet when shielding conditions and settings are correct.
Note: Preheating can be part of a qualified procedure for certain steels, thicknesses, and service conditions, but it is not a general fix for an undersized welder. Do not preheat coated metal, sealed parts, unknown alloys, hardened components, or heat-treated steel without material-specific guidance.
Safety Considerations Every Welder Must Know
Welding safety matters every time you strike an arc. Ultraviolet and infrared radiation, hot metal, slag, fumes, fire, noise, and electrical energy can cause serious injury even when the machine is small. Follow the welder manual, electrode safety data, local rules, and established hot-work practices.
Protective Gear Essentials
Wear a welding helmet, safety glasses with side protection, dry leather gloves, flame-resistant clothing, and sturdy leather boots. Cover all exposed skin because arc radiation can burn skin and injure eyes. Safety glasses stay on under the helmet when you chip slag or grind.
Choose the filter shade by process, electrode size, and arc current. OSHA’s eye-protection table lists shade 7 as the minimum for SMAW below 60 amps and shade 8 as the minimum from 60 to 160 amps, while other OSHA guidance commonly recommends shade 10 for small SMAW electrodes. Start darker and move lighter only as needed without going below the applicable minimum or the helmet and workplace requirements.
Handling Fumes and Fire Risks
Keep your head out of the plume and use effective ventilation that draws fumes away without blowing the electrode’s shielding gases across the arc. OSHA identifies welding fumes, ultraviolet radiation, burns, eye injury, and electric shock as major welding hazards. A fan that merely pushes fumes through your breathing zone is not adequate control.
Painted, plated, galvanized, oily, or solvent-contaminated metal can produce hazardous fumes and gases. Remove coatings safely before welding and identify the coating first. A respirator may be required, but it must be selected for the hazard, fitted correctly, and used as part of an appropriate respiratory-protection program.
Warning: Do not weld galvanized, painted, plated, or solvent-contaminated metal in a closed space. Never use chlorinated solvents near an arc, and never weld on an uncleaned container that held flammable or toxic material.
Move rags, cardboard, fuel, sawdust, solvents, and other combustibles away from the work. OSHA’s hot-work rules require movable fire hazards to be removed or protected and call for suitable extinguishing equipment. In workplaces covered by these rules, a fire watch may be required when combustible material is within 35 feet or can be reached by sparks, and the watch continues for at least 30 minutes after the work ends.
Electrical and Equipment Safety
Inspect cables, the electrode holder, the work clamp, input plug, and insulation before each use. Do not wrap welding leads around your body. Keep gloves and clothing dry, avoid contact between your skin and the electrode or energized metal parts, and disconnect input power before servicing the machine.
Assume every welded part remains hot after the arc stops. Use pliers or dry gloves before moving metal, place hot parts where nobody can touch them, and mark them when other people share the workspace. Shield nearby people from arc rays and flying sparks with suitable welding screens.
Real-World Applications for 70 Amp Stick Welding
A 70 amp stick welder works best for learning and small non-critical jobs. It gives you a compact way to practice arc control, joint preparation, fit-up, slag removal, and visual inspection. Keep the work clean, short, and within the machine’s verified capacity.
DIY Projects for Hobbyists
You can use a small stick welder for plant stands, light brackets, practice coupons, small gates, simple shop fixtures, and decorative mild-steel projects. Test the same joint on scrap first so you can check rod choice, travel speed, and distortion before touching the final part.
Avoid projects that carry people, vehicles, suspended loads, pressurized contents, or valuable property. A bike rack or frame may look light, but failure on a road or above a person can have serious consequences.
Small Field Repairs
Small stick welders can help with light fence repairs, non-critical farm-gate fixes, and simple shop maintenance when the input supply and weather are safe. Clean the repair area as thoroughly as possible, protect the machine from moisture, and inspect what is behind the weld zone for fuel, wiring, hoses, wood, or other fire hazards.
Limitations and When to Upgrade
Upgrade when you need thicker-steel capacity, a longer duty cycle, more stable starts, wider electrode choice, better current control, or repeatable penetration. A higher-output machine may improve capability, but the joint still needs the right filler, procedure, preparation, and operator skill.
If your welds repeatedly look cold, sit high on the joint, or fail to tie into the toes after you verify preparation and settings, the material may be beyond your machine. Do not cover a weak joint with extra passes. Stop and choose equipment and a procedure that can produce sound fusion.
Frequently Asked Questions
What thickness of metal can you weld with a 70 amp stick welder?
There is no universal maximum thickness because output quality, rod, polarity, joint design, position, and operator skill all matter. Light 1/8-inch mild steel is a reasonable non-critical target for many 70 amp machines with proper preparation, but you must verify fusion on scrap. Use a larger welder and qualified procedure for thicker or structural steel.
Which rod works best for beginners using a 70 amp welder?
A 5/64-inch E6013 is often the easiest starting choice on clean mild steel when its package range and polarity match the machine. It usually runs smoother than E6011. A 3/32-inch E6013 may need more than 70 amps, depending on the product.
Can a 70 amp welder run a 3/32-inch rod?
It can run some 3/32-inch electrodes, but not all. Manufacturer examples place 3/32-inch E6011 within a range that includes 70 amps, while some 3/32-inch E6013 products start around 70 to 75 amps. Check the exact package and test the arc on scrap.
How do you stop rods from sticking on a low-amp machine?
Use a rod whose current range includes your setting, keep the electrode dry, attach the work clamp to clean metal, confirm polarity, and strike quickly. Hold a short arc after it starts. If sticking continues, try a smaller compatible diameter instead of dragging a cold rod across the joint.
Can you use a 70 amp stick welder outside?
Yes, stick welding tolerates outdoor air movement better than gas-shielded processes. Keep the welder, connections, gloves, and work dry; never weld in rain or standing water. Control sparks, inspect the area for combustibles, and avoid wind that carries fumes through your breathing zone.
Why does a 70 amp weld look weak or sit on top?
The material may be too thick, the joint may be dirty, the work connection may be poor, or the rod may need more current than the welder can provide. Clean the steel, shorten the arc, verify polarity, and test a smaller compatible rod. If fusion still fails, use a more capable machine.
How long can a 70 amp welder run before cooling?
Read the duty-cycle label or manual. A 20% rating at 70 amps means two minutes of arc time in a 10-minute period at the stated test conditions. The rating may be higher at a lower output. Let the machine cool as directed and never defeat thermal protection.
Final Thoughts on 70 Amp Stick Welding
A 70 amp stick welder can make useful light-duty welds when the rod, metal, polarity, joint, and technique fit the machine’s limits. Start with clean scrap, a manufacturer-approved small electrode, a short arc, and straight practice beads until your starts and travel become consistent.
Keep your PPE on, respect the duty cycle, clean every pass, and inspect the bead after removing slag. When a joint needs more penetration, longer run time, or dependable structural strength than the machine can provide, the correct move is a larger power source and a qualified procedure, not more cover passes.
Sources
- Lincoln Electric: Fleetweld 37 E6013 — electrode applications, diameters, polarity, and typical operating ranges.
- Lincoln Electric: Fleetweld 180 E6011 — electrode characteristics and typical current ranges.
- Miller: Five Steps to Improving Your Stick Welding Technique — amperage selection, arc length, rod angle, manipulation, and travel speed.
- Miller: Duty Cycle, What It Is and Why It’s Important — duty-cycle definition and cooling limits.
- OSHA: Welding, Cutting, and Brazing Hazards and Solutions — fume, radiation, burn, and electrical hazards.
- OSHA 29 CFR 1910.252 — hot-work fire prevention, combustible clearance, extinguishers, and fire-watch requirements.