Stick welding thin metal is possible, but it gives you a much smaller margin for error than MIG or TIG. The arc concentrates heat quickly, so a long arc, oversized electrode, poor fit-up, or a few extra seconds in one spot can cause burn-through and distortion. Your best results come from using the smallest suitable electrode, a stable low-amperage machine, tight fit-up, short tacks, and plenty of cooling time.
Quick Answer
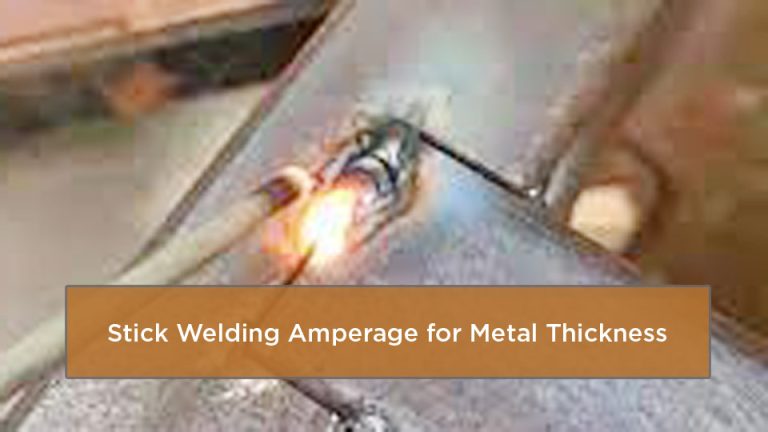
To weld thin metal with an arc welder, clean and clamp the joint, use a small E6013 electrode, start near the low end of the manufacturer’s amperage range, and keep a very short arc. Make quick tacks or short stitches instead of a continuous bead, skip around the joint, and let the metal air-cool between welds.
For clean mild steel, a 1/16-inch E6013 rod is usually the easiest stick electrode to control when you can find it. A 3/32-inch rod can work on roughly 16-gauge and thicker sheet, but it adds heat faster. On 18- to 22-gauge steel, MIG or TIG is usually easier and produces less cleanup, so treat stick welding as a repair method rather than the automatic first choice.
The settings in this guide are starting points, not universal prescriptions. Electrode brand, polarity, machine design, joint type, position, and actual material thickness all change the correct amperage. Always confirm the range printed on the electrode package or data sheet and test on matching scrap before welding the project.
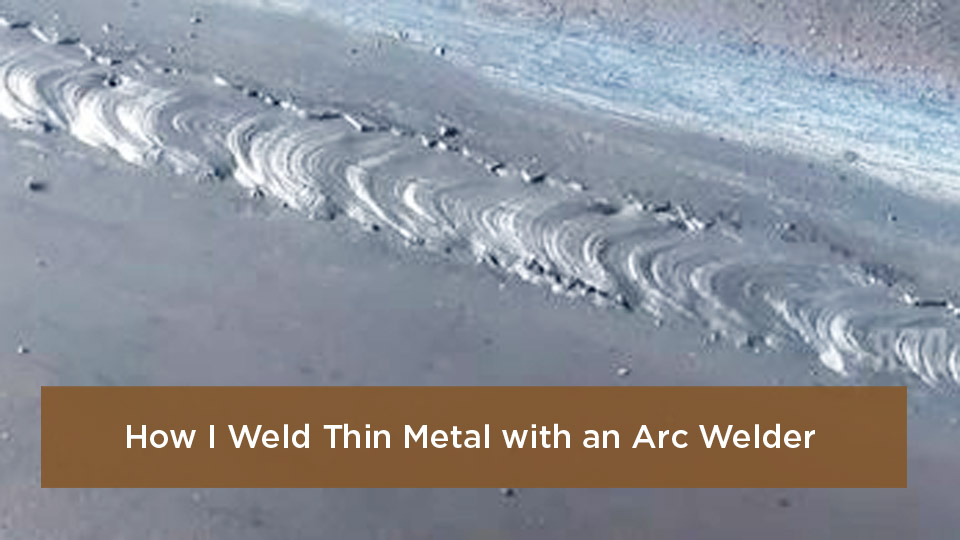
Image by yeswelder
Key Takeaways
- Use clean, dry mild steel and the smallest electrode your machine can run smoothly.
- E6013 is usually easier to control on clean thin sheet than deep-digging E6011.
- Keep the arc short and use tacks, skip welding, or short stitches instead of one long bead.
- A dry copper backing bar can support the puddle and absorb heat. Never use wet wood or a wet rag at the live welding area.
- For structural, vehicle-safety, pressure, or load-bearing work, use an approved welding procedure and qualified inspection.
At a Glance
| Time Required | About 30–60 minutes for setup, practice, welding, cooling, and inspection |
| Difficulty | Intermediate; difficult below about 18 gauge |
| Tools Needed | Low-amperage stick welder, electrode holder, work clamp, small electrodes, clamps, wire brush, chipping hammer, grinder, dry copper backing bar, PPE, and ventilation |
| Cost | Low if you already own the welder and PPE; electrodes, abrasives, and backing material are the main consumables |
What Is Thin Metal in Welding and Why Is It Tricky?
In this guide, “thin metal” means mild-steel sheet and light-wall tubing from about 14 gauge down to 22 gauge. Gauge numbers are easy to misread because a higher gauge means thinner metal, and gauge thickness also changes with the material. Measure the work with calipers whenever possible instead of trusting appearance alone.
| Mild-Steel Gauge | Nominal Thickness | Stick-Welding Difficulty |
|---|---|---|
| 14 gauge | About 0.075 in. (1.9 mm) | Manageable with a small electrode and short welds |
| 16 gauge | About 0.060 in. (1.5 mm) | Challenging but practical with good fit-up |
| 18 gauge | About 0.048 in. (1.2 mm) | Difficult; use small tacks and a backing bar |
| 20 gauge | About 0.036 in. (0.9 mm) | Very difficult; MIG or TIG is usually better |
| 22 gauge | About 0.030 in. (0.8 mm) | Not a good beginner stick-welding job |
Thin sheet heats through almost immediately. Once the edge reaches melting temperature, the puddle can fall away before you add enough filler to bridge it. Heat also spreads into the surrounding sheet, causing oil-canning, buckling, and pulled-out-of-square assemblies.
Flux adds another challenge. You must maintain enough heat for fusion while moving fast enough to keep slag from running ahead of the puddle. On a very short tack, that leaves little time to read the puddle and correct your angle.
On thin sheet, control comes from reducing the time spent in one spot, not from trying to “wash” a wide puddle across the joint.
Choosing the Right Arc Welder for Thin Metal Projects
A thin-metal-friendly stick welder needs a stable arc at low current. Look for a constant-current inverter with a genuinely low minimum output, accurate amperage adjustment, DC output, and the ability to select the polarity required by the electrode. Hot-start and anti-stick functions can help, but aggressive arc-force settings can increase digging action and make burn-through worse.
Compact machines vary more than their maximum amp rating suggests. For example, the official Miller Maxstar 161 S specifications list a 20-amp minimum for stick output, while the Lincoln Invertec 135S, 150S, and 170S data sheet lists a 10-amp minimum. Those numbers show machine capability, not a guaranteed setting for every rod.
Older transformer and engine-driven welders often have a higher minimum output or coarser adjustment. They can still weld 14- or 16-gauge steel with the right electrode and technique, but they are harder to control on 18-gauge and thinner material. If the arc surges, wanders, or will not stay stable at the required current, check the leads, work connection, input power, and the troubleshooting steps in this guide to arc welding machine problems and solutions.
Products Worth Considering

【UPGRADED 200Amp STICK WELDER 110V】Welder machine 110V Adjustable Current: 20-200A. Comes with 20 welding rods, can weld metal materials with 0.06-0.2 inch thickness, such as cast iron, mild steel, etc. Ideal for home repairs and DIY projects.

Advanced IGBT Inverter Technology – Featured with premium IGBT inverter technology, this welding machine provides stable arc ignition and steady current output for superior welding performance. It greatly reduces welding spatter and produces smooth, neat weld seams. Easy to operate and suitable for a wide variety of metal materials, it comes with closed-loop feedback control to keep constant voltage output without interfering with household power grids
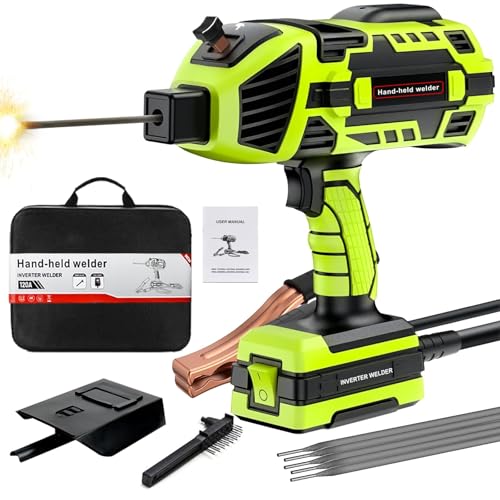
PORTABLE HANDHELD WELDING MACHINE: The ARC Welder Gun measures is 9.8*10 inch, compact and portable design makes it easy to use in a variety of work environments without taking up too much workbench space. Itself weighs only 3.9 pounds and is great for working at heights, which can be easily operated with one hand, allowing you to feel the convenience of a lightweight machine
Features That Matter Most
- Stable low-current output: The arc must stay lit without forcing you to raise amperage beyond what the sheet can absorb.
- Correct polarity options: Use only a polarity approved by the electrode manufacturer.
- Low or adjustable arc force: Start low on thin sheet. Add only enough to prevent sticking.
- Accurate display or dial: Small five-amp changes can matter on light-gauge steel.
- Sound leads and a clean work connection: Resistance at the work clamp causes unstable starts and inconsistent heat.
Note: The clamp connected to the welding circuit is a work clamp, not the equipment grounding conductor. Attach it to clean bare metal close to the weld, and follow the welder manual for proper electrical grounding.
Best Rod Types for Arc Welding Thin Metal
Electrode choice affects arc force, penetration, slag behavior, and how quickly metal is deposited. For clean mild steel, E6013 is usually the most forgiving place to start because it has a softer arc and can run at relatively low current. The Lincoln Fleetweld 37 E6013 product information, for example, identifies sheet metal and low-amperage operation as intended uses.
The classification matters, but do not reduce it to a slogan. In E6013, “60” indicates a 60,000-psi minimum tensile-strength class, “1” indicates all-position classification, and the final two digits identify coating and current characteristics under the applicable electrode standard. Always follow the specific product data sheet because two E6013 brands can run differently.
| Electrode | Use on Thin Mild Steel | Main Caution |
|---|---|---|
| E6013 | Best general starting choice for clean sheet; choose 1/16 in. when available or 3/32 in. at the low end of its approved range | Fluid slag can run ahead if you travel too slowly; avoid a wide weave |
| E6011 | Useful when the machine is AC-only or the surface cannot be made perfectly clean | Forceful, deep-digging arc increases burn-through and spatter risk |
| E7014 | Can make smooth welds on suitable joints and positions | Higher deposition is usually harder to manage on very thin sheet |
| E7018 | Use when a qualified procedure or design requirement calls for low-hydrogen metal | Common sizes need more current, and opened electrodes require controlled storage |
Do not look for an “ER70S-6 stick rod.” ER70S-6 is a solid-wire or bare filler-metal classification used with processes such as MIG or TIG, not a covered SMAW electrode classification.
Products Worth Considering

ELECTRODE SPECIFICATION: E6013 welding rods with 3/32 inch diameter and 14-inch length, designed for general purpose arc welding applications on carbon steel materials

MODEL: E6013 is a mild-steel general purpose rod. It operates on AC or DC welding current and works well on low voltage AC machines.

Product Introduction: E6013 welding rod is suitable for both AC and DC applications and can be used for all position welding
How to Store Electrodes
Keep E6013 and E6011 dry in their original packaging or a clean sealed container. If they become visibly damaged, contaminated, or run poorly after long humid exposure, follow the manufacturer’s instructions or replace them. Do not improvise a household-oven drying cycle.
Low-hydrogen electrodes such as E7018 have different exposure, holding, and re-drying rules. Lincoln Electric’s electrode storage guidance calls for controlled heated storage after opening and product-specific re-drying procedures. Those requirements do not automatically apply to E6011 or E6013.
Essential Safety Gear for Welding Thin Sheet Metal
Thin material does not make the arc safer. You still face ultraviolet and infrared radiation, hot slag, fumes, fire, electrical shock, and sharp sheet-metal edges.
- Helmet: Use a compliant welding helmet. OSHA’s shade guide lists shade 10 for shielded metal arc welding with 1/16- through 5/32-inch electrodes.
- Eye protection: Wear safety glasses with side protection under the helmet for slag chipping and grinding.
- Clothing: Wear dry leather gloves, flame-resistant sleeves or a jacket, long pants without cuffs, and leather boots.
- Hearing protection: Use it when grinding, chipping, or working in a loud shop.
- Ventilation: Keep your head out of the plume and use local exhaust or adequate general ventilation.
Warning: Never weld in wet gloves, wet clothing, standing water, or on a damp work surface. Do not place wet wood, a wet rag, or another water-soaked material behind an energized weld area. Moisture raises shock risk and can create steam, spatter, and uncontrolled cooling.
OSHA’s welding-fume fact sheet explains that outdoor work does not automatically provide adequate ventilation and that local exhaust should capture fumes close to the source. A small fan may move fumes away from you in some open-air situations, but it is not a substitute for proper extraction or exposure controls.
Remove paper, sawdust, fuel, solvent containers, and other combustibles from the hot-work area. OSHA’s general welding requirements use a 35-foot fire-prevention zone unless combustibles are moved or protected. Keep the correct extinguisher available and arrange a fire watch when conditions require one.
Coated, Painted, and Galvanized Metal
Identify coatings before you strike an arc. Paint, plating, galvanizing, oil, and solvent residue can release hazardous fumes. Remove coatings for a sufficient distance around the joint, capture fumes at the source, and use respiratory protection when a qualified exposure assessment shows it is required.
Do not weld on a used tank, drum, fuel container, refrigerant line, or closed section unless it has been professionally cleaned, isolated, vented, and approved for hot work. Residue can produce a fire, explosion, or toxic gas even when the container looks empty.
Preparing Thin Metal for Arc Welding Success
Preparation controls both heat and weld quality. On thin metal, a small gap or contaminated edge can matter more than a five-amp setting change.
1. Confirm the Material and Thickness
Make sure the part is weldable mild steel, not aluminum, magnesium, hardened steel, or an unknown plated alloy. Measure thickness with calipers. If the part is safety-critical or the material is unknown, stop and identify it before choosing an electrode.
2. Clean to Bright, Dry Metal
Remove rust, paint, scale, oil, and plating around the joint. Use a dedicated wire brush or a clean flap disc. A non-chlorinated cleaner may be used when the manufacturer allows it, but let it evaporate fully and remove the container from the hot-work area before welding. Never weld near chlorinated solvent vapor because arc ultraviolet energy can help form highly toxic decomposition products.
3. Choose a Joint That Helps You
A lap joint is usually easier than a butt joint because the overlap creates more mass under the arc. For a thin butt joint, keep the fit-up tight and even. Do not grind a large 30-degree bevel into 18- or 20-gauge sheet; that removes the edge you are trying to preserve. A 1/16-inch gap is also very large relative to 20-gauge material and greatly increases burn-through risk.
For tubing, deburr the cut, close gaps, and clamp the pieces square. Tack opposite sides first so shrinkage does not pull the tube out of alignment.
4. Clamp and Back the Joint
Use clamps or a fixture that holds the metal flat without covering the weld path. Place a clean, dry copper bar behind a butt joint when access allows. Copper absorbs heat and supports the molten puddle without becoming part of a mild-steel weld under normal conditions.
Pro Tip: Practice on two or three coupons cut from the same material, with the same joint and backing. A setting that works on thick scrap may fail immediately on the actual panel.
Step-by-Step Guide to Arc Welding Thin Metal
The following method works best for a small lap or tightly fitted butt joint in clean mild steel. It is not a substitute for a qualified welding procedure on structural or regulated work.
Step 1: Set Up the Work Area
Clear combustibles, position ventilation, wear full PPE, and place the machine on a dry surface. Inspect the holder, leads, insulation, and work clamp before energizing the welder.
Step 2: Clean, Fit, and Clamp the Joint
Bring both surfaces to bright metal. Clamp the joint tightly and add a dry copper backing bar behind a butt joint when possible. Put the work clamp on clean bare metal close to the weld.
Step 3: Select the Electrode and Polarity
For clean mild steel, start with the smallest E6013 the machine can run steadily. Use AC, DCEP, or DCEN only when the specific electrode data sheet permits it. TWI notes that DCEN generally reduces penetration in manual metal arc welding, but electrode coating and manufacturer restrictions take priority.
Step 4: Start at the Low End of the Approved Range
Set amperage near the lower end of the electrode manufacturer’s range, then test on matching scrap. If the arc repeatedly sticks despite a clean connection and correct technique, raise amperage in small steps. If the edge collapses or the puddle becomes uncontrollable, stop and reduce heat input.
Step 5: Make the First Tacks
Place quick tacks at the ends and then in the center. Add more tacks by splitting the remaining gaps. On a long seam, alternate locations instead of working from one end to the other.
Step 6: Hold a Very Short Arc
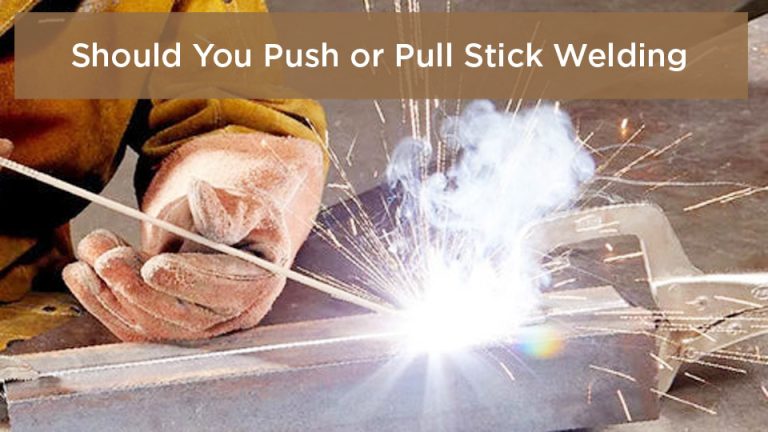
Scratch-start close to the joint and immediately shorten the arc. For a fillet or lap joint, use the correct work angle to share heat between both pieces. Use a slight drag angle, usually about 5–15 degrees, unless the electrode instructions specify otherwise.
Step 7: Connect Tacks With Short Stitches
Use brief stitches or overlapping tacks. On very thin sheet, each weld may last only a fraction of a second. Move to a distant part of the seam and let the first area cool before returning. Do not make a wide side-to-side weave with E6013 on thin sheet.
Step 8: Cool, Clean, and Inspect
Let the part air-cool. Do not quench it with water. Chip slag only after the weld has solidified, then wire-brush the seam. Look for cracks, pinholes, undercut, trapped slag, missed edges, and distortion. Grind and repair defects before the joint goes into service.
Machine Settings for Low-Heat Arc Welding on Thin Stock
There is no single amperage chart that fits every electrode and welder. The table below gives conservative starting zones for clean mild steel with a small E6013 electrode. Confirm the product data sheet before using them.
| Steel Thickness | Electrode Starting Point | Technique |
|---|---|---|
| 22–20 gauge | 1/16 in. E6013, near the product’s minimum approved current | Isolated tacks, tight fit, copper backing; MIG or TIG preferred |
| 18 gauge | 1/16 in. E6013, low end of the approved range | Overlapping tacks or very short stitches |
| 16 gauge | 1/16 in. E6013, or 3/32 in. only if its minimum current is stable | Short stitches with skip sequence |
| 14 gauge | 3/32 in. E6013 near the lower half of its approved range | Short stringer beads or stitches |
For a broader machine reference, use this stick welder settings chart, then verify the exact electrode package. Treat any chart as a test starting point, not a welding procedure.
Polarity
DCEN can reduce penetration when the electrode is approved for it, which may help on thin sheet. DCEP usually increases penetration and can improve fusion. AC can reduce magnetic arc blow and works with electrodes rated for AC. The correct choice depends on the electrode, joint, position, and required weld properties.
Arc Force and Hot Start
Start with arc force low. Increase it only enough to stop the rod from sticking during a properly short arc. A high arc-force percentage can make the arc harsher and dig into the edge. Keep hot start low or moderate when the machine allows adjustment, because a strong start surge can punch a hole before the tack forms.
Open-Circuit Voltage and Travel Speed
Do not choose a machine by chasing a universal 70–80-volt open-circuit target. Modern welders use different OCV and voltage-reduction designs. What matters is that the machine safely starts and maintains the selected electrode within its rated operating range.
Travel speed is judged by the puddle, not a fixed inches-per-minute number. Move fast enough that the edge does not collapse, but not so fast that the bead sits on top without fusing.
Techniques for Controlling Heat in Thin Metal Arc Welds
Use Tack Welding as the Main Process
On 20- or 18-gauge sheet, think of the seam as a series of controlled tacks. Place one tack, move several inches away, place another, and return only after the first area loses its red heat. Overlap the tacks slightly when you need a continuous seal.
Skip Around the Joint
Divide a long seam into sections. Weld one section, then move to the opposite end or another side of the assembly. This spreads shrinkage and keeps one zone from absorbing all the heat.
Use Backstepping Carefully
With backstepping, each short weld travels toward the previous completed weld even though the overall sequence moves forward. The method can reduce cumulative distortion, but each segment still needs time to cool.
Keep the Bead Narrow
Use a straight stringer or a tiny controlled motion. A wide weave increases time at the edges and gives slag more opportunity to become trapped. Watch the leading edge of the puddle and stop before it grows wider than the joint needs.
Balance Heat on Tubing
Tack light-wall tubing at four points around the joint. Weld short sections on opposite sides and rotate the work when possible. This keeps one face from shrinking more than the others.
Use Dry Heat Sinks
A clean copper or thick aluminum backing block can absorb heat and support the joint. Keep it dry and electrically safe. Do not substitute damp wood, a wet sponge, or a soaked rag.
Common Mistakes When Arc Welding Thin Metal and How to Fix Them
| Problem | Likely Cause | Fix |
|---|---|---|
| Burn-through | Too much current, long arc, large gap, oversized electrode, or too much time in one spot | Stop, let the area cool, add copper backing, reduce heat input, and rebuild the edge with tiny tacks |
| Rod sticking | Current too low, poor work connection, damp or damaged electrode, or arc held too short before it stabilizes | Clean the clamp point, inspect leads, use a sound electrode, and raise current in small steps |
| Excessive spatter | Long arc, wrong polarity, contaminated metal, damaged electrode, or excessive current | Shorten the arc, verify polarity, clean the joint, and test a fresh rod |
| Porosity | Oil, paint, rust, moisture, or trapped surface contamination | Grind out the defect, clean to bright dry metal, and reweld |
| Slag inclusion | Travel too slow, slag running ahead, welding over uncleaned slag, or wide weaving | Remove the defect, clean between welds, narrow the motion, and keep the puddle ahead of the slag |
| Undercut | Too much current, long arc, wrong angle, or excessive travel speed | Lower heat, shorten the arc, correct the work angle, and make a smaller bead |
| Lack of fusion | Current too low, travel too fast, poor angle, or welding over scale | Clean the metal, verify the angle, and add only enough current to fuse both edges |
| Distortion | Long continuous welds, weak fixturing, or an unbalanced sequence | Use more tacks, skip around, clamp firmly, and allow air cooling |
How to Repair a Burn-Through Hole
- Stop welding and let the area cool naturally.
- Grind away ragged, oxidized edges until you reach sound metal.
- Clamp a clean copper bar behind the hole.
- Place a tiny tack on one edge, then tack the opposite edge after cooling.
- Continue adding separated tacks around the opening until it closes.
- Clean and inspect the repair before lightly grinding it flush.
If the hole keeps growing, the metal may be too thin or contaminated for practical stick repair. Switch to MIG, TIG, brazing, or a properly fitted patch instead of repeatedly overheating the panel.
Pros and Cons of Using Arc Welding for Thin Metal Jobs
Advantages
- No external shielding-gas cylinder is required.
- Equipment can be compact and practical for outdoor or field repairs.
- Electrodes are easy to carry and change for different mild-steel jobs.
- A lap joint in 14- or 16-gauge steel can be strong when the procedure and fit-up are correct.
Limitations
- Burn-through and distortion are harder to control than with a well-set MIG or TIG process.
- Slag and spatter add cleanup and can hide defects.
- Very short tacks are harder to start consistently with some machines.
- Cosmetic automotive panels usually require more grinding and distortion correction.
- Electrode size and minimum machine output limit how thin you can weld reliably.
I still like stick welding for portable repairs on brackets, light frames, farm equipment guards, and similar non-cosmetic work. For a visible body panel or 20-gauge patch, I would normally reach for MIG or TIG because both offer finer heat control.
Real-World Applications for Thin Metal Arc Welding in the USA
Common uses include light brackets, toolboxes, mower guards, gates, non-pressure duct supports, thin-wall mild-steel tubing, and field repairs where shielding gas is inconvenient. The method can also work for small lap-joint repairs on farm and shop equipment after the material, coating, and load are understood.
Automotive body panels are technically weldable with stick, but the process is rarely the best choice for appearance or distortion control. Galvanized HVAC sheet adds zinc-fume and coating-restoration concerns, so many installations use code-approved mechanical seams, spot welding, brazing, or another specified method instead.
For structural sheet-steel work, use the applicable design and welding requirements. The current AWS D1.3/D1.3M:2025 Structural Welding Code—Sheet Steel covers welded joints in commonly used structural-quality sheet steel, including zinc-coated sheet within its scope. AWS D1.1 is the structural-steel code, but citing D1.1 alone does not automatically establish the correct procedure for thin sheet.
Warning: Do not rely on a visual bead alone for trailer frames, suspension parts, lifting points, roll structures, pressure equipment, or other life-safety work. Those jobs require the correct code, design, qualified procedure, welder qualification, and inspection.
Advanced Tips for Professional-Quality Thin Metal Arc Welds
Build a Repeatable Test Coupon
Cut practice pieces from the same sheet, prepare the same joint, and record electrode brand, diameter, polarity, amperage, machine controls, position, and tack timing. Break or bend a sample when appropriate so you can see whether the weld fused both pieces instead of judging only the surface.
Use Run-On Tabs When the Joint Allows
A small scrap tab at the edge gives you somewhere to strike the arc and stabilize it before reaching the finished joint. Remove the tab after the weld cools.
Control Restarts
Clean slag from the crater before restarting. Start slightly ahead of the previous tack, move back into it briefly, then continue forward. This reduces cold laps and pinholes at the tie-in.
Do Not Stack Unnecessary Passes
Thin sheet normally needs one small weld sized for the joint. A 6011 root followed by a 6013 cap adds heat and distortion and is not a general thin-sheet technique. Use multiple passes only when an engineered procedure requires them.
Treat Galvanized Work as a Fume-Control Job
Remove zinc in the weld zone where the procedure permits, use effective local exhaust, keep your head out of the plume, and restore corrosion protection after the joint cools and is cleaned. Respiratory protection must be selected through a proper hazard assessment and fit-testing program, not by guessing at a mask type.
Know When to Change Processes
If you cannot keep the arc stable below the burn-through point, the process is mismatched to the job. Moving to short-circuit MIG, pulsed MIG, TIG, resistance spot welding, or brazing is not giving up. It is choosing a process with a wider working window for the material.
Conclusion
You can weld thin metal with an arc welder, but success depends on controlling time, fit-up, and electrode size more than chasing one magic amperage. Start with clean mild steel, a small E6013 rod, a stable low-current machine, tight joints, and a dry copper backing bar. Hold a short arc, place quick tacks, skip around the seam, and let the part air-cool.
The biggest improvements come from removing unsafe shortcuts. Do not cool a live welding area with wet materials, do not use improvised rod-drying cycles, and do not assume a smooth-looking bead is strong enough for a critical part. Test on matching scrap, follow the electrode and machine instructions, and switch to MIG or TIG when the sheet is too thin for reliable stick control.
Frequently Asked Questions
Can you weld 18-gauge steel with a stick welder?
Yes, but it is difficult. Use a stable low-amperage machine, a 1/16-inch E6013 electrode when available, tight fit-up, a dry copper backing bar, and separated tacks. Test on matching scrap first. MIG or TIG is usually easier for long seams or cosmetic work.
What is the best amperage for thin metal arc welding?
Use the lower end of the electrode manufacturer’s approved range, then adjust in small steps on matching scrap. The correct current depends on electrode brand and diameter, polarity, machine design, joint type, position, and metal thickness. A fixed 30- or 40-amp answer does not fit every setup.
How do you prevent warping when welding thin sheets?
Clamp the work firmly, use many small tacks, skip between distant areas, balance welds on opposite sides, and allow air cooling between stitches. A dry copper backing bar can also absorb heat. Avoid long continuous beads and water quenching.
Is DCEN or DCEP better for thin metal?
DCEN generally gives less penetration in manual metal arc welding and may help reduce burn-through, but only use it when the electrode manufacturer approves that polarity. DCEP generally penetrates more. Electrode coating, joint design, and required fusion matter more than a blanket polarity rule.
Can beginners arc weld thin tubing without burning holes?
A beginner can learn on 16-gauge mild-steel tubing, but should practice on flat coupons first. Fit the tube tightly, tack four sides, weld short sections on opposite faces, and let it cool. Very light-wall tubing is better handled with MIG or TIG.
What size welding rod is best for thin sheet metal?
Use the smallest electrode your welder can run steadily. A 1/16-inch E6013 is a common starting choice for very light mild steel. A 3/32-inch E6013 may suit 16- or 14-gauge material, but its minimum current can be too hot for thinner sheet.
Can you use E7018 on thin metal?
You can when the electrode size, machine, and qualified procedure suit the joint, but E7018 is not usually the easiest choice for hobby sheet metal. Common sizes require more current, and opened low-hydrogen electrodes need controlled storage. E6013 is generally easier for clean noncritical mild-steel sheet.
When should you use MIG or TIG instead of stick?
Choose MIG or TIG when the material is around 18 gauge or thinner, the seam is long, appearance matters, distortion must be minimal, or your stick welder cannot maintain a stable arc below the burn-through point. MIG is usually faster, while TIG gives the finest manual heat control.
How do you fix a hole burned through thin sheet?
Let the area cool, grind back to sound metal, place a clean copper bar behind the hole, and add tiny separated tacks from opposite edges until the opening closes. If the edge keeps disappearing, install a fitted patch or switch to a lower-heat process.
Sources
- OSHA 29 CFR 1910.252, General Requirements for Welding, Cutting, and Brazing — eye protection, fire prevention, electrical safety, coatings, and ventilation requirements
- OSHA, Controlling Hazardous Fume and Gases During Welding — fume hazards, surface cleaning, positioning, local exhaust, and respiratory-protection guidance
- TWI, Electrode Polarity in Manual Metal Arc Welding — DCEN, DCEP, penetration, and electrode restrictions
- Lincoln Electric Fleetweld 37 E6013 — low-amperage sheet-metal use and electrode characteristics
- Lincoln Electric, Storing and Redrying Electrodes — moisture control and low-hydrogen electrode handling
- AWS D1.3/D1.3M:2025, Structural Welding Code—Sheet Steel — current code scope for structural sheet-steel welding