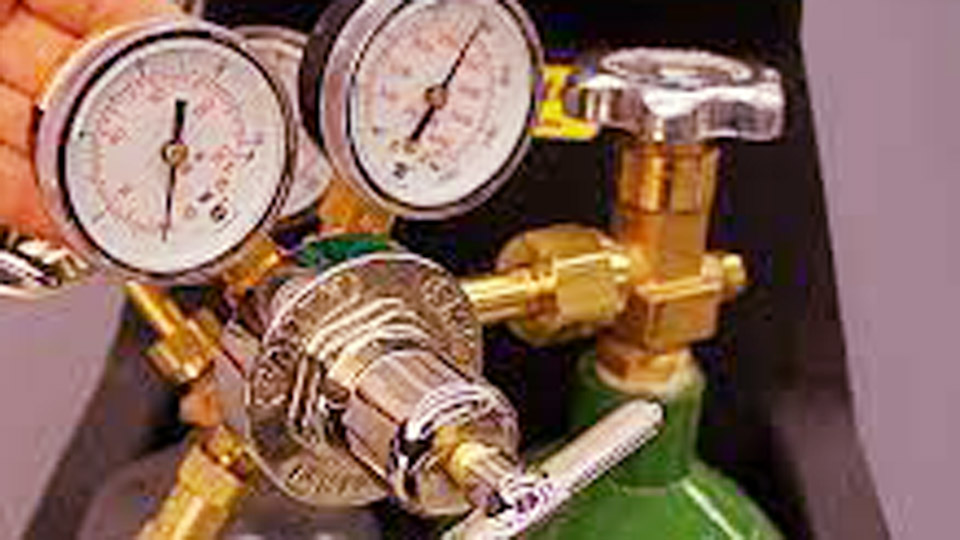
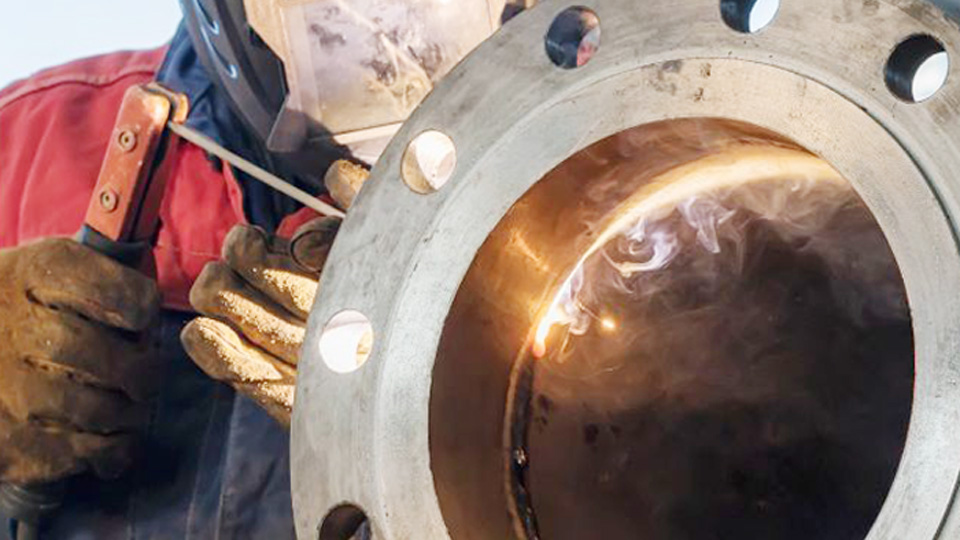
I still remember the first time I laid down a bead on a piece of rusty mild steel. It sparked, popped, and looked awful. That early attempt taught me that the advantages and disadvantages of welding do not come from the machine alone. Material condition, joint design, filler choice, heat control, access, and operator skill all shape the result.
Quick Answer
Welding can create strong, compact, permanent joints and is useful for repairs, production, and custom fabrication. Its main disadvantages are heat distortion, safety hazards, equipment cost, inspection needs, and the skill required to produce reliable joints. The best choice depends on the material, load, environment, access, and applicable rules.
Whether you are burning rods with shielded metal arc welding, controlling a puddle with TIG, or running a MIG bead on sheet metal, every process has tradeoffs. Joint preparation, metal thickness, filler classification, welding position, shielding, and whether the metal is carbon steel, stainless steel, aluminum, cast iron, or another alloy can change what is safe and practical.
Key Takeaways
- A properly designed and executed weld can carry substantial loads, but no welding process is automatically the strongest.
- MIG is productive, TIG offers fine control, stick is portable, and flux-cored welding performs well on many outdoor and heavy-fabrication jobs.
- Heat can distort the work and change properties in the heat-affected zone around the weld.
- Machine settings must come from the welder chart, owner’s manual, approved procedure, and a test coupon—not a universal amperage number.
- Structural, pressure-retaining, lifting, vehicle-restraint, and other life-safety welds require qualified design, procedures, personnel, and inspection.
Image by letstalkscience
Why Welding Matters in the Real World
Welding is used in construction, transportation, manufacturing, energy, agriculture, marine work, aerospace, maintenance, and custom fabrication. It can join parts without bulky fasteners, seal certain joints, repair damaged equipment, and support efficient production.
A weld is not automatically safe because it looks smooth. Reliable work begins with suitable materials, a sound joint design, controlled preparation, compatible consumables, correct parameters, and an inspection level that matches the risk. A poor weld can contain cracks, porosity, undercut, incomplete fusion, or other discontinuities that are difficult to judge from appearance alone.
Professional structural-steel projects may invoke AWS D1.1/D1.1M:2025-AMD1 or another project-specific code. Covered boiler and pressure-vessel work may fall under the 2025 ASME Boiler and Pressure Vessel Code. The contract documents, engineer, manufacturer instructions, and authority having jurisdiction determine what actually applies.
I learned this on an early steel-gate job. The gate looked simple, but I underestimated the preparation and fit-up. A weak area later cracked. The lesson was not that one process was bad; it was that even ordinary projects need clean metal, sensible joint geometry, correct heat, and enough inspection for the consequences of failure.
Warning: This guide is for general education and noncritical practice work. Do not use it as a welding procedure for bridges, building members, pressure vessels, gas piping, lifting devices, trailers, roll cages, suspension parts, seat-belt anchors, fuel systems, or other life-safety components.
Advantages of Welding
Welding remains a preferred joining method because it can combine strength, compact construction, speed, and design freedom. The benefit depends on selecting a suitable process and controlling the work.
Strong, Compact, and Permanent Joints
Fusion welding joins materials by melting the joint area, with or without added filler metal. Other welding families use pressure or different energy sources. A properly designed and qualified welded joint can meet the strength required by the design while avoiding bolts, nuts, overlapping straps, or large mechanical connectors.
That does not mean the weld is always stronger than the base metal. Joint strength depends on the base-metal grade, filler properties, joint geometry, weld size, heat-affected zone, loading direction, defects, procedure, and workmanship. In some designs, the surrounding base metal is expected to yield before the weld; in others, toughness, fatigue life, corrosion resistance, or ductility controls the design.
Why it matters: Compact permanent joints are valuable in frames, machinery, tanks, brackets, and fabricated assemblies where loose fasteners or extra joint bulk would be undesirable.
Practical tip: Identify the base metal before selecting filler. ER70S-6 wire and E7018 electrodes are common in suitable mild-steel applications, but neither is a universal repair consumable. Follow the filler manufacturer, approved welding procedure specification, and project requirements.
Mistake to avoid: Do not treat penetration as the only measure of quality. Excessive penetration, poor bead shape, undercut, wrong weld size, cracking, and heat damage can still make a joint unacceptable.
Versatility Across Materials and Processes
Welding processes can join many carbon steels, stainless steels, aluminum alloys, nickel alloys, titanium alloys, cast materials, and other metals. Each material has its own weldability limits and may require different shielding gas, polarity, filler, preheat, cleanliness, interpass temperature, or postweld treatment.
I have used TIG when fine puddle control and a clean appearance mattered, and stick welding on outdoor farm repairs where portability was more important. The core habits—identify the metal, prepare the joint, control heat, protect the weld pool, and inspect the result—carry across processes, but the procedures do not transfer unchanged.
Practical tip: Direct-current electrode negative is commonly used for TIG welding many steels and stainless steels, while aluminum TIG work commonly uses alternating current. Actual current and balance settings must match the machine, alloy, thickness, joint, tungsten, position, and procedure.
Mistake to avoid: Do not choose aluminum filler by color or availability alone. ER4043 and ER5356 are both widely used, but the correct selection depends on the exact base alloy and required properties.
Cost Efficiency for Suitable Repairs
Welding can extend the life of a repairable part and reduce the need to replace a complete assembly. A cracked mower deck, worn bracket, steel gate, workbench, or noncritical machine guard may be economical to repair when the material is known and the damage has not made the part unsafe.
I once repaired a cracked metal component for a friend and avoided the cost of replacing the entire assembly. That kind of saving is real, but only when the cause of the crack is understood. Welding over a fatigue crack without removing it or correcting the underlying stress can lead to another failure beside the repair.
Practical tip: Remove the full crack as required, clean the area, inspect for additional damage, and select a repair procedure that accounts for material grade, restraint, thickness, service temperature, and loading.
Mistake to avoid: Do not weld directly over rust, oil, paint, plating, or an unknown coating. Contamination can create porosity and fumes, while some coatings contain metals or compounds that demand specialized controls.
High Production Speed
Continuous-wire processes such as gas metal arc welding and flux-cored arc welding can provide high deposition rates and reduce time spent changing electrodes. Mechanized and automated welding can improve repeatability and productivity when the joint is designed for the process.
In a small shop, MIG helped me produce batches of steel brackets faster than I could have with repeated stick-electrode changes. Production speed still depends on preparation, fixturing, joint access, duty cycle, cleaning, inspection, and rework.
Practical tip: Begin with the parameter chart supplied with the machine or the owner’s manual. Miller’s MIG parameter guidance likewise recommends starting with the manual and then checking the result on representative material.
Mistake to avoid: Do not increase travel speed simply to finish sooner. Excessive speed can cause undercut or incomplete fusion, while moving too slowly can increase heat input, bead size, and distortion.
Custom Fabrication and Design Flexibility
Welding makes it possible to build shapes that would be awkward with bolts or adhesives. Frames, handrails, fixtures, sculpture, furniture, racks, enclosures, and machine bases can be built from standard plate, tube, angle, channel, and formed parts.
I used this flexibility to build a custom steel garden trellis around a client’s dimensions. The difficult part was not striking the arc. It was controlling alignment as the parts heated and contracted.
Practical tip: Use drawings, measurements, jigs, stops, squares, and clamps. Tack the assembly in several locations and recheck dimensions before completing the welds.
Mistake to avoid: Do not assume clamps alone will prevent distortion. Joint sequence, tack placement, heat input, restraint, part symmetry, and fit-up all matter.
Reduced Joint Bulk and Fewer Loose Parts
A welded joint may eliminate holes, nuts, washers, and overlapping reinforcement plates. This can reduce joint bulk, simplify cleaning, and produce a smooth exterior where appearance or aerodynamics matters.
The tradeoff is permanence. A welded assembly is usually harder to disassemble for service, recycling, adjustment, or component replacement. Cutting a weld apart can damage the original parts and create more repair work.
Disadvantages of Welding
Welding adds heat, fumes, electrical energy, fire risk, and workmanship variables. These disadvantages do not make welding a poor choice, but they must be included in the project decision.
High Skill and Procedure Requirements
Producing a consistent weld takes training and practice. The operator must coordinate travel angle, work angle, arc length or contact-tip distance, travel speed, heat input, filler placement, and puddle control while working in different positions.
Poor technique can cause incomplete fusion, slag inclusions, cracking, porosity, undercut, overlap, burn-through, or incorrect weld size. I once saw an inexperienced welder place an attractive-looking bead on a railing without achieving sound fusion at the joint. Appearance alone did not make it safe.
Practical tip: Practice on clean coupons of the same material, thickness, joint type, and position. Cut, bend, or break noncritical practice coupons where appropriate so you can see whether the weld fused through the intended joint.
Mistake to avoid: Do not move from flat practice beads directly to structural, overhead, pressure-retaining, or safety-critical work.
Equipment, Consumable, and Facility Costs
The total cost includes more than the power source. A safe setup may require the correct electrical circuit, leads, gun or torch, work clamp, shielding gas, regulator, cylinder cart, filler, electrodes, tungsten, contact tips, nozzles, grinders, clamps, fire-resistant screens, ventilation, extraction, personal protective equipment, maintenance, and inspection tools.
My first basic machine cost much less than a later multiprocess setup, but the machine price was only part of the difference. Gas, consumables, accessories, and shop preparation added ongoing costs.
Practical tip: Choose equipment around the material, maximum thickness, process, duty cycle, input power, portability, and future work. A multiprocess machine can be useful, but not every unit provides full-featured AC TIG, pulse functions, spool-gun support, or the output needed for every job. A current manufacturer process-selection guide can help compare basic capabilities.
Mistake to avoid: Do not buy solely by maximum advertised amperage. Confirm input requirements, rated output and duty cycle, service support, replacement consumables, safety listings, and process limitations.
Safety Hazards
Arc welding can expose the operator and nearby people to ultraviolet and infrared radiation, hot metal, sparks, fumes, gases, noise, electric shock, fire, and compressed-gas hazards. The material being welded and any coating or residue can change the hazard substantially.
I once experienced an eye injury after inadequate protection around an arc. It was painful and preventable. A welding helmet protects the face and eyes from arc radiation, but safety glasses with side protection are still needed under the helmet for grinding, chipping, and flying particles.
Practical tip: Follow the applicable OSHA welding, cutting, and brazing requirements, the machine and helmet instructions, and workplace rules. Select filter shade according to the process, electrode size or arc current—not a single universal number.
Mistake to avoid: Do not rely on an open door or a disposable dust mask as a complete fume-control plan.
Heat-Affected-Zone Changes, Distortion, and Residual Stress
Welding heats a narrow area above and beside the joint. The melted weld metal solidifies, while the surrounding heat-affected zone experiences a thermal cycle without fully melting. Depending on the alloy and procedure, this can change hardness, strength, toughness, corrosion resistance, or crack sensitivity.
As the weld cools and contracts, it can pull parts out of alignment and leave residual stress. Thin sheet, long seams, asymmetrical joints, aluminum, and highly restrained assemblies may be especially sensitive.
I ruined a thin panel by adding too much heat in one area. The solution was not simply to move as fast as possible. Better fit-up, short weld segments, a balanced sequence, controlled parameters, and cooling time were all needed.
Practical tip: Use the lowest heat input that still provides the required fusion and bead shape. Tack adequately, distribute welds around the assembly, use short segments where appropriate, and check dimensions throughout the job.
Mistake to avoid: Do not quench a hot weld unless the qualified procedure or manufacturer specifically permits it. Rapid cooling can change properties or promote cracking in some materials.
Material and Dissimilar-Metal Limitations
Many metals are weldable, but they are not equally forgiving. Carbon content, alloying elements, casting quality, prior heat treatment, coating, contamination, thickness, and service conditions can change the procedure.
I once struggled to join stainless steel to mild steel until I changed the filler and technique. A 309-series stainless filler is common for some stainless-to-carbon-steel joints, but the correct choice still depends on the exact alloys, dilution, service environment, strength, and corrosion requirements.
Cast iron may require controlled preparation, preheat, suitable filler, slow cooling, or an alternative repair method. Some high-strength steels, aluminum alloys, magnesium alloys, plated parts, and unknown castings should not be approached with a generic procedure.
Practical tip: Confirm the alloy from documentation, markings, positive material identification, or a qualified technical source. Test pieces are useful, but they do not replace engineering or procedure qualification for critical work.
Inspection and Repair Can Be Difficult
Visual inspection can reveal surface cracks, undercut, overlap, poor profile, incorrect size, arc strikes, and some porosity. It cannot reliably find every subsurface discontinuity.
Higher-risk work may require liquid penetrant, magnetic-particle, ultrasonic, radiographic, leak, proof, or other examinations selected by the governing specification. These methods require suitable procedures, equipment, interpretation, and personnel.
Repairing a rejected weld can also add heat and restraint. The defect must be removed completely, the excavation inspected when required, and the repair performed under an accepted procedure.
Welded Assemblies Are Hard to Disassemble
A welded connection is normally intended to remain permanent. That is an advantage for rigidity and tamper resistance, but a disadvantage when a part needs regular service, alignment, replacement, or transport.
Bolts or pins may be better for removable guards, bearings, motors, access panels, modular racks, field assembly, or components that wear out before the surrounding frame.
No welding process is inherently the strongest. Joint design, material, filler, heat control, procedure, execution, loading, and inspection determine whether a weld is fit for service.
Comparing Common Welding Processes
The best process is the one that fits the material, thickness, position, environment, quality requirements, production rate, and operator capability.
| Process | Main Advantages | Main Disadvantages | Common Uses |
|---|---|---|---|
| MIG/GMAW | Continuous wire, productive, relatively easy to begin, little slag | Shielding gas is vulnerable to wind; equipment and setup are less portable than basic stick | Shop fabrication, automotive sheet, frames, production work |
| TIG/GTAW | Fine heat and filler control, clean appearance, useful on thin and reactive materials | Slower, sensitive to cleanliness and shielding, greater coordination required | Stainless steel, aluminum, thin sections, precision fabrication |
| Stick/SMAW | Portable, tolerant of outdoor work, no external shielding-gas cylinder required | Slag removal, electrode changes, more spatter, harder on very thin metal | Field repair, farm equipment, construction, maintenance |
| Flux-Cored/FCAW | High deposition, strong performance on thicker steel; self-shielded wire can work outdoors | More fumes and slag with many wires; wire type and polarity must match the application | Structural fabrication, heavy repair, outdoor steel work |
| Oxyfuel Welding | Portable heat source; equipment can also heat, braze, and cut | Broad heat input, slower on many jobs, cylinder and flame hazards | Repair, heating, brazing, and some thin-steel work |
When to choose each: MIG is useful when productivity and ease of use matter. TIG is valuable when puddle control and appearance matter. Stick suits portable outdoor repairs. Flux-cored welding is useful for high deposition and many field applications. Oxyfuel equipment remains useful when heating, brazing, or cutting is part of the job.
Products Worth Considering
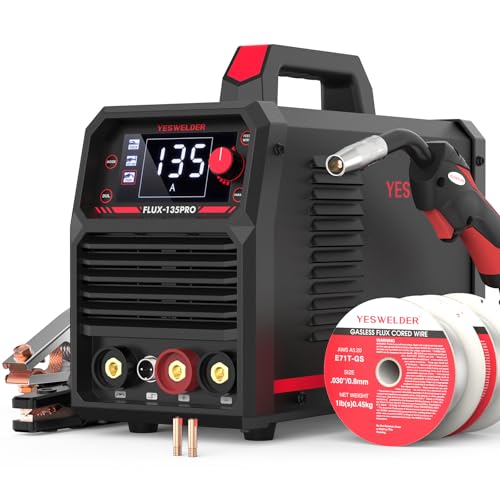
READY OUT OF THE BOX: Start welding immediately! It masterfully handles Gasless Flux Core MIG, Stick, and Lift TIG (Extra Lift TIG torch required). This budget-friendly 3-in-1 machine includes extra E71T-GS .030''&.035'' flux core wires, known for its smooth arc and high feedability. Say goodbye to heavy shielding gas cylinders—perfect for outdoor, windy, or all-position welding.

3-in-1 Multi Process Welder: Designed to handle Gasless MIG welder, MMA, and Lift TIG perfectly, this 110V welding machine is a garage essential for home DIY and fast farm repairs.(Lift TIG Torch NOT included)

MULTIFUNCTIONAL: A 4-in-1 welder, capable of Flux Core MIG/Gas MIG/ Stick/Lift TIG (need to purchase extra tig lift torch). This unit caters to a wide range of welding applications and meets your various welding needs.
Welding Versus Bolting, Brazing, and Adhesives
Products Worth Considering
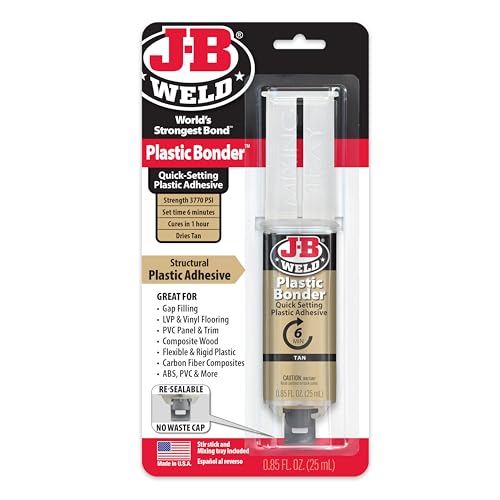
J-B WELD PLASTICBONDER (Tan): A quick setting and multipurpose two part urethane adhesive & gap filling system that provides a strong and lasting bond to many plastic surfaces. J-B Weld PlasticBonder is great for DIY plastic repairs, filling dents, bumper repairs and more! J-B Weld PlasticBonder now comes in a syringe allowing for an easy 1:1 mix ratio. The unique syringe has a re-sealable cap that prevents drying out and leaking, allowing for multiple uses!

Ready-to-use liquid weld for rigid parts: Metal epoxy glue bonds aluminum, steel, stainless, and cast iron; also wood, ceramic, glass, rigid plastics, and concrete—ideal for auto repair, marine hardware, plumbing leak repair, and home fixes.
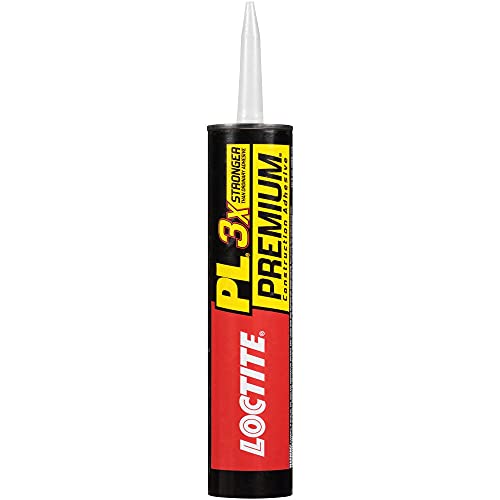
All Purpose: One component polyurethane-based adhesive that covers a wide variety of projects and bonds to most materials for consistently successful results
Choose Welding When
- A permanent, rigid joint is desirable.
- The materials and thickness are suitable for a qualified welding process.
- Joint bulk or protruding fasteners would be a problem.
- The assembly can tolerate welding heat and distortion.
- Both sides of the joint do not need to remain accessible for fastener installation.
- Production volume or custom geometry favors welded fabrication.
Choose Bolts, Screws, or Pins When
- The assembly must come apart for service, shipping, adjustment, or replacement.
- Heat would damage coatings, electronics, seals, heat-treated material, or nearby components.
- Field assembly must occur without welding power, hot-work controls, or a qualified welder.
- A manufacturer specifies mechanical attachment.
Consider Brazing When
- Lower base-metal temperatures are beneficial.
- Thin or dissimilar materials are suitable for a brazed joint.
- Capillary action can be used with a close-fitting joint.
- The required service temperature and strength fall within the filler’s limits.
Consider Structural Adhesives When
- Joining thin panels over a broad area helps distribute stress.
- Heat must be minimized.
- Sealing and joining can occur in one operation.
- The adhesive is approved for the materials, surface preparation, temperature, moisture, chemicals, load, and service life.
Note: Hybrid joints may combine welds, rivets, bolts, or adhesives. Do not add welding to an engineered joint unless the designer or manufacturer permits it; the added heat and stiffness can change how the assembly carries load.
When You Should Not Weld
- Unknown containers: Never weld, cut, or heat a tank, drum, pipe, or container that may hold flammable, toxic, pressurized, or reactive residue unless it has been handled under an approved cleaning and hot-work procedure.
- Pressurized equipment: Do not weld a component while it is pressurized or energized.
- Unknown coatings: Stop until paint, plating, galvanizing, insulation, sealant, oil, or chemical residue has been identified and controlled.
- Confined spaces: Do not enter or weld in a confined space without the required entry, atmospheric testing, ventilation, attendant, rescue, and permit controls.
- Life-safety components: Do not improvise repairs to structural members, pressure boundaries, cranes, lifting points, roll cages, suspension parts, steering parts, seat mounts, seat-belt anchors, fuel systems, or similar components.
- Unidentified high-strength material: Welding can soften, harden, embrittle, or crack some steels and heat-treated alloys.
- Wet or electrically unsafe conditions: Stop when the work area, leads, holder, torch, insulation, grounding, or power supply creates a shock hazard.
- Fire cannot be controlled: Do not start hot work when combustible material cannot be removed, shielded, monitored, and checked after work.
Step-by-Step Guide to a Basic MIG Practice Project
This example is for practicing a simple noncritical mild-steel joint. It is not a procedure for structural, automotive-safety, gas, pressure, lifting, or code-governed work.
At a Glance
| Time Required | About 1–3 hours for setup, practice beads, a basic joint, cooling, and inspection |
| Difficulty | Beginner to moderate; supervised training is strongly recommended |
| Tools Needed | Suitable MIG welder, approved wire and shielding gas, clean steel coupons, clamps, wire brush or grinder, pliers, measuring tools, ventilation, fire extinguisher, helmet, safety glasses, gloves, protective clothing, and boots |
| Cost | Varies widely with the machine, electrical supply, PPE, shielding gas, consumables, ventilation, and tools |
Step 1: Assess the Project
Identify the metal and measure its thickness. For a beginner coupon, use clean, known mild steel from a welding supplier rather than scrap with unknown plating, paint, oil, or chemical exposure.
Choose a basic joint such as a lap joint or square butt joint that matches your training plan. Check whether the machine, wire, gas, polarity, and output range are suitable.
Pro tip: Use two or more extra coupons from the same material for setup. A setting that works on a thick scrap block may fail on the thinner project.
Step 2: Prepare and Fit the Metal
Remove rust, mill scale where required, paint, oil, moisture, and other contamination from the weld area. Use a clean wire brush or suitable abrasive tool. Keep tools used on stainless steel or aluminum separate when cross-contamination would be a concern.
Fit the pieces with the intended gap and alignment. Beveling may be needed on thicker material, but bevel angle, root face, root opening, and backing should come from a suitable joint design or procedure rather than guesswork.
I once skipped cleaning on a rusty pipe coupon and produced visible pores in the bead. Cleaning would not have guaranteed a sound weld, but contamination made success far less likely.
Step 3: Set Up the Welder
Confirm input power, polarity, wire type and diameter, drive-roll groove, contact tip, shielding gas, gas connections, gun liner, and work-clamp contact. Secure the shielding-gas cylinder upright with an approved chain, strap, or cart.
Use the settings chart on the machine, the owner’s manual, or an approved welding procedure as the starting point. Make a short bead on a representative coupon and inspect arc stability, bead profile, fusion, spatter, and burn-through. Adjust one variable at a time.
Mistake to avoid: Do not copy a voltage, amperage, gas-flow, or wire-feed number from an unrelated machine. Two welders may display or control parameters differently.
Step 4: Tack and Weld the Joint
Clamp the pieces, place tacks where they will control alignment, and recheck dimensions. Position the gun using an appropriate work angle and a modest travel angle. Maintain a consistent contact-tip-to-work distance and watch the leading edge of the puddle.
Run a steady bead without outrunning the puddle or dwelling long enough to overheat the joint. For sheet metal, spaced tacks or short segments may reduce heat buildup when the joint and procedure allow them.
I burned through thin steel when I stayed in one place too long. The correction was better fit-up, a suitable setting, shorter arc-on time, and practice on matching scrap.
Step 5: Inspect, Clean, and Test the Coupon
Allow the part to cool in a safe location. Look for cracks, surface porosity, undercut, overlap, excessive convexity or concavity, incomplete fill, burn-through, poor tie-in, and obvious lack of fusion. Confirm the weld is in the intended location and has the required size.
Clean spatter only after deciding whether it is evidence of an incorrect setup. Grind a weld flush only when the design permits it; excessive grinding can reduce the weld or base-metal thickness.
For a noncritical practice coupon, a supervised bend or break test can reveal fusion problems that were not obvious from the surface. Do not assume this informal test qualifies a procedure or welder for code work.
Warning: A soap-based leak-detection solution may help locate escaping gas only when it is approved for that system and test procedure. It does not prove weld strength, qualify the welder, replace nondestructive examination, or substitute for a code-required pressure test.
Common Weld Problems and What They Suggest
| Problem | Possible Causes | Safer Next Step |
|---|---|---|
| Porosity | Contamination, moisture, wind, gas leak, wrong gas flow, blocked nozzle, excessive gun distance | Stop, remove the defective area as required, clean the joint, inspect the gas system, protect shielding, and test on a coupon |
| Lack of fusion | Insufficient heat, excessive travel speed, poor angle, large root face, contamination, arc aimed away from the joint | Review joint design and approved settings; practice directing the arc into both members |
| Undercut | Excessive voltage or current, long arc, poor angle, excessive speed, bad manipulation | Correct one variable at a time and produce a new coupon before returning to the work |
| Burn-through | Excessive heat, slow travel, large gap, thin material, poor fit-up | Improve fit-up, reduce heat input using approved controls, and use shorter weld segments if suitable |
| Cracking | Wrong filler, hydrogen, high restraint, unsuitable cooling, hardenable material, crater, contamination, poor procedure | Stop work and identify the cause; do not weld over a crack |
| Excess distortion | High heat input, long continuous welds, poor sequence, asymmetrical joint, weak fixturing | Revise sequence, tack plan, restraint, and heat input before continuing |
Practical Tips for Better Welding
- Practice consistently: Use known scrap that matches the project material, thickness, joint, and position.
- Keep consumables correctly: Protect wire from rust and contamination. Store electrodes according to the manufacturer, welding procedure, and governing requirements. I once lost low-hydrogen electrodes after poor humidity control; a sealed container alone is not automatically enough for every classification.
- Use jigs and clamps: Secure parts, but keep checking dimensions as the assembly heats and contracts.
- Read the full procedure: Material, filler, polarity, preheat, interpass temperature, position, electrical parameters, joint details, and inspection may all be controlled.
- Maintain the machine: Inspect leads, insulation, connectors, liners, drive rolls, tips, nozzles, work clamps, fans, and gas connections.
- Separate grinding from welding judgment: A smooth ground surface can hide an undersized or defective weld.
- Record successful setups: Note the machine, wire, gas, material, position, joint, and settings so the result can be repeated on comparable work.
- Know your qualification: Completing a course or holding an inspection credential does not automatically qualify a person for every welding process, position, material, code, or procedure.
Pro Tip: Keep one approved setup coupon beside the work when practical. Comparing bead shape, arc behavior, and heat effects against a known result is more useful than chasing a universal “perfect setting.”
Safety Considerations
Welding can be performed safely only when the hazards are identified and controlled. OSHA’s welding rules address fire prevention, ventilation, cylinders, personal protective equipment, and other hot-work concerns. The correct controls depend on the process, metal, coating, location, and task.
Eye, Face, Skin, and Hearing Protection
Use a welding helmet with a filter shade approved for the process and arc current. Follow the helmet instructions and applicable OSHA shade table. Begin with a shade that is too dark to see the weld zone and adjust only within the permitted range.
Wear safety glasses with side protection under the helmet. Use flame-resistant gloves, closed protective clothing, suitable footwear, and hearing protection where noise or flying particles require it. Avoid synthetic clothing that can melt onto the skin.
Fumes and Gases
Welding fume is a mixture whose contents depend on the base metal, filler, flux, coating, shielding gas, process, and contamination. NIOSH welding-fume guidance identifies respiratory and other health concerns associated with metal-fume exposure.
Keep your head out of the plume. Use local exhaust close enough to capture fume without pulling away necessary shielding gas. General ventilation may also be needed. Galvanized steel, stainless steel, painted metal, plated parts, and metals containing lead, cadmium, beryllium, chromium, nickel, manganese, or other hazardous constituents require special attention.
Respiratory protection may be required when engineering and work-practice controls do not reduce exposure adequately. The respirator must be selected for the assessed contaminant and used according to applicable requirements; a casual dust mask is not a universal welding respirator.
Fire and Explosion Prevention
Remove combustible material from the work area or protect it with suitable fire-resistant barriers. Inspect the opposite side of walls, floors, tanks, and partitions because sparks and heat can travel through openings or conduct through metal.
Keep an appropriate fire extinguisher available. Use a hot-work permit, fire watch, and post-work monitoring when the workplace or governing rules require them. I once had a small fire after a spark reached debris outside my immediate view; clearing and checking the surrounding area became part of every setup after that.
Never use oxygen to ventilate, cool clothing, blow dust, or improve an arc. Keep oxygen equipment free of oil and grease.
Compressed-Gas Cylinders
Secure cylinders upright with a suitable chain, strap, or cart. Protect valves during movement, use the correct regulator, inspect hoses and fittings, close valves when the equipment is not in use, and keep cylinders away from heat, impact, sparks, and electrical circuits.
Do not lift a cylinder by its cap, move it with the regulator exposed unless the carrier is designed for that use, or attempt unauthorized cylinder repair.
Electrical Safety
Inspect electrode holders, guns, torches, leads, connectors, insulation, work clamps, plugs, and power cables. Keep gloves and clothing dry. Avoid wet floors, standing water, cramped conductive locations, and contact with the electrode and work circuit at the same time.
Disconnect and lock out power before internal maintenance unless an authorized procedure specifically requires energized testing by qualified personnel.
Unknown Containers and Confined Spaces
Heating a closed or contaminated container can cause explosion, fire, or toxic exposure. A container that appears empty may still hold vapor or residue. Cleaning, isolation, atmospheric testing, purging, entry, rescue, and hot-work requirements must be handled under an approved procedure.
Shielding gases can displace oxygen. Do not assume argon, carbon dioxide, helium, or nitrogen is harmless because it is not flammable.
Real-World Applications in the USA
- Construction: Structural steel, stairs, railings, decking attachments, and reinforcing work may be governed by drawings, specifications, codes, and inspection requirements.
- Automotive: Welding is used on exhaust parts, body panels, brackets, and fabricated components. High-strength body structures, fuel systems, steering, suspension, restraints, and roll cages require manufacturer or sanctioning-body procedures and qualified fabrication.
- Marine: Aluminum, stainless steel, carbon steel, and specialized alloys may require corrosion-focused material and filler selection.
- DIY: Appropriate projects can include practice coupons, decorative work, noncritical furniture, a shop cart, or a workbench. I still use a welded steel workbench in my shop, but I would apply a very different level of engineering and inspection to a lifting device or pressure boundary.
- Industrial maintenance: Machinery, piping, tanks, and process equipment may require permits, lockout, material verification, approved repair procedures, inspection, and documentation.
- Manufacturing: Fixtures, robots, positioners, procedure control, and repeatable parts can make welding fast and consistent at production scale.
Welding skills can lead to work in manufacturing, construction, inspection, repair, energy, shipbuilding, and aerospace. Qualification requirements vary by employer, code, process, material, thickness, and position. Welder performance qualification and inspector certification serve different roles and should not be treated as interchangeable.
Conclusion
Understanding the advantages and disadvantages of welding helps you decide whether it is the right joining method before you strike an arc. Welding can produce compact permanent joints, support fast production, extend the life of suitable parts, and make custom fabrication possible.
The same process introduces heat, distortion, fumes, fire hazards, electrical risk, inspection needs, and a strong dependence on preparation and skill. A smooth bead is not proof of strength, and no process—including TIG—is automatically the strongest.
For a basic shop project, identify the material, clean and fit the joint, follow the machine chart or approved procedure, test on matching scrap, protect yourself and the work area, and inspect the result. For structural, pressure-retaining, lifting, vehicle-safety, or other critical work, use the required engineering, qualifications, procedures, and examination rather than a general online setting.
Frequently Asked Questions
What is the strongest welding process?
There is no universally strongest process. MIG, TIG, stick, flux-cored, submerged arc, resistance, laser, and other processes can all produce suitable joints when they are matched to the material and design. Joint geometry, filler, heat input, defects, loading, procedure qualification, and workmanship determine performance.
Is welding cheaper than other joining methods?
It can be economical for permanent fabrication and suitable repairs, especially when it avoids replacing a complete assembly. Total cost must include the machine, power, consumables, shielding gas, preparation, ventilation, PPE, training, inspection, distortion control, and possible rework. Bolting or another process may be cheaper when disassembly is required.
Can all metals be welded?
Many metals can be welded, but weldability varies. Some alloys require special filler, shielding, preheat, interpass control, postweld treatment, or a different joining process. Unknown castings, coated metals, high-strength steels, and dissimilar-metal combinations should not be welded with a generic procedure.
Are welding fumes dangerous?
They can be. The risk depends on the base metal, coating, filler, flux, process, and exposure. Use source capture and ventilation, keep your head out of the plume, identify coatings and metals before welding, and use correctly selected respiratory protection when the hazard assessment shows it is needed.
How do I prevent warping when welding?
Start with accurate fit-up and adequate tacks. Use suitable parameters, avoid unnecessary overwelding, distribute the weld sequence, use short segments where the procedure permits them, restrain parts appropriately, and check alignment as you work. Do not quench the weld unless the approved procedure allows it.
Is welding better than bolting?
Welding is often better for a compact permanent joint, while bolting is often better when the assembly must be removed, adjusted, inspected, or serviced. The correct choice depends on load, fatigue, environment, access, heat sensitivity, production needs, and the governing design.
Can a beginner weld a trailer, railing, roll cage, or pressure vessel?
A beginner should not treat those as unsupervised practice projects. Failure can cause serious injury or property damage, and the work may require engineering, material controls, approved procedures, welder qualification, inspection, testing, and compliance with a code or manufacturer specification.
Can soap solution prove that a pipe weld is safe?
No. An approved leak-detection solution may reveal escaping gas under a controlled procedure, but it does not measure weld strength or replace visual examination, nondestructive examination, qualification, or a code-required pressure test. Pressure-system testing should be performed under the applicable procedure by qualified personnel.
Sources
- OSHA 29 CFR 1910.252 — Welding, Cutting, and Brazing — fire prevention, ventilation, eye protection, cylinders, and general hot-work safety.
- NIOSH — Welding Fumes and Manganese — health concerns associated with welding-fume exposure.
- American Welding Society — AWS D1.1/D1.1M:2025-AMD1 — current structural-steel welding-code context.
- ASME — 2025 Boiler and Pressure Vessel Code — current boiler and pressure-vessel code framework.
- Miller Electric — Setting Correct MIG Parameters — machine-chart, manual, and parameter-selection guidance.
- Miller Electric — Buying Your First Welder — practical comparison of common welding-process capabilities.