To replace the carbon brushes in your angle grinder, first, unplug the tool and disassemble it by removing the side handle and rear housing. Disconnect the worn brushes, then slide new ones into the holders securely. Reattach the brush spring and verify all components are tightly secured before reassembling the grinder. Look for signs of brush wear like unusual noises or reduced power. Following these steps will restore efficiency and prolong your tool’s lifespan—there’s more to explore about maintenance tips.
Why Replace Carbon Brushes in Your Grinder?
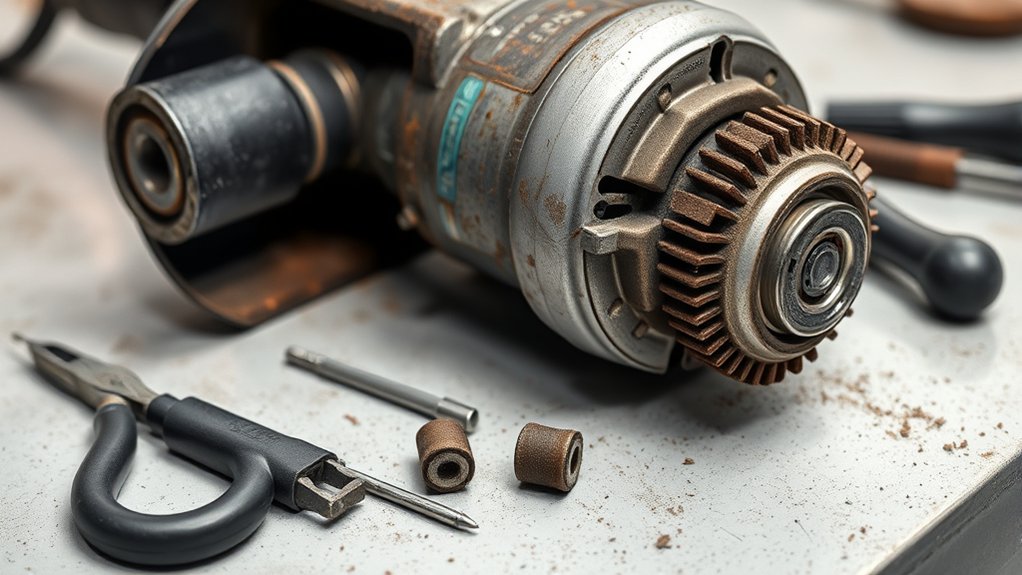
When you notice a decrease in power or unusual noises from your angle grinder, it’s likely time to replace the carbon brushes. These components are essential for transferring electricity to the armature, enabling your tool to operate efficiently. Over time, friction causes the brushes to wear down, leading to diminished performance and reliability.
You need to replace worn brushes promptly to avoid further issues, like intermittent operation. By doing this, you not only restore the grinder’s efficiency but also extend its lifespan, saving yourself from costly repairs or replacements down the line. Make sure you monitor your grinder regularly for signs of wear; catching these issues early can prevent more significant problems. Replacing carbon brushes is a straightforward maintenance task that empowers you to keep your tool in peak condition, ensuring you can tackle any project with confidence.
Tools You’ll Need for the Replacement Process
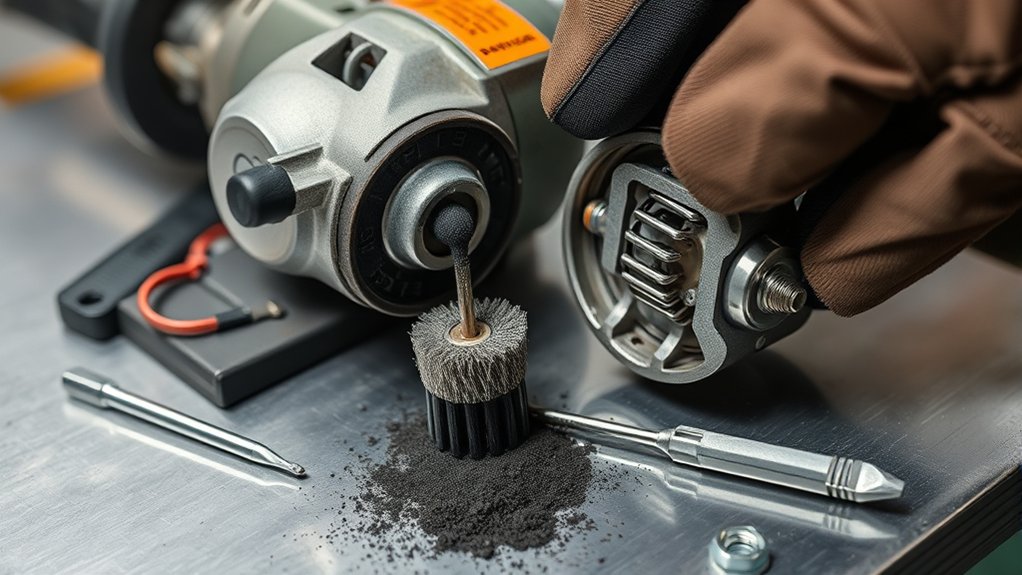
To successfully replace the carbon brushes in your angle grinder, gather the right tools first. You’ll need various screwdriver types, typically a Phillips to remove the rear housing, which is secured by a single screw. Pliers usage is essential for detaching the brush connection from the brush holder; they give you the grip needed for a clean removal.
Don’t forget to purchase a new set of carbon brushes specific to your grinder model from eReplacementParts.com to guarantee compatibility. Keeping a small container handy is smart for holding any screws or small parts you remove during disassembly, preventing them from getting lost.
Lastly, prioritize safety precautions. Wear safety goggles to protect your eyes from debris while you work. With these tools and precautions in place, you’re ready to tackle the carbon brush replacement with confidence and efficiency.
Step-by-Step Guide to Disassembling Your Grinder
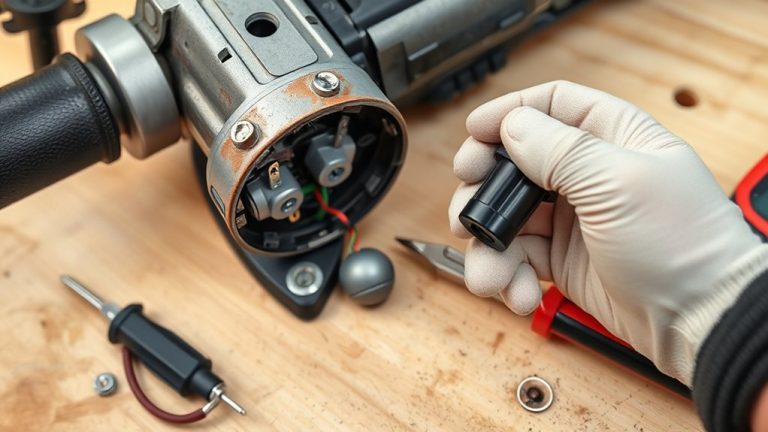
Start by removing the side handle and guard from your angle grinder to access the internal components. Next, locate the rear housing, secured by a single screw. Carefully unscrew it to expose the brush assembly. Remember to follow tool safety precautions throughout this process to avoid injury.
Once exposed, pull the brush spring away from the carbon brush to release tension, making removal easier. Use pliers to gently detach the brush connection from the brush holder—be cautious to prevent damage. This step is vital, as different carbon brush types may vary in design.
After detaching, extract the worn brush from the brush holder. This is an essential part of your grinder maintenance tips, ensuring peak performance. Now, you’re ready to install a new carbon brush, bringing your angle grinder back to life.
Signs Your Carbon Brushes Need Replacement?
You should watch for several signs that indicate your carbon brushes need replacement. Common performance issues like reduced power or unusual noises can signal wear, while visible signs such as uneven surfaces are clear indicators. Addressing these issues promptly can prevent further damage to your angle grinder.
Common Performance Issues
A drop in your angle grinder’s performance can be a clear indicator that the carbon brushes need replacing. If your grinder struggles to maintain speed under load or shows a significant power loss, worn carbon brushes may be the cause. Excessive sparking around the motor area is another warning sign, indicating the brushes are failing. Pay attention to any grinding noises; these suggest improper contact with the armature. If you notice smoke or a burning smell, overheating due to failing brushes is likely. Additionally, frequent tripping of circuit breakers may point to electrical issues related to worn brushes. Following proper grinder maintenance tips can help prevent these performance issues, ensuring peak efficiency from various carbon brush types.
Visual Wear Indicators
Visual wear indicators are crucial for evaluating the condition of your angle grinder’s carbon brushes. Check for signs that could impact brush longevity and performance. If the brushes are shorter than specified, it’s time for replacement. Look for wear patterns like cracks, chips, or significant wear; these are clear indicators that they need immediate attention. Excessive sparking or arcing during operation often signals that the brushes aren’t making proper contact, further necessitating replacement. You might also notice a decrease in power or inconsistent performance, which can stem from worn brushes. Finally, a burnt or scorched smell during use should prompt you to inspect the brushes urgently to maintain peak functionality and guarantee appropriate replacement frequency.
Grinding Noise Changes
When grinding noise changes, it often signals that the carbon brushes in your angle grinder are wearing out. A noticeable increase in grinding noise can indicate poor contact with the armature. If you hear a high-pitched sound, it may mean the brushes need replacement due to excessive wear. Intermittent operation or reduced power while grinding also suggests ineffective brush function. Sparks or arcing from the brush area are clear signs of deterioration.
| Noise Type | Possible Cause |
|---|---|
| Increased grinding noise | Worn carbon brushes |
| High-pitched sound | Excessive wear |
| Intermittent operation | Ineffective brush contact |
| Sparks or arcing | Deteriorating brushes |
Regular inspections and replacements prevent motor damage and optimize performance.
Installing New Carbon Brushes for Your Grinder
To install new carbon brushes in your Makita grinder, start by sliding each brush securely into its holder. Verify the wire connection is firmly attached to maintain electrical continuity. A common installation mistake is neglecting to reattach the brush spring; after inserting the new brush, secure it in place with the spring. This prevents movement during operation, enhancing brush longevity. Repeat the process for the second brush to verify both are functioning efficiently.
Always tuck the wires neatly to avoid interference, which can lead to troubleshooting brush issues down the line. If you notice a drop in performance, revisit the installation steps to confirm everything is correctly positioned. Following these guidelines not only improves efficiency but also empowers you to handle brush replacements confidently. By avoiding simple errors, you can extend the life of your grinder and keep it running smoothly.
Best Practices for Connecting Carbon Brush Wires
Connecting carbon brush wires requires careful attention to detail, as a secure connection guarantees peak performance of your grinder. Start by employing effective wire stripping techniques—strip just enough insulation from the wire to create a clean connection with the brush holder. Use pliers to firmly attach the wire, confirming connection security to prevent any disconnection during operation. Avoid excessive bending or twisting of the wire, as this can compromise its integrity and lead to electrical failure.
After securing the connection, employ insulation methods such as heat-shrink tubing or electrical tape to cover any exposed wire. This step is vital for safety and preventing short circuits. Finally, double-check that all wires are properly tucked away before reassembling your grinder to avoid interference with moving parts.
| Step | Action | Tools Needed |
|---|---|---|
| Strip Wire | Remove insulation | Wire Strippers |
| Connect Wire | Securely attach to brush holder | Pliers |
| Insulate Connection | Cover exposed wire | Heat-shrink tubing |
| Tuck Wires | Confirm wires are neat and tidy | None |
Ensure Everything Is Tightly Reassembled
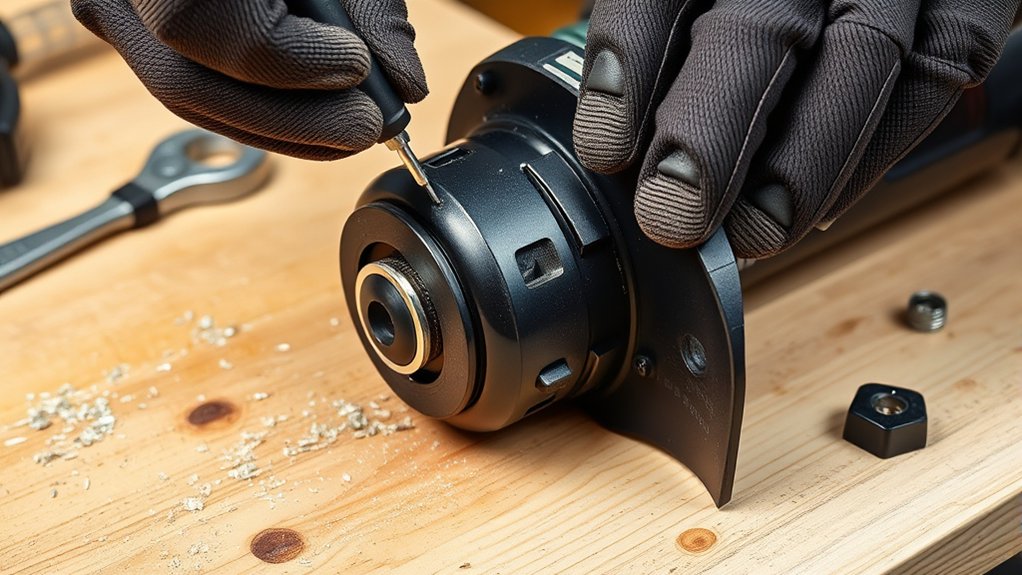
After reassembling your angle grinder, check all fasteners to guarantee they’re secure. Inspect for any loose parts that could affect performance or safety. Finally, verify the functionality of the tool before use to prevent any issues during operation.
Check All Fasteners Securely
Ensuring all fasteners are securely tightened is essential for the safe operation of your Makita angle grinder. After replacing the carbon brushes, check that the rear housing screw is tight to secure the assembly. Pay attention to fastener types, like screws and bolts, using appropriate securing techniques for each. Confirm that the brush springs are properly positioned and that the brushes sit firmly in their holders. When reinstalling the guard, make sure it’s aligned and all fasteners are tightened to prevent movement during operation. Finally, verify the side handle is securely attached; this enhances safe handling. Following these maintenance tips not only prevents tool malfunctions but also extends the longevity of your grinder.
Inspect For Loose Parts
Inspecting for loose parts is vital after reassembling your angle grinder. Neglecting this step could lead to serious safety issues and performance impact. Take a moment to conduct thorough safety checks:
- Verify all external screws are tightly secured.
- Pay special attention to the rear housing screw, essential for the brush assembly.
- Confirm the side handle is firmly attached; a loose handle can jeopardize safety.
- Check that the guard is aligned and secured to prevent debris hazards.
- Listen for vibrations or rattling sounds during a brief test run, as these indicate loose components.
Verify Functionality Before Use
Before using your angle grinder, it’s essential to confirm that everything is tightly reassembled. Start by ensuring the rear cover is securely attached to prevent debris from entering. Double-check that all screws and components are tightened properly to avoid operational issues. Verify that the side handle and guard are correctly installed, as these are vital safety precautions that enhance stability during use. Inspect the wiring, making sure it’s neatly tucked away to prevent interference with moving parts. Finally, conduct a brief test run to perform functionality tests, ensuring the grinder operates smoothly and the carbon brushes are properly seated. User feedback emphasizes the importance of these checks for safe and effective operation.
Avoid These Common Mistakes When Replacing Brushes
When replacing brushes in your angle grinder, it’s vital to avoid common mistakes that can lead to damage or malfunction. Familiarizing yourself with these common pitfalls can save you time and frustration.
- Always unplug the grinder before starting to avoid electric shock.
- Don’t use excessive force when detaching the brush connection; it can damage the wire or brush holder.
- Confirm the new brushes match your specific Makita grinder model for proper fit.
- Be careful not to misplace the brush spring; it’s important for maintaining pressure against the brush.
- Securely reassemble all components before use to prevent malfunctions.
Maintain Your Grinder for Longer Life
To guarantee your angle grinder lasts longer, regular maintenance is vital. Start with these grinder maintenance tips: frequently inspect the carbon brushes for wear. Replace them as needed to prevent electrical issues and maintain consistent performance. Use effective cleaning techniques to keep your grinder free from debris, which can extend the lifespan of its components, including the brushes.
Lubricate moving parts to reduce strain and enhance durability. Proper alignment of these components is also important. Finally, consider your storage solutions. Store your grinder in a dry environment, away from moisture and extreme temperatures, to preserve its overall condition. By following these steps, you’ll not only maintain peak performance but also enjoy a longer life for your angle grinder. Regular vigilance and care go a long way in keeping your tool ready for any job.
Where to Find Replacement Parts for Your Grinder
Finding reliable replacement parts for your angle grinder guarantees peak performance and longevity. A great source for carbon brushes is eReplacementParts.com. This site offers a wide selection of compatible parts for your specific grinder model. Here are some tips to enhance your online shopping experience:
- Search by your grinder’s model number for precise matches.
- Read customer reviews to gauge quality and performance.
- Check detailed descriptions and specifications for carbon brush compatibility.
- Utilize installation guides and videos for a smooth replacement process.
- Explore tool categories for additional parts you might need.
Frequently Asked Questions
How to Replace Carbon Brushes on Angle Grinder?
To replace carbon brushes on your angle grinder, disassemble the tool, remove old brushes, and insert new ones. Verify power tool safety by securely reattaching components and considering different carbon brush types for best performance.
How to Replace a Carbon Brush?
To replace a carbon brush, inspect for brush wear indicators, disconnect the old brush, and install the new one. Regular carbon brush maintenance prevents grinder performance issues, ensuring your tool runs like a well-oiled machine.
Which Way Do Carbon Brushes Go?
For proper installation, guarantee the carbon brush orientation has the flat side facing the armature. Avoid common mistakes by fitting brushes snugly and positioning springs correctly to prevent uneven wear and electrical issues during operation.
Do Carbon Brushes Need to Bed In?
No, carbon brushes don’t need to bed in. Instead, proper installation enhances their longevity. Running at low speeds briefly helps optimize performance and wear patterns, preventing premature wear from excessive pressure during initial use.
Conclusion
Replacing carbon brushes in your angle grinder is crucial for peak performance and longevity. Remember, “a stitch in time saves nine”—addressing issues early can prevent bigger problems down the line. By following the steps outlined and maintaining your grinder, you’ll guarantee it runs smoothly for years to come. Keep an eye out for signs of wear and always use quality replacement parts to maximize efficiency and safety. Happy grinding!