
Angle grinder guard exposure is the part of the wheel left open for contact with the work. For right-angle-head and vertical portable grinders covered by OSHA 1910.243(c)(3), the opening may not exceed 180 degrees, and the guard must sit between the operator and the wheel. That 180-degree figure is a legal maximum for the covered setup, not a universal target. Use the model-specific guard and expose only the working area the grinder and wheel manufacturers allow.
Last updated: July 22, 2026 · Author/reviewer: [VERIFY: add the real author and qualified safety reviewer]
Quick Answer
For a right-angle-head or vertical portable grinder covered by OSHA 1910.243(c)(3), guard exposure may not exceed 180 degrees. Position the guard between you and the wheel, point the open side toward the work and away from your body, and follow the grinder’s accessory chart. A cutting wheel may require a closed, two-sided Type 1/41 guard.
Key Takeaways
- Keep the correct guard installed and locked unless the manufacturer expressly allows a different setup for that accessory.
- Place the guard body between you and the wheel, with the open side facing the work and away from your body.
- Check three things together: the OSHA limit that applies to the workplace, the grinder manual, and the wheel label/accessory chart.
- Use the guard specified for the wheel type; thin cutting wheels commonly need a closed, two-sided Type 1/41 cutting guard.
- Disconnect power before adjusting the guard, changing a wheel, or checking a rubbing or loose part.
- Inspect the guard, wheel, flanges, side handle, switch, and cord or battery before every use.
At a Glance
| OSHA Maximum | 180° for the right-angle-head and vertical portable grinders addressed by 29 CFR 1910.243(c)(3) |
| Guard Position | Guard body between the operator and wheel; open side toward the work and away from the body |
| Cutting Wheels | Use the guard listed in the accessory chart; many thin Type 1/41 cutting wheels require a closed, two-sided cutting guard |
| Before Adjustment | Unplug the tool, remove the battery, or isolate the air supply before touching the guard or wheel |
What’s in This Article
- What Is Angle Grinder Guard Exposure?
- How Much Wheel Exposure Is Allowed?
- Why Guard Coverage Is Critical for Safety
- Match the Guard to the Wheel and Task
- Positioning Your Guard for Safety and Visibility
- Adjusting Your Angle Grinder Guard
- Pre-Use Angle Grinder Guard Checklist
- What Risks Arise From Poor Guard Exposure?
- Angle Grinder Safety Best Practices
- Essential Personal Protective Equipment
- How to Maintain Your Angle Grinder Guard
- OSHA Rules, ANSI Guidance, and Manufacturer Instructions
- Angle Grinder Guard Troubleshooting
- Frequently Asked Questions
What Is Angle Grinder Guard Exposure?

Angle grinder guard exposure is the open arc of the wheel, disc, brush, or other accessory that is not enclosed by the guard. That opening lets the accessory contact the workpiece, but it also creates a path for sparks, chips, wire strands, and wheel fragments.
The guard should shield the operator from the wheel surface and deflect debris away from the body. It must also remain aligned with the wheel and firmly attached. OSHA’s portable-tool rule says the guard must cover the spindle end, nut, and flange projections except in listed situations where the tool or work provides equivalent protection.
Guard exposure is only one part of the setup. Wheel type, wheel diameter, maximum operating speed, flange arrangement, side-handle position, workpiece support, and operator stance all affect safety.
Note: OSHA standards regulate workplaces and employers. Home users may not be subject to the same enforcement framework, but the guard and operating principles remain sound safety practice.
How Much Wheel Exposure Is Allowed?
Under 29 CFR 1910.243(c)(3), a safety guard on a right-angle-head or vertical portable grinder may have a maximum exposure angle of 180 degrees. The same rule requires the guard to sit between the operator and the wheel and to deflect pieces of a broken wheel away from the operator.
A 180-degree opening is the maximum OSHA permits for the covered portable-grinder setup—not a recommendation to expose as much wheel as possible.
In practical terms, the guard must shield the operator-facing side of the wheel in that setup. Use the smallest correct opening that allows the approved accessory to contact the work without rubbing the guard. The grinder manual may require more enclosure, a different guard design, or a closed cutting guard for a specific wheel.
Do not apply bench-grinder clearances to a handheld angle grinder. The one-eighth-inch work-rest gap and one-fourth-inch adjustable tongue-guard gap in 29 CFR 1910.215 concern offhand, bench, and floor-stand grinding machinery, not the adjustable wheel guard on a handheld angle grinder.
Use this decision order: First identify the grinder model and wheel type. Next check the manufacturer’s accessory chart for the required guard and flanges. Then confirm the workplace rule that applies. If those sources do not clearly approve the combination, do not use it.
Why Guard Coverage Is Critical for Safety
Guard coverage helps protect against direct wheel contact, thrown debris, sparks, and fragments from a damaged wheel. It can also limit the path of loose wire strands from a wire brush. A guard does not prevent every injury, and it does not make an incompatible or damaged wheel safe.
Reducing Contact and Fragment Hazards
A correctly placed guard creates a barrier between your hands and body and the wheel path. It also gives fragments a better chance of being deflected away if a wheel breaks during startup or under load.
- Use a guard approved for the exact grinder and wheel diameter.
- Keep the guard clamp, latch, or screw fully engaged.
- Do not cut, bend, grind, drill, or shorten a guard.
- Replace a cracked, distorted, loose, or heat-damaged guard.
Warning: Do not run an angle grinder with a cracked wheel, a guard that will not lock, an incorrect flange setup, or a loose or missing side handle when the manual requires that handle. Remove the tool from service until the problem is corrected.
Controlling Sparks and the Danger Zone
A guard helps direct sparks and chips, but the workpiece and wheel rotation also affect their path. Keep sparks away from your face, clothing, power cord, batteries, hoses, flammable materials, windows, vehicles, and nearby workers.
Grinding can create fire and explosion hazards around fuel vapors, combustible dust, oily waste, dry vegetation, and other ignitable materials. Workplace jobs may require a hot-work permit, screens, ventilation, or a fire watch.
Supporting Control and Compliance
A locked guard gives you a stable reference for body position and helps keep the open wheel area pointed away from you. In workplaces, missing or poorly positioned guards can also violate OSHA rules and the employer’s safety program.
Match the Guard to the Wheel and Task
An effective guard fits the grinder, clears the accessory, and matches the wheel type. Guard names vary by brand, so use the tool’s manual and accessory chart rather than relying only on a guard’s appearance.
| Accessory or Task | Guard Guidance | Main Check |
|---|---|---|
| Type 27 depressed-center grinding wheel | Use the grinding guard specified by the grinder manufacturer. | Wheel, guard, and flanges must all be compatible. |
| Type 1/41 thin cutting wheel | Many grinders require a closed, two-sided Type 1/41 cutting guard. | Never assume an open grinding guard is approved for cutting. |
| Flap disc | Use the guard listed for the flap-disc type and grinder. | Confirm diameter, speed rating, and backing-flange needs. |
| Wire cup brush or wire wheel | Use the manufacturer-approved guard and accessory size. | Allow clearance for wire expansion at operating speed. |
| Conventional sanding disc with backing pad | Some manuals permit a guardless sanding setup; others differ. | Follow the exact tool manual and reinstall the proper guard before other work. |
For example, the DEWALT DCG410 manual specifies a Type 1 guard for wheels that must not be used for surface grinding and tells the operator to place the guard body between the spindle and operator. Other brands may use different guard labels or mounting systems.
Never use a cutting wheel for side grinding. Thin cut-off wheels are designed mainly for edge loading and can break if bent, twisted, or pressed sideways. The wheel’s marked maximum operating speed must be at least as high as the grinder’s rated speed.
Products Worth Considering
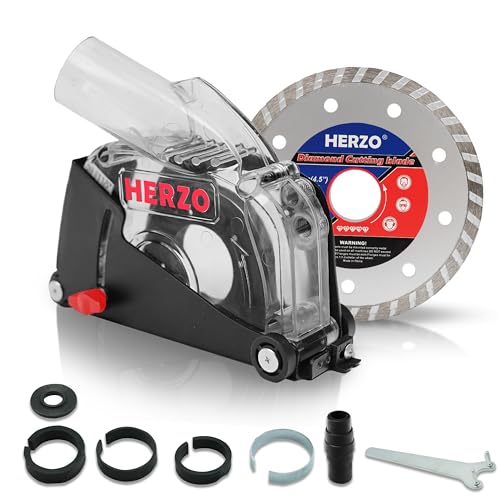
Widely Adapt:Suitable for 80% Main Brand 4-1/2 and 5 inch Angle Grinder

Premium metal construction for durability: Our angle grinder stand holder is made of high-quality metal material, ensuring strong hardness and long-lasting durability
Positioning Your Guard for Safety and Visibility
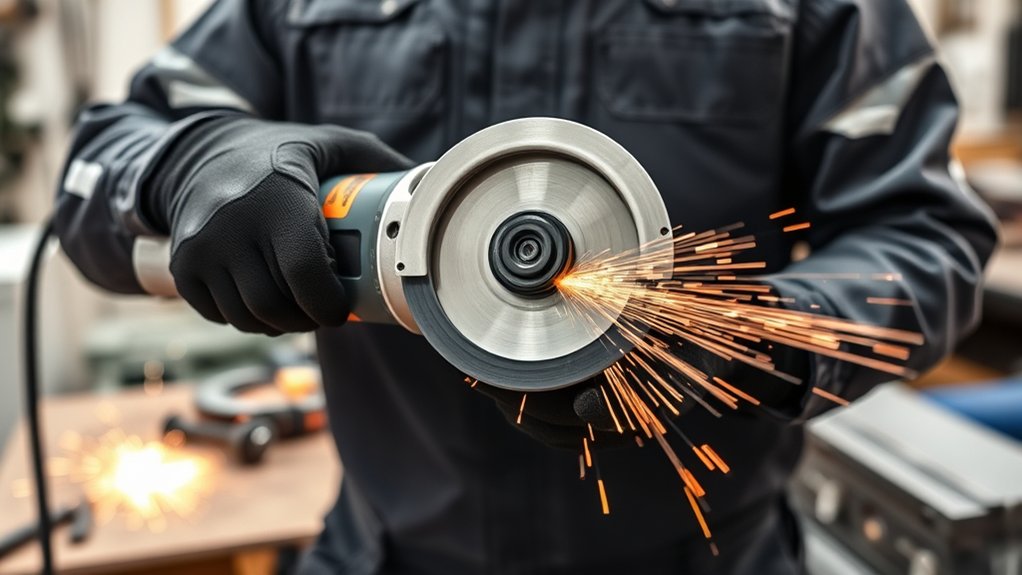
Position the guard body between your body and the wheel. The open part should face the workpiece and away from your face, hands, torso, and legs. Keep your body out of the wheel’s plane, especially during startup and cutting.
- Set the side handle so you can hold the grinder with both hands and keep your wrists in a controlled position.
- Arrange the work so sparks travel into a clear, nonflammable area.
- Maintain a clear view of the contact point without leaning into the wheel plane.
- Keep the cord, hose, or battery pack out of the spark stream and wheel path.
- Stand to one side during startup until the wheel reaches full speed without unusual vibration.
For example, the DEWALT DCG410 manual directs the open underside away from the operator during edge grinding and cutting. Follow your grinder’s model-specific direction. Do not rotate the guard merely for convenience if that places the open wheel path toward your body.
Pro Tip: After confirming safe positions in the manual, you may use a removable marker on the tool housing to identify common guard settings. Never drill, notch, score, or permanently alter the guard.
Adjusting Your Angle Grinder Guard
Adjust the guard before starting work and whenever your stance, cut direction, accessory, or workpiece position changes. Never place your hands near the wheel while the grinder can start.
- Disconnect the power. Unplug a corded grinder, remove the battery from a cordless grinder, or isolate the air supply on a pneumatic tool.
- Read the accessory chart. Confirm that the guard, wheel, flanges, and grinder model are approved for one another.
- Inspect the parts. Look for cracks, bends, worn locking teeth, missing hardware, damaged flanges, and wheel defects.
- Release the guard. Open the clamp, loosen the screw, or press the release lever exactly as the manual directs.
- Rotate the guard. Place the guard body between you and the wheel, with the open section facing the work and away from your body.
- Lock the guard. Tighten or latch it fully, then tug it by hand to confirm that it cannot rotate unexpectedly.
- Check wheel clearance. Rotate the wheel by hand and confirm that it does not touch the guard, flanges, or tool housing.
- Test from a safe position. Reconnect power, hold the tool with both hands, stand outside the wheel plane, and run the wheel for the period specified in the manual before contacting the work. Some manuals require a one-minute no-load test after installing a new or replacement wheel.
If the guard blocks the operation, change the workpiece position, use a manufacturer-approved accessory guard, or choose another tool. Removing or modifying the guard is not a safe workaround.
Pre-Use Angle Grinder Guard Checklist
- Guard: Correct type and diameter, no cracks or distortion, clamp fully locked, and positioned between operator and wheel.
- Wheel: Correct material and task rating, readable label, no chips or cracks, and maximum speed equal to or above the grinder’s rated speed.
- Mounting: Correct backing flange and locking flange, clean contact surfaces, and no improvised washers or adapters.
- Handle and switch: Side handle tight, switch working normally, and no defeated lock-off or safety feature.
- Power source: Cord and plug undamaged, battery secure, or air hose and fittings in good condition.
- Workpiece: Supported and clamped when practical, with no hidden wiring, fuel lines, pressurized parts, or combustible material in the spark path.
- Work area: Bystanders kept clear, ventilation adequate, and flammables, combustible dust, and trip hazards removed.
- PPE: Eye protection, face protection when needed, hearing protection, suitable gloves, fitted clothing, and sturdy footwear.
OSHA requires abrasive wheels to be closely inspected before mounting and calls for sounding or ring testing. OSHA also notes that ring testing is ineffective for wheels 4 inches or smaller and for plug- or cone-shaped wheels. Follow the wheel maker’s instructions because the test is not equally useful for every wheel design or bond.
What Risks Arise From Poor Guard Exposure?
Too much exposure or a guard placed on the wrong side can send sparks, chips, loose wire strands, or wheel fragments toward the operator. It also increases the open area where a hand, sleeve, cord, or nearby object can contact the accessory.
Kickback is another major hazard. If a wheel binds, catches an edge, or is twisted in a cut, the grinder can move suddenly. The guard may reduce some contact or fragment exposure, but it does not stop the kickback force.
- Wheel breakage: Often linked to damage, overspeed, side loading, incorrect mounting, or binding.
- Direct contact: More of the wheel is reachable when the guard is missing or rotated away from the operator.
- Fire: Sparks can ignite flammables or combustible dust.
- Eye and face injury: Small particles can travel around or under a poorly positioned guard.
- Loss of control: A loose guard may rotate, rub the wheel, or distract the operator.
Angle Grinder Safety Best Practices
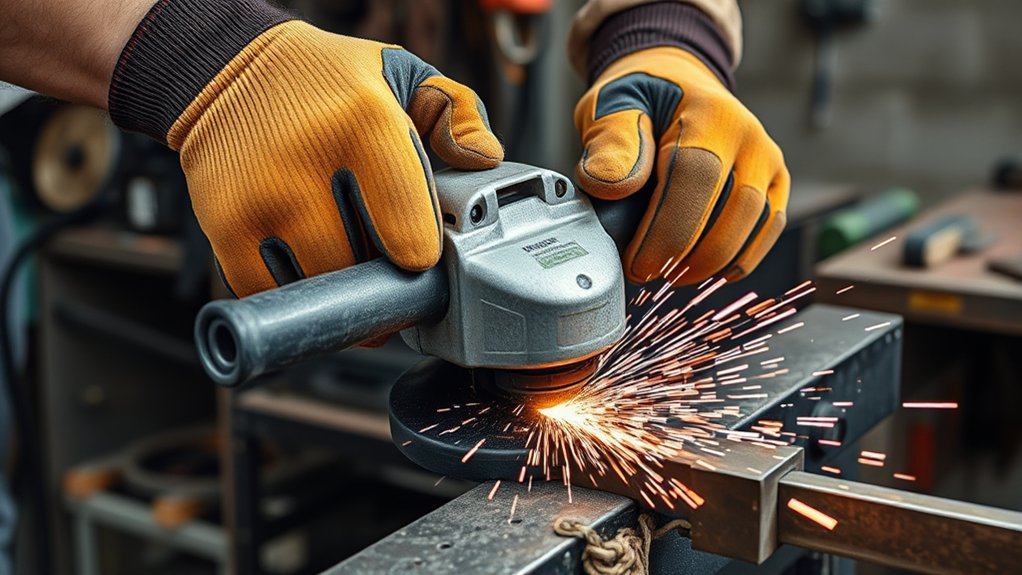
Safe grinding starts before the wheel touches the work. Use the correct accessory, secure the workpiece, maintain a balanced stance, and keep both hands on the grinder.
- Let the wheel reach full speed before contact and stop if it vibrates or sounds abnormal.
- Apply light, controlled pressure; forcing the grinder can slow the wheel, overheat the tool, or increase binding.
- Do not twist a cutting wheel or change the cut angle after the kerf is established.
- Do not use the side of a wheel unless its label and the tool manual allow that use.
- Keep everyone outside the likely spark, debris, and kickback path.
- Wait for the wheel to stop completely before setting the grinder down.
- Remove damaged tools and accessories from service rather than attempting a temporary repair.
Grinding angle depends on the accessory. Many depressed-center grinding wheels use a shallow working angle, while cutting wheels run on the edge. Follow the wheel label and grinder manual instead of relying on one angle for grinding, cutting, sanding, and wire brushing.
Essential Personal Protective Equipment for Using Angle Grinders
PPE is the last line of defense, not a substitute for the correct guard and wheel. The work material and coating also matter because grinding can release metal dust, silica, lead, paint residue, or other hazardous contaminants.
Products Worth Considering

SUPERIOR PROTECTION — Experience all-around face protection thanks to the curved design of this faceshield. The visor of this face guard is ANSI Z87+ certified, and up to 2x thicker for increased durability. Plus, you can comfortably wear your grinding face shield over prescription glasses.

COMPLETE PROTECTION — Pairing anti-fog and scratch-resistant goggles with a tough polycarbonate torch face shield, this unbeatable duo has you covered from splashes, dust, and debris. And they are built to resist high-speed impacts, even in extreme temperatures.

HIGH IMPACT FACE SHIELD - Sellstrom's Advantage Face Shield is ideal for various types of machinery, welding, cutting, grinding, woodworking, and other types of work that present potential hazards to the face
Eye and Face Protection
Wear impact-rated safety glasses with side protection or suitable goggles. Add a face shield when the hazard assessment or tool manual calls for more face coverage. A face shield is supplemental protection, so wear it over safety glasses or goggles rather than instead of them. See 29 CFR 1910.133 and the instructions for the specific grinder.
Hearing, Hand, Foot, and Body Protection
- Use hearing protection appropriate for the measured or expected noise exposure.
- Wear well-fitting gloves suitable for sharp edges and hot sparks, with no loose cuffs or frayed material.
- Wear fitted, flame-resistant or natural-fiber work clothing when sparks are present; avoid loose sleeves, jewelry, drawstrings, and synthetic clothing that can melt.
- Wear sturdy footwear that protects against dropped workpieces and hot debris.
- Tie back long hair and keep it away from rotating parts.
Dust and Respiratory Protection
Use local dust collection, ventilation, wet methods only when the tool and process are designed for them, or another approved control based on the material. Do not grind an unknown coating until you know what it contains. Respirator selection must follow a hazard assessment and, in workplaces, the applicable respiratory-protection program.
Warning: Never use an ordinary angle grinder in an explosive atmosphere or where sparks can reach fuel vapors, combustible dust, gas cylinders, or other ignitable material. Stop and establish the correct hot-work controls first.
How to Maintain Your Angle Grinder Guard
Clean and inspect the guard as part of the tool’s normal maintenance. Dust and metal chips can hide cracks, interfere with the lock, or make the guard difficult to rotate.
- Disconnect power before cleaning or inspection.
- Brush or wipe residue away without thinning, grinding, or reshaping the guard.
- Check the collar, latch, lever, screw, spring, and locking points for wear or damage.
- Confirm that the guard locks in every approved working position.
- Check for rub marks that may indicate the wrong wheel, guard, flange, or mounting position.
- Replace damaged parts with manufacturer-approved components for the exact model.
Do not use tape, wire, clamps, homemade brackets, or welding repairs to hold a guard in place. A repaired or improvised guard may not retain fragments or remain aligned at operating speed.
OSHA Rules, ANSI Guidance, and Manufacturer Instructions
For U.S. general-industry workplaces, OSHA 1910.243 covers portable abrasive-wheel tools. It requires guards in most normal external-grinding situations, limits right-angle portable-grinder exposure to 180 degrees, and requires the guard to be between the operator and wheel.
Construction employers should also review OSHA 1926.303. Fixed bench and floor grinders have different requirements under OSHA 1910.215, including work-rest and tongue-guard clearances that do not describe handheld angle-grinder guard exposure.
ANSI/UAMA B7.1-2017 addresses the use, care, and protection of abrasive wheels, including guards, mounting, handling, and storage. OSHA standards may incorporate older ANSI language, while current manufacturer instructions may be more specific for modern tools and accessories.
Follow every requirement that applies to the job: the law, the employer’s safety program, the grinder manual, the wheel label, and the accessory instructions. If those sources appear to conflict, stop and obtain clarification from the employer or manufacturers. A generic statement such as “use a 180-degree guard” does not replace the model-specific guard chart.
Angle Grinder Guard Troubleshooting
| Problem | Likely Cause | Safe Response |
|---|---|---|
| Guard will not lock | Wrong guard, debris in the collar, worn latch, missing spring, or damaged mounting parts | Disconnect power, clean and inspect the mechanism, verify the part number, and replace damaged parts. |
| Wheel rubs the guard | Incorrect wheel diameter, wrong flange orientation, bent guard, or misaligned mounting | Do not run the tool. Recheck the manual, wheel size, flanges, and guard condition. |
| Sparks travel toward the operator | Poor guard position, unsuitable stance, or workpiece arranged in the wrong direction | Stop, disconnect power, and reposition the guard, work, and operator. Do not remove the guard. |
| Cut is inaccessible with the guard installed | Wrong tool, guard, wheel size, or workpiece orientation | Use a manufacturer-approved cutting guard, a smaller compatible tool, or a different cutting method. |
| Guard rotates during use | Loose clamp, worn locking parts, incorrect assembly, or impact damage | Stop immediately and remove the grinder from service until the guard system is repaired correctly. |
Frequently Asked Questions
What are the OSHA requirements for angle grinder guards?
For right-angle-head or vertical portable grinders, OSHA 1910.243(c)(3) limits the maximum exposure angle to 180 degrees and requires the guard to be between the operator and wheel. OSHA also requires the guard to be adjusted so fragments from an accidentally broken wheel are deflected away from the operator. Other provisions address alignment, fastenings, mounting, and limited exceptions.
Is there a 19-inch rule for angle grinders?
No. OSHA’s angle-grinder provisions do not contain a “19-inch rule.” The relevant guard number for covered right-angle-head and vertical portable grinders is a maximum exposure angle of 180 degrees. OSHA 1910.243 separately mentions a 19,000-feet-per-minute limit for rotary mower blade-tip speed, but that rule does not apply to angle grinders.
How much of an angle grinder wheel should the guard cover?
For the right-angle portable grinders addressed by OSHA 1910.243(c)(3), the open exposure cannot exceed 180 degrees, so the guard covers at least the operator-facing half of the wheel. The correct guard may cover more, and the manufacturer’s manual can require a different enclosure for a specific accessory.
Where should an angle grinder guard be positioned?
Position the guard body between you and the wheel. Point the open side toward the work and away from your face, hands, torso, and legs. Keep your body outside the wheel plane, especially during startup and cutting.
Can you use an angle grinder without a guard?
Do not remove the guard for normal grinding, cutting, flap-disc, or wire-wheel work. A few tool manuals allow a different setup for specific sanding accessories, but that exception is model- and accessory-specific. When the job cannot be done with the approved protection, use another tool or setup.
Can a grinding guard be used with a cutting wheel?
Only when the grinder manufacturer’s accessory chart expressly approves that combination. Many thin Type 1/41 cutting wheels require a closed, two-sided cutting guard. Do not assume an open Type 27 grinding guard provides the required protection.
Does the guard prevent angle grinder kickback?
No. The guard can reduce contact and fragment exposure, but it does not eliminate kickback. Prevent binding by using the correct wheel, supporting the work, avoiding side pressure on cutting wheels, maintaining two-handed control, and keeping your body out of the wheel’s likely travel path.
Safety Disclaimer: This article provides general information and does not replace hands-on training, a job hazard assessment, the grinder and wheel manufacturers’ instructions, or applicable workplace rules. Stop using any tool or accessory that is damaged, incompatible, or difficult to control.
Conclusion
Angle grinder guard exposure should be set by the correct guard and accessory chart, not guesswork. Keep the guard installed, match it to the wheel and task, and position its body between you and the wheel. For the right-angle-head and vertical portable grinders covered by OSHA 1910.243(c)(3), exposure may not exceed 180 degrees, while the tool manual may require more enclosure.
Disconnect power before adjustment, confirm that the guard locks, check wheel clearance, and use both hands with the right PPE. When a safe guard position makes the job impossible, change the tool, accessory, or work setup instead of removing the protection.
Sources
- OSHA 29 CFR 1910.243, Guarding of Portable Powered Tools — portable abrasive-wheel guarding, 180-degree exposure, placement, inspection, and mounting
- OSHA 29 CFR 1926.303, Abrasive Wheels and Tools — construction-industry abrasive-wheel requirements
- OSHA 29 CFR 1910.215, Abrasive Wheel Machinery — fixed-grinder guarding, work-rest, and tongue-guard rules
- OSHA 29 CFR 1910.133, Eye and Face Protection — protection from flying particles and side-impact hazards
- DEWALT DCG410 Instruction Manual — model-specific guard positioning, closed cutting-guard, and Type 27 versus Type 1/41 accessory requirements
- OSHA, Safe Use of Portable and Hand-Held Power Tools — wheel inspection, ring-test limitations, guarding, and portable-tool precautions
- Norton Abrasives, What You Should Know About Grinding Wheel Guards — guard compatibility and full 180-degree coverage for cutting-off wheels
- Unified Abrasives Manufacturers’ Association — ANSI/UAMA B7.1-2017 abrasive-wheel safety guidance