An angle grinder spindle lock holds the output spindle still while you remove or install a grinding wheel, cutting disc, backing pad, or other approved accessory. Used correctly, it makes the change faster and gives the wrench a stable point to work against. It must only be pressed after the grinder is disconnected and the spindle has completely stopped.
Quick Answer
An angle grinder spindle lock stops the spindle so you can loosen or tighten the wheel’s flange nut. Disconnect the plug or remove the battery, wait for the wheel to stop, press the lock while turning the spindle by hand, then use the supplied wrench. Never press the lock on a moving spindle.
Key Takeaways
- Disconnect the grinder from power before touching the wheel, flange nut, or spindle-lock button.
- Never press the spindle lock while the spindle or accessory is moving.
- The lock holds the spindle during a wheel change; the correct flanges, nut, and mounting method secure the wheel during operation.
- Inspect the accessory, confirm its speed rating, and follow the exact flange orientation shown in your model’s manual.
- Do not force, hammer, or lubricate a faulty spindle lock unless the manufacturer specifically instructs you to do so.
At a Glance
| Time Required | About 5–10 minutes for a normal wheel change |
| Difficulty | Easy, provided the flange nut and spindle lock are undamaged |
| Tools Needed | The grinder’s supplied spanner, lock-nut wrench, or hex wrench; a dry brush for exterior cleaning if needed |
| Cost | Usually $0 when the original wrench and mounting hardware are available |
Warning: Never press the spindle-lock button while the wheel, accessory, or spindle is moving. Disconnect the plug or remove the battery before changing accessories. Pressing the lock against a moving spindle can damage the locking pin or gearbox and create an injury hazard.
What Is the Angle Grinder Spindle Lock?
The angle grinder spindle lock, also called a shaft lock, is a button or lever that temporarily prevents the output spindle from turning. Inside the gear housing, the button normally moves a pin or similar part into a matching recess in the spindle or gear.
The lock is intended for installing and removing approved accessories. Makita’s angle-grinder instructions describe the shaft lock as a way to prevent spindle rotation during accessory installation or removal and warn against operating it while the spindle is moving.
The spindle lock does not clamp the wheel by itself. On a conventional grinder, the wheel is held by the correct inner flange, outer flange or locking nut, and the manufacturer’s specified tightening method. A threaded hub, keyless nut, or proprietary quick-change interface may perform the same retention job on other models.
Note: A spindle lock is not designed to stop the grinder after use. Switch the grinder off and wait for the wheel to coast to a complete stop.
Spindle Lock vs. Lock-On Switch, Keyless Nut, and X-LOCK
Several angle-grinder features use similar words but perform different jobs:
- Spindle lock or shaft lock: Holds the spindle still while an accessory is installed or removed.
- Lock-on switch: Keeps the grinder’s power switch in the running position on models that permit continuous operation. It does not hold the spindle.
- Keyless or quick-locking nut: Replaces a conventional pin-spanner nut on compatible grinders. The spindle lock may still be used while the nut is released.
- X-LOCK or another proprietary quick-change system: Uses a dedicated accessory interface rather than a standard backing flange and locking nut. Follow that system’s release and mounting instructions instead of the conventional procedure below.
Bosch explains that its X-LOCK interface eliminates the standard backing flange, locking nut, and wrench. It also warns users not to operate the wheel-release lever until the wheel has completely stopped. Always identify your grinder’s mounting system before attempting a wheel change.
Before Using the Spindle Lock
Complete these checks before loosening or installing an accessory:
- Disconnect all power. Unplug a corded grinder or remove the battery pack from a cordless model. Move the switch to its off position.
- Wait for a complete stop. Do not touch the spindle-lock button until the accessory has stopped moving.
- Let hot parts cool. A wheel, nut, flange, and workpiece can remain hot after grinding or cutting.
- Check the replacement accessory. Confirm that its diameter, arbor or thread, wheel type, and intended application match the grinder and guard.
- Compare speed ratings. The accessory’s marked maximum speed must be at least as high as the grinder’s rated no-load speed.
- Inspect for damage. Do not mount a wheel that is cracked, chipped, distorted, expired where an expiration date applies, contaminated, or otherwise damaged.
- Check the mounting parts. Use only the flange, locking nut, guard, backing pad, and adapters approved for the grinder and accessory.
OSHA’s portable abrasive-wheel requirements call for wheel inspection before mounting and verification that the grinder’s spindle speed does not exceed the wheel’s marked maximum operating speed.
How to Use an Angle Grinder Spindle Lock Safely
The exact flange arrangement and wrench type vary by grinder, so keep the owner’s manual nearby. The following procedure applies to a typical conventional angle grinder with an inner flange and locking nut.
Removing the Installed Wheel
- Place the disconnected grinder on a stable surface. Position it so the spindle, wheel, and lock button are easy to reach without placing your hands on a sharp wheel edge.
- Locate the spindle-lock button. It is usually on top of the metal gear housing near the spindle.
- Press the button gently. Do not force it straight into a position where the internal pin does not line up.
- Turn the wheel or spindle slowly by hand. Keep light pressure on the button until it drops into engagement and the spindle stops turning.
- Confirm the lock is fully engaged. The spindle should not rotate when light hand pressure is applied. If it slips, stop and re-engage it before using the wrench.
- Hold the button and loosen the nut. Use the supplied spanner, lock-nut wrench, or hex wrench in the direction specified by the manual.
- Remove the nut and accessory. Set the mounting parts down in their original order and orientation.
Installing the Replacement Wheel
- Clean the exposed mounting surfaces. Use a dry brush or clean cloth to remove loose debris from the spindle, flange faces, and nut. Do not grind, file, or reshape these parts.
- Install the inner flange correctly. Match its orientation to the diagram in the grinder’s manual. Flanges may have raised shoulders or reversible faces for specific wheel types.
- Seat the accessory flat. The wheel or disc should rest correctly on the flange without rocking, binding, or being forced over the spindle.
- Install the outer flange or nut. Use the side and orientation specified for that wheel type.
- Engage the spindle lock. Press the button while turning the spindle slowly by hand until the lock catches.
- Tighten with the supplied hand wrench. Make the nut secure without using a powered impact driver, extension pipe, hammer, or excessive force.
- Release the spindle-lock button. Confirm that it returns fully to its normal position.
- Remove every wrench and adjustment tool. Never leave the spanner attached when power is restored.
- Turn the accessory by hand. It should rotate freely without scraping the guard, wobbling, or binding.
- Check the guard position. Make sure the correct guard is secure and positioned between you and the wheel’s exposed area.
Bosch Professional’s wheel-mounting guidance says flanges must not be reversed and the mounting nut should not be tightened excessively. It also advises using the supplied spanner rather than a power tool to install the wheel.
Pro Tip: Before loosening anything, take a clear photo of the wheel, inner flange, outer flange, and nut. The photo can help you restore the original order and orientation, but the owner’s manual remains the final authority.
Why Using the Spindle Lock Enhances Safety
A working spindle lock prevents the spindle from turning while you use the approved wrench. This gives you better control and reduces the temptation to hold the wheel with pliers, wedge a screwdriver into the guard, or use another improvised method.
The lock also makes it easier to apply controlled hand-wrench force. It does not replace correct wheel inspection, flanges, guards, or mounting hardware, and it does not hold the wheel secure while the grinder is running.
| Benefit | What It Means |
|---|---|
| Controlled spindle movement | Stops the spindle from turning while the flange nut or threaded accessory is loosened or tightened. |
| Safer wheel changes | Reduces the need to grip a sharp wheel or improvise a way to hold the spindle. |
| Faster setup | Makes accessory changes easier, although most conventional systems still require the supplied wrench. |
The spindle lock holds the shaft during an accessory change. The correct mounting hardware and installation method hold the accessory during operation.
Common Spindle Lock Mistakes to Avoid
Pressing the Lock While the Wheel Is Moving
Wait until the wheel has stopped completely. Manufacturer instructions warn that actuating the lock against a moving spindle can damage the tool.
Using the Spindle Lock as a Brake
The lock is not a brake. Turn the grinder off and let the accessory coast to a stop naturally. Do not press the button to shorten the stopping time.
Forcing the Button
The locking pin may not align with its recess when you first press the button. Keep only light pressure on it while turning the spindle slowly by hand. Hammering or clamping the button can damage the mechanism.
Overtightening the Flange Nut
Excessive tightening can make removal difficult and may damage a wheel, flange, nut, or spindle. Use the wrench and tightening method supplied for the exact grinder. Do not use an impact driver or an extension pipe for extra leverage.
Reversing the Flange
Many grinders use flanges with different faces or shoulders for different accessory types. Installing one backward can prevent the wheel from seating correctly. Match the arrangement shown in the owner’s manual.
Restoring Power Before the Final Check
Before reinstalling the battery or plugging in the cord, release the lock button, remove the wrench, turn the accessory by hand, and confirm that it clears the guard.
Troubleshooting Spindle Lock Issues
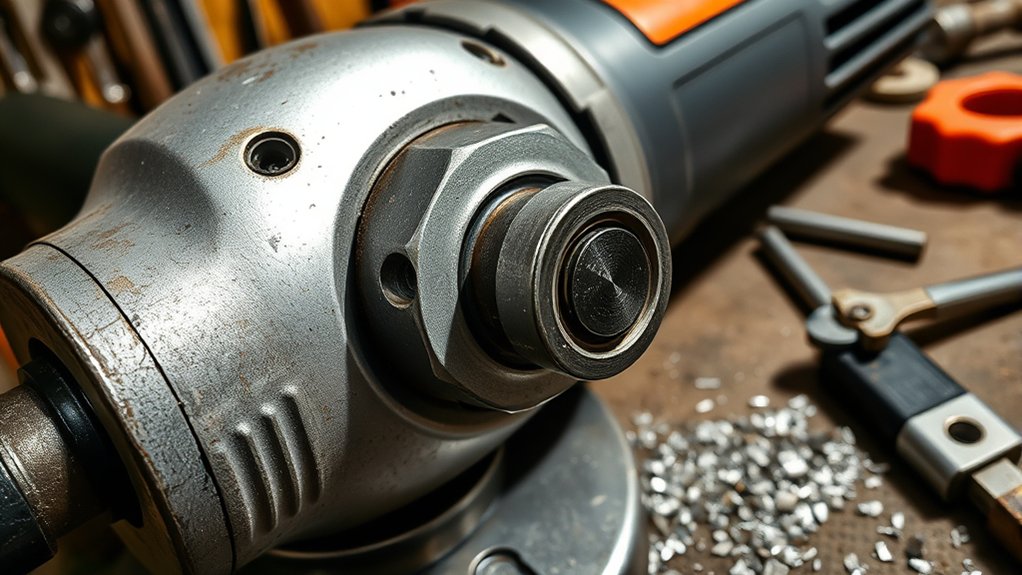
Always disconnect the grinder before troubleshooting. Do not open the gear housing unless the manufacturer’s service instructions authorize the work and you are qualified to complete it.
| Symptom | Possible Cause | Safe Next Step |
|---|---|---|
| Button will not move | The pin is not aligned, exterior dust is packed around the button, or the mechanism is damaged. | Apply light button pressure while turning the spindle slowly by hand. Clean only the exterior with a dry brush or vacuum. Do not force it. |
| Button moves but does not catch | The spindle is between engagement points, or the pin or gear recess is worn. | Rotate the spindle through a full turn while applying gentle pressure. If it never engages, stop and arrange service. |
| Lock engages but slips under wrench pressure | Partial engagement, a damaged pin, or worn internal engagement surfaces. | Stop applying force. Re-engage once. If it slips again, do not use the lock until the tool is repaired. |
| Flange nut will not loosen | Overtightening, debris, heat, corrosion, incorrect flange orientation, or a damaged nut. | Use only the specified wrench and manual procedure. Do not hammer the wrench, use an impact driver, or overload the spindle lock. Seek service if normal hand force fails. |
| Button remains stuck down | Packed debris, a broken return spring, a bent button, or internal damage. | Do not reconnect power. Have the grinder inspected and repaired before use. |
| Wheel feels loose after installation | Incorrect accessory, missing or reversed flange, wrong nut face, poor seating, or incompatible arbor size. | Remove the accessory and compare every part with the manual. Do not operate the grinder until the cause is corrected. |
Warning: A spindle lock that slips, remains depressed, is cracked, or fails to return should be treated as a damaged tool. Do not rely on pliers, screwdrivers, punches, or extra leverage to work around the failure.
Products Worth Considering

Adjustable Lock-nut Grinder Wrench

【Efficient Quick-Change Design】 Features a convenient quick-change mechanism that allows for fast and tool-free installation and removal of grinding or cutting discs, significantly reducing downtime and improving work efficiency

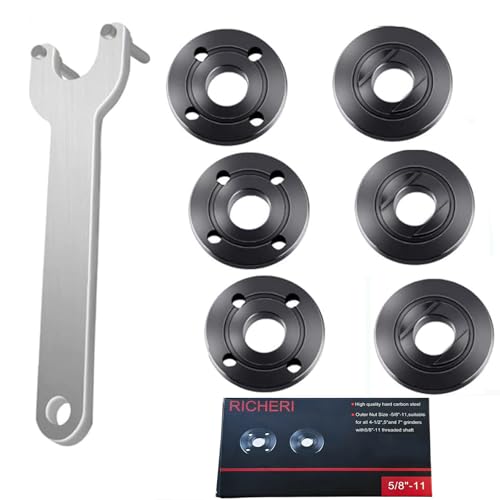
Angle Grinder Wrench & Nut Kit, 7-Piece Set: Includes 1 grinder wrench and 6 flange lock nuts (3 inner, 3 outer) for quick wheel changes and arbor nut replacement on 4-1/2", 5", and 7" grinders.
Tips for Maintaining Your Spindle Lock
- Inspect the button before wheel changes. Look for cracks, looseness, deformation, or a button that does not return normally.
- Keep the exterior clean. Brush or vacuum loose dust from around the button and gear housing after the grinder is disconnected and cool.
- Use compressed air cautiously. Use it only when the manufacturer permits it. Keep the pressure controlled, wear eye protection, direct debris away from people, and avoid driving particles deeper into the mechanism.
- Keep the mounting hardware clean. Remove loose grit from flange faces, the spindle, and the locking nut. Do not use damaged, distorted, or homemade mounting parts.
- Do not add oil automatically. Lubricate the spindle-lock mechanism only when the exact model’s manual gives a procedure and specifies the lubricant. Oil applied in the wrong location can collect abrasive dust.
- Use qualified repair service. Internal lock-pin, spring, gear, or gearbox work should be completed by a qualified technician using approved replacement parts.
The maintenance section of the Makita 9564CV/9565CV instruction manual directs users to keep the tool and air vents clean and refers other maintenance or adjustment work to authorized service personnel. Always follow the instructions for your exact model.
When to Stop and Have the Grinder Repaired
Disconnect the tool and arrange qualified service when any of the following occurs:
- The button is cracked, missing, bent, loose, or stuck.
- The lock repeatedly slips under normal hand-wrench pressure.
- The spindle turns even though the lock appears fully engaged.
- The gear housing makes new clicking, grinding, or scraping sounds.
- The spindle, flange, or nut is visibly damaged.
- The accessory cannot be removed with the approved wrench and normal hand force.
- The wheel will not seat flat or rotate freely after correct installation.
Do not reconnect the grinder merely to test a stuck or partly engaged spindle lock. A failed return mechanism can leave the locking pin in contact with rotating parts.
Products Worth Considering
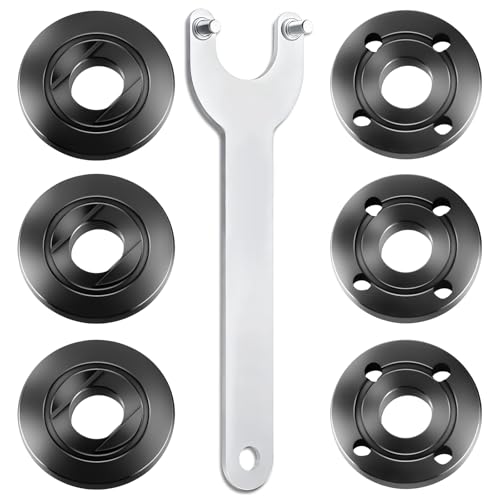
WHAT YOU GET: Includes 1 extended angle grinder wrench and 6 thickened-design flange nuts (3 inner nuts + 3 outer nuts), always have spare nuts to avoid downtime.
Replacement part numbers: 224399-1, 193465-4, 224568-4 parts Fit for Makita 9005BZ 9015B 9505BH 9527PB 9527NB 9015DB 9561CV 9016B 9049 9067L 9077SL 9564,GA7021, GA9040S 9" 15A, GA5010Z 10.5A 5", 9557NB, 9558PB, GA6020, 9005B, 9503BH, 9524NB, 9528PB, 9528NB 9" 15A Angle Grinder, etc

Two-Piece Kit for Versatile Grinding Applications: This set includes two specialize flange nuts: a low-profile 9mm silver D-ring nut for flush cutting in tight spaces, and a 13.5mm black knurled nut for enhanced stability during heavy-duty tasks. Together, they form a complete angle grinder flange nut solution for varied grinding, cutting, and sanding needs.
Frequently Asked Questions
What is the function of a spindle lock on a grinder?
The spindle lock temporarily prevents the grinder’s spindle from turning while you install or remove an approved wheel or accessory. It gives the supplied wrench a stable point to work against. It is not an operating brake and does not replace the flange, locking nut, guard, or correct wheel-mounting procedure.
What does the spindle-lock button do?
Pressing the button moves an internal locking part into engagement with the spindle or gearbox. Because the engagement points may not be aligned at first, you normally press gently while turning the disconnected spindle slowly by hand until it catches.
Should I hold the spindle lock while the angle grinder is running?
No. Never press or hold the spindle lock while the grinder is running or while the wheel is coasting. The feature is only for accessory installation and removal after the tool has been disconnected and the spindle has stopped completely.
Why will my angle grinder spindle lock not engage?
The internal pin may be between engagement points, so turn the spindle slowly by hand while applying light pressure to the button. Exterior debris may also restrict the button. If the lock never catches, slips, or stays depressed after exterior cleaning, stop using it and have the grinder serviced.
Can I use the spindle lock to loosen a severely stuck flange nut?
Use the lock only with the approved wrench and normal hand force. Do not hammer the wrench, attach a long extension pipe, or use an impact driver because the extra force may break the locking pin or damage the gearbox. Follow the model manual or arrange service when the nut will not release normally.
What should I do if my grinder has no spindle-lock button?
Check the manual before improvising. Some grinders use spindle flats with two wrenches, a keyless nut, or a proprietary quick-change system such as X-LOCK. Use only the procedure and tools specified for that model.
How do anti-angle-grinder locks work?
An anti-angle-grinder lock is a separate physical-security product, not a part of the grinder’s spindle mechanism. These locks use hardened materials, protected shackles, rotating barriers, or thick shapes intended to slow a grinder attack. Resistance varies by design and independent security rating; no physical lock should be described as completely grinder-proof.
Sources
- Makita 9564CV/9565CV Instruction Manual — shaft-lock operation, power disconnection, wheel mounting, inspection, and maintenance guidance.
- Bosch Professional: Proper Use of Angle Grinders — flange direction, controlled tightening, accessory inspection, speed ratings, and X-LOCK guidance.
- OSHA Construction eTool: Power Tools — disconnecting power before servicing or changing accessories.
- OSHA 29 CFR 1910.243: Guarding of Portable Powered Tools — guards, abrasive-wheel inspection, mounting surfaces, and speed compatibility.
- NIOSH Abrasive Wheel Machinery and Tools Checklist — wheel inspection, guarding, spindle speed, and safe abrasive-wheel practices.
Conclusion
The angle grinder spindle lock is a simple accessory-change aid, but it must be used within clear limits. Disconnect the grinder, wait for a complete stop, inspect the wheel and mounting parts, engage the lock gently, and tighten the correct hardware with the supplied hand wrench.
Never use the lock as a brake or force it against a seized nut. When the button slips, sticks, cracks, or fails to engage, stop using the mechanism and arrange qualified repair. Following the exact manual for your grinder and accessory is the safest way to complete every wheel change.