I built a simple, safe, and highly effective mini circular saw that packs big performance into a compact, easy to make package. In this guide I walk you through the materials, the build process, safety tips, and a few clever hacks I discovered while fabricating and testing the tool. I keep the design practical and repeatable so you can make one from common parts and basic welding skills.
🛠️ What this mini saw is and why I made it
This mini circular saw is a compact cutter built from a small high RPM motor, a proper mini circular blade, and a welded metal housing and guard. I wanted something more accurate than a handheld saw for small shop work and faster than a jigsaw on thin metals and plywood. The result is a tool that is rigid, simple to control, and extremely useful for detailed cuts and repeatable small ripping and trimming jobs.
🔩 Materials and tools you will need
For my build I used parts that are easy to source. Substitute comparable parts you already have but keep safety in mind.
- Motor: A small brushless or brushed motor from an angle grinder, old circular saw, or hobby motor with around 5,000 to 15,000 RPM depending on blade size.
- Mini circular blade: 3 to 5 inch blade rated for the material and RPM you will run (never exceed the blade’s maximum RPM). Match the arbor size to the motor shaft or use an adapter.
- Arbor adapter and flange: To mount the blade securely to the motor shaft.
- Housing and guard: Mild steel plate and sheet for a welded housing and blade guard.
- Fasteners: Bolts, washers and locknuts for mounting and depth adjustment.
- Switch: Magnetic no-volt release (NVR) paddle switch with proper current rating (add an emergency stop if available).
- Power supply: Corded or battery system matched to motor requirements, with an appropriate speed controller (ESC/PWM/triac/VFD) so motor speed never exceeds the blade’s maximum RPM.
- Tools: Welding gear, angle grinder for shaping, drill press or drill for holes, files and measuring tools.
🧰 Step by step build
I break the build into clear stages so you can follow along and adapt things depending on your parts.
- Prepare the motor and shaft: Ensure the motor shaft is clean, true, and check runout. If the arbor does not match the motor shaft, use a rated sleeve adapter. Balance is important to avoid vibration.
- Make the mounting plate: Cut a small steel plate to act as a base. Drill holes to bolt the motor in place. Keep the motor low and tight to improve rigidity.
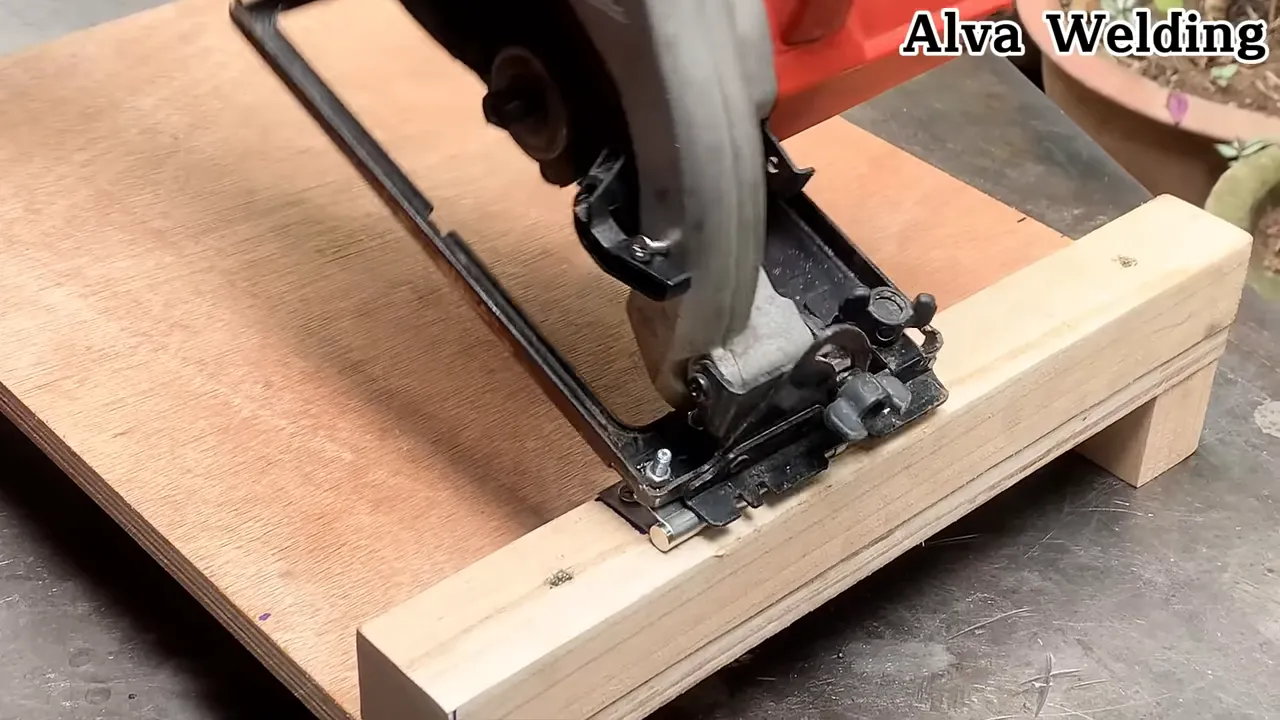
- Fabricate the blade guard: Weld a curved guard over the blade area leaving the cutting face exposed. The guard should direct debris away from the operator and keep fingers away from the blade. A retractable lower guard that automatically covers the blade when not cutting makes blade changes easier (never operate without guarding).
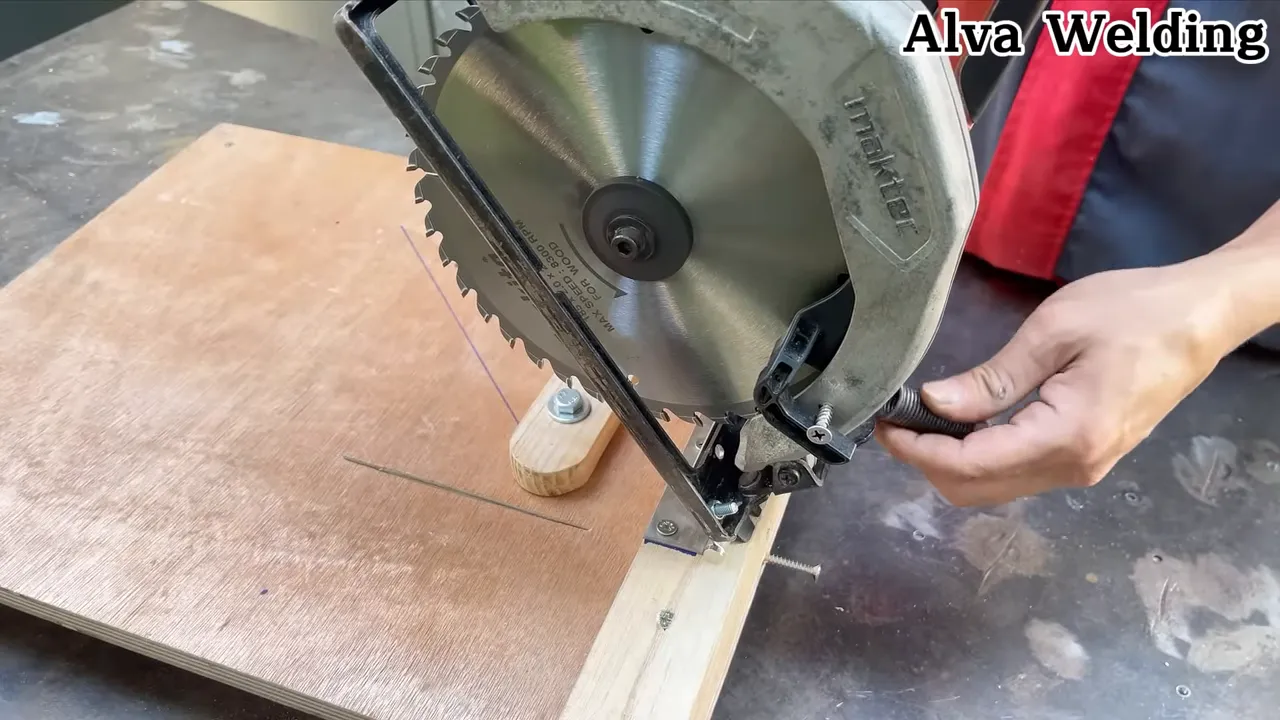
- Install the blade: Fit the adapter and blade, tighten the flange evenly. Manually spin the blade to check clearance and runout. Even a small wobble will make cuts inaccurate. Confirm the blade’s arrow matches motor rotation and that your motor/controller will not exceed the blade’s max RPM.
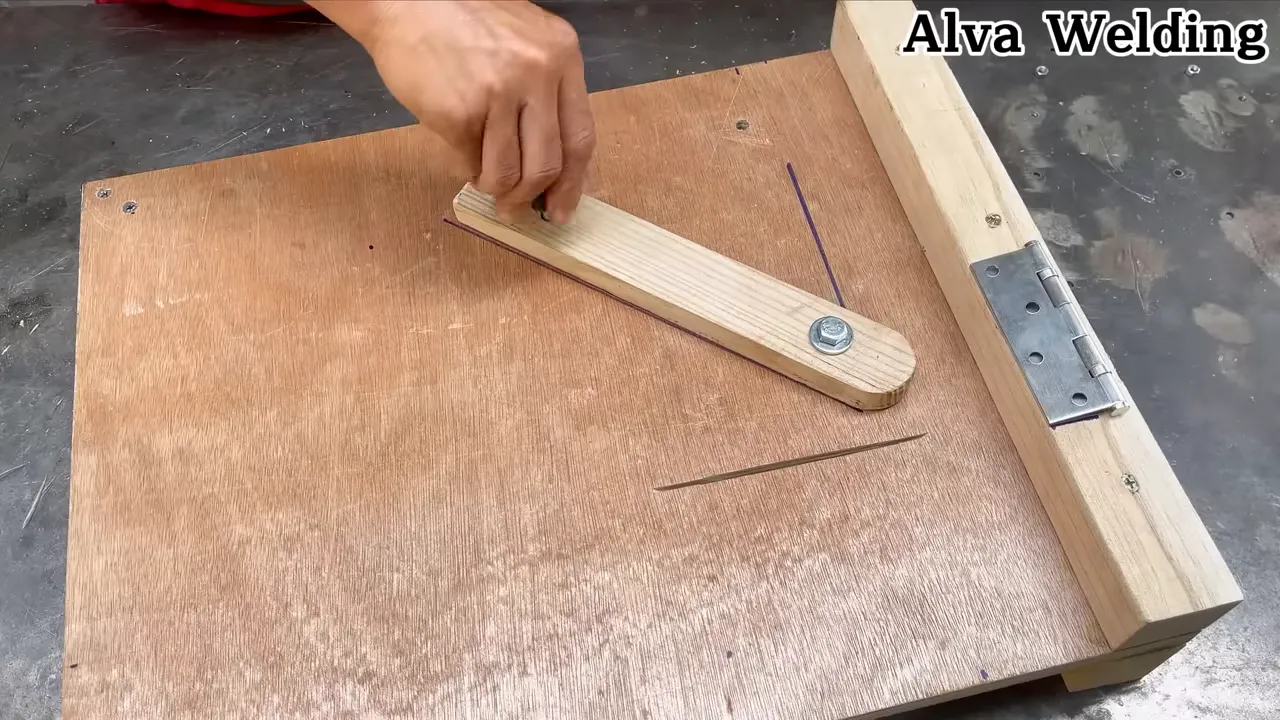
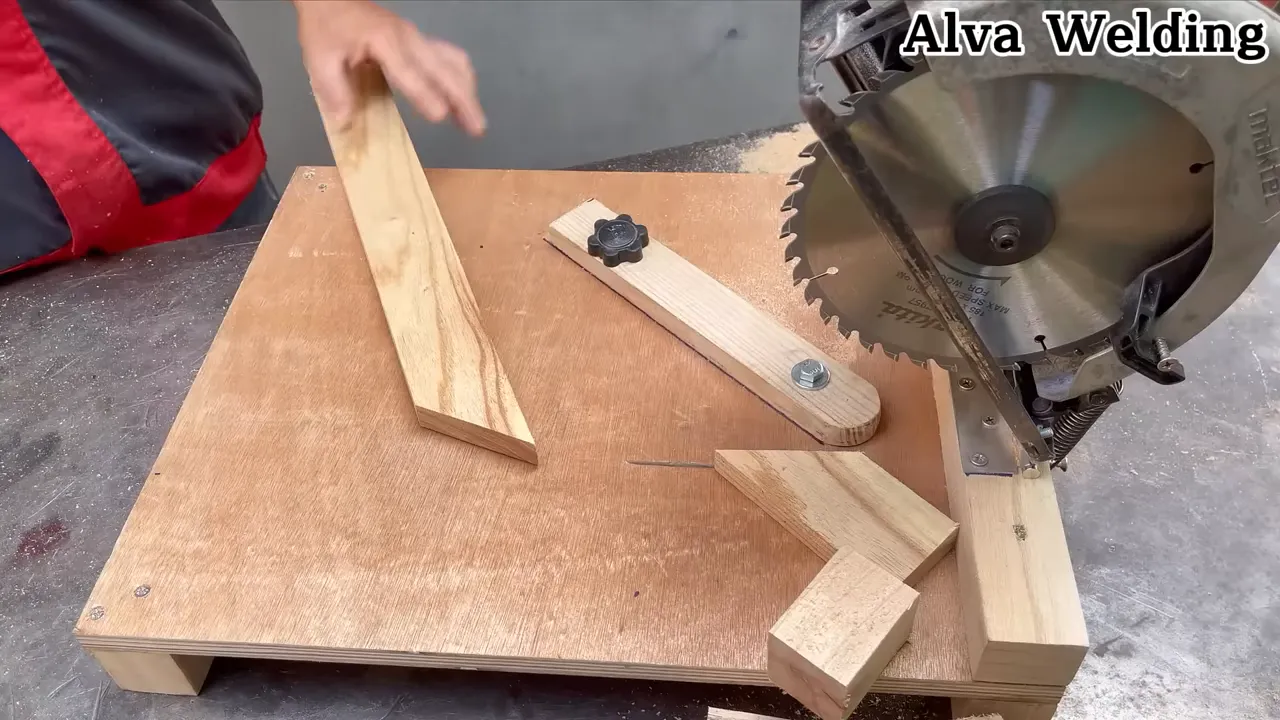
- Mount a depth stop and fence: A simple bolt and slot arrangement lets you set cutting depth. A small removable fence can be clamped for straight rip cuts.
- Wire the switch and power: Use a properly rated NVR paddle switch, correct wire gauge, and secure wiring with strain relief and grommets. Ground/earth the metal housing on corded builds and include a fuse or breaker (use a GFCI/RCD outlet where possible). If you use batteries make sure the battery connector is secure and fused, and the pack has a BMS/low-voltage cutoff.
- Final checks: Tighten all fasteners, check blade alignment, and test at low speed first. Wear hearing and eye protection for the first cuts.

⚠️ Safety first
Safety is the most important part of any tool build. I take a few extra precautions when I build and when I use the mini saw.
- Always use a blade guard and keep the guard functional when cutting.
- Wear eye protection, hearing protection, and gloves when appropriate.
- Secure the workpiece with clamps. Do not hold small pieces with your hands near the blade.
- Check for secure fasteners and minimal blade runout before each use.
- Keep a fuse or circuit breaker appropriate to the motor to protect wiring and components.
- Use a splitter/riving knife for wood to reduce pinching and kickback.
- Never exceed the blade’s maximum RPM; verify compliance before first use and after any changes.
🔧 Useful hacks and practical tips
Over time I learned several tricks that make this mini saw more capable and safer.
- Use a sacrificial fence: Glue or screw a thin hardwood strip to the fence to create a zero-clearance edge so you can cut cleaner edges and avoid metal-to-metal contact that damages the fence.
- Anti-kickback strategy: Feed the material slowly and keep the blade depth to the minimum required. A small zero-clearance insert reduces tear-out and helps control the cut.
- Blade choice: Choose blades designed for the material. Fine teeth for plywood and thin metals, aggressive tooth counts for wood. Using the correct blade reduces noise, heat, and effort.
- Welded supports for rigidity: Short, stout welds tying the motor mount to the base reduce vibration more than long thin welds. If you are not confident welding, high-strength bolts and steel shim plates work fine.
- Test cuts: Do a few trial cuts on scrap to set speed, feed rate, and depth. I remember saying “Oh!” the first time the saw made a perfect cut with almost zero tear-out.
🔍 Finishing touches and maintenance
Keep the saw running well with a few regular maintenance steps.
- Clean debris from the guard and around the motor after each use.
- Check blade sharpness and replace or sharpen as soon as cutting quality degrades.
- Lubricate moving clamps and pivots if present.
- Inspect electrical connections for heat damage and replace frayed wires.
- Check that guards, the splitter/riving knife, and the NVR switch function correctly before each session.
❓ Frequently asked questions
- What blades can I use with this mini saw?
- Use blades sized for the motor RPM and the arbor size. For small table or mini saws a 3 to 5 inch blade is common. Choose material-specific blades (wood, non-ferrous, or abrasive/metal-cutting) and never exceed the blade’s maximum RPM.
- Can I use a battery motor from an old tool?
- Yes if the battery and motor provide enough sustained power and you can safely mount them. Ensure proper cooling and a secure electrical connection. Add a BMS/low-voltage cutoff to protect the battery and do not mix different packs or chemistries.
- Is welding necessary to build this saw?
- No. Welding gives a compact and rigid result but you can use bolted steel plates and brackets if you prefer. Just ensure the assembly is rigid and all fasteners are torque locked.
- What safety features should I prioritize?
- A solid blade guard (with a retractable lower guard), a reliable on/off NVR switch, a secure blade mount, and proper PPE are top priorities. For wood, use a splitter/riving knife. Verify the blade’s RPM rating is not exceeded. Do not remove guards for convenience.
🔚 Final notes
This mini circular saw has become one of my most used shop tools for detailed trimming and small panel work. It is simple to build with basic welding and metalworking skills and gives precise, repeatable results when set up correctly. If you follow the safety steps and use the right blade you will get clean cuts and a reliable tool.
Happy building and stay safe out there. When you mount the blade and make that first cut you might find yourself saying “Oh!” at how well it works.


