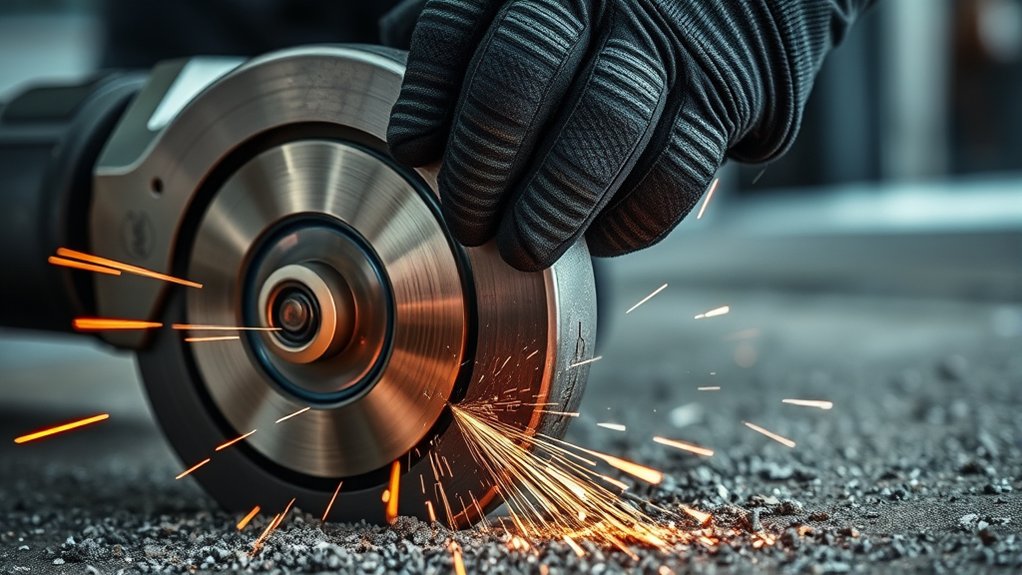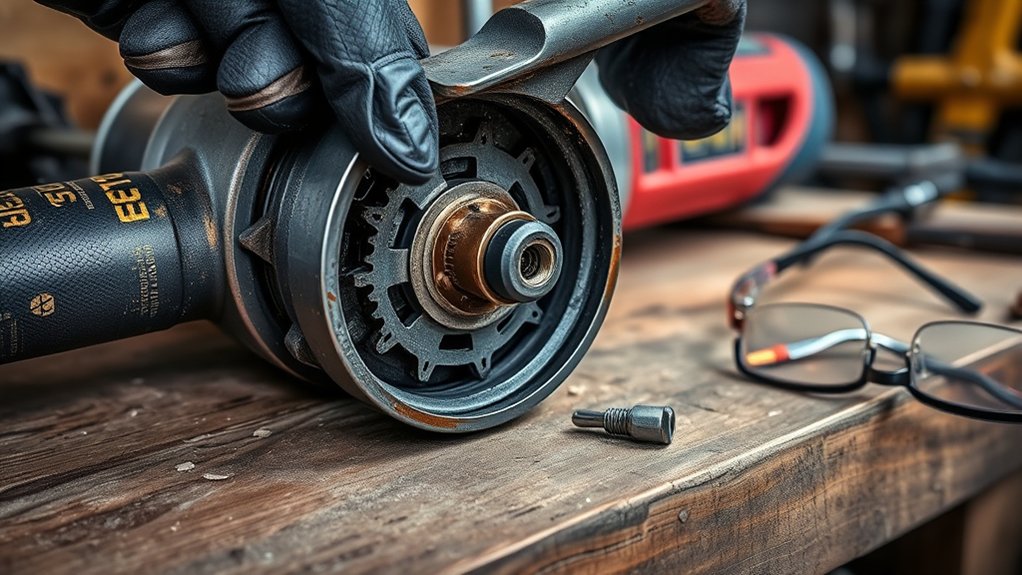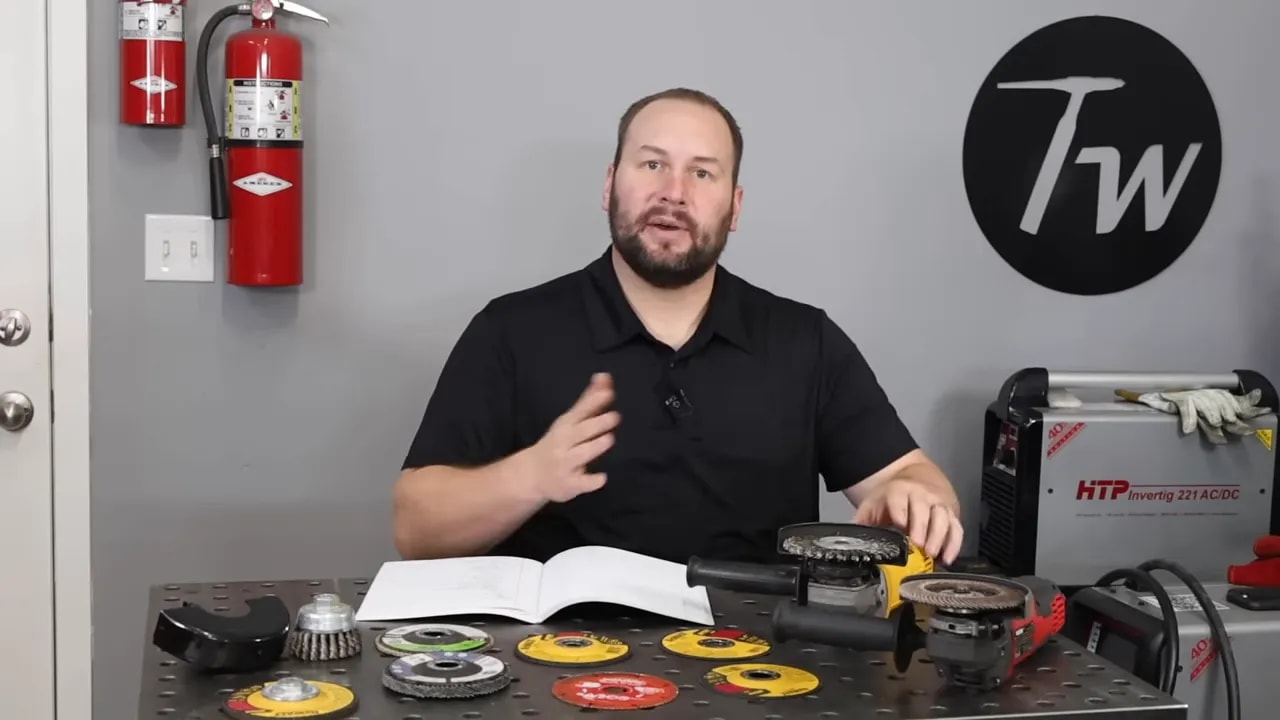
An angle grinder is a compact, high-speed handheld tool used to cut, grind, blend, deburr, clean, and finish metal or masonry. The tool is useful, but the wrong wheel, guard, mounting setup, or body position can turn a simple job into a serious injury. This guide explains how to choose a grinder, match accessories, mount wheels, prevent kickback, control dust and sparks, and use the tool safely.
Quick Answer
Use an angle grinder safely by matching the wheel’s diameter, arbor, type, material rating, and maximum RPM to the tool; fitting the correct guard and side handle; securing the work; wearing eye, face, hearing, and task-specific respiratory protection; and keeping the wheel straight without forcing or twisting it.
Key Takeaways
- The accessory must match the grinder’s size, mount, guard, speed, and intended material.
- Never side-grind with a thin cut-off wheel or remove the guard to fit a larger wheel.
- Flange and lock-nut orientation varies by grinder and wheel, so follow the tool manual instead of relying on one universal rule.
- Clamp the work and support it so the cut opens rather than pinches the wheel.
- A face shield supplements safety glasses; it does not replace them.
- Dust controls and respirator selection depend on the material, coating, and work environment.
At a Glance
| Time Required | About 10–15 minutes for inspection, setup, and a practice pass; the job itself varies |
| Difficulty | Beginner to intermediate, depending on the cut and material |
| Tools Needed | Angle grinder, compatible wheel, correct guard, side handle, clamps, mounting wrench if required, and PPE |
| Cost | Varies by grinder, guard, wheel, dust control, and protective equipment |
How an Angle Grinder Works
The motor turns a spindle at high speed. A bonded abrasive wheel, flap disc, wire brush, or diamond accessory mounts to that spindle and removes material at the contact point. The guard helps direct fragments and sparks away from the operator, while the side handle provides the control needed to resist kickback.
Before using any accessory, read both the grinder label and the accessory label. Confirm the wheel diameter, thickness, arbor or thread, wheel type, approved material, direction arrow when present, and maximum operating speed. The wheel’s maximum RPM must be equal to or greater than the grinder’s no-load speed.
A wheel that fits on the spindle is not automatically safe. Its diameter, speed rating, guard, flange system, and intended use must also match the grinder.
Which Angle Grinder Size, Power, and Switch Type Is Best?
Products Worth Considering

Powerful Performance: This corded angle grinder is equipped with10A pure copper motor provides 1200W high power and 13000 RPM no-load speed, delivering stable and strong power for cutting, grinding and polishing various materials efficiently. providing consistent power and efficiency for home DIY projects and light to medium tasks

【180° Rotating Body for Flexible Control】The grinder body can rotate 90° left or right, allowing better operating angles in tight spaces or different cutting positions. Helps improve comfort and control when working on metal pipes, bolts, steel bars, tiles, masonry, wood and more.

7-amp motor generates up to 11,000 RPM
Wheel Diameter
Angle grinders are usually identified by the largest wheel diameter the tool is designed to use. A 4-1/2-inch grinder is a practical choice for general metalwork because it is compact, easy to control, and supported by a wide range of accessories. Five- and six-inch tools offer more reach and capacity. Seven- and nine-inch grinders make deeper cuts and remove material faster, but they are heavier and demand more control.
Never install a wheel larger than the grinder, guard, or manual allows. Removing the guard to gain clearance changes the protection and can expose the operator to a wheel running at an unsafe speed.
Corded Power and Cordless Voltage
Amperage alone does not tell you how much useful torque a grinder will deliver. Compare rated power, wheel speed, the tool’s ability to hold speed under load, duty cycle, weight, and safety features. A compact corded grinder is efficient for long shop sessions. A brushless cordless grinder is convenient for field repairs and short cuts, but heavy grinding can drain batteries quickly.
Switch Types
- Slide switch: Compact and convenient. Some versions lock on, so check whether the tool has restart protection and understand how to switch it off quickly.
- Paddle switch: Usually stops when released, which can reduce run-on risk if you lose your grip. Some models still include a lock-on feature.
- Rear trigger handle: Common on larger grinders and useful when the tool’s weight calls for a longer two-handed stance.
Safety Features Worth Choosing
- Electronic brake: Stops the wheel sooner after the switch is released.
- Anti-kickback clutch or electronic control: Can reduce motor torque if the wheel suddenly binds.
- Restart protection: Helps prevent an unexpected restart after power is restored.
- Soft start: Reduces the startup jerk.
- Tool-free guard adjustment: Makes it easier to keep the guard in the correct position.
- Variable speed: Helpful only when the selected accessory is approved for the chosen speed range.
How to Match a Wheel to the Grinder
Use this compatibility check before every wheel change:
- Diameter: The accessory must not exceed the maximum wheel diameter on the grinder nameplate.
- Arbor or thread: Match the center hole, threaded hub, X-LOCK interface, or other mount exactly. Do not use makeshift reducers.
- Wheel type: Confirm whether the accessory is a grinding wheel, flap disc, Type 1/41 cut-off wheel, Type 27/42 depressed-center cut-off wheel, wire brush, sanding disc, or diamond wheel.
- Material: Use a wheel labeled for steel, stainless steel, aluminum, masonry, concrete, tile, or the exact material being worked.
- Speed: The wheel’s maximum operating RPM must be at least the grinder’s no-load RPM.
- Guard and flange: Use the guard and flange arrangement specified by the grinder and accessory manufacturers.
Warning: Do not assume that every thin cutting disc can be used with the standard open grinding guard. Many abrasive and diamond cutting wheels require a closed, two-sided cutting guard. Follow the grinder manual and wheel label.
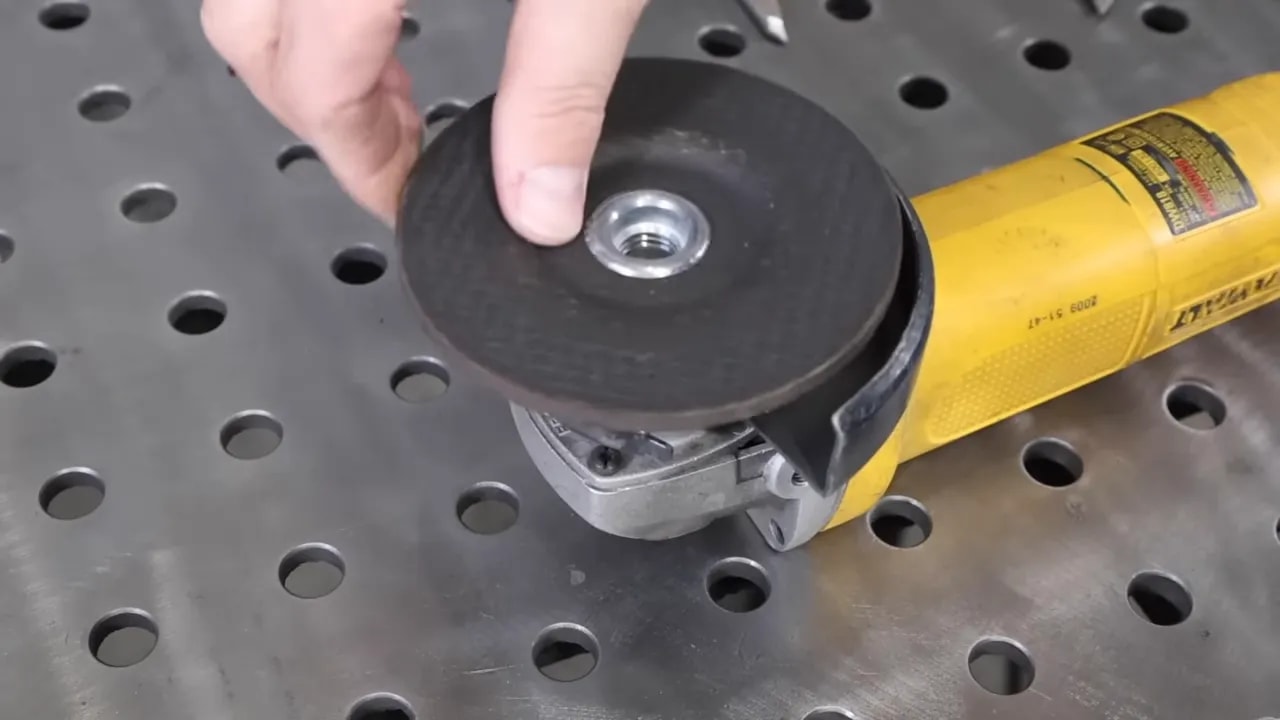
How to Mount Angle Grinder Wheels Correctly
Angle grinders use several mounting systems:
- Threaded hub: A wire cup, wheel, or other accessory screws directly onto a matching spindle thread. A common North American spindle is 5/8-11, but other threads exist.
- Plain arbor hole with flanges and lock nut: The wheel sits on an inner flange and is secured by an outer flange or lock nut.
- Tool-free interface: Systems such as Bosch X-LOCK use a compatible click-on wheel instead of a standard flange nut.
On many conventional flange systems, one lock-nut face is used for a thin wheel and the raised or shouldered face is used for a thicker depressed-center wheel. That is not a universal rule. The correct direction can change with wheel thickness, wheel type, flange design, and grinder model. The diagrams in the manufacturer’s manual take priority.
Step-by-Step Mounting Checklist
- Switch the grinder off. Unplug the cord or remove the battery.
- Inspect the guard, spindle, inner flange, outer flange, lock nut, and wheel for damage, contamination, or missing parts.
- Confirm the wheel label matches the grinder’s diameter, speed, mount, material, and guard.
- Install the correct guard and position its closed side between your body and the wheel.
- Seat the inner flange in the correct direction. Place the wheel flat and centered without forcing it over the spindle.
- Install the outer flange or lock nut in the orientation shown in the tool manual.
- Tighten it only enough to secure the wheel. Excess force can distort a flange or damage the wheel.
- Turn the wheel by hand to confirm it clears the guard and does not wobble.
- Reconnect power, hold the tool with two hands, stand out of the wheel’s plane, and let it reach full speed before touching the work.
The Makita XAG10 instruction manual, for example, shows that lock-nut and inner-flange direction varies with wheel type and thickness.
Wheel Types and When to Use Them
Products Worth Considering

Premium and Value: This 10-pack 4-1/2 x 7/8-inch metal/stainless steel cut-off wheel set is specially formulated for fast cutting in metals and stainless steel

Structural Components: A Cut off wheel typically comprises an abrasive, a binder, and air holes. The abrasive cuts, the binder shapes and strengthens, and the air holes remove swarf and dissipate heat to prevent damage to the cutting disc from overheating

【Fits All 4-1/2 Inch Angle Grinders】 PRETEC Cut Off Wheel is compatible with all 4-1/2 inch angle grinders with 7/8 inch arbor. The high rotating speed of up to 13,300 RPM, more than common 13,000 RPM, ensure maximum efficiency.
Abrasive Cut-Off Wheels
Thin Type 1/41 or Type 27/42 abrasive cut-off wheels are designed for edge cutting. They remove little material and can make fast cuts in sheet, bar, tubing, and fasteners when the wheel is matched to the metal.
- Do not side-grind: Side pressure can crack or break a thin cutting wheel.
- Keep it straight: Once the kerf is established, do not twist or change the wheel angle.
- Use the cutting guard: Fit the closed or two-sided guard required by the tool and wheel instructions.
- Use light pressure: Let the abrasive cut instead of forcing the wheel.
Diamond Cut-Off Wheels
Diamond wheels are available for metal, concrete, masonry, tile, and other materials. A diamond wheel intended for concrete is not automatically suitable for steel, and a metal-cutting diamond wheel is not a general-purpose masonry blade. Follow the material marking, rotation arrow, dry-or-wet-use instructions, and required guard. Do not claim one wheel type is universally safer or faster; performance depends on the wheel design and application.
Grinding Wheels
Bonded grinding wheels are thicker than cut-off wheels and are used for stock removal, beveling, shaping, and weld cleanup. Hold the wheel at the angle specified by the tool and wheel maker. For many common Type 27 grinding wheels, that is a moderate angle rather than laying the wheel flat. Avoid excessive pressure and keep the tool moving.
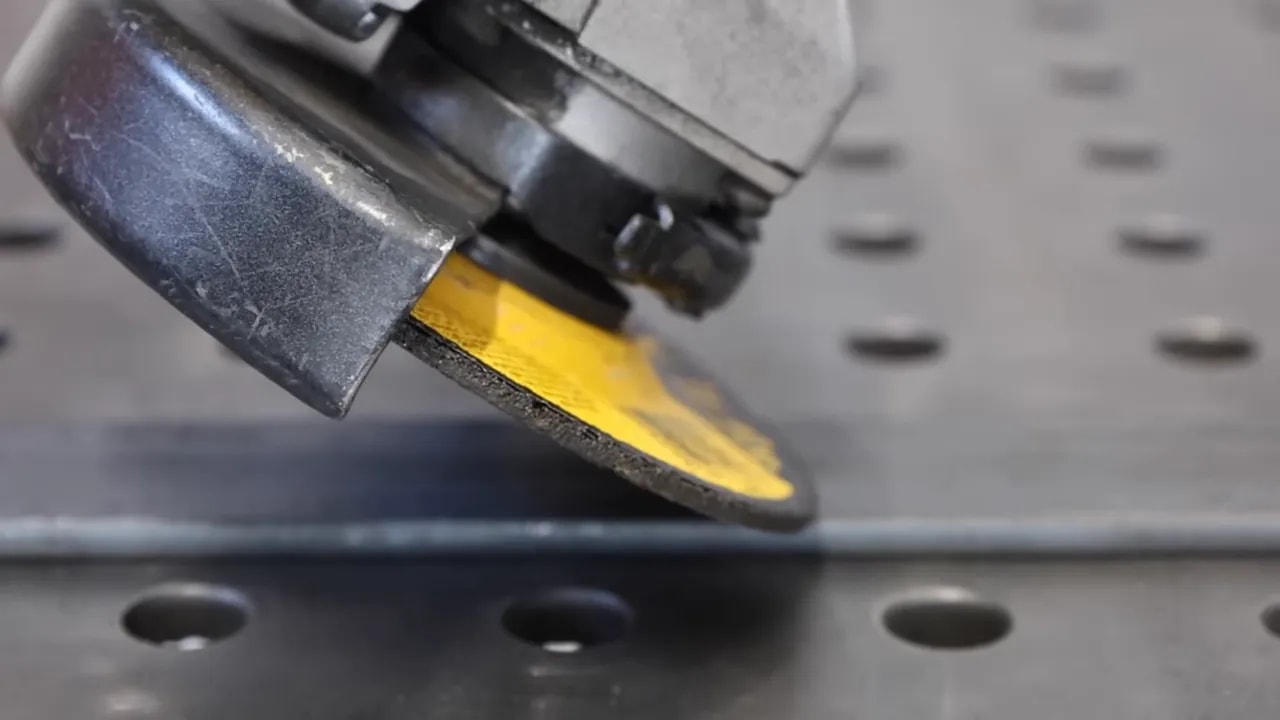
Flap Discs
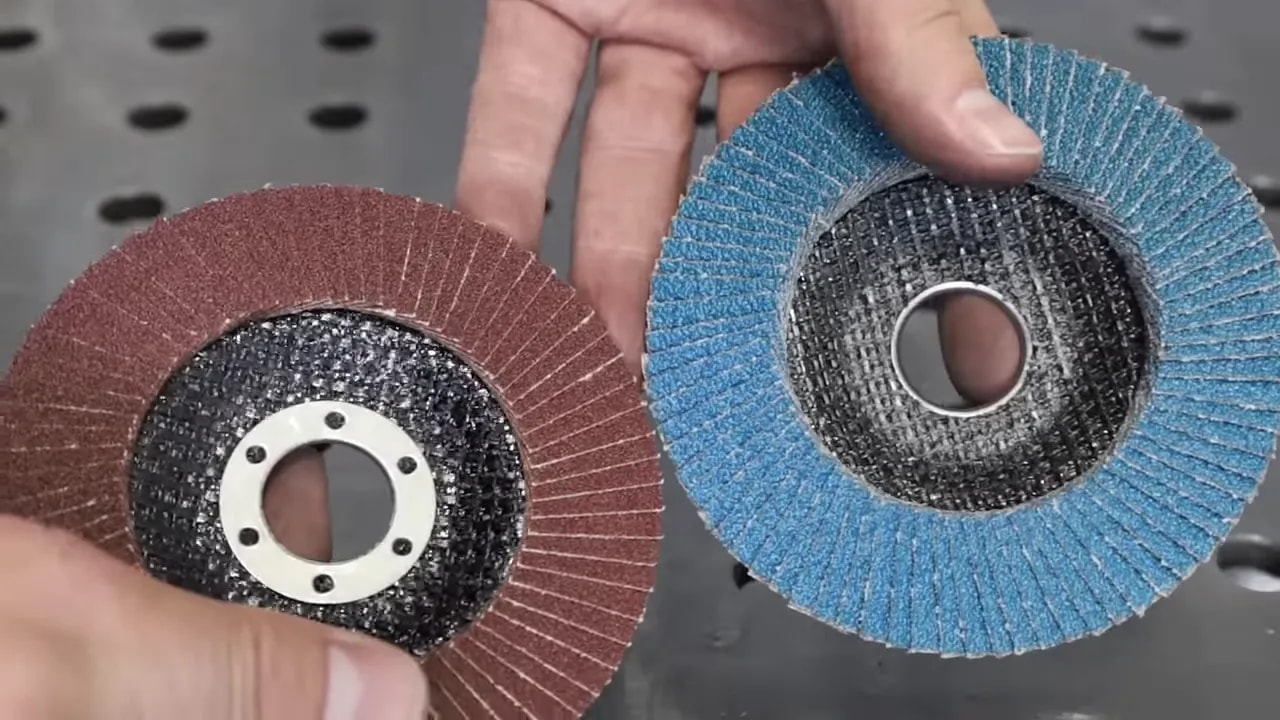
Flap discs use overlapping abrasive flaps to grind and blend in one step. They are useful for smoothing welds, removing light scale, and preparing metal for coating without the deep gouges a hard wheel can leave.
- Grain: Zirconia, ceramic, and aluminum-oxide products all have valid uses. Choose a disc labeled for the base material and task instead of relying on color alone.
- Shape: Type 27 flat discs suit flatter finishing work. Type 29 conical discs are generally more aggressive at an angle.
- Grit: Coarse grits remove material faster; finer grits leave a smoother finish.
- Stainless steel: Use a disc labeled for stainless and keep it dedicated to stainless work to reduce cross-contamination.
- Aluminum: Use an abrasive designed to resist loading or clogging on soft aluminum.
Wire Cup and Wire Wheel Brushes
Wire cup brushes clean broad surfaces, while wire wheels and stringer-bead brushes reach edges, grooves, and welds. Use only brushes rated for the grinder’s speed. Apply light pressure; forcing the brush bends the wires and can cause early wire breakage. Wear safety glasses with side protection and a face shield because loose wires can be thrown from the brush.
Sanding and Surface-Conditioning Discs
Fiber sanding discs require the correct backing pad and retaining nut. Nonwoven surface-conditioning discs are useful for light rust, paint residue, and blending. Use the guard or shroud required by the grinder and accessory instructions, and do not exceed the backing pad or disc speed rating.
Masonry and Concrete Wheels
Use a diamond or bonded wheel specifically labeled for the masonry material and the grinder. Cutting or grinding concrete, brick, block, mortar, and stone can create respirable crystalline silica. Use an approved shroud and dust extractor or a compatible water-delivery system when the tool and wheel allow it. OSHA explains that silica dust is created by grinding these materials and can cause serious lung disease.
Note: A disposable N95 is not a universal solution for grinding dust. The correct control may require dust extraction, wet methods, exposure assessment, and a properly selected and fitted respirator.
Correct Cutting Technique: Step by Step
- Inspect the setup. Confirm the correct wheel, guard, handle, flanges, and speed rating. Check the cord or battery and make sure the switch works normally.
- Secure the work. Clamp it firmly. Support tubing, bar, or sheet so the cut opens as it progresses instead of pinching the wheel.
- Plan the spark path. Aim sparks and debris away from your body, other people, hoses, cords, glass, vehicles, and combustible material.
- Set your stance. Use both hands, keep balanced footing, and position your body outside the likely kickback path.
- Start clear of the work. Let the grinder reach full speed before the wheel touches the material.
- Enter gently. Make a shallow scoring pass when it helps guide a long cut.
- Follow the tool’s rotation guidance. Use the rotation arrow and manufacturer instructions to orient the grinder. Do not rely on a universal “always push” or “always pull” rule.
- Keep the wheel square. Hold a cut-off wheel perpendicular to the work and do not twist it in the kerf.
- Let the wheel cut. Excess pressure creates heat, slows the wheel, and increases binding risk.
- Finish safely. Remove the wheel from the cut before switching off, then wait for a complete stop before setting the grinder down.
Pro Tip: Before cutting tubing or bar, look at where the offcut’s weight will move. Add supports or reposition clamps so gravity cannot close the kerf and trap the wheel.
What Causes Kickback and How to Prevent It
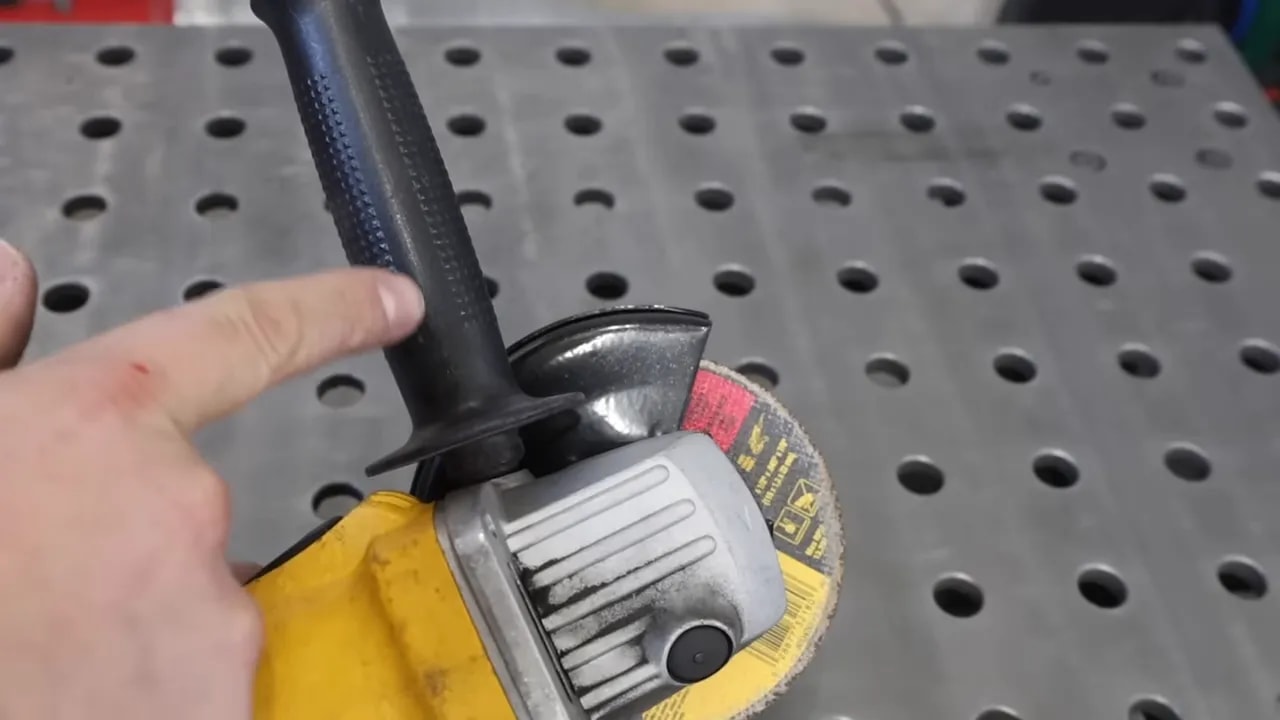
Kickback is a sudden reaction to a pinched, bound, or snagged rotating wheel. The grinder can move rapidly in the direction opposite the wheel’s movement at the pinch point.
- Keep the side handle installed and maintain a firm two-handed grip.
- Do not start the tool with the wheel touching the work.
- Avoid bouncing the wheel into corners, sharp edges, or weld toes.
- Support the work so the kerf stays open.
- Do not reach across the wheel or place your body in line with it.
- Use extra care when restarting in an existing cut. Center the wheel in the kerf before bringing it back to speed.
- Stop if the wheel slows sharply, chatters, wanders, or binds. Disconnect power and correct the setup.
Grinding and Weld Preparation Best Practices
- Use the recommended angle: Many grinding wheels work at a moderate angle, while flap discs use a shallower angle. Follow the accessory label and tool manual.
- Keep moving: Staying in one spot can gouge, overheat, warp, or discolor the work.
- Use staged grits: Start coarse for heavy removal, then move to a finer grit for blending and coating preparation.
- Protect dimensions: Mark the limit of material removal and check often. A grinder can remove more metal than expected.
- Prepare the weld zone: Remove scale, rust, paint, oil, moisture, and other contaminants from the joint and nearby heat-affected area.
- Avoid thinning the base metal: Blend the weld gradually instead of digging into the parent material.
Material-Specific Hazards
Painted or Coated Metal
Grinding unknown paint, primers, plating, or sealants can release hazardous dust or fumes. Lead-based coatings are a special concern. Identify the coating before work, use local exhaust or other controls, and follow workplace respiratory-protection rules. Do not treat a basic dust mask as protection against every coating hazard.
Galvanized Steel
Removing zinc coating creates zinc-containing dust, and welding the freshly exposed area can create zinc oxide fumes. Use ventilation and the controls required for the task. Keep grinding residue away from food and wash before eating or drinking.
Stainless Steel
Use accessories labeled for stainless steel. Keep stainless-only abrasives separate from carbon-steel abrasives to reduce iron contamination. Control dust and avoid overheating, which can discolor the surface and damage the finish.
Aluminum
Aluminum can load or clog an unsuitable abrasive. Use a wheel or flap disc specifically approved for aluminum. Keep aluminum dust away from ignition sources and do not mix it with incompatible metal dust in a collector.
Safety Checklist: Do These Every Time
The OSHA angle grinder safety guidance emphasizes correct wheels, guards, speed ratings, secured work, two-handed control, and suitable PPE.
- Guard: Keep the correct guard installed and adjusted between you and the wheel. OSHA’s portable-grinder rule requires guards to deflect fragments away from the operator.
- Side handle: Install it securely and use both hands.
- Eye and face protection: Wear safety glasses or goggles with side protection and a face shield over them.
- Hearing protection: Grinding noise can be hazardous. NIOSH treats noise at or above 85 dBA as hazardous and recommends correctly selected protection when exposure cannot be reduced enough.
- Respiratory protection: Use dust collection or wet methods where appropriate. Select a respirator for the actual dust, metal, coating, or silica hazard and use it correctly.
- Clothing: Wear snug-fitting gloves and non-melting or flame-resistant work clothing suitable for sparks. Remove jewelry and secure long hair.
- Wheel condition: Reject cracked, chipped, warped, contaminated, damp, dropped, or otherwise damaged wheels. Check any date code or use-by marking the manufacturer provides.
- Speed: Never use a wheel whose maximum RPM is lower than the grinder’s no-load RPM.
- Workpiece: Clamp it. Do not hold a small part in one hand while grinding with the other.
- Fire prevention: Remove or shield combustibles. Do not grind where combustible dust or vapor may be present. Follow hot-work rules where they apply.
- Power: Unplug the tool or remove the battery before changing accessories, clearing a jam, or servicing the grinder.
- Startup: Stand out of the wheel plane and let the tool reach full speed before contact.
- Shutdown: Wait until the wheel stops completely before setting the tool down.
Common Mistakes and How to Avoid Them
- Using a cut-off wheel for side grinding: Use a grinding wheel or flap disc instead.
- Assuming one nut orientation fits every wheel: Follow the assembly diagram for the exact grinder, flange, and wheel.
- Using the standard grinding guard for every cut: Install the cutting guard required by the wheel and tool manual.
- Installing an oversized wheel: Use only the diameter listed on the grinder.
- Not clamping or supporting the work: Prevent movement and keep the kerf from closing.
- Forcing the grinder: Replace a glazed, loaded, worn, or incorrect wheel instead of adding pressure.
- Ignoring dust: Identify the material and coating, then use suitable engineering controls and PPE.
- Using a toothed saw blade: Do not install circular-saw or chain-style blades unless the grinder manufacturer expressly approves the exact accessory and guard.
- Setting down a spinning wheel: Wait for a full stop.
Quick Maintenance and Accessory Checklist
- Compatible cut-off wheels, grinding wheels, and flap discs in the needed grits
- Correct grinding guard and cutting guard
- Manufacturer-specified inner flange, lock nut, and pin wrench or approved tool-free nut
- Side handle
- C-clamps, locking pliers, or a vise
- Safety glasses or goggles, face shield, hearing protection, gloves, and task-specific respiratory protection
- Dust shroud and compatible extractor for masonry work where required
Keep the grinder’s ventilation openings clear using the method in its manual. Inspect the cord, plug, battery, guard clamp, handle threads, spindle, flanges, and switch. Store bonded wheels dry and protected from impact, heat, chemicals, and distortion. Do not improvise a ring test on a thin cut-off wheel; use the inspection method specified by the wheel maker.
Practical Examples and Short Workflows
Cutting 16-Gauge Steel Sheet
- Mark the cut and clamp the sheet to a stable bench.
- Support the sheet so vibration is controlled and the kerf will not close.
- Install a thin metal cut-off wheel approved for the grinder. Mount the flange and nut exactly as shown in the manual.
- Fit the correct cutting guard and side handle, then put on PPE.
- Let the wheel reach full speed and make a light scoring pass.
- Follow the score with steady, light pressure while keeping the wheel straight.
- Wait for a complete stop, disconnect power, and change to a flap disc to deburr the edge.
Removing Mill Scale Before Welding
- Secure the work and identify any coating or contamination.
- Choose a coarse flap disc or grinding wheel labeled for the steel.
- Hold the accessory at its recommended working angle.
- Move continuously until the joint area is clean, bright metal.
- Blend the cleaned area far enough from the joint to keep scale, rust, paint, and oil out of the weld.
- Remove abrasive dust before welding.
Cutting Concrete or Masonry
- Confirm the grinder, diamond wheel, guard, and dust-control system are approved for the material.
- Inspect for hidden electrical, plumbing, gas, or structural hazards before cutting.
- Use a compatible shroud with a dust extractor or a permitted water-delivery method.
- Wear eye, face, hearing, and respiratory protection selected for the exposure.
- Make controlled passes without forcing the wheel or exceeding its depth capacity.
- Collect slurry or dust safely and clean the area without dry sweeping airborne silica dust.
Troubleshooting Angle Grinder Problems
| Problem | Likely Cause | Safe Response |
| Wheel wobbles | Wrong flange orientation, dirt, damaged wheel, poor seating, or incompatible arbor | Stop immediately, disconnect power, and rebuild the mounting setup with correct undamaged parts |
| Cut is slow or wheel turns dark | Wrong wheel, glazed abrasive, excessive pressure, low battery, or pinching kerf | Stop, support the work correctly, and replace the wheel with one suited to the material |
| Grinder kicks or climbs | Wheel snag, wrong direction, side load, or poor body position | Release the switch, keep control until the wheel stops, then correct the setup and technique |
| Excessive sparks or burning | Too much pressure, unsuitable abrasive, or staying in one spot | Reduce pressure, keep moving, and verify the accessory is correct |
| Tool stops under load | Overload protection, binding, depleted battery, or tool fault | Remove the tool from the work, disconnect power, clear the cause, and follow the reset procedure in the manual |
Frequently Asked Questions
What disc should I use to cut metal quickly?
Use a thin abrasive cut-off wheel or a metal-cutting diamond wheel that is labeled for the material, grinder diameter, arbor, and speed. Fit the required cutting guard and keep the wheel straight. The fastest safe option depends on the metal thickness and wheel design.
Can I use a cut-off wheel to grind on the side?
No. Thin cut-off wheels are intended for edge cutting and can fail under side pressure. Use a grinding wheel, flap disc, or another accessory specifically rated for side grinding.
How do I check whether an angle grinder wheel is safe?
Read the label and inspect for cracks, chips, warping, contamination, moisture damage, or a damaged center. Confirm the diameter, arbor, wheel type, material, guard, and maximum RPM. If the wheel was dropped or its history is unknown, replace it. Use only the test method specified by the manufacturer.
What PPE is essential for angle grinding?
Wear safety glasses or goggles with side protection and a face shield over them, plus hearing protection, snug work gloves, suitable clothing, and protective footwear. Add dust control and a properly selected respirator when the material or coating creates an inhalation hazard.
Is a cordless angle grinder a good alternative?
Yes. Cordless grinders are useful for field work, quick cuts, and locations without convenient power. For long grinding sessions, a corded tool may avoid battery changes. Compare wheel capacity, speed, safety features, runtime, and ergonomics rather than voltage alone.
Why does my angle grinder wheel wobble?
Common causes include a damaged wheel, dirt between mounting surfaces, the wrong flange or nut direction, an incompatible arbor, or a bent spindle. Stop using the grinder immediately, disconnect power, and inspect the complete mounting system.
Can I cut concrete with an angle grinder?
Yes, when the grinder, diamond wheel, guard, and dust-control equipment are approved for concrete. Concrete cutting can create respirable crystalline silica, so use the required shroud, extraction or wet method, and respiratory protection for the exposure.
Final Takeaways
An angle grinder is one of the most useful tools in a metal or masonry shop, but safe results depend on the entire setup. Match the wheel to the tool and material, use the specified flange and guard, clamp and support the work, hold the grinder with two hands, and avoid side pressure or twisting.
Inspect every wheel before mounting and stop whenever the tool vibrates, binds, slows sharply, or behaves differently from normal. Let the manual—not habit—decide flange orientation, guard type, accessory limits, and operating direction.
Sources
- OSHA Angle Grinder Safety — wheel selection, guards, speed ratings, secured work, sparks, and PPE
- OSHA 29 CFR 1910.243: Guarding of Portable Powered Tools — portable-grinder guard positioning and fragment protection
- OSHA Safe Use of Portable and Hand-Held Power Tools — wheel inspection, mounting, startup position, speed, and manufacturer instructions
- Makita XAG10 Instruction Manual — guard selection, two-handed use, kickback precautions, and wheel-specific flange orientation
- NIOSH: About Occupational Hearing Loss — hazardous-noise guidance and the 85 dBA reference level
- OSHA: Crystalline Silica — silica generation and health risks during concrete and masonry grinding