How to Clamp Workpieces for Angle Grinder Cutting
What’s in This Article
- Before You Begin Angle Grinder Clamping
- Why Proper Clamping Is Essential for Safe Angle Grinder Use
- Preparing Your Work Area for Safe Clamping
- Choosing the Best Clamping Devices for Workpieces
- Step-by-Step Guide to Securely Clamp Your Workpiece
- How to Apply Even Pressure When Clamping Workpieces
- What Mistakes Can You Make When Clamping?
- How to Ensure Stability Before Grinding
- Essential Safety Checks Before Operating the Angle Grinder
- What to Do if Your Workpiece Shifts During Cutting?
- Frequently Asked Questions
A loose workpiece can turn a simple angle grinder cut into a serious safety risk. The material can shift, the disc can bind, and the grinder can kick back before you react. This guide shows you how to clamp workpieces for angle grinder cutting with a safer setup, better control, and cleaner cuts.
Quick Answer
To clamp workpieces for angle grinder cutting, place the material on a flat, stable surface and secure it with a bench vise, C-clamps, bar clamps, or a suitable fixture. Keep the clamps away from the cut line, tighten them evenly, and test the setup with a gentle shake before you cut. Stop right away if the workpiece moves.
Key Takeaways
- Clamp the workpiece before every angle grinder cut so it can’t shift or vibrate.
- Choose a clamp that fits the material size, shape, weight, and surface.
- Keep your cut line clear so the disc never touches the clamp.
- Use more than one clamp for long, heavy, thin, or odd-shaped workpieces.
- Stop the grinder at once if the material moves during cutting.
Before You Begin Angle Grinder Clamping
Set aside a few minutes to prepare before you start the grinder. A rushed setup can cause poor cuts, damaged material, or injury.
You may need a stable workbench, bench vise, C-clamps, bar clamps, quick-action clamps, magnetic holders, jigs, or scrap blocks for support. You should also wear eye protection, hearing protection, gloves suited to grinding work, and a dust mask or respirator when the material creates harmful dust.
Estimated time: Most clamping setups take 3 to 10 minutes, depending on the workpiece size and shape.
Why Proper Clamping Is Essential for Safe Angle Grinder Use
When you use an angle grinder, proper clamping protects your safety and improves cut accuracy. A secure workpiece helps stop movement that can cause rough cuts, disc binding, or kickback.
Loose material can pull your hands toward the disc or make the grinder jump. Clamps such as quick-action clamps, C-clamps, bench vises, or magnetic holders give you a more stable setup and better grinder control.
A firmly secured workpiece also helps you hold a steady cutting angle. That can reduce wasted material and give you a cleaner finished edge.
Preparing Your Work Area for Safe Clamping
Prepare your work area before you clamp the material. Clear the floor, set up bright lighting, and make sure you have enough room to stand in a stable position.
Work Area Organization
A well-organized work area helps you clamp workpieces with less risk. Remove clutter so you can move freely around the grinder and the cut line.
Use a sturdy, flat surface that will not rock or shift during cutting. Keep flammable materials well away from sparks, and move rags, paper, sawdust, fuel, and solvents out of the grinding area.
Adequate Lighting Setup
Good lighting helps you see the cut line, clamp position, and disc path. Use overhead lights with a task lamp when shadows hide part of the workpiece.
Place the lights so they reduce glare on metal surfaces. Clean dusty light covers before you start, since dull lighting makes accurate clamping harder.
Ventilation and Dust Control
Ventilation and dust control matter when you cut metal, masonry, tile, or coated material. Open doors or windows when safe, and use an exhaust fan or dust control setup when the job creates airborne dust.
Clean the area before cutting so dust does not build up on the floor. Wear a dust mask or respirator when the material can release harmful particles.
Warning: Sparks from an angle grinder can ignite nearby flammable materials, so clear the area before you start.
Choosing the Best Clamping Devices for Workpieces
The best clamp depends on the workpiece shape, size, weight, and material. Your goal is simple: hold the material firmly without crushing, bending, or blocking the cut.
Products Worth Considering

Universal Vise: Maximum opening of jaw is up to 2.79'', jaw width 3.2''. Base clamping range increased to 4'' for various thicknesses. Designed for home, workshop, professional use, general purpose and light work, and ideal for woodworking, cutting conduit, drilling, gluing, metalworking, sanding or planing, sawing, and more!

【Universal Table Vise 】 Maximum opening of jaw is up to 3 inch/76.2mm, jaw width 2.8 inch/71mm, This vise fits most tables and workbenches of various thicknesses and is suitable for a variety of clamping angles,It can not only fix regular objects such as wooden strips, but also irregular objects such as walnuts.
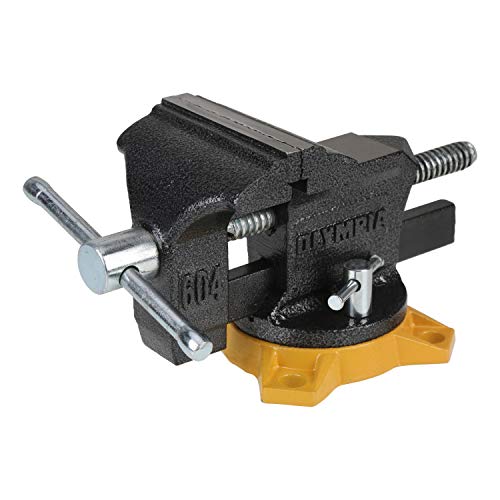
BENCH VISE: This vise features a heavy reinforced 4-lug base, polished anvil & anvil horn for shaping, swivel lock leaver, permanent pipe jaws, replaceable hardened steel jaw faces & a heavy-duty machined spindle & hand.
Types of Clamping Devices
Bench vises hold many metal and wood workpieces securely. They work well for short pieces, small parts, and cuts near an edge.
C-clamps work well for many temporary setups. They can hold flat stock, angle iron, tubing, or sheet material when you place them on a stable surface.
Quick-action clamps help when you need fast setup and adjustment. Magnetic holders can help with ferrous metal, but you should not rely on them if vibration may break the hold.
Jigs and fixtures support repeat cuts, small parts, and odd shapes. They can improve accuracy when a normal clamp does not give enough contact area.
Selecting Appropriate Clamp Size
Choose a clamp that opens wide enough for the workpiece and support surface. The clamp should also have enough throat depth to reach a solid contact point.
For larger or heavier material, use bar clamps, a bench vise, or more than one C-clamp. For thin material, use scrap blocks to spread pressure and reduce dents.
Make sure your clamp can handle the workpiece weight and cutting force. A clamp that looks tight can still slip if it grips at a poor angle.
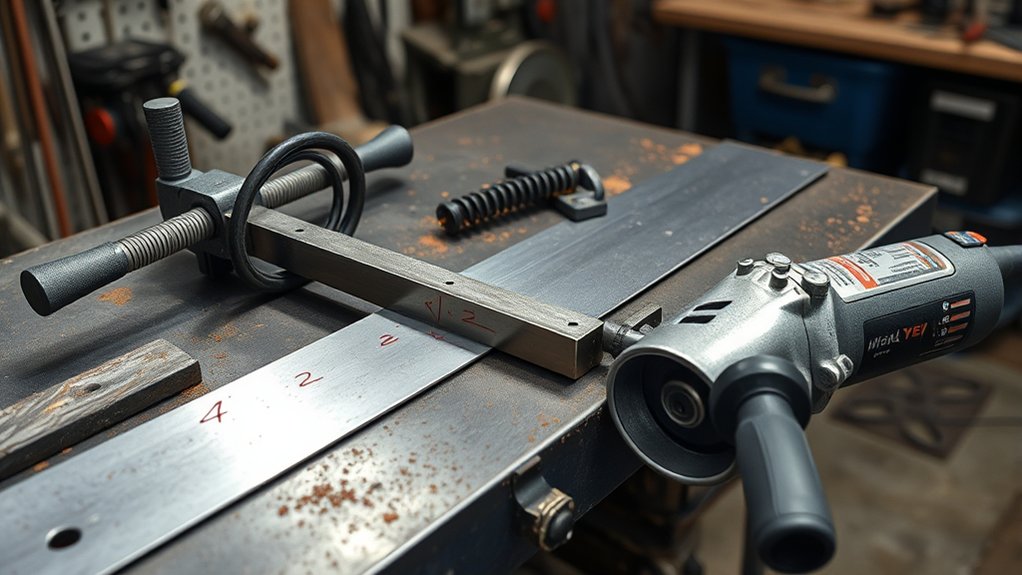
Step-by-Step Guide to Securely Clamp Your Workpiece
Follow these steps before you start cutting. Each step helps you build a stable setup and keep the grinder under control.
- Choose the right clamp. Pick a bench vise, C-clamp, bar clamp, quick-action clamp, magnetic holder, or fixture that matches your material.
- Place the workpiece on a stable surface. Keep it flat, supported, and close enough to the edge for a clear cutting path.
- Mark the cut line clearly. Make sure the line stays visible after you place the clamps.
- Position the clamps away from the disc path. Leave enough space so the grinder cannot hit the clamp.
- Tighten the clamps evenly. Use firm pressure, but don’t crush, bend, or dent the material.
- Support loose ends. Use extra clamps, blocks, or stands for long, heavy, or flexible pieces.
- Test the setup. Shake the workpiece gently and adjust the clamps if you feel movement.
For larger or irregular shapes, use multiple clamps to spread pressure. That helps stop the workpiece from twisting, lifting, or vibrating during the cut.
Products Worth Considering
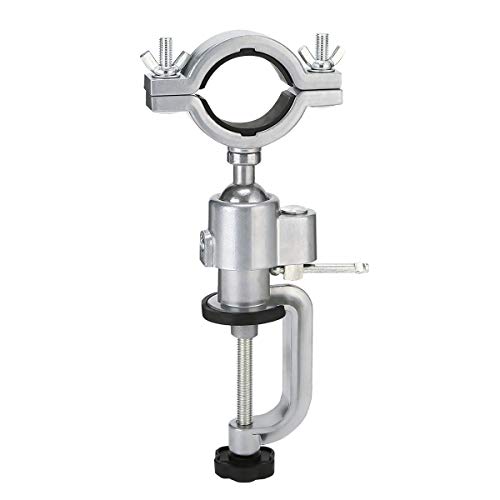
Grinder Holder Opening Distance: 35-65mm(1-3/8"~2-5/9")

Sutekus electric drill stand holder is made of aluminum alloy, durable and lightweight

Non-Slip & Stable: Designed with anti-slip textured jaws, this tilting vise delivers up to 7KN of clamping force to hold workpieces securely. It effectively resists slipping, ensuring steady performance for drilling, engraving, grinding, and more
How to Apply Even Pressure When Clamping Workpieces
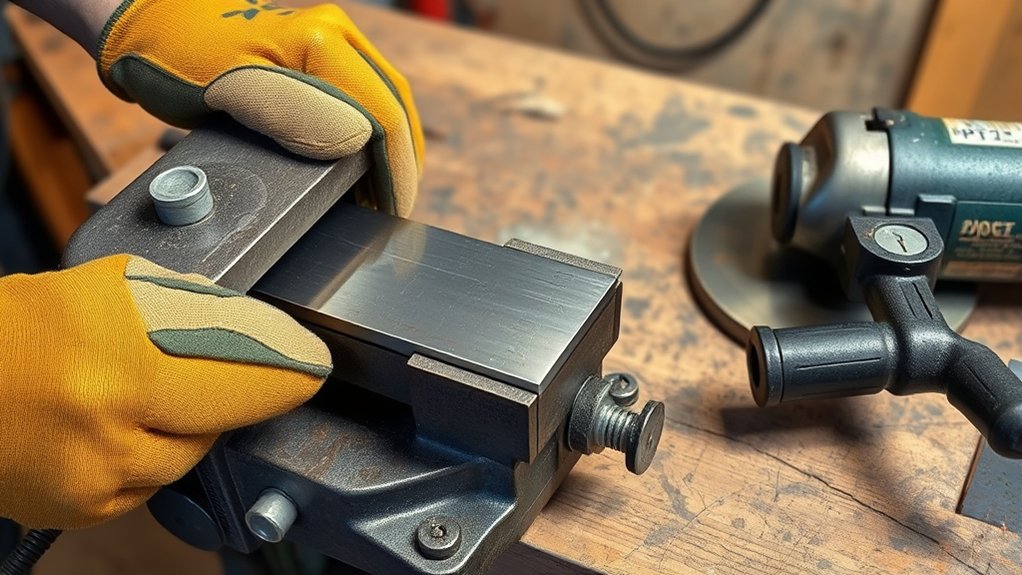
Even pressure helps keep the workpiece stable during cutting. Start by placing clamps at balanced points along the material instead of loading all pressure on one end.
Tighten each clamp a little at a time when you use more than one. This method reduces twisting, warping, and clamp marks.
Keep every clamp away from the cutting line. Before you cut, check that the grinder body, guard, and disc can move through the full cutting path without hitting the clamp.
Pro tip: Use scrap wood or metal pads between the clamp jaw and workpiece when you need to protect the surface.
What Mistakes Can You Make When Clamping?
Small clamping mistakes can lead to poor cuts and unsafe grinder control. Check for these common issues before you pull the trigger.
| Mistake | Consequence | Prevention |
|---|---|---|
| Inadequate securing | Movement and inaccurate cuts | Use proper clamps |
| Using inappropriate clamps | Slipping or breakage | Choose the right clamps |
| Ignoring wear and damage | Weak holding power | Inspect clamps often |
| Over-tightening | Deformation and damage | Apply even pressure |
| Cluttered workspace | Higher accident risk | Keep the area clear |
Over-tightening can damage thin sheet metal, tubing, soft wood, or finished surfaces. Under-tightening can let the material shift as soon as the disc contacts the workpiece.
How to Ensure Stability Before Grinding
Stability is essential for safe and effective grinding. Before you start the grinder, use this short checklist:
- Secure your workpiece with a bench vise, C-clamp, bar clamp, or suitable fixture.
- Place the material on a flat, stable surface to reduce vibration.
- Clamp the material at a comfortable working height so you can control the grinder.
- Check that the clamp does not block the cutting disc, guard, or grinder body.
- Test the workpiece with a gentle shake before you cut.
If you work with larger or irregularly shaped materials, use multiple clamps to spread pressure. This helps stop shifting and gives you better control through the full cut.
Essential Safety Checks Before Operating the Angle Grinder

Before you start grinding, inspect the grinder, disc, guard, cord, and workpiece setup. These checks help reduce the risk of disc breakage, kickback, and loss of control.
| Safety Check | What to Look For | Why It Matters |
|---|---|---|
| Angle grinder | Cracks, loose parts, or unusual wear | Helps prevent accidents |
| Cutting disc | Sharp, intact, correct type, and properly fitted | Reduces breakage risk |
| Guard | Secure and adjusted toward the spark path | Helps block debris |
| Power cord | Cuts, exposed wire, or loose plug | Reduces electrical hazards |
| Workpiece | Stable, supported, and clear of the disc path | Improves control |
Run the grinder briefly at full speed away from the workpiece before you start cutting. Stop if you notice vibration, wobble, strange sound, or disc damage.
What to Do if Your Workpiece Shifts During Cutting?
If your workpiece shifts during cutting, stop the grinder immediately. Do not try to finish the cut while the material moves.
- Release the trigger: Let the disc stop before you touch the workpiece or clamps.
- Check the setup: Look for loose clamps, poor contact points, or weak support.
- Reposition the clamps: Move each clamp to a stronger contact point and tighten evenly.
- Add more support: Use another clamp, block, stand, jig, or fixture if the workpiece still moves.
- Inspect the disc: Check for chips, cracks, or warping before you restart.
Restart only when the workpiece feels solid and the grinder passes your safety check. If the material keeps shifting, change your setup instead of forcing the cut.
Frequently Asked Questions
What Are 10 Safety Precautions Before Using a Grinding Machine?
Wear eye, face, hand, hearing, and respiratory protection when the job calls for it. Inspect the grinder, check the disc, secure the guard, clamp the workpiece, clear flammable items, manage dust, check the cord, keep both hands on the tool, and stop if anything feels wrong.
How Do You Safely Cut Metal With an Angle Grinder?
Use the correct cutting disc, clamp the metal firmly, and keep the cut line clear. Let the grinder reach full speed, apply light steady pressure, and keep your body out of the direct spark and kickback path.
What Safety Precautions Should You Take When Using an Angle Grinder?
Wear proper protective gear, use the guard, inspect the disc, and clamp the workpiece before cutting. Keep the work area clean, control dust and sparks, and stop the tool if you feel vibration or movement.
How Do You Use an Angle Grinder Step by Step?
Choose the correct disc, inspect the grinder, clamp the workpiece, and mark your cut line. Start the grinder away from the material, guide it with both hands, use light pressure, and let the disc stop fully before setting the tool down.
Can You Hold a Workpiece by Hand While Cutting With an Angle Grinder?
No, you should not hold a workpiece by hand during angle grinder cutting. Clamp it to a stable surface so both hands can control the grinder.
Where Should You Place Clamps Before Cutting?
Place clamps on solid contact points that hold the workpiece flat and steady. Keep them far enough from the cut line so the disc, guard, and grinder body cannot hit them.
Safety Disclaimer: This article is for informational purposes only and does not replace professional safety training. Always follow your tool manual, workplace rules, and local safety requirements before using an angle grinder.
Conclusion
Safe angle grinder cutting starts with a workpiece that cannot move. Choose the right clamp, support the material, keep the cut path clear, and test the setup before you start.
If the workpiece shifts, stop the grinder and fix the setup before you continue. A few minutes of careful clamping can give you safer cuts, cleaner results, and better control on every project.


