Removing an angle grinder guard may give you a little more room or a clearer view, but it also removes one of the tool’s main safety barriers. The correct guard helps shield you from the spinning wheel, sparks, workpiece debris, and fragments if an abrasive wheel breaks. In most grinding and cutting jobs, the safer answer is to keep the proper guard installed and change the tool, accessory, or setup instead.
Quick Answer
No. During grinding or cutting, keep the correct guard installed and positioned between you and the wheel. Removing it exposes you to wheel contact, sparks, debris, and broken fragments. Omit a guard only when the exact tool manual expressly allows it for a specific sanding or surface-finishing setup.
Key Takeaways
- Keep the correct guard installed for grinding and cutting operations.
- Use the guard, wheel, flange, arbor size, and speed rating approved for your exact grinder.
- A grinding guard and a cutting guard are not always interchangeable.
- Disconnect the plug or battery before adjusting the guard or changing an accessory.
- Wear primary eye protection, add a face shield, and control dust, sparks, noise, and hazardous material exposure.
- Choose another tool or reposition the work when the guard prevents safe access.
What’s in This Article
- Why Angle Grinder Guards Matter
- What OSHA and Tool Manuals Require
- Risks of Removing an Angle Grinder Guard
- Should You Ever Remove the Guard?
- Matching the Guard to the Wheel
- Why People Remove Grinder Guards
- Angle Grinder Pre-Use Check
- Safe Angle Grinder Operation
- Safer Alternatives When the Guard Blocks Access
- When to Stop Work Immediately
- Frequently Asked Questions
Why Angle Grinder Guards Matter
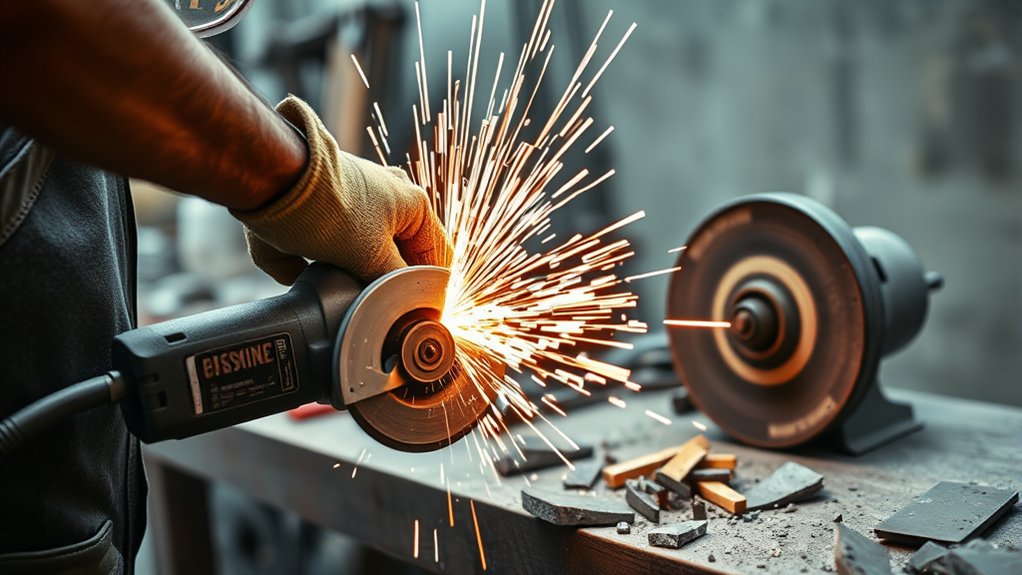
An angle grinder guard is more than a spark deflector. It creates a barrier between you and part of the rapidly spinning wheel. It also helps redirect sparks, grit, metal chips, and fragments away from your body.
The guard becomes especially important if the wheel binds, cracks, is mounted incorrectly, or is struck from the side. Abrasive and cutting wheels rotate fast enough to throw fragments with considerable force. The OSHA guidance for portable abrasive-wheel tools states that guards protect workers from both the moving wheel surface and flying fragments if a wheel breaks.
A guard cannot make an unsafe setup safe by itself. You still need the correct wheel, secure flanges, a side handle, two-handed control, proper body position, personal protective equipment, and a workpiece that cannot move or pinch the wheel.
The guard is a last line of defense for the moment when the wheel, workpiece, or operator does not behave as expected.
What OSHA and Tool Manuals Require
For covered U.S. workplaces, OSHA rules address guarding on portable abrasive-wheel tools. The general-industry portable-tool standard requires guarding on right-angle-head grinders and limits how much of the wheel may remain exposed. The construction abrasive-wheel standard also generally requires guards on portable abrasive wheels.
Those rules contain narrow exceptions for particular equipment and work conditions. They are not blanket permission to remove the guard for better visibility, faster work, or access to a tight space. Employers must also consider other applicable requirements, including PPE, training, hot work, respiratory protection, and silica controls.
Whether you are at work or in a home shop, the exact grinder manual and accessory instructions matter. Manufacturers specify which guard, flange, wheel type, diameter, and operating speed may be used together. A wheel that fits on the spindle is not automatically safe or approved.
Note: Some manuals allow the guard to be omitted for narrowly defined conventional sanding or surface-finishing operations. That exception does not apply to ordinary grinding wheels, cutting wheels, flap discs, wire wheels, or other accessories unless the manual specifically says it does.
Risks of Removing an Angle Grinder Guard
Removing the guard increases your exposure to several hazards at the same time. Experience may improve your control, but it cannot prevent every wheel defect, bind, impact, or workpiece movement.
- Wheel contact: An exposed wheel can cut skin, gloves, clothing, cords, hoses, or nearby objects.
- Wheel fragments: A damaged, overspeed, poorly mounted, or side-loaded wheel can break and throw pieces outward.
- Kickback: If a cutting wheel is pinched or stopped suddenly, the grinder may drive toward or away from you along the wheel’s path.
- Flying workpiece debris: Metal chips, abrasive grit, scale, masonry particles, wire bristles, and coating fragments can strike the face and body.
- Sparks and fire: Sparks can ignite paper, sawdust, fuel, solvents, dry vegetation, clothing, insulation, and combustible dust.
- Hazardous dust: Concrete, mortar, stone, coatings, and some metals can release dust or contaminants that require collection, ventilation, or respiratory protection.
- Electrical hazards: A damaged cord, wet location, cut cable, or unsuitable dust-control method can expose you to electric shock.
- Loss of control: Awkward access, one-handed use, excessive pressure, and an incorrect wheel can increase vibration and make the grinder harder to control.
Warning: Never remove a guard to install an oversized wheel, defeat a flange problem, expose more of a cutting disc, or fit an accessory that the grinder manufacturer has not approved.
Should You Ever Remove the Guard?
Do not remove the guard for routine grinding or cutting. If the guard prevents you from reaching the work, stop and reconsider the setup rather than accepting more wheel exposure.
| Situation | Unsafe Shortcut | Safer Response |
|---|---|---|
| Tight space | Remove the guard for clearance | Reposition the work or use a smaller grinder, die grinder, file, or rotary tool |
| Cut line is hard to see | Expose more of the wheel | Improve lighting, mark the cut clearly, and reposition the guard without exposing yourself to the wheel path |
| Cutoff wheel will not fit the existing guard | Run the wheel without a guard | Obtain the closed cutting guard and flange combination specified in the manual |
| Larger wheel seems faster | Remove the guard and install the larger wheel | Use only the maximum wheel diameter marked on the grinder |
| Sanding or finishing | Assume guards are never required | Follow the exact tool and accessory instructions; use any required hand guard, backing pad, speed setting, or wheel guard |
| Guard will not lock or keeps moving | Remove it and continue | Take the grinder out of service until the correct guard or locking parts are repaired or replaced |
Pro Tip: Move the workpiece before removing a safety device. Rotating, raising, or reclamping the material often creates a safer wheel path and a better view.
Match the Guard to the Wheel and Accessory
Angle grinders may use several accessories, but each one must be approved for the tool and paired with the correct protection. Guard names vary among manufacturers, so use the accessory chart in your grinder manual rather than relying only on a wheel’s appearance.
Many small grinders use an open-style guard for approved grinding wheels and a more enclosed guard for cutoff wheels. For example, the DeWalt DWE43231 manual distinguishes guard requirements for grinding and cutting and calls for a closed, two-sided guard with specified abrasive or diamond cutting wheels.
Before installing any wheel or accessory, verify all of the following:
- Wheel type: Use a wheel designed for cutting, surface grinding, edge grinding, sanding, or brushing as applicable. Do not grind with a cutting-only wheel.
- Maximum diameter: Never install a wheel larger than the grinder’s marked capacity.
- Speed rating: The accessory’s maximum safe operating speed must be at least equal to the maximum speed marked on the grinder.
- Arbor and mounting system: The arbor hole, spindle, backing flange, locking flange, and any threaded hub must match.
- Guard type: Install the guard required for that wheel and operation.
- Direction: Follow any rotation arrow on a directional diamond wheel or accessory.
- Condition: Reject cracked, chipped, dropped, wet, distorted, expired, excessively worn, or contaminated wheels.
Do not use an adapter, reducer, improvised washer, or altered flange unless the manufacturer expressly approves it. Do not mount a toothed saw blade, chain-type cutter, carving accessory, or other attachment merely because it can be made to fit. OSHA warns that substituting unapproved saw blades on abrasive-wheel tools can cause loss of control, lacerations, and amputations.
Why People Remove Grinder Guards

People commonly remove grinder guards because they want better access, quicker wheel changes, a clearer view, or room for an accessory that does not fit. Some copy what they see in a shop or online video. Others have completed many jobs without an injury and begin to view the guard as optional.
Those reasons explain the behavior, but they do not reduce the hazard. A wheel can bind, crack, shed material, or strike an edge even when the operator has years of experience. Safe habits are most valuable during the unexpected event, not during the part of the cut that goes as planned.
Angle Grinder Pre-Use Check
Take a few minutes to inspect the tool and plan the wheel path before every job. Repeat the check after a grinder is dropped, a wheel is struck, an accessory is changed, or the tool begins to behave differently.
At a Glance
| Time Required | About 2–3 minutes before use |
| Difficulty | Easy, but requires knowing the tool and wheel specifications |
| Tools Needed | Correct guard, approved wheel and flanges, side handle, clamps, lighting, and task-specific PPE |
| Cost | Usually no added cost when the correct equipment is already available; replace missing or damaged safety parts before use |
- Disconnect the energy source. Unplug a corded grinder or remove the battery before touching the guard, wheel, flange, or spindle.
- Read the labels. Confirm the wheel type, diameter, arbor, expiration or use-by information when provided, and maximum operating speed.
- Inspect the accessory. Look for cracks, chips, water damage, distortion, glazing, missing wire strands, or impact damage. Perform a ring test only when the wheel manufacturer and applicable procedure say that wheel type and size can be tested that way.
- Inspect the tool. Check the cord, plug, battery, switch, spindle, flanges, vents, guard, guard latch, and side handle.
- Mount the wheel correctly. Use the specified flanges and tighten them as instructed without distorting the wheel.
- Turn the wheel by hand. Make sure it rotates freely and does not touch the guard or another tool part.
- Position the guard. Lock it between your body and the wheel path, with the open side and sparks directed away from you and other people.
- Secure the workpiece. Clamp it so it cannot move, close the cut, or trap the wheel.
- Clear the area. Remove flammables, route cords and hoses safely, control dust, and keep bystanders outside the debris path.
Safe Angle Grinder Operation
Use Two-Handed Control and Safe Body Position
Install and tighten the side handle. Hold the main grip with one hand and the side handle with the other. Keep balanced footing and arrange the work so you do not have to reach across the wheel.
Stand out of the wheel’s plane when starting the grinder. Allow it to reach operating speed before touching the work. If the wheel wobbles, vibrates, rubs, or sounds unusual, switch off the tool and inspect it.
Keep the guard between you and the wheel, and direct the open side away from your body. For surface grinding, the OSHA portable-tool fact sheet describes holding the grinding face at approximately 5 to 15 degrees from the work surface. Follow the wheel and grinder instructions when they specify a different technique.
Use light, controlled pressure. Forcing the wheel can slow the grinder, create heat, damage the abrasive, and increase the chance of a bind. Do not twist a cutoff wheel in the cut or use its side for grinding.
Wear Task-Appropriate PPE
Wear safety glasses or goggles that provide suitable impact and side protection. Add a face shield for the face exposure created by sparks, fragments, and wire bristles. A face shield is secondary protection and should be worn over primary eye protection, not instead of it.
Use hearing protection based on the noise exposure and task duration. Wear close-fitting gloves that provide abrasion and heat protection without weakening your grip. Choose long sleeves, long pants, and sturdy footwear made from materials suitable for the spark and heat exposure. Do not wear loose clothing, jewelry, dangling drawstrings, or anything that can reach the wheel.
Respiratory protection must be selected for the material and exposure. A disposable mask chosen without a hazard assessment may not protect against silica, lead, hexavalent chromium, coating debris, or other hazardous contaminants. Workplace respirator use may require medical evaluation, fit testing, training, and a written program.
Control Dust, Sparks, and Fire
Before grinding concrete, mortar, brick, stone, engineered stone, or similar material, determine whether respirable crystalline silica may be present. The OSHA construction silica standard identifies controls for handheld grinders, including compatible dust shrouds and dust collectors or integrated water delivery for qualifying tasks.
Use water only when the grinder, accessory, electrical setup, location, and manufacturer instructions permit wet operation. An ordinary dry grinder must not be exposed to water simply to reduce dust. Where water is authorized, use suitable electrical protection and keep connectors protected.
Check painted, plated, galvanized, stainless, or contaminated material before grinding. Coatings and metals may produce hazardous dust or fumes. Remove or control the hazard using the applicable workplace procedure rather than relying only on open doors or a small fan.
Move fuel, solvents, aerosols, paper, wood dust, dry grass, insulation, oily rags, and other combustibles away from the spark path. Do not grind where combustible dust or a flammable atmosphere may be present. Follow workplace hot-work requirements where they apply.
Warning: Sparks can travel farther than they appear to during the cut. Check behind, below, and on the other side of the workpiece for hidden insulation, fuel lines, electrical cables, and combustible material.
Training and Maintenance
Training should cover wheel selection, guard adjustment, mounting, grinder orientation, spark direction, kickback, dust control, PPE, and emergency shutdown. Review the manual when using a new grinder or an unfamiliar accessory, even if you have used similar tools before.
Keep vents clean and have damaged electrical or mechanical parts repaired by a qualified service provider. Store abrasive wheels according to the wheel manufacturer’s instructions in a dry, protected location away from impacts, freezing conditions, high heat, and severe temperature changes.
Do not tape, wire, clamp, grind, or modify a guard to make it fit. Replace a guard that is bent, cracked, badly worn, incorrectly sized, or unable to lock securely.
Safer Alternatives When the Guard Blocks Access
If the guard prevents a safe cut, do not treat removal as the first solution. Change the setup while preserving the barrier between you and the wheel.
- Rotate the guard to another approved locking position after disconnecting the power source.
- Turn, raise, or reclamp the workpiece to improve access and visibility.
- Approach the cut from the opposite side while keeping your body out of the projected wheel path.
- Use a smaller grinder that accepts the correct wheel and guard for the task.
- Use a die grinder, rotary tool, power file, hand file, hacksaw, reciprocating saw, nibbler, sander, or another purpose-built tool.
- Use a manufacturer-approved dust shroud or accessory guard when dust collection is required.
- Buy the correct cutting guard rather than operating a cutoff wheel with an open grinding guard.
Products Worth Considering
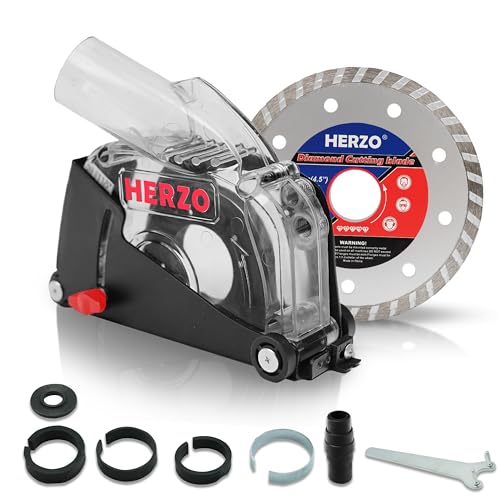
Widely Adapt:Suitable for 80% Main Brand 4-1/2 and 5 inch Angle Grinder High Quality Material:This body is made by high quality PVC materials.Less light with higher strong...
When to Stop Work Immediately
Release the switch, wait for the wheel to stop, and disconnect the grinder if you notice any of these conditions:
- The guard is loose, bent, cracked, rubbing the wheel, or will not lock.
- The wheel is cracked, chipped, dropped, wet, distorted, badly worn, or past a marked use-by date.
- The wheel does not turn freely after installation.
- The grinder vibrates, wobbles, stalls, overheats, or makes a new sound.
- The side handle, flange, spindle, switch, cord, plug, or battery connection is damaged.
- The workpiece begins moving or the cut starts closing around the wheel.
- Sparks, dust, or fragments are reaching people or combustible material.
- You cannot maintain two-handed control and stable footing.
- The correct guard or approved accessory is unavailable.
Note: After a wheel binds or receives a hard impact, do not restart immediately. Disconnect the grinder and inspect the wheel, flanges, guard, spindle, and work setup first.
Frequently Asked Questions
Why do people take the guard off angle grinders?
People often remove guards for better access, a clearer view, faster adjustments, or room for an accessory that does not fit. Those benefits do not reduce the risk of wheel contact, kickback, sparks, debris, or broken fragments. Repositioning the work or choosing another tool is safer.
Can you physically remove the guard from an angle grinder?
Many grinder guards are removable so they can be replaced or exchanged for another approved guard. That does not mean the grinder may be used without one. Keep the required guard installed for grinding and cutting, except for a specific operation that the exact tool manual expressly permits without it.
Is a cutting guard different from a grinding guard?
Often, yes. Many grinders use a relatively open guard for approved grinding wheels and a more enclosed guard for cutoff wheels. The required design depends on the grinder and accessory, so check the manufacturer’s accessory chart instead of assuming one guard fits every operation.
Can you use a flap disc without a guard?
Do not assume that a flap disc is exempt from guarding. Many grinder manuals require a guard for sanding flap discs. Use the guard and backing arrangement specified for your grinder, disc, and operation.
Can you remove the guard to install a larger wheel?
No. A larger wheel may exceed the grinder’s design limits and can have an unsafe peripheral speed even when its printed RPM appears acceptable. Use only wheel diameters and guard combinations approved for the tool.
What is one risk of working on a bench grinder with the guard removed?
A bench grinder without proper guarding can expose the operator to the wheel and to fragments if the wheel breaks. A bench grinder is a different machine from a handheld angle grinder and has separate requirements for guards, exposure angles, work rests, and tongue guards. Follow its manual and the standards that apply to that machine.
Why must the guard stay between you and the wheel?
That position places the guard in the path of sparks, debris, and some wheel fragments before they can travel directly toward your body. It also reduces access to part of the moving wheel. Rotate and lock the guard so the open side faces away from you.
What should you do if the guard gets in the way?
Stop and disconnect the grinder. Reposition the guard, turn or reclamp the workpiece, improve the lighting, use the correct cutting guard, or select a smaller or more suitable tool. Do not remove the guard merely to make an awkward cut possible.
Safety Disclaimer: This article provides general information and does not replace professional training, a workplace hazard assessment, applicable regulations, or the instructions supplied with your grinder, wheel, guard, and accessories. Stop and seek qualified guidance when the correct setup or material hazard is uncertain.
Conclusion
An angle grinder guard protects you from hazards that can develop in a fraction of a second. Removing it for convenience exposes more of the wheel and reduces protection from sparks, debris, contact, and wheel failure. Keep the correct guard installed for grinding and cutting, match every wheel to the grinder and guard, and change the work setup when safe access is not possible. A specific manual-authorized exception is not permission for routine guardless use.
Sources
- OSHA 29 CFR 1910.243 — Guarding of Portable Powered Tools — general-industry requirements for portable grinder guards and wheel exposure.
- OSHA 29 CFR 1926.303 — Abrasive Wheels and Tools — construction requirements for abrasive-wheel guarding, mounting, and inspection.
- OSHA Safe Use of Portable and Hand-Held Power Tools — guard functions, wheel inspection, operating position, PPE, and accessory selection.
- OSHA 29 CFR 1926.1153 — Respirable Crystalline Silica — dust-control methods for handheld grinders used on silica-containing materials.
- DeWalt DWE43231 Series Instruction Manual — accessory-specific guard requirements, guard positioning, flanges, and cutting-wheel protection.
- Bosch GWS12V-30 Operating Instructions — guard adjustment, operator positioning, accessory dimensions, and speed-rating requirements.