What’s in This Article
- Understanding Flap Disc Grit Numbers
- Why Grit Size Matters in Flap Discs
- Flap Disc Grit Chart Explained
- How to Select Grit Size for Material Removal
- Optimal Grit Sizes for Blending and Finishing
- Common Mistakes When Picking Grit Sizes
- How Grit Size Affects Surface Quality
- Matching Grit Sizes to Different Materials
- Tips for Transitioning Between Grit Sizes
- Final Flap Disc Grit Checklist
- Frequently Asked Questions
- Conclusion
Pick the wrong flap disc grit, and you can scratch good metal, waste discs, or spend extra time fixing the surface. Pick the right grit, and your grinder works faster with less cleanup. This guide explains what flap disc grit numbers mean, which grit works best for each task, and how to move from rough grinding to a smoother finish.
Quick Answer
Flap disc grit numbers tell you how coarse or fine the abrasive is. Lower numbers, such as 24, 36, and 40, remove material fast. Higher numbers, such as 120, 180, and 240, create smoother finishes. For most welding and metal prep jobs, start with coarse grit only when you need strong removal, then step up to finer grits for blending and finishing.
Key Takeaways
- Use 24 to 60 grit flap discs for fast material removal, weld cleanup, and rough shaping.
- Use 80 to 120 grit discs for blending, deburring, and smoother surface prep.
- Use 150 grit and higher for fine finishing, polishing, and paint preparation.
- Match the grit to the material so you don’t remove too much or leave deep scratches.
- Clean the workpiece between grit changes to protect the final finish.
Understanding Flap Disc Grit Numbers
Flap disc grit numbers show the size of the abrasive particles on the disc. Lower numbers mean larger particles, so the disc cuts faster and leaves a rougher surface. Higher numbers mean smaller particles, so the disc removes less material and leaves a smoother finish.
Coarse grits, such as 24 to 60, work well for heavy material removal. You can use them for weld grinding, rust removal, edge shaping, and rough cleanup on hard metals. Medium grits, such as 80 to 120, give you a balance between removal and surface smoothness.
Fine grits, such as 150 to 240, suit finishing work, polishing, and surface prep before coating. Very fine grits, such as 320 and higher, help when you need an extra smooth surface. By using the right grit range, you can improve speed, reduce scratches, and get a cleaner finish.
Why Grit Size Matters in Flap Discs
Grit size affects two things at the same time: how fast the disc removes material and how smooth the surface looks after grinding. A coarse disc cuts fast, but it can leave heavy marks. A finer disc gives you better control, but it removes material more slowly.
When you select the right grit, you can match the disc to the job instead of forcing one disc to do everything. This helps you avoid deep scratches, overheating, uneven surfaces, and wasted time.
How Grit Size Changes the Result
Coarse grit, often 24 to 60, uses larger abrasive grains for strong cutting action. It works best when you need to remove welds, burrs, paint, scale, or extra stock. These grits suit rough work, not final finishing.
Medium grit, often 60 to 120, gives you more control. It can smooth rough marks, blend weld edges, and prepare metal for primer or paint. Fine grit, often 150 to 240, works best when surface quality matters more than speed.
How to Select the Right Grit
Start by asking what the surface needs next. If you need to remove a lot of metal, start with coarse grit. If you need to smooth or prepare the surface, move to medium or fine grit.
For edge beveling and weld grinding, 40 to 60 grit often gives a useful balance. For blending and light finishing, 80 to 120 grit often works better. For polishing or paint prep, choose 150 grit or higher based on the finish you need.
Flap Disc Grit Chart Explained
A flap disc grit chart helps you choose a disc by task, not by guesswork. Each grit range has a clear purpose. Use the chart as a starting point, then adjust based on your material, grinder speed, pressure, and finish goal.
| Grit Range | Best Use | Typical Finish |
|---|---|---|
| 24 to 36 grit | Fast stock removal, heavy weld grinding, rough shaping | Very rough |
| 40 to 60 grit | Weld cleanup, beveling, rust removal, deburring | Rough to moderate |
| 80 to 120 grit | Blending, light grinding, surface prep | Moderately smooth |
| 150 to 240 grit | Finishing, fine smoothing, prep before coating | Smooth |
| 320 grit and above | Fine finishing and delicate surface prep | Very smooth |
Products Worth Considering

✨【Meets All Your Needs】Our 4-1/2-inch flap disc set comes with 40/60/80/120 grits, totaling 12 packs. This comprehensive set includes 4 pieces each of 40 grit and 60 grit, along with 2 pieces each of 80 grit and 120 grit, providing a versatile selection for grinding various metals. It perfectly caters to all your grinding needs.
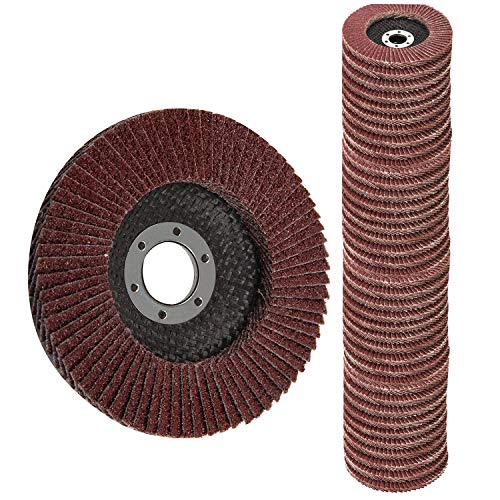
40PCS 40/60/80/120 Grit assorted pack, each grit 10 pcs, 4-1/2 Inch Diameter, 7/8 Inch Arbor

【Versatile Grinding Solutions】Comprehensive 50-Pack Set with 40/60/80/100/120 Grit T29—Our 4-1/2-inch flap disc set includes 10 pieces of each grit, offering a versatile range for all your grinding needs across various materials.
Grit Size Categories
Coarser grit ranges, such as 24 to 60, remove material quickly. They work best when speed matters more than surface finish. Medium grits, such as 80 to 120, suit blending, light grinding, and prep work.
Fine grit flap discs, such as 150 to 240, help when you want a smoother surface. Very fine grits, such as 320 and above, work best for delicate final prep. Choosing the right category helps you get the result you want without extra rework.
Material Removal Applications
For heavy material removal, choose coarse grit discs in the 24 to 60 range. These discs suit hard metals, thick welds, sharp burrs, and rough edges. They cut quickly, but they can leave visible scratches.
For weld blending, medium grit discs in the 60 to 120 range often work better. They still remove material, but they leave a cleaner surface. For light cleanup and finishing, fine grit discs reduce scratch depth and improve surface quality.
Finishing Techniques Overview
Finishing work needs a slower and more careful grit plan. Start with the lowest grit needed to remove marks, then move step by step to finer grits. This method prevents deep scratches from showing through the final finish.
For paint or coating prep, avoid jumping from very coarse grit straight to very fine grit. The fine disc may polish over deep scratches instead of removing them. A steady grit progression gives you a more even result.
How to Select Grit Size for Material Removal
Choose grit size based on the amount of material you need to remove. A lower grit number removes stock faster. A higher grit number gives you a smoother surface with less cutting force.
- Use 24 to 60 grit for heavy material removal on tough surfaces.
- Use 40 to 60 grit for weld grinding, edge beveling, and rough deburring.
- Use 80 to 120 grit for blending and light surface prep.
- Use 150 to 240 grit for finishing, polishing, and smoother results.
- Use 320 grit and above for ultra-smooth prep before paint or coating.
Always match the grit to both the material and the final surface goal. Hard metals can handle coarser grits better than soft metals, wood, or composites. Softer materials often need lighter pressure and finer grit to avoid gouges.
Warning: Wear eye protection, gloves, hearing protection, and a face shield when you use flap discs on a grinder.
Products Worth Considering

Multiple Specifications Design: The flap wheel sander for drill set contains 5 sizes of flap wheel, each size includes 60 grit, 80 grit, 120 grit and 240 grit sufficient quantity to meet your various needs and replacement

PREMIUM QUALITY: These angled flap discs, also known as cut off wheels 4 1/2 inch, are constructed with industrial grade premium zirconia abrasive for strength, durability, and extended disc life as it holds up to high temperatures and pressure.

PREMIUM QUALITY: These angled flap discs, also known as cut off wheels 4 1/2 inch, are constructed with industrial grade premium zirconia abrasive for strength, durability, and extended disc life as it holds up to high temperatures and pressure.
Optimal Grit Sizes for Blending and Finishing
For blending and finishing, grit sizes from 60 to 120 often give the best balance. A 60 grit disc can remove weld marks and shape the surface. An 80 or 120 grit disc can smooth the area and reduce visible scratches.
For delicate finishing, choose 150 grit or higher. These finer grits work well when you want a cleaner surface before paint, coating, or polish. Move gradually from coarse to fine grit so you don’t leave scratch marks under the final finish.
Material type matters here. Aluminum, mild steel, stainless steel, wood, and composites can react differently to the same grit. Test on a small area when finish quality matters.
Common Mistakes When Picking Grit Sizes
Small grit mistakes can create extra work. The most common problem comes from using a disc that’s too coarse for the finish you want. Another common problem comes from using a fine grit too early, which slows the job and heats the workpiece.
- Skipping grit sizes can leave deep scratches and an uneven surface.
- Using the wrong abrasive type can reduce performance on your material.
- Pressing too hard can overheat the disc and damage the surface.
- Over-grinding can change the shape of the workpiece.
- Failing to clean between grit changes can drag debris across the surface.
Pro tip: Let the disc do the cutting, and use steady pressure instead of forcing the grinder into the work.
How Grit Size Affects Surface Quality
Grit size has a direct effect on the final surface. Lower grit numbers, such as 24 to 60, remove material fast but leave rough marks. Coarse grit flap discs can also create deep scratches if you use them on finishing tasks.
Medium grits, such as 60 to 120, give you a more balanced result. They work well for weld blending, smoothing edges, and preparing metal for the next step. Fine grits, such as 150 to 240, create smoother surfaces for painting, coating, or polishing.
If the surface needs to look clean, don’t stop at a coarse grit. Step up through medium and fine grits until the scratch pattern matches your finish goal.
Matching Grit Sizes to Different Materials
Selecting the right grit size for your material helps you work faster and avoid damage. Harder materials often need stronger cutting action. Softer materials need more care because coarse grits can gouge them quickly.
- Hard metals: Use 24 to 60 grit for heavy removal, then move finer for blending.
- Stainless steel: Use ceramic or zirconia discs when possible, and avoid too much heat buildup.
- Mild steel: Use 40 to 80 grit for common grinding and weld cleanup.
- Aluminum: Use a disc rated for non-ferrous metal, and avoid loading the abrasive.
- Wood and composites: Use finer grits and light pressure to reduce gouging.
- Paint prep surfaces: Use 150 grit and higher when you need a smoother base.
Note: Some flap discs suit specific materials better than others, so check the disc label before grinding aluminum, stainless steel, or wood.
Tips for Transitioning Between Grit Sizes
When you change grit sizes, move in stages instead of making a large jump. This helps each disc remove the scratch pattern from the disc before it. Clean the workpiece between grits so loose abrasive and metal dust don’t scratch the surface.
Use Gradual Grit Progression
Gradual grit progression helps you move from rough grinding to a smoother finish. Start only as coarse as the job requires. Then step up to medium and fine grits until the surface meets your goal.
- Start with 36 to 60 grit for heavy material removal.
- Move to 80 to 120 grit for smoothing and blending.
- Finish with 150 to 240 grit for a cleaner surface.
- Use 320 grit or higher only when you need very fine prep.
Clean Between Grits
Clean between grit changes to protect the surface. Use a soft brush, clean rag, or compressed air to remove dust and grit before the next step. This simple habit reduces random scratches and helps you see the true surface condition.
Inspect the work after each grit stage. If you still see deep scratches, don’t jump to a much finer grit yet. Use the next grit range until the scratch pattern looks even.
Final Flap Disc Grit Checklist
Before you start grinding, choose the disc by task, material, and finish goal. Coarse grits remove stock quickly. Fine grits improve the finish but work more slowly.
Choose coarse grit for removal, medium grit for blending, and fine grit for finishing.
- Use high-density flap discs when you need longer life during demanding jobs.
- Choose ceramic alumina for hard metals when fast cutting matters.
- Choose aluminum oxide for general steel work and common shop tasks.
- Use flat flap discs for lower grinding angles and smoother blending.
- Use conical flap discs when you need more aggressive stock removal.
- Clean your surface between grit changes to protect the final finish.
Frequently Asked Questions
What Is the Grit Range for Flap Discs?
Many flap discs range from about 24 grit to 320 grit and higher. Coarse grits remove material fast, while fine grits create a smoother finish. Some brands may offer different ranges, so always check the disc label.
What Is the Difference Between 40 Grit and 60 Grit Flap Discs?
A 40 grit flap disc removes material faster and leaves a rougher surface. A 60 grit disc gives you more control and a slightly smoother finish. Choose 40 grit for heavier grinding and 60 grit for weld cleanup or beveling.
What Do Grit Numbers Mean?
Grit numbers show abrasive particle size. Lower numbers mean larger particles that cut faster. Higher numbers mean smaller particles that remove less material and leave a smoother surface.
What Grit Flap Disc Should I Use?
Use coarse grit for heavy grinding, medium grit for blending, and fine grit for finishing. For many shop jobs, 40 to 60 grit works well for weld cleanup. Use 80 to 120 grit when you need a cleaner surface before paint or coating.
Can You Use a Flap Disc on Wood?
You can use some flap discs on wood, but you need light pressure and the right grit. Coarse grits can remove wood too fast and leave gouges. Start with a finer grit if the surface shape matters.
Conclusion
The best flap disc grit depends on how much material you need to remove and how smooth the surface must be. Start with coarse grit only when you need strong removal, then move to medium or fine grit for blending and finishing. Keep your workpiece clean between grit changes, and don’t skip too far between grit ranges. With the right grit plan, you can grind faster, protect your surface, and finish each project with more control.


