
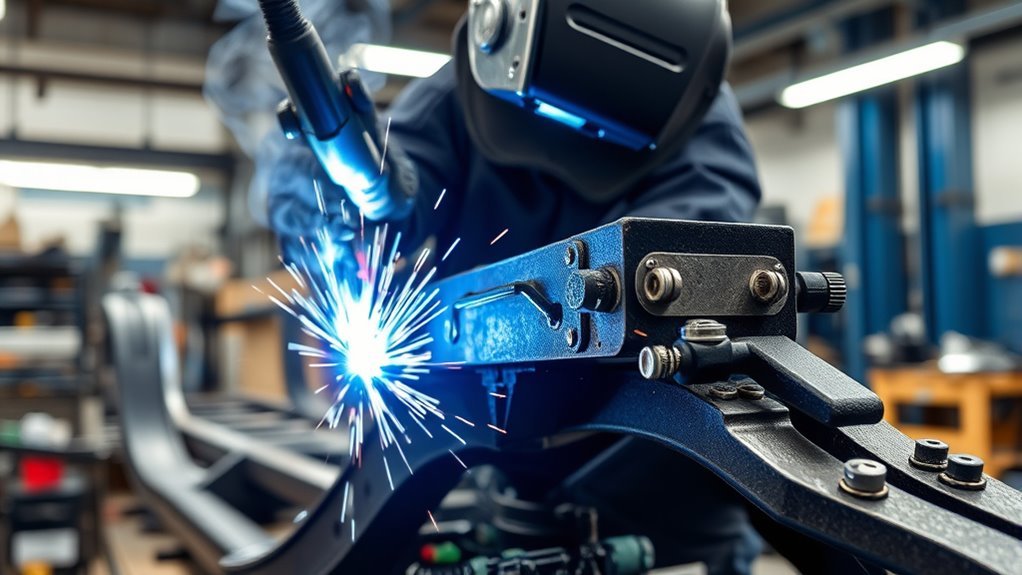
A damaged vehicle structure can change how the vehicle steers, brakes, fits together, and manages crash energy. Even a small crack, shifted rail, or corroded mounting area can hide wider damage. Frame damage welding repair may be part of the solution, but only when the vehicle maker permits the repair and a qualified structural technician follows the VIN-specific procedure.
Quick Answer
Frame damage can sometimes be welded, sectioned, straightened, or replaced, but the correct method depends on the exact vehicle, material, damage location, and OEM repair procedure. Modern repairs may require MAG/GMA welding, resistance spot welding, MIG brazing, riveting, bonding, measurement, scanning, corrosion protection, and ADAS calibration—not simply MIG or TIG welding.
Key Takeaways
- A weld is safe only when the vehicle maker allows that repair at that exact location and the shop follows the specified joint, attachment method, equipment, and material requirements.
- Frame repair needs three-dimensional measurements before, during, and after the work; a visual check or wheel alignment alone cannot confirm structural accuracy.
- MIG-versus-TIG is an incomplete comparison. OEM procedures may call for MAG/GMA plug or butt welds, squeeze-type resistance spot welds, MIG brazing, adhesives, rivets, or complete part replacement.
- High-strength steel, ultra-high-strength steel, aluminum, hybrids, EVs, SRS parts, and ADAS-equipped vehicles require extra procedures and may have strict heat or repair limits.
- A complete repair includes weld testing, corrosion protection, scans, required calibrations, alignment checks, final measurements, and written documentation.
At a Glance
| Time Required | Several labor hours to multiple days after teardown; parts availability, measuring, refinishing, scanning, and calibration can extend the schedule. |
| Difficulty | Advanced professional structural repair; not a do-it-yourself welding job. |
| Tools Needed | OEM repair information, frame rack or approved bench, three-dimensional measuring system, specified welding or joining equipment, test coupons, scan tools, calibration equipment, PPE, and fire protection. |
| Cost | A vehicle-specific written estimate is required. Cost changes with damage depth, material, replacement parts, labor, corrosion protection, scans, calibrations, and whether the vehicle is repairable. |
Warning: This article explains the repair process for vehicle owners; it is not a welding procedure. Do not drive or weld a vehicle with suspected structural damage. Have it towed when there is visible separation, tire contact, fluid leakage, altered steering or braking, or an SRS warning.
What’s in This Article
- What Is Frame Damage Welding?
- What Frame Damage Needs Welding?
- How Frame Damage Repair Works Step by Step
- MIG, MAG, TIG, Spot Welding, and MIG Brazing
- When Can a Frame Be Repaired Instead of Replaced?
- How Long Does Frame Repair Take and What Affects Cost?
- Why Professional Frame Damage Repair Matters
- Why Choose East End Body Shop?
- How to Check the Finished Repair
- Frequently Asked Questions
- Sources
What Is Frame Damage Welding?
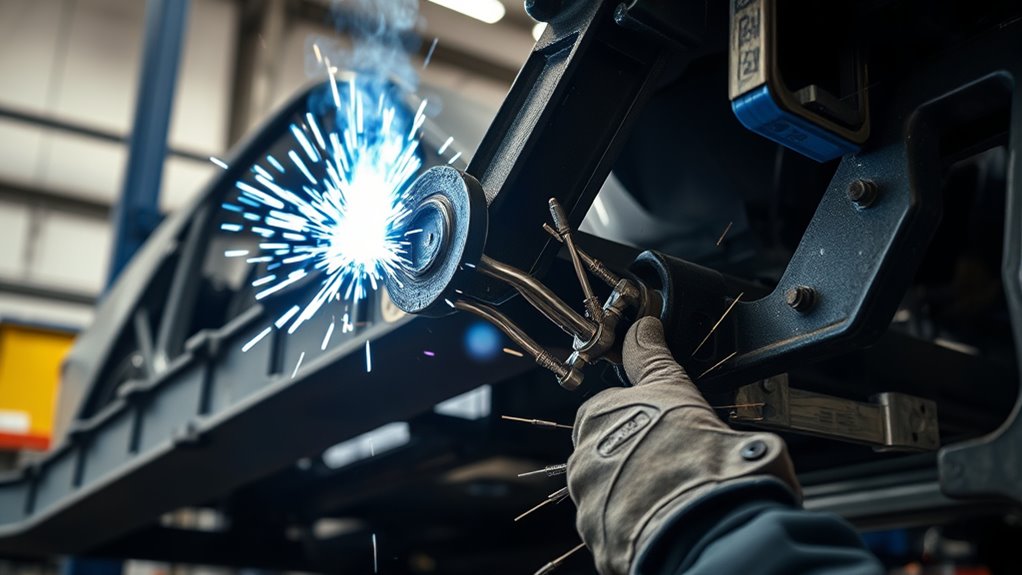
Frame damage welding uses controlled heat and a specified joining method to repair or replace part of a vehicle’s structure after collision damage, cracking, or corrosion. Depending on the vehicle, the work may involve gas metal arc welding, often called GMA or MAG welding, squeeze-type resistance spot welding, MIG brazing, structural adhesive, rivets, or a combination of methods.
The repair targets weak or displaced sections that affect alignment, handling, panel fit, and crash-energy management. The correct heat, filler wire, joint design, and attachment pattern matter because excess heat or the wrong process can change the properties of modern high-strength materials.
The goal is to restore the structure to the dimensions and repair condition required by the vehicle maker. A shop cannot confirm that result by looking at a finished weld bead alone.
Each vehicle design uses different metals, thicknesses, reinforcements, adhesives, weld locations, and repair limits. A proper repair must match the vehicle identification number, model year, frame or body type, damaged area, and current OEM procedure. The I-CAR OEM Technical Information Matrix shows why repairers must check manufacturer-specific information for materials, sectioning, attachment methods, corrosion protection, and calibration requirements.
Note: Many people use “frame” for any vehicle structure. A body-on-frame truck or SUV has separate frame rails, while a unitized or unibody vehicle carries loads through welded body structures such as rails, rockers, pillars, floors, and reinforcements. The repair rules differ.
What Frame Damage Needs Welding?
You may need welding when a repairable crack, fracture, or damaged section affects a steel or aluminum structural member and the OEM procedure permits welding or section replacement. A bent rail may need controlled straightening, part replacement, or both. Welding is not automatically required after every pull, and it must never be added as an improvised reinforcement.
A thorough inspection must decide whether the part can be repaired, must be replaced at factory seams, may be sectioned at an approved location, or makes the vehicle uneconomical or unsafe to repair. That decision depends on material strength, deformation, tears, kinks, mounting-point damage, corrosion, previous repairs, and access to an approved procedure.
Cracks and Fractures
Cracks and fractures in steel or aluminum structural parts require immediate professional evaluation. Some cracks can be repaired with an OEM-approved weld or sectioning procedure; others require complete part replacement.
Technicians inspect high-stress points closely because cracks often appear near joints, suspension or powertrain mounts, holes, brackets, and earlier repair areas. The inspection must also look beyond the visible crack for distortion, torn layers, damaged reinforcements, and changes in adjacent measurements.
The welding or replacement method must match the material and crack location. A process that works on mild steel may not be approved for high-strength steel, hot-stamped steel, cast aluminum, or an extruded aluminum rail.
Warning: Do not stop-drill, plate, sleeve, or weld a cracked vehicle structure without a documented repair procedure. An improvised repair can create a new stress concentration or change how the structure manages crash forces.
Small cracks can grow under repeated load. Prompt inspection helps prevent a minor-looking defect from becoming a larger structural failure.
Bent Frame Rails
Bent frame rails often need professional repair after a collision moves the structure out of specification. Precise measurements are required before straightening so the technician can identify the direction and amount of movement.
After controlled pulling restores an approved repairable rail, welding may be needed only where the OEM procedure calls for a section joint, replacement part, or specified attachment. Some materials and vehicles restrict or prohibit straightening, heating, or sectioning, so the technician must identify the material before applying force or heat.
Small measurement errors can affect panel fit, suspension geometry, steering, wheel alignment, glass fit, sensor aim, and crash performance. The vehicle should be measured during the repair, not only at the end.
After structural work, the shop should compare the final dimensions with current manufacturer data and complete any required alignment, scan, and calibration procedures.
Rust and Corrosion
Rust and corrosion can reduce structural strength, especially around rails, cross-members, suspension mounts, body mounts, seams, boxed sections, drain points, and areas exposed to moisture or road salt.
Damage may appear as cracks, holes, swelling, delamination, heavy scaling, or flaking metal. The visible surface may understate how far corrosion extends inside a boxed member or between layered panels.
Welding may be possible only after the technician removes the affected material back to sound metal and confirms that an approved repair or replacement section exists. Severe corrosion near a mounting point, reinforcement, or multi-layer structure may require full component replacement or may make the vehicle unsuitable for repair.
After welding, the shop must restore the coatings removed during the work. I-CAR notes that seam sealer, cavity wax, adhesives, primers, and other corrosion-protection materials must be restored in the locations specified by the body repair manual.
When Welding Is Not the Answer
A technician should not weld merely because a damaged area is accessible. Replacement or a different joining method may be required when:
- The OEM does not publish or permit a repair at that location.
- The part is made from ultra-high-strength or hot-stamped steel that cannot be sectioned or butt welded there.
- A multi-layer reinforcement, safety-cell component, suspension mount, seat-belt mount, or battery enclosure is damaged beyond the stated limit.
- An aluminum casting, extrusion, or bonded assembly must be replaced rather than straightened or welded.
- Corrosion extends beyond a practical repair area or leaves no sound material for the specified joint.
- Previous repairs, fire, flooding, or hidden damage prevent the shop from confirming structural condition.
How Frame Damage Repair Works Step by Step
A frame repair starts with damage analysis and measurement, not welding. The technician must identify the damaged zones and the vehicle’s construction before cutting, pulling, or applying heat.
Next, the shop removes parts that block inspection, protects sensitive components, cleans the repair area, and follows the exact attachment and corrosion-protection steps in the vehicle maker’s repair information.
After the structural work, the technician measures the vehicle again and completes the scans, calibrations, alignment, and quality-control checks required for that vehicle.
Products Worth Considering

Package: 1 x Sheet Metal Tool Hook. Color: Gold. Size: 33 x 8 cm. Working Load Limit/Carrying capacity: 2000KG/4400LBS. Weight: 0.95kg.

Boost your Bull-Work Efficiency: The VEVOR porta power kit with a 4-ton hydraulic pump is the ultimate heavy-lifter you need for all your repair needs. The automatic overload system prevents any damage to the equipment or rams, while the hydraulic spreader with a 1/2 ton capacity makes all your repairs a breeze. Get your hands on this powerhouse today!

19 Pcs Trim removal tools - Works great for car audio/radio system installing or removing, door panel, moldings, emblems, window trims or automotive interior repairing and furniture restoration
1. Inspect the Damage and Document the Condition
Damage inspection starts with a visual check for bends, cracks, rust, creases, torn spot welds, displaced seams, fluid leaks, tire contact, warning lights, and panel-gap changes. The shop should photograph the damage, scan the vehicle when required, and inspect adjacent structures, suspension points, restraints, glass openings, wiring, fuel components, and high-voltage parts.
2. Identify Materials and Pull the VIN-Specific Procedure
The technician uses the VIN and model year to locate the current body repair manual, material maps, dimension data, sectioning limits, attachment methods, weld settings, corrosion-protection steps, and calibration requirements. This step confirms whether the damaged part is mild steel, high-strength steel, ultra-high-strength steel, aluminum, magnesium, composite, or a mixed-material assembly.
For example, American Honda’s 2025 welding guidelines allow different attachment methods at different steel strengths and restrict some plug or butt welds. That is why a generic statement such as “use MIG on thick steel and TIG on thin metal” is not an acceptable repair plan.
3. Disassemble the Vehicle and Make It Safe
The shop removes trim, glass, suspension parts, fuel-system parts, batteries, modules, wiring, sound deadener, seam sealer, and other items as required for access and fire protection. It follows OEM instructions for battery disconnection, SRS handling, module protection, and combustible-material removal.
For a hybrid or EV, a trained technician must follow the manufacturer’s high-voltage disable and verification procedure. I-CAR advises following OEM information and disconnecting both the 12-volt system and high-voltage service disconnect before welding where applicable.
4. Measure, Anchor, and Plan Any Pulling
The vehicle is mounted on an approved frame rack, bench, or fixture when required. A three-dimensional measuring system compares control points with current specifications. The technician plans pulls so forces travel through proper anchoring points and do not create secondary damage.
5. Straighten Only When the OEM Allows It
Controlled cold straightening may be permitted on some full-frame or body structures. Other parts must be replaced, and some OEMs restrict heat or prohibit pulling on specific aluminum or ultra-high-strength components. The technician must not use an open flame or an assumed heat limit.
6. Remove Damage and Fit the Replacement Part
The shop separates factory attachments or cuts at an approved sectioning location. It protects undamaged layers, removes only the coatings required by the procedure, and test-fits the service part. Door openings, suspension points, glass openings, panel gaps, and neighboring components are checked before permanent attachment.
7. Set Up Equipment and Make Test Welds
The technician selects the specified welder, wire, shielding gas, electrodes, tips, rivets, and adhesive. Test coupons that match the vehicle’s material type and stack thickness are welded and destructively tested when required. A bead that looks smooth is not proof of penetration, nugget size, or joint strength.
8. Weld, Braze, Bond, or Rivet as Specified
The replacement is attached in the required sequence with the stated weld count, spacing, joint design, adhesive, rivet type, and heat control. Cooling time and clamp pressure matter when adhesives or mixed attachment methods are part of the repair.
9. Restore Corrosion Protection and Refinish the Area
The technician dresses welds only as permitted, applies epoxy primer or other specified coatings, restores seam sealer and cavity wax, replaces foam or sound-control materials, and refinishes exposed surfaces. Boxed sections and the back side of joints need protection, not just the visible face.
10. Complete Measurements, Scans, Calibrations, and Final Checks
The shop records final structural measurements, verifies panel and suspension fit, performs a wheel alignment when required, and completes post-repair scans. Cameras, radar, steering-angle sensors, occupant systems, ride-height inputs, or other ADAS components may require static or dynamic calibration under OEM conditions.
The final quality-control file should include the repair plan, OEM procedures used, measurements, weld-test results, scan reports, calibration reports, alignment results, parts invoices, corrosion-protection steps, and repair warranty.
Pro Tip: Ask for the pre-repair and post-repair measurement reports. “It aligned successfully” does not replace documented structural dimensions.
The right question is not “Which welder is strongest?” It is “Which attachment method does the VIN-specific OEM procedure require at this exact location?”
MIG, MAG, TIG, Spot Welding, and MIG Brazing for Frame Repair
MIG and TIG are familiar welding terms, but modern collision repair uses more attachment methods than that simple comparison suggests. The vehicle maker’s procedure—not personal preference—must control the choice.
| Method | Typical Collision-Repair Use | Main Limit |
|---|---|---|
| GMA/MAG welding | Plug welds, approved butt joints, and some full-frame repairs. When an argon/CO2 active gas is used on steel, MAG is the more exact term, although many shops still say MIG. | Wire, gas, joint, steel strength, heat input, and weld locations must match the procedure. |
| Squeeze-type resistance spot welding | Recreates many factory-style spot-welded flange attachments on modern steel structures. | Requires access, correct tip geometry, clamping force, current, settings, and destructive testing. |
| MIG brazing | Uses silicon-bronze filler at lower temperature where the OEM specifically requires or permits it. | It is not a substitute for steel fusion welding unless the repair procedure says so. |
| Aluminum GMA welding | Approved aluminum panel or structural repairs using dedicated equipment and contamination control. | Not every aluminum casting, extrusion, or bonded assembly is weld-repairable. |
| TIG welding | May appear in certain manufacturer-approved aluminum or specialty procedures. | It is not a universal “more precise” choice for vehicle structures and must not replace a specified OEM attachment method. |
| Adhesive and rivet bonding | Mixed-material structures, aluminum parts, and locations designed for structural adhesive and mechanical fasteners. | Product, rivet, surface preparation, clamp pressure, cure time, and attachment sequence are procedure-specific. |
Products Worth Considering

50-PIECE VALUE PACK — Includes 50 wave dent pull spot welding wires for frequent auto body work, collision repair shops, mechanics and DIY vehicle dent repair projects.

50-PIECE VALUE PACK — Includes 50 wave dent pull spot welding wires for frequent auto body work, collision repair shops, mechanics and DIY vehicle dent repair projects.

Highly Durable Design: The shell of stud welder kit is made of high-quality ABS body, has good stability under high temperature conditions, withstand temperature of 93-118℃, and the movement is pure copper electrode. This welder stud kit is wear-resistant, strong and sturdy.
When Can a Frame Be Repaired Instead of Replaced?
A repairable frame is one for which the vehicle maker provides an allowed straightening, welding, sectioning, or partial-replacement method and the remaining material can be returned to specification. The shop must also be able to verify adjacent structures, mounting points, and safety systems.
Replacement is more likely when there is a sharp kink, tear, collapsed crush zone, damaged reinforcement, prohibited material, deformation at a critical mount, extensive corrosion, heat damage, or no approved sectioning location. On some vehicles, the service part must be installed as a complete assembly at factory seams.
A total-loss decision is separate from repairability. Insurers usually compare the documented repair cost and related expenses with the vehicle’s value and applicable state rules. A technically possible repair may still be uneconomical, while a repairable vehicle still requires an OEM-compliant plan.
How Long Does Frame Repair Take and What Affects Cost?
There is no reliable flat price or universal completion time for structural welding repair. A small approved section repair on an accessible steel rail is different from replacing a bonded aluminum assembly, measuring a complex unibody, or working near an EV battery enclosure.
The estimate and schedule depend on:
- Teardown and hidden damage found after disassembly
- Full-frame, unibody, aluminum, mixed-material, hybrid, or EV construction
- Whether the part can be straightened, sectioned, or must be replaced
- OEM information access, required fixtures, and specialized equipment
- Replacement-part availability and shipping time
- Mechanical, suspension, glass, restraint, and electrical work
- Corrosion protection, refinishing, seam sealer, and cavity wax
- Pre- and post-repair scans, wheel alignment, and ADAS calibrations
- Insurance authorization, supplements, and required inspections
Ask for a written repair plan after a complete teardown and measurement. An early visual estimate may change when the shop exposes hidden layers or retrieves the OEM procedure.
Why Professional Frame Damage Repair Matters
Structural repair affects more than a visible crack. Rails, rockers, pillars, floors, cross-members, reinforcements, glass openings, and mounting points work together with restraints, suspension, steering, and crash sensors.
A qualified shop should have technicians trained for the vehicle’s material and joining methods, current OEM information, calibrated measuring and welding equipment, weld-testing capability, scan tools, corrosion-protection products, and access to required ADAS calibration equipment or a documented sublet provider.
Professional repair also protects the vehicle’s record. Keep the final invoice, repair plan, measurement printouts, scans, calibrations, alignment report, parts documentation, photos, and warranty. Future buyers, insurers, inspectors, or repairers may need to understand what structural work was completed.
Why Choose East End Body Shop?
Choose East End Body Shop only if it can document the same structural-repair capabilities you should require from any collision facility. A shop name or a claim of “frame expertise” is not enough by itself.
Before authorizing work, ask East End Body Shop to confirm:
- It has retrieved the current VIN-specific OEM repair procedures and will attach them to the repair plan.
- Its technicians hold current structural welding and material-specific training appropriate for your vehicle.
- It will use an approved frame rack or bench and provide pre-repair and post-repair three-dimensional measurements.
- It has the specified spot-welding, GMA/MAG, MIG-brazing, aluminum, adhesive, or riveting equipment required by the procedure.
- It will complete and document test welds, corrosion protection, scans, calibrations, alignment, and final quality control.
- It provides a written warranty and explains any outsourced structural, alignment, scanning, or calibration work.
Note: OEM certification and I-CAR recognition can be useful screening tools, but verify that the specific technicians, equipment, and procedures needed for your vehicle are available for your repair.
How to Check the Finished Repair
Before pickup, review the repair file and ask the shop to explain what was repaired, replaced, welded, bonded, calibrated, and measured. Confirm that no warning lights remain and that required scans and calibrations show successful completion.
After pickup, contact the repairer promptly if you notice:
- The vehicle pulls, the steering wheel is off-center, or new vibration appears
- Uneven panel gaps, door or hatch binding, water leaks, or unusual wind noise
- ADAS, airbag, ABS, stability-control, battery, or other warning messages
- Fresh corrosion, missing seam sealer, exposed metal, loose underbody coatings, or water trapped near the repair
- Tire rubbing, abnormal tire wear, suspension noise, or a change in ride height
These signs do not prove the structural repair is defective, but they justify a prompt inspection and comparison with the repair documentation.
Frequently Asked Questions
Can a cracked vehicle frame be welded?
Sometimes. A crack may be weld-repairable only when the OEM permits the repair at that location and specifies the joint, process, filler, heat control, and inspection. Cracks in prohibited materials, reinforcements, mounting points, or severely damaged areas may require complete part replacement.
Is a welded frame safe?
A structural weld can be part of a safe repair when a trained technician follows the vehicle-specific OEM procedure, makes and tests matching weld coupons when required, restores corrosion protection, verifies measurements, and completes all related scans and calibrations. A visually attractive weld alone does not prove the repair is safe.
Is TIG better than MIG for vehicle frame repair?
Not as a general rule. Modern structural repairs may require MAG/GMA welding, squeeze-type resistance spot welding, MIG brazing, aluminum GMA welding, adhesive, rivets, or replacement at factory seams. TIG should be used only when the vehicle maker’s procedure allows it for that material and location.
Can a rusted frame be welded?
Only if the corrosion can be removed back to sound material and an approved repair or replacement procedure exists. Widespread scaling, layered corrosion, damaged mounts, or rust inside a boxed member may require a larger replacement or make repair impractical.
Does frame repair affect resale value or insurance?
Structural damage and repair history can affect valuation, insurance decisions, inspections, and buyer confidence. Rules and disclosure duties vary by state. Keep complete repair records and answer title, insurance, or sale questions accurately.
Do EVs and ADAS-equipped vehicles need extra steps?
Yes. Hybrid and electric vehicles require model-specific high-voltage disable, verification, and component-protection procedures. Structural work, wheel alignment, suspension changes, glass removal, or sensor movement may also trigger pre- or post-repair scans and ADAS calibrations specified by the OEM.
Sources
- I-CAR OEM Technical Information Matrix — OEM availability of material, sectioning, attachment, corrosion-protection, and repair information.
- American Honda: Body Repair Manual Welding & Sectioning Guideline Revisions — approved welding methods, steel-strength limits, filler-wire guidance, heat restrictions, and sectioning rules.
- I-CAR: Repair Tolerances — three-dimensional measurement and repeated checks during structural repair.
- I-CAR: Corrosion Protection Inspection During the Repair Process — restoring seam sealer, cavity wax, adhesives, and coatings after welding.
- I-CAR: Welding on a Hybrid or Electric Vehicle — high-voltage and 12-volt disable precautions before welding.
- I-CAR: OEM ADAS Information Documents — finding vehicle-specific scan and calibration requirements.




