A plasma cutter can cut poorly, shut down, or trip a breaker when its power supply cannot support the load. The confusing part is that the amperage shown on the front of the cutter is usually its torch output, not the amperage it draws from the wall. Before plugging one in, match the machine’s input voltage, input current, plug, circuit, wiring, duty cycle, and compressed-air requirements.
Quick Answer
Compact plasma cutters may operate from an approved 120-volt, 15- or 20-amp supply, while many 40- to 45-amp output machines use a 200- to 240-volt circuit in roughly the 30- to 50-amp class. The correct requirement is always the manufacturer’s input specification—not the torch-output setting.
Key Takeaways
- Input amps and output amps are different. A “45-amp cutter” does not necessarily draw 45 amps from the wall.
- Read the nameplate and manual for input voltage, phase, rated input current, breaker or fuse guidance, plug type, and duty cycle.
- Do not increase a breaker’s size unless a qualified electrician confirms the conductors, receptacle, panel, and installation can support it.
- Lower supply voltage may reduce maximum output or duty cycle on a dual-voltage machine.
- The air compressor may need its own circuit so its starting current does not trip the cutter’s breaker.
- Use the manufacturer’s cut chart—not a universal amps-per-thickness rule—to select torch output.
At a Glance
| Time Required | 10–20 minutes to review the nameplate and manual; circuit installation requires additional time |
| Difficulty | Easy to verify specifications; advanced electrical work should be performed by a qualified electrician |
| Tools Needed | Cutter manual, nameplate information, panel schedule, plug and receptacle inspection, and electrician’s test equipment when installation work is needed |
| Cost | No cost to verify specifications; outlet, circuit, panel, permit, and electrician costs vary by the existing installation |
What’s in This Article
- Input Amps vs. Output Amps
- Understanding Plasma Cutter Power Consumption
- Plasma Cutter Circuit Examples
- Workshop Electrical Requirements for Plasma Cutting
- Circuit Breaker and Outlet Specifications
- Choosing the Right Plasma Cutter Model
- Generator and Extension Cord Requirements
- Why a Plasma Cutter Trips the Breaker
- Safety Measures for Plasma Cutting Operations
- Managing Noise and Consumables
- Optimizing Efficiency and Cutting Performance
- Frequently Asked Questions
Input Amps vs. Output Amps
A plasma cutter has at least two amperage figures that serve different purposes:
- Output current is the adjustable current delivered to the torch. It affects cutting capacity, speed, kerf, and which consumables you use.
- Input current is the current the power supply draws from the building or generator at a stated voltage and operating condition.
These figures are not interchangeable. A cutter rated for 45 amps of output may draw less than 45 amps from a 240-volt supply or more current from a lower-voltage supply. Voltage, efficiency, power factor, phase, and operating load all affect input current.
Warning: Never size a branch circuit from the number on the cutter’s output knob. Use the manufacturer’s input-power table and installation instructions. An oversized breaker on undersized wiring can allow dangerous overheating without tripping promptly.
Understanding Plasma Cutter Power Consumption
Start with the machine’s data plate and operator manual. Look for the following items:
- Input voltage: Common portable machines may accept 120 V, 200–240 V, or both. Industrial units may require higher voltage or three-phase power.
- Phase: A machine marked `1-PH` needs single-phase power. A machine marked `3-PH` requires a compatible three-phase supply.
- Rated input current: This is the key amperage figure for electrical planning.
- Recommended fuse or breaker: Follow the manufacturer’s installation table and applicable electrical requirements.
- Plug and receptacle: The connector must match the machine and circuit. A plug’s face rating does not, by itself, prove that the wiring behind the outlet is correct.
- Duty cycle: This states how long the cutter can operate within a 10-minute period under the published test conditions before it must cool.
- Engine-drive rating: Use this figure when selecting a generator.
For example, the legacy Hypertherm Powermax45 XP has an output range of 10–45 A. Its published single-phase input is 39 A at 200 V and 32 A at 240 V. At 45 A output, its duty cycle is 50% at 40°C, which means five minutes of cutting within a ten-minute test period before the required cooling interval.
The cutter’s output setting tells you what reaches the torch. The input table tells you what the workshop power supply must support.
Plasma Cutter Circuit Examples
There is no safe universal breaker size for every plasma cutter. The following manufacturer specifications show why the model and supply voltage matter.
| Example | Input | Torch Output | What It Shows |
| Powermax30 XP | 25.5 A at 120 V; 18.8 A at 240 V at the published 3.8 kW condition | 15–30 A | The same dual-voltage cutter draws different input current and has a lower published duty cycle on 120 V. |
| Powermax45 XP, legacy model | 39 A at 200 V; 32 A at 240 V | 10–45 A | The CSA version shipped with a NEMA 6-50P connection, but installation still has to follow its manual and local requirements. |
| Powermax45 SYNC | 39 A at 200 V; 32 A at 240 V | 9–45 A | A current 45 A family machine has similar input demands to the discontinued XP, but its own manual remains controlling. |
Note: Hypertherm stopped manufacturing the Powermax45 XP in March 2024, although the company continues to support it and supply service parts. Used-machine owners should follow the XP manual; new buyers should compare current models.
Workshop Electrical Requirements for Plasma Cutting
Review the complete workshop load before cutting. The plasma power supply is only part of the demand. A separate air compressor, dust collector, ventilation equipment, lighting, and other tools may operate at the same time.
A dedicated branch circuit is often the most practical setup for a mid-size or high-output cutter because it prevents another tool from consuming part of the circuit capacity. However, “dedicated” does not automatically mean “50 amp.” Its rating must match the cutter instructions and the installed electrical system.
Pay special attention to the air compressor. Compressor motors can draw a brief but high starting current. When the compressor and cutter share a marginal circuit, the breaker may trip when the compressor restarts during a cut.
Warning: Do not replace a 15-, 20-, or 30-amp breaker with a larger one simply to stop tripping. The breaker protects the branch-circuit conductors. A qualified electrician must verify conductor size, insulation, receptacle, terminations, panel capacity, grounding, and local requirements before changing the circuit.
Circuit Breaker and Outlet Specifications
The breaker, conductors, receptacle, plug, disconnecting method, and equipment grounding path form one system. Choosing only the breaker size is not enough.
Circuit Breaker Ratings
Use the breaker or fuse guidance in the operator manual for the exact model, voltage, and phase. Do not assume that every 30 A output cutter belongs on a 30 A branch circuit or that every 45 A output cutter belongs on a 50 A circuit.
For the Powermax45 XP example, the machine’s rated input is 32 A at 240 V and the CSA power cord uses a 50 A, 250 V NEMA 6-50P plug. That documented configuration helps explain why these cutters are commonly seen with a 6-50 receptacle, but it does not authorize improvised wiring or an unverified breaker change.
Dedicated Outlet Installation
Use this process to plan the installation:
- Identify the exact model and region: Electrical versions can differ between North America, Europe, and other markets.
- Read the input-power table: Record voltage, phase, frequency, rated input current, and the manufacturer’s breaker or fuse guidance.
- Check the supplied plug: Use the correct listed receptacle or the manufacturer-approved connection method.
- Review panel capacity: A qualified electrician should calculate whether the service and panel can support the new load.
- Inspect the full branch circuit: Confirm conductor size, run length, terminations, receptacle condition, grounding, and any required protection.
- Keep other heavy loads separate: Place the compressor or other motor loads on another suitable circuit when required.
Pro Tip: Photograph the cutter’s nameplate, plug, and electrical-specification page before speaking with an electrician. Those details are more useful than saying only that the machine is a “30-amp” or “45-amp” cutter.
Choosing the Right Plasma Cutter Model
Choose a machine by balancing the metal you cut, the speed you need, available electrical power, compressed-air capacity, portability, and duty cycle.
Dual-voltage capability adds flexibility, but it does not guarantee identical performance at both voltages. The Powermax30 XP, for example, publishes a 20% duty cycle at 120 V and a 35% duty cycle at 240 V under its stated test conditions. A lower-voltage connection may also limit the output setting or practical cutting capacity on other models.
Use the manufacturer’s recommended cut capacity rather than its maximum severance claim when selecting a machine for regular work. Recommended capacity reflects a more useful cutting speed; severance capacity describes a slow cut near the machine’s limit.
The Powermax30 XP publishes a recommended capacity of 3/8 inch at 20 inches per minute and 1/2 inch at 10 inches per minute. The Powermax45 XP publishes 5/8 inch at 20 inches per minute and 7/8 inch at 10 inches per minute. These are product-specific examples, not universal rules for all 30 A and 45 A cutters.
Before buying, answer four questions:
- What metal and thickness will you cut most often?
- What voltage and circuit capacity are available?
- Can the air supply maintain the required pressure and flow while cutting?
- How long must the machine cut before stopping to cool?
Products Worth Considering
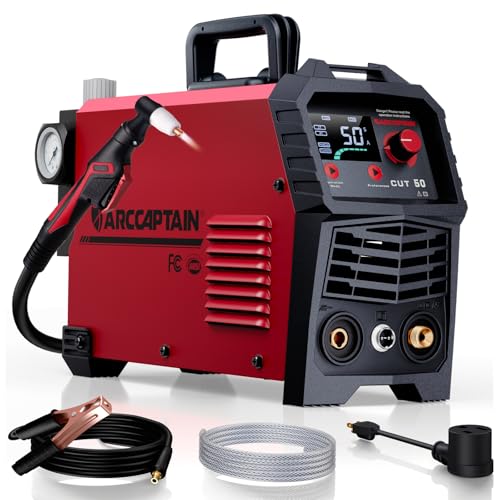
【Powerful Cutting Ability】Switch effortlessly between 110V and 220V for home or workshop use. Achieve professional 1/2" clean cuts on steel, aluminum, and copper with advanced LGBT technology. Perfect for DIY projects and heavy-duty tasks. Recommended maximum cutting thickness: 12mm @ 35A / 110V / 55 PSl; 18mm @ 50A / 220V / 75 PSI. Note: Requires compressed air (compressor sold separately).

[75A Plasma Cutting Performance]: The STC750P plasma cutter machine delivers powerful cuts with advanced IGBT inverter technology and high-frequency pilot arc. Supporting 110V/220V dual voltage, it offers 15-45A at 110V for home garage projects and up to 75A at 220V for professional metal fabrication. Clean cuts up to 5/8" (16mm) and maximum severance thickness up to 1" (25mm) at 75A/70 PSI on 220V with reduced slag and less post-cut grinding

【Non-Touch Pilot Arc Function】The plasma cutter features a high frequency non-touch arc starting mode. It allows for cutting steel surfaces with dirt, rust or coatings. The torch head does not need to touch the metal plate, reducing energy consumption, minimizing electrode burning, and extending service life. NOTE: DO NOT power on until the screen turns off and the fan stops working!
Generator and Extension Cord Requirements
Products Worth Considering

【𝐂𝐞𝐫𝐭𝐢𝐟𝐢𝐜𝐚𝐭𝐢𝐨𝐧 & 𝐃𝐞𝐭𝐚𝐢𝐥𝐬】ETL Listed NEMA L14-30P to 6-50R, 4 Prong 30 Amp to 3 Prong 50 Amp, STW 10AWG/3C 125/250V 3750/7500W 12inch
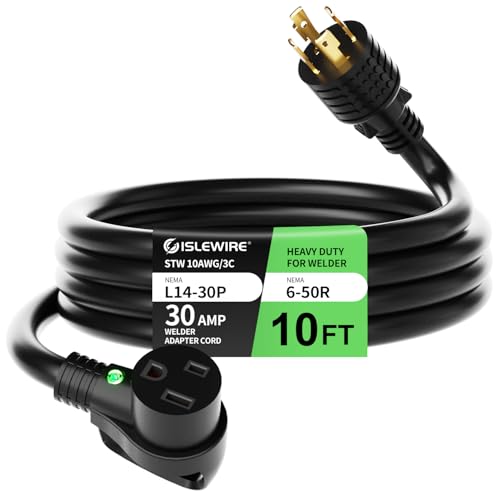
30 Amp Welder Adapter Extension Cord: Built with ETL Listed 10AWG 100% copper conductors, this NEMA L14-30P to 6-50R extension cord supports 30 Amps at 250 Volts, delivering up to 7,500 Watts of stable, high-load power. Designed to convert your 4-prong generator outlet into a 3-prong welder plug, it's the ideal welder adapter cord 30 amp for stick welders, MIG/TIG setups, and plasma cutters—no rewiring required.

50A to 30A Welder Adapter Cord: this adapter cord converts a 50amp 6-50P plug to a 30amp l6-30R locking receptacle, allowing you to easily connect the 30Amp welder and plasma cutter or other devices with a L6-30P plug to 50Amp welder outlet or other devices with a 6-50R outlet without changing the power cable; Max 240V 30 Amp, cannot transform to 120V
Generator Sizing
Do not size a generator only by multiplying the cutter’s front-panel amps by the supply voltage. Use the cutter manufacturer’s engine-drive requirement because starting behavior, voltage regulation, waveform quality, and arc stretch also matter.
Hypertherm lists the following examples for the legacy Powermax45 XP:
- 10 kW engine drive: full 45 A output
- 8 kW engine drive: 45 A with limited arc stretch
- 6 kW engine drive: full performance at 30 A output
The Powermax30 XP lists a 5.5 kW engine-drive requirement for full 30 A output. Confirm grounding, neutral arrangement, receptacle compatibility, and generator instructions before use.
Extension Cords
A long or undersized extension cord can cause voltage drop, difficult arc starts, poor performance, overheating, or nuisance trips. Use an extension cord only when the cutter manufacturer permits it.
The required conductor size depends on supply voltage, cutter load, cord length, conductor material, ambient conditions, and local requirements. Do not copy the size of a short factory power cord and assume it is adequate for a long extension.
Note: Household plug adapters and improvised extension assemblies can bypass the connector, grounding, or conductor capacity intended by the manufacturer. Use only approved components in good condition.
Why a Plasma Cutter Trips the Breaker
Frequent breaker trips are a warning to diagnose the setup—not a reason to install a larger breaker. Common causes include:
- The cutter’s rated input exceeds the available circuit capacity.
- The air compressor, lights, heater, or another tool shares the circuit.
- The cutter is being operated at an output or duty cycle not supported by the selected input voltage.
- An extension cord is too long, too small, damaged, or poorly connected.
- The plug or receptacle has loose, worn, discolored, or overheated contacts.
- The branch circuit has a loose termination or other installation defect.
- The breaker is damaged or inappropriate for the installation.
- The plasma cutter has an internal electrical fault.
Use this safe troubleshooting order:
- Stop using the cutter if you smell hot insulation, see discoloration, hear arcing, or find a hot plug or receptacle.
- Confirm the exact input requirements in the manual.
- Disconnect other loads from the circuit.
- Remove an extension cord and test only when a correct direct connection is available.
- Reduce output only if the manual permits lower performance on the available supply.
- Have a qualified electrician inspect the circuit if tripping continues.
- Have an authorized service technician inspect the cutter when the electrical supply is verified as correct.
Safety Measures for Plasma Cutting Operations
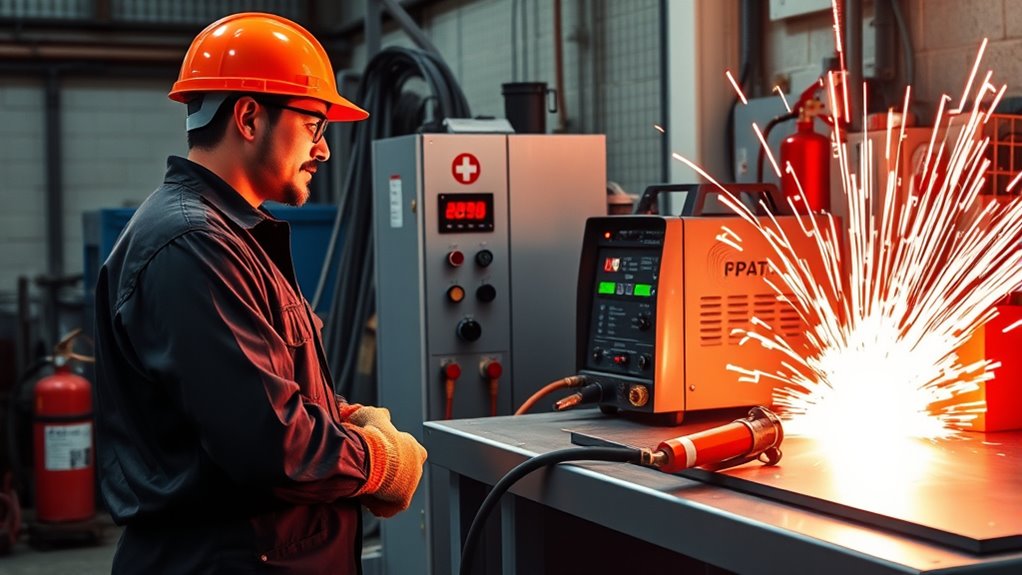
Plasma cutting exposes the operator and nearby people to electric shock, intense light, hot metal, sparks, fire, noise, compressed air, and airborne metal fume. Follow the cutter’s safety manual and applicable workplace requirements.
Eye, Face, Skin, and Hearing Protection
Use safety glasses with side protection under a suitable cutting shield or helmet. Select a filter shade appropriate for the arc current and manufacturer instructions. OSHA requires protection from flying particles, molten metal, and injurious light radiation and provides minimum filter-shade guidance for arc operations in 29 CFR 1910.133.
Wear flame-resistant clothing that covers exposed skin, heat-resistant gloves, and suitable footwear. Synthetic fabrics can melt when struck by sparks. Use hearing protection when noise exposure is high or cutting is prolonged.
Fumes and Ventilation
Plasma cutting melts metal and produces airborne fume. The hazard changes with the base metal, coatings, paint, oil, plating, and contaminants. Stainless steel and chromium-containing coatings can create hazardous chromium compounds, while galvanized metal can produce zinc-containing fumes.
OSHA’s welding-fume guidance recommends keeping the plume out of the breathing zone and using effective ventilation or local exhaust near the source. Cutting outdoors does not automatically guarantee adequate ventilation.
Respiratory protection may be required when engineering controls and work practices cannot control exposure. Workplace respirator use requires proper selection, medical evaluation, fit testing, training, and a compliant respiratory-protection program. Do not enter or cut in a confined space without the required confined-space assessment, ventilation, atmospheric controls, attendant procedures, and emergency planning.
Fire and Container Hazards
Move paper, rags, fuel, solvents, dust, gas cylinders, and other combustibles away from sparks and hot slag. Keep suitable fire-extinguishing equipment available and inspect the surrounding area after cutting because sparks can travel into cracks or concealed spaces.
Warning: Do not cut a sealed, closed, or unknown container. A tank that appears empty may contain flammable vapor or pressure. Containers and hollow spaces require proper identification, cleaning, isolation, venting or purging, and an approved hot-work procedure before cutting.
Remove paint, solvent residue, plating, and other coatings only through a method that does not create a new hazard. Review the material’s safety information before heating or cutting it.
Electrical and Work-Clamp Safety
- Keep the cutter, gloves, clothing, leads, and work area dry.
- Inspect the torch, power cord, plug, work lead, and work clamp before each use.
- Connect the work clamp to clean metal as directed by the manufacturer.
- Do not touch live torch parts, damaged insulation, or exposed conductors.
- Turn off and isolate power before inspecting or replacing parts unless the manual specifically requires another procedure.
- Do not operate a damaged machine until it has been repaired.
Managing Noise and Consumables
Plasma cutters and compressed-air systems can produce damaging noise. Reduce exposure through equipment maintenance, source controls, distance, shorter exposure time, and suitable hearing protection.
Consumable life depends on the number of starts, cutting current, pierce technique, torch height, air quality, material, and whether the parts are used within their intended range. There is no reliable universal number of cuts or hours.
Inspect the electrode, nozzle, shield, retaining cap, and swirl ring according to the manual. Replace parts when wear reaches the manufacturer’s limit, the arc becomes unstable, holes become out of round, bevel increases, or cut quality falls.
Use clean, dry, oil-free air at the specified pressure and flow. The Powermax30 XP, for example, publishes 4 standard cubic feet per minute at 80 psi. The Powermax45 XP publishes approximately 6.7 standard cubic feet per minute at 90 psi. Air pressure without enough flow can still cause a pressure fault during cutting.
Pro Tip: Drain the compressor and filters regularly, inspect the air line for oil or moisture, and keep the correct spare electrodes and nozzles with the machine. Poor air quality can damage new consumables quickly.
Optimizing Efficiency and Cutting Performance
Set output amperage from the machine’s cut chart and consumable instructions. The correct setting depends on the metal, thickness, consumable set, torch type, cutting method, and desired speed.
- Install matching consumables: A nozzle designed for one current range should not be operated outside its published limit.
- Set the recommended output: Use the manufacturer’s chart as the starting point.
- Maintain correct travel speed: Moving too slowly increases dross and widens the kerf; moving too fast can prevent full penetration.
- Use the correct torch height: Excessive standoff weakens the arc and changes the cut angle.
- Protect input voltage: Avoid overloaded circuits and unsuitable extension cords.
- Supply clean, steady air: Confirm both pressure and flow while the torch is operating.
- Respect duty cycle: Allow the machine to cool when required rather than repeatedly resetting a thermal shutdown.
Using maximum amperage on every job is not more efficient. Excessive output can enlarge the kerf, shorten nozzle life, distort thin sheet, and consume more energy without improving the finished cut.
Estimating Electricity Cost
Estimate cutting energy with this formula:
Input kilowatts × arc-on hours × electricity rate per kilowatt-hour = estimated energy cost
For example, a machine drawing 6.5 kW at a published operating point and cutting for 30 actual arc-on minutes uses approximately 3.25 kWh before accounting for changing load and other equipment. The compressor and ventilation system add their own consumption. Use the machine’s input-power specification and your utility rate for a realistic estimate.
Frequently Asked Questions
How many amps does a plasma cutter usually need?
A compact cutter may operate from an approved 120 V, 15- or 20-amp supply, while many 40- to 45-amp output machines use a 200- to 240-volt circuit in roughly the 30- to 50-amp class. Larger industrial systems may need substantially more power or three-phase service. Check the input table for the exact model.
Can a plasma cutter run on a 20 amp circuit?
Some compact or dual-voltage machines can use an approved 20-amp circuit, particularly at 120 V or 240 V when the manual allows it. Available output or duty cycle may be lower on the 120 V connection. Do not use a 20-amp circuit unless the machine documentation permits it.
Does a plasma cutter need a dedicated circuit?
A dedicated circuit is often the safest and most reliable arrangement for a mid-size or high-output cutter, especially when a compressor or other heavy loads are nearby. Whether it is required and how it must be sized depend on the cutter instructions, the installation, and applicable electrical requirements.
What is the difference between input amps and output amps?
Output amps are delivered to the torch and affect cutting performance. Input amps are drawn from the wall or generator. Use input amps and the manufacturer’s installation table when planning the electrical supply.
How does a plasma cutter affect energy bills?
Multiply the cutter’s input kilowatts by actual arc-on hours and the utility’s price per kilowatt-hour. Include the air compressor and ventilation equipment for a fuller estimate. Setup time does not consume the same power as continuous cutting.
Can I use a generator to power a plasma cutter?
Yes, when the generator meets the manufacturer’s engine-drive rating, voltage, frequency, receptacle, grounding, and power-quality requirements. Use the cutter’s generator table instead of relying only on its nominal wattage.
What is the lifespan of a plasma cutter’s consumables?
There is no universal lifespan. Starts, pierces, output current, air quality, torch height, material, and technique all affect wear. Inspect the electrode and nozzle against the manufacturer’s limits and replace them when cut quality or arc stability declines.
Do plasma cutters require regular maintenance?
Yes. Inspect consumables, torch parts, leads, the work clamp, plug, air filters, and cooling openings. Drain moisture from the compressor and filters and follow the maintenance intervals in the operator manual.
Are there portable plasma cutter options for outdoor use?
Yes. Choose a model that matches the available utility or generator supply and provides the required compressed air. Keep the equipment dry, control sparks and fire hazards, secure gas and air lines, and do not assume outdoor airflow provides adequate fume control.
Why does my plasma cutter keep tripping the breaker?
Possible causes include an undersized or shared circuit, compressor starting current, an unsuitable extension cord, voltage drop, damaged connections, excessive duty cycle, an electrical-installation defect, or an internal machine fault. Stop using overheated or damaged equipment and have the circuit inspected rather than installing a larger breaker.
Conclusion
The number on a plasma cutter’s output control is not the number you should use to size its electrical circuit. Start with the input-power table for the exact model, voltage, phase, and region. Then match the breaker or fuse, conductors, plug, receptacle, grounding, panel capacity, and generator to the manufacturer’s instructions and applicable requirements.
Compact cutters may operate from approved 15- or 20-amp supplies, while many 40- to 45-amp output machines use larger 200- to 240-volt circuits. The range is only a starting point. A qualified electrician should evaluate any new outlet, altered circuit, repeated breaker trip, damaged connection, or uncertain workshop installation.
With correct power, clean dry air, matching consumables, proper ventilation, and suitable protective equipment, a plasma cutter can start more reliably, cut more consistently, and operate without placing unnecessary stress on the machine or electrical system.
Sources
- Hypertherm Powermax30 XP specifications — input current, output range, duty cycle, cutting capacity, air supply, and generator requirement
- Hypertherm Powermax45 XP product support — input specifications, duty cycle, generator performance, cutting capacity, and discontinued status
- Hypertherm Powermax45 SYNC specifications — current 45 A system input, output, duty cycle, and air requirements
- OSHA 29 CFR 1910.133: Eye and Face Protection — protection from flying particles, molten metal, and radiant energy
- OSHA: Controlling Hazardous Fume and Gases During Welding — plasma-cutting fumes, coatings, ventilation, local exhaust, and respiratory protection
- OSHA 29 CFR 1910.252: Welding, Cutting, and Brazing — hot-work fire prevention, containers, hollow spaces, and confined-space precautions