Inspect your auto-darkening welding helmet before each use for cracks, dents, worn headgear, and lens damage. Clean the ADF and cover lenses with compressed air and a lightly dampened microfiber cloth; avoid harsh chemicals and abrasives. Check batteries, solar charging, and battery contacts, then test the darkening function in bright light. Store the helmet in a dry case, replace worn parts promptly, and keep your respiratory gear maintained so you can work safer and smarter.
Inspect Your Welding Helmet Before Use
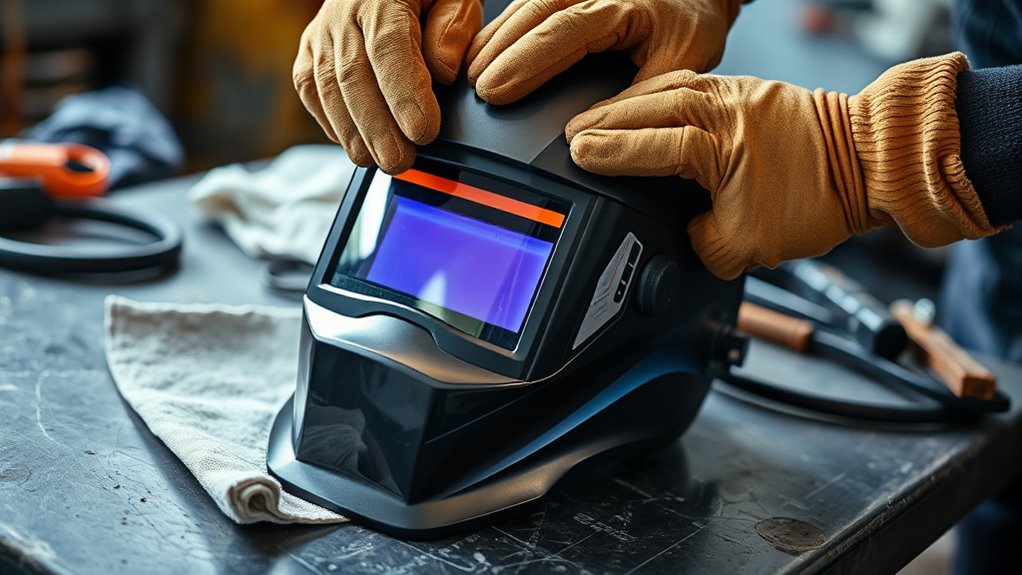
Before you start welding, inspect your helmet for any cracks, dents, or other wear that could affect safety. This basic HELMET CARE step protects you and keeps your gear dependable.
Check the shell closely for impact damage, warped edges, or stress marks. Then examine the auto-darkening filters for scratches, visible defects, or signs that they won’t respond correctly.
Check the shell for impact damage, then inspect the auto-darkening filters for scratches or response issues.
Secure the headgear and adjust it so the helmet sits snug without shifting or pinching. A stable fit lets you work freely and keeps the lens aligned with your view.
Next, use the test mode to verify that the ADF darkens when exposed to bright light. If the response looks slow or uneven, don’t use it until you resolve the issue.
Finally, turn the adjustment knobs and confirm they move smoothly and change shade and sensitivity settings as intended. This ensures optimal auto-darkening performance during your welding tasks.
Clean the ADF Lens Properly
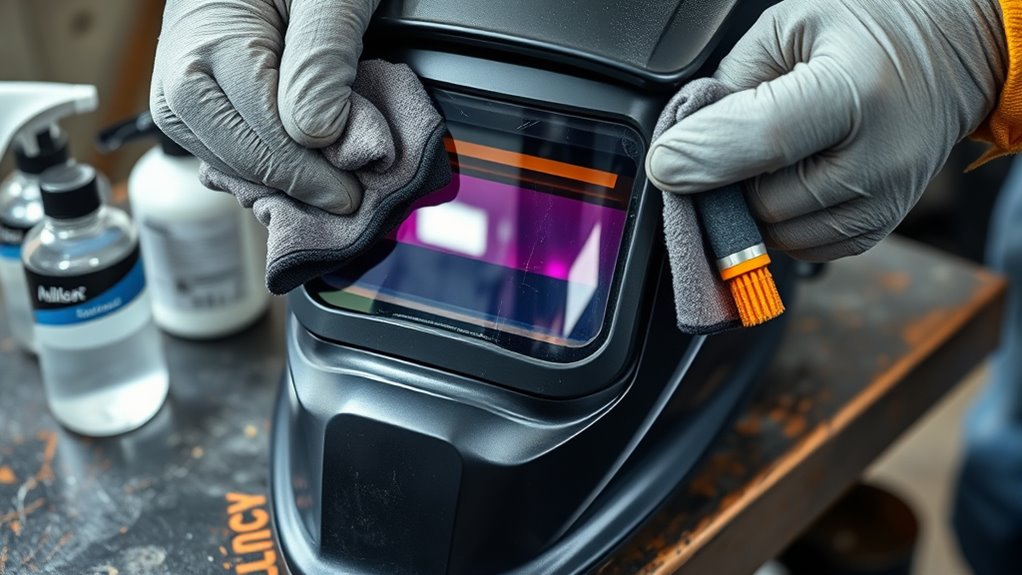
Keep the ADF lens free of dust, smudges, and spatter so you can see clearly while welding.
Before you wipe it, use compressed air to remove loose grit and particles; that lowers scratch risk. Then clean the ADF with a lightly dampened microfiber clean cloth, moving in gentle strokes.
Don’t spray cleaner directly on the lens, and don’t flood the edge seals. Skip harsh chemicals, solvents, and abrasive pads, because they can damage the liquid crystal layers inside the ADF.
Check the lens often for haze, fingerprints, or residue that could distort your view and slow your work. If buildup stays on, repeat the wipe with a fresh section of cloth instead of pressing harder.
After cleaning, let the surface air-dry fully before storing the helmet. Keep the helmet in a clean, dry place so dust doesn’t return fast.
Good maintenance protects your sight and keeps your welding precise, independent, and controlled. Additionally, using a quick auto-darkening filter can enhance safety and efficiency while you work.
Keep Cover Lenses Clear
The cover lenses do a lot of the hard work for your helmet, so inspect them regularly for scratches, pitting, and other damage that can block your view or expose the ADF. If the outer cover lens looks worn, replace it fast; a new one usually costs only $5–15 and keeps your protection intact.
For routine cleaning, wipe the outer lens with a microfiber cloth using light circular or straight strokes. Don’t use rough rags or abrasive pads, since they can scar the surface and reduce clarity. Before welding, you can apply a thin coat of car wax or furniture polish to help stop spatter from sticking.
Check the inner cover lens too, and clean it with a soft cloth to remove sweat and grime that can cloud your view and slow performance. Clear cover lenses keep your work sharp, your hands free, and your welding under control. Maintaining the cover lenses is crucial for ensuring optimal vision clarity during your welding tasks.
Check Batteries and Solar Charging

Check the batteries in your auto-darkening helmet to make sure they’re installed correctly and the compartment is clean.
If your helmet uses solar charging, keep it exposed to light so the battery stays charged.
Test the ADF periodically with bright light to confirm the backup power still lets it darken properly. Regular maintenance ensures you benefit from its advanced auto-darkening technology for optimal performance.
Products Worth Considering

HQRP® Four Lithium Batteries;

Energizer 2450 Lithium Coin Battery with child resistant packaging
【FASTER AUTO-DARKENING】Features high-end auto-darkening lenses with 4 premium arc sensors, switching from light to dark in 1/25000 sec. Easily adjust the shade and sensitivity of the lenses for different working environments, perfect for TIG/MIG/ARC welding. Dark state level: 4/9-13.
Battery Installation Check
Start by confirming that your auto-darkening welding helmet has the correct CR2450 batteries installed, usually at the top of the ADF cartridge. You need solid battery power before you strike an arc, so verify the cells sit firmly in place and match the manufacturer’s spec.
Test the helmet’s functions before use; if it won’t respond, the batteries may be dead. Inspect the contacts for corrosion, dirt, or looseness, and clean them if needed to restore conductivity.
If the helmet still acts unreliable, replace batteries. Keep the solar-assist system in working condition, since it helps maintain charge.
Follow the manufacturer’s replacement schedule and safety guidance so your gear stays dependable and you stay free to work with confidence.
Solar Charge Exposure
A well-exposed auto-darkening helmet uses solar power and battery backup together, so you should keep it where it can get plenty of light between jobs. This solar charge exposure keeps AUTO-DARKENING HELMETS ready and steady.
| Check | Action |
|---|---|
| Storage light | Place it in bright areas |
| Sunlight | Let panels soak up light |
| Welding arcs | Use them to aid charging |
| Battery cell | Verify the CR2450 stays installed |
| Performance | Replace weak cells fast |
Keep the ADF cartridge facing light when you’re off the job. Don’t bury the helmet in a dark locker or truck box; that slows charging. Inspect the battery regularly, since a tired cell can weaken auto-darkening response. By managing solar charge exposure, you protect function, safety, and your freedom to weld without hesitation.
Backup Power Monitoring
Keep an eye on the ADF’s backup power so your helmet doesn’t fail mid-job. For solid backup power monitoring, inspect the CR2450 batteries at the top of the cartridge often.
If the lens hesitates, flickers, or shows LOW BATTERY, replace them before you strike another arc. Your helmet’s solar cells recharge in daylight, and arc welding adds charge during use, so don’t leave it parked in a dark locker or toolbox.
Store it where light can reach the panel, and test the ADF before each session. This routine keeps your gear ready, protects your eyes, and keeps you free to work without avoidable interruption.
Test the Auto-Darkening Function
Before each use, put your auto-darkening helmet in test mode per the manufacturer’s instructions and watch the lens respond to bright light; it should shift from light to dark, then return to light promptly when the arc is removed. This test verifies the auto-darkening function before you strike an arc.
Keep your face shield clean enough to see the lens clearly, then activate test mode and observe the full cycle. If the lens darkens and resets quickly, the helmet’s sensing circuit is doing its job.
Keep your face shield clean, then test the lens and confirm it darkens and resets quickly.
Repeat this check regularly, not just after storage or battery changes, so you can trust the protection on every weld. If the lens doesn’t darken, stays dark, or returns too slowly, don’t use the helmet. A lightweight construction minimizes fatigue during extended use, ensuring you can focus on your welding tasks.
Contact the manufacturer for service or replacement guidance. A working helmet protects your vision and keeps your welding practice autonomous, safe, and efficient.
Set Shade and Sensitivity Correctly
Set your helmet’s shade to match the welding process, usually within DIN 9 to DIN 13, and confirm the correct level with the WPS.
Adjust sensitivity so it reacts reliably to the arc without triggering from ambient light.
Before you weld, use the test mode to verify the lens darkens and returns to light properly. Additionally, ensure your settings align with the helmet’s auto-darkening capability for optimal safety and performance.
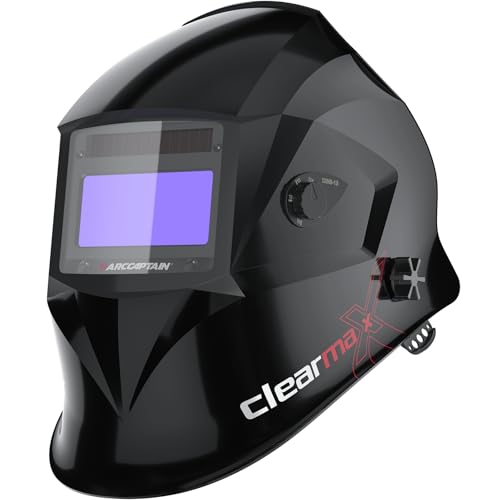
Products Worth Considering

Wide Application Range: Shade 3.5/9-13 supports TIG, MIG, MMA/ARC and Grind, and the helmet accommodates magnifying lenses for close-up and detailed work.

Advanced Eye Protection with Blue Light Blocking Technology: This welding helmet features cutting-edge Blue Light Blocking outer lens, shielding your eyes from harmful blue light during welding, protects your eyes by filtering out most of harmful high energy blue light rays while letting through the less harmful portion of the blue light spectrum. This ensures long-lasting eye comfort and safety for extended welding sessions

Better clarity & True color view: The welding hood is equipped with a 3.64"x1.67" viewing window, featuring top-tier 1/1/1/1 optical clarity lenses and true color technology. You do not have to frequently flip up the helmet during work, and greatly improving the accuracy and efficiency while reducing eye strain.
Choose Proper Shade Level
Choose the right shade level on your auto-darkening helmet, typically DIN 9 to DIN 13, based on the brightness of the welding job and the WPS for that application. Your shade level must match the arc intensity, so pick the appropriate shade for the process and amperage. Use this quick guide:
| Condition | Setting |
|---|---|
| Low current | DIN 9 |
| Medium current | DIN 10 |
| General fabrication | DIN 11 |
| Bright arc | DIN 12 |
| Very bright work | DIN 13 |
Test the lens before you weld; it should darken fast and return cleanly. If the view feels too dim or too bright, adjust one step and retest. A proper shade level protects your eyes, improves control, and lets you work with confidence and freedom.
Adjust Sensitivity For Arc
Once you’ve picked the right shade, fine-tune the sensitivity so the auto-darkening filter reacts correctly to the arc.
Set the adjustable shade to match your process, usually DIN 9 to DIN 13, so you get protection without losing visibility.
Then use the sensitivity control to balance arc detection: turn it up for low-current work, down if nearby lights trigger false darkening.
You want the lens to respond fast to welding light, but stay calm during grinding, fit-up, and other non-welding tasks.
Check your welding procedure specifications for the recommended settings, and match them to your comfort.
A proper setup keeps your eyes protected, your hands free, and your work precise.
Test Response Before Welding
Before you strike an arc, test the helmet’s auto-darkening filter in test mode to make sure it responds correctly to light changes. Keep your Auto-Darkening Filter (ADF) ready and verify it gives you control, not risk.
Observe the lens darken instantly when exposed to a bright light source. Then set the shade for your job, usually DIN 9 to DIN 13, so you stay protected without losing visibility.
- Activate test mode exactly as the manual says.
- Check that the ADF darkens without delay.
- Set sensitivity so ambient light doesn’t trigger false response.
- Recheck before each use to prevent eye injury.
When you tune these settings, you work with confidence and defend your freedom to weld safely.
Remove Spatter, Dust, and Scratches
To remove weld spatter from the outer lens, apply lens cleaner or soapy water, let it sit briefly, and then wipe it gently with a microfiber cloth to avoid scratching the surface. This welding helmet cleaning step keeps your view clear and your work independent. Blow off dust and debris with compressed air, holding the can upright so moisture doesn’t collect on the lens. For minor scratches, use furniture polish to fill fine marks and improve clarity. If you see deeper scratches, use a fine rubbing compound carefully, because aggressive polishing can worsen damage. Regular inspections of the lens are crucial to ensure safety and optimal performance during welding tasks, especially given the helmet’s optical clarity rating.
| Issue | Action | Result |
|---|---|---|
| Spatter | Soak and wipe | Clean lens |
| Dust | Air blast | Clear surface |
| Scratches | Polish or compound | Better visibility |
Inspect the lens often. Replace the outer cover lens when damage grows, so you keep control, maintain safety, and weld with confidence.
Store Your Welding Helmet Safely
Store your welding helmet in a protective bag or case when you’re not using it to prevent scratches and impact damage. Keep it in a dry, temperature-controlled area away from direct sunlight and heavy objects to avoid moisture, warping, and component degradation. Check the storage area for dust and debris so the helmet stays clean and ready for use. Regularly cleaning the lens is crucial to ensure optimal visibility and prevent arc eye injuries during welding.
Safe, Dry Storage
Keep your welding helmet in a clean, dry storage area to prevent moisture buildup, mold, and mildew from damaging the helmet’s components. Your safe storage setup should stay stable, dust-free, and away from extreme heat or cold that can warp materials or weaken the auto-darkening filter.
- Place it upright so parts don’t shift.
- Keep the area free of debris and pests.
- Check for dampness before you store it.
- Verify nothing can tip or crush it.
Use a dedicated shelf or cabinet to keep control over your gear. When you store the helmet correctly, you protect its alignment, electronics, and shell.
That simple routine supports reliable performance and gives you more freedom to weld without avoidable failure.
Protective Storage Bag
A protective storage bag helps shield your welding helmet from scratches, dust, and impact damage when it’s not in use.
Choose a protective storage bag made from durable material with padding so you can protect your welding helmet during transport and storage. A water-resistant shell adds another layer of defense against moisture, grit, and other environmental threats.
Pick a model with pockets if you want to keep lenses, batteries, and other accessories organized and ready.
Don’t toss the bag aside after purchase; inspect it regularly for worn seams, broken zippers, or thinning padding. If you spot damage, replace it fast so your helmet stays secure.
Smart storage gives you control, reduces waste, and keeps your gear ready for work without unnecessary replacement costs.
Replace Worn Helmet Parts
Inspect your welding helmet regularly and replace worn parts before they affect safety or visibility. To replace worn helmet parts, check the front cover lens, Auto-Darkening Filter (ADF), batteries, and comfort components on a fixed schedule.
A scratched lens scatters light and can hide defects, so swap it as soon as you see damage. If the ADF responds slowly or darkens unevenly, install a new module. Weak CR2450 batteries can also cause failures, so test and replace them before they drop performance.
- Inspect the cover lens for scratches.
- Verify ADF response and shade consistency.
- Replace CR2450 batteries as needed.
- Renew sweat bands and padding for comfort.
Additionally, ensure secure attachment to maintain stable protection during operation. Follow the manufacturer’s replacement guidance to keep your helmet within safety standards. When you maintain each part, you protect your eyes, reduce fatigue, and keep your work space under your control.
Care for Respiratory Protection Gear
If your welding helmet includes respiratory protection, check the filters and consumables before each use and replace them on schedule. Inspect each filter for tears, warping, dust loading, or loose seals; a compromised element can quickly cut filtration and let particles through during welding.
On systems like a Speedglas 9100 with 3M Adflo PAPR, keep to the service interval so your respiratory protection stays effective and your airflow remains steady. Don’t blow filters out with compressed air; it can damage the media and weaken protection.
Keep to the service interval so respiratory protection stays effective and airflow remains steady.
Clean the helmet shell, hose, and face seal with the method the manufacturer specifies, then let everything dry fully before storage. Track wear on straps, gaskets, and connectors, and swap parts at the first sign of fatigue.
Proper ventilation and fume control are essential to ensure your respiratory protection is effective in maintaining a safe working environment. Follow the manufacturer’s guide for replacement frequency, because that’s how you stay compliant, protect your lungs, and keep your gear ready for the next weld.
Frequently Asked Questions
Do Auto Darkening Welding Helmets Wear Out?
Yes, they do wear out. Your auto darkening lifespan depends on helmet maintenance, heat, UV exposure, impacts, and battery condition. You’ll need to inspect the ADF, lenses, and seals, then replace worn parts promptly.
Why Do Welders Lose Their Eyesight?
You lose sight like a camera left in a furnace: UV and IR radiation burn your corneas, trigger arc eye, and, without welding safety and vision protection, can cloud lenses or cause permanent damage.
How to Clean Auto Darkening Welding Lens?
Use compressed air first, then wipe the auto-darkening lens with a microfiber cloth. Use mild soap and distilled water for deeper cleaning, never spray directly. Your lens maintenance and cleaning techniques keep vision clear and protect freedom.
Why Is My Auto Darkening Welding Helmet Not Darkening Fast Enough?
Your helmet may not darken fast enough because the ADF is failing, the lens sensitivity is set too low, batteries need better battery maintenance, sensors are dirty, or shade settings don’t match your arc.
Conclusion
By caring for your auto-darkening welding helmet, you keep your view clear and your protection reliable. Inspect it before each use, clean the ADF and cover lenses, and test the darkening response often. Replace damaged parts early, and store it in a dry, safe place. A well-maintained helmet lasts longer and performs better. Since arc rays can injure eyes in less than 1/10,000 of a second, consistent maintenance isn’t optional—it’s essential.


