How to Check Angle Grinder Brushes for Wear
What’s in This Article
- Why Regular Angle Grinder Brush Inspection Is Critical
- What Tools Do You Need for Brush Inspection?
- Before You Begin: Check Time and Safety
- Step-by-Step Process to Remove and Inspect Brushes
- Identifying Signs of Wear and Damage in Brushes
- How to Easily Replace Worn Brushes
- Common Mistakes to Avoid When Checking Brushes
- Tips for Maintaining Your Angle Grinder for Longevity
- Frequently Asked Questions
- Conclusion
A worn brush can make your angle grinder spark, stall, overheat, or lose power right when you need it most. You can catch most brush problems with a simple visual check and a quick length measurement. This guide shows you how to inspect, remove, and replace angle grinder brushes safely so your tool keeps running well.
Quick Answer
Unplug the angle grinder, let it cool, and remove the brush access covers. Pull out each carbon brush, keep track of its orientation, and measure its length. Replace the brushes if they look cracked, chipped, burned, unevenly worn, or worn down near one-quarter of their original length.
Key Takeaways
- Unplug the grinder before you remove any covers or touch the brushes.
- Replace carbon brushes when they reach the wear limit listed in your owner’s manual.
- Check for cracks, chips, heavy sparking, weak starts, and uneven brush surfaces.
- Clean dust from the brush area before you reinstall the covers.
- Use the correct replacement brushes for your exact angle grinder model.
Why Regular Angle Grinder Brush Inspection Is Critical

Regular brush checks help your angle grinder deliver steady power. Worn brushes can cause weak starts, uneven speed, extra sparking, and poor contact with the motor commutator.
Carbon brushes wear down as you use the grinder. Many manufacturers set a minimum brush length or wear mark, so use your owner’s manual as the final guide. If the brush looks very short, damaged, or uneven, replace it before you run the tool again.
Ignoring worn brushes can lead to heat, poor motor contact, and higher repair costs. A short inspection also helps you spot dust buildup, damaged holders, or loose covers before they become bigger problems.
Warning: Never inspect grinder brushes while the tool stays plugged in, even if the switch sits in the off position.
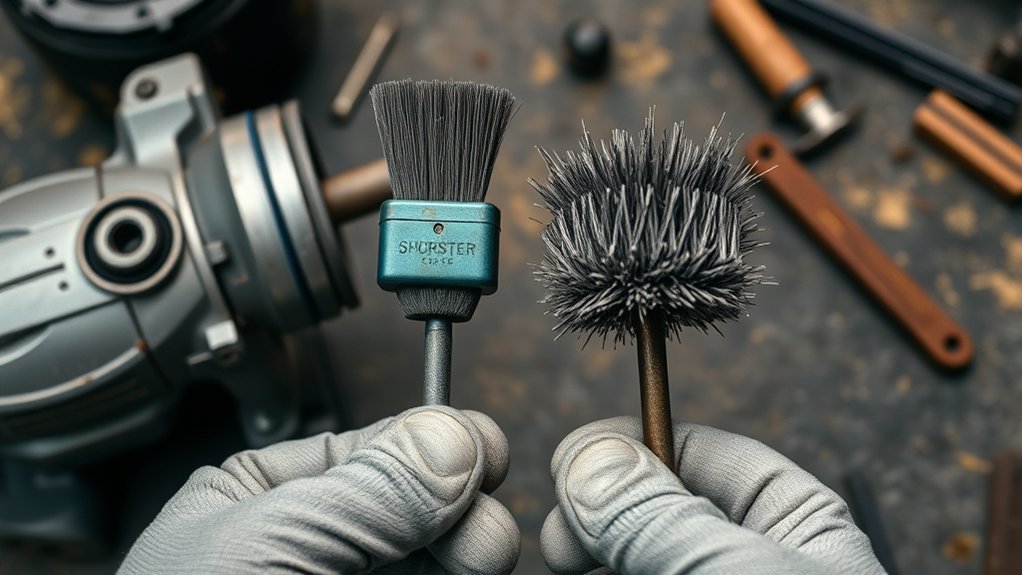
What Tools Do You Need for Brush Inspection?
You only need a few basic tools to inspect angle grinder brushes. Gather them before you start so you don’t handle the grinder while distracted.
- Screwdriver: Use the right size to remove the brush access covers without stripping the screws.
- Flashlight: Shine light into the brush area so you can see cracks, dust, and uneven wear.
- Ruler or caliper: Measure brush length and compare it with the manual or a new brush.
- Safety gloves: Protect your hands from sharp edges, dust, and small metal burrs.
- Soft brush or cloth: Clean loose dust from the brush area before you reinstall parts.
A can of compressed air can also help clear vents, but use it lightly. Strong air blasts can push abrasive dust deeper into the tool.
Products Worth Considering

Material is Carbon and Metal, size is 13x9x6mm/0.51"x0.35"x0.23“

Cost-Effective 6 Pcs Angle Grinder Wire Wheel: WENORA Angle grinder brushes are made of high strength hardened carbon steel wire for better performance than comparable products. Wire brush sets for angle grinders are a better value than buying from your local tool store.

[Compatibility]: Compatible With WS125, Black & Decker G720.
Before You Begin: Check Time and Safety
Estimated total time: 10 to 20 minutes for inspection, or 20 to 30 minutes if you replace both brushes.
Start with a cool, unplugged grinder on a clean bench. Remove the disc if it blocks access or makes the tool hard to handle. Keep small screws in a tray so they don’t roll away.
Use only brushes made for your grinder’s brand and model. A brush that fits loosely, binds in the holder, or uses the wrong grade can cause poor contact and early wear.
Products Worth Considering

Durable Material: Our Electric Motor Carbon Brushes are made of quality graphite and copper, crafted from premium-grade materials, ensuring minimal electrical noise and reduced sparking

For-Makita-GA9050 GA9067 9069 Angle Grinders CB204 CB-204 New 4*Carbon Brushes

【Carbon Brush Replacement】:part number : N257540
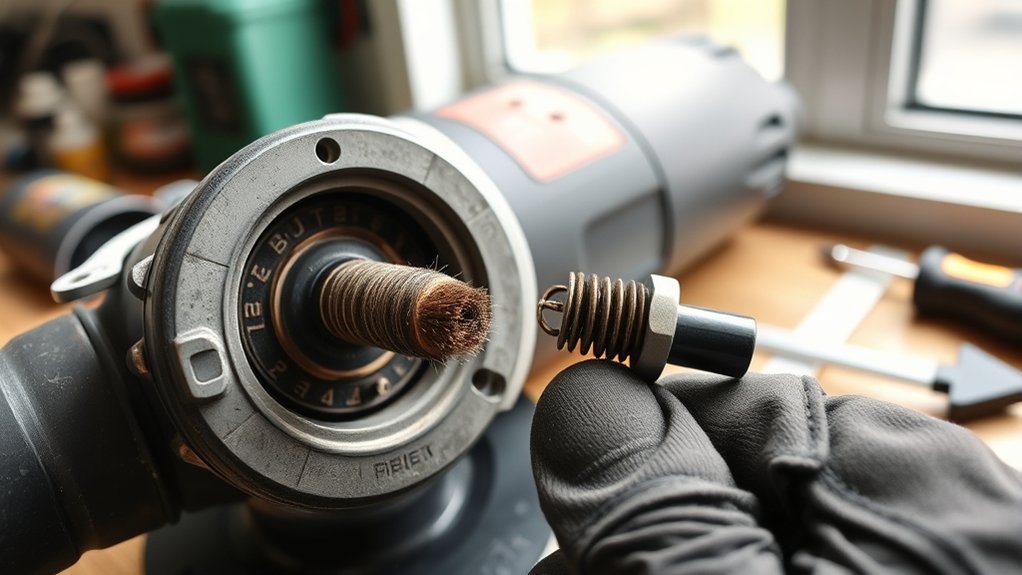
Step-by-Step Process to Remove and Inspect Brushes
Follow these steps in order. If your grinder uses a different cover style, follow the owner’s manual for that model.
- Unplug the grinder. Disconnect the power cord and let the tool cool before you touch the motor housing.
- Locate the brush access covers. Find the caps or covers on the motor housing, usually on opposite sides.
- Remove the covers. Use the correct screwdriver and turn slowly so you don’t damage the screws or plastic caps.
- Pull out each brush. Lift the brush gently and note its direction so you can reinstall it the same way if it still looks usable.
- Measure the brush length. Compare it with the manual, the wear mark, or a new replacement brush.
- Inspect the brush face. Look for cracks, chips, burned spots, crumbling edges, or uneven wear.
- Check the brush holder. Make sure the holder looks clean, firm, and free from damage.
- Clean the area. Use a soft brush or cloth to remove loose dust without forcing debris into the motor.
- Reinstall or replace the brushes. Seat each brush fully and confirm that it moves freely in the holder.
- Secure the covers. Tighten the caps or covers snugly, then reconnect power only after you finish reassembly.
If the brush spring looks weak or the holder looks burned, stop using the grinder. A qualified repair person should inspect the tool before you run it again.
Identifying Signs of Wear and Damage in Brushes
Brush wear can show up in the part itself and in the way the grinder runs. Use both checks, since a brush may look acceptable but still cause poor contact.
Visual Inspection Techniques
Check the brush under bright light. A healthy brush should slide smoothly in its holder and have a firm spring behind it.
- Check length. Replace the brush when it reaches the wear limit in your manual or looks much shorter than a new brush.
- Inspect the surface. Replace brushes with cracks, chips, crumbling edges, or burned marks.
- Test the fit. Make sure the brush slides freely without sticking or wobbling in the holder.
- Clean the housing. Remove dust that can trap heat or keep the brush from moving freely.
Performance Symptoms to Monitor
Watch for extra sparking from the motor housing, especially if the spark pattern grows brighter than usual. Some sparking can occur with brushed motors, but heavy or sudden sparking points to a problem.
Weak starts, uneven speed, power loss, and unusual motor noise can also point to brush wear. A burning smell or a hot motor housing means you should stop work and inspect the grinder before using it again.
How to Easily Replace Worn Brushes
Replacing worn brushes takes only a few minutes on many grinders. Always replace brushes in pairs unless your manual says otherwise.
Inspecting and replacing worn brushes helps your angle grinder run with steadier power and less strain.
- Remove the brush access cover to expose the carbon brush.
- Compare the old brush with the correct replacement brush for your model.
- Note the old brush orientation before you remove it.
- Slide the new brush into the holder without forcing it.
- Reinstall the cover and repeat the process on the other side.
- Run the grinder under light use for a few minutes so the brushes can seat.
If the grinder still sparks heavily after you install new brushes, stop using it. The commutator, holder, spring, or wiring may need service.
Common Mistakes to Avoid When Checking Brushes
A few simple errors can damage the tool or shorten brush life. Avoid these mistakes during inspection and replacement.
- Don’t mix old and new brushes unless the manual allows it.
- Don’t force a brush into a tight holder.
- Don’t sand the brush face unless the manufacturer tells you to do so.
- Don’t run the grinder with loose brush caps or missing covers.
- Don’t use generic brushes if the fit, lead, spring, or grade differs from the original part.
Pro tip: Take a quick photo before you remove each brush so you can match the original orientation during reassembly.
Tips for Maintaining Your Angle Grinder for Longevity
A clean grinder runs cooler and gives the brushes a better chance to last. Build a short maintenance habit after each heavy use.
Regular Cleaning Routine
Clean the grinder after dusty cutting or grinding jobs. Metal dust and abrasive grit can block vents and build up around moving parts.
- Wipe the housing. Use a dry rag to remove dust and grit from the outside.
- Clear the vents. Use light compressed air or a soft brush to clean air openings.
- Inspect the cord. Look for cuts, crushed spots, or exposed wire before each use.
- Clean the spindle area. Remove metal buildup around the disc mount with a suitable brush.
Inspecting Wear Indicators
Many carbon brushes include a wear mark, spring limit, or clear size difference compared with a new brush. Check your owner’s manual before you decide that a brush still has enough life left.
After you replace the brushes, confirm that both sit correctly in their holders. Run the grinder under light load first, then check for unusual smell, noise, or sparking.
Frequently Asked Questions
How do you inspect an angle grinder?
Unplug the grinder, check the guard and disc, inspect the cord, and look for blocked vents. For brush inspection, remove the brush covers and check each carbon brush for length, damage, and fit.
How often should you check angle grinder brushes?
Check the brushes during routine maintenance and any time the grinder loses power, sparks more than usual, or starts poorly. Heavy use, dusty work, and long grinding sessions require more frequent checks.
Can you use an angle grinder with worn brushes?
You should not keep using a grinder with badly worn or damaged brushes. Worn brushes can cause poor motor contact, heat, weak power, and extra sparking.
What safety precautions apply when using wire brushes?
Match the wire brush speed rating to the grinder and inspect the brush before use. Wear eye, face, hand, and body protection because wire bristles can break free during operation.
What are the OSHA requirements for angle grinder guards?
Workplace rules require proper guarding for abrasive wheels, and guards must protect the operator during use. Check the current Occupational Safety and Health Administration (OSHA) requirements for your workplace and tool type before you remove or adjust a guard.
Conclusion
Brush inspection gives you one of the easiest ways to keep an angle grinder safe, strong, and reliable. Check the brushes when performance changes or during regular tool maintenance. Replace damaged or worn brushes with the correct parts for your model. A few careful minutes now can help you avoid poor cuts, unsafe sparking, and preventable repairs.


