
A dirty or damaged welding helmet lens can hide the puddle, increase eye strain, and make it harder to control your work. Safe cleaning starts with identifying the part in front of you, because a replaceable cover plate and an electronic auto-darkening filter do not have the same care instructions. Always check your helmet manual before applying water, soap, wipes, or cleaner.
Last updated: July 19, 2026
Quick Answer
To clean a welding helmet lens, first identify whether you are cleaning a replaceable cover plate or the auto-darkening filter. Remove loose grit without rubbing, then wipe with a soft lint-free cloth lightly dampened with the cleaner your helmet manual allows. Never use solvents, abrasives, or polish. Replace scratched, pitted, cracked, or cloudy parts.
Key Takeaways
- Check your helmet manual before choosing a cleaner or removing a cover plate.
- Remove loose grit before wiping so particles do not scratch the plastic.
- Clean replaceable cover plates separately from the electronic auto-darkening filter.
- Never use solvents, abrasive pads, blades, toothpaste, or polishing compounds.
- Replace scratched, pitted, cracked, warped, or permanently cloudy cover plates.
- Stop welding immediately if the auto-darkening filter fails to darken or shows damaged areas.
At a Glance
| Time Required | 5 to 10 minutes |
| Difficulty | Easy, with model-specific precautions |
| Tools Needed | Two soft lint-free cloths, a hand bulb blower, and a manufacturer-approved cleaning solution |
| Cost | Usually no added cost with existing supplies; replacement cover plates vary by helmet model |
What’s in This Article
- Why a Clean Welding Helmet Lens Matters
- Identify the Parts Before Cleaning
- Choose the Right Welding Helmet Lens Cleaner
- Clean Your Welding Helmet Lens Step by Step
- Remove Stubborn Residue and Handle Scratches
- Keep Auto-Darkening Parts Working
- Troubleshoot Common Lens Problems
- Store and Inspect Your Welding Helmet Lens
- Frequently Asked Questions
- Final Thoughts on Clean Welding Helmet Lenses
- Sources
Why a Clean Welding Helmet Lens Matters
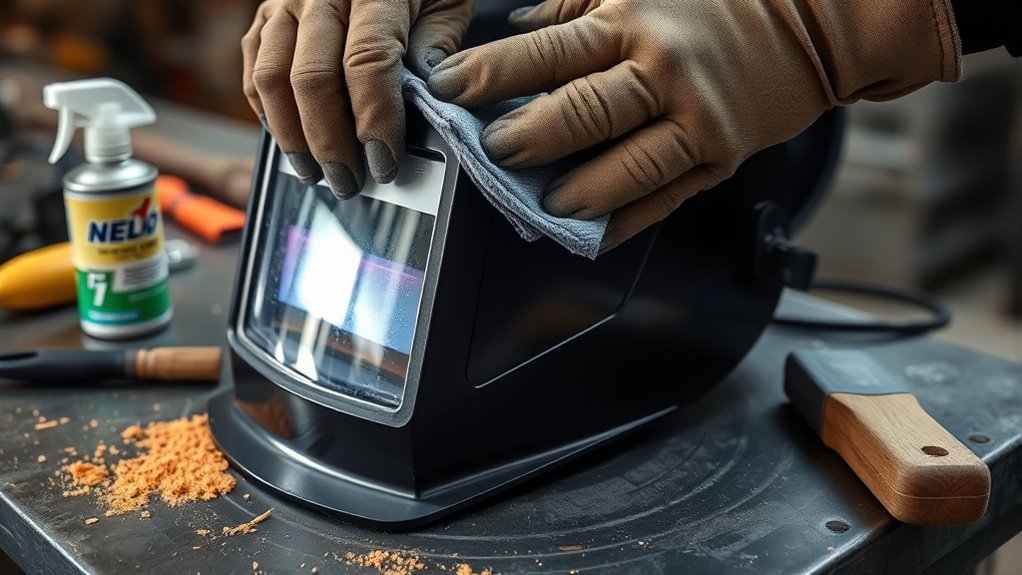
A clean viewing area helps you see the joint, electrode or wire position, weld puddle, and travel line. Better visibility makes it easier to maintain a steady angle, arc length, and travel speed. It does not guarantee a defect-free weld, but it removes one avoidable obstacle.
Welding arcs also produce potentially harmful radiant energy. In the United States, OSHA requires properly selected filter lenses with a suitable shade for the work being performed. The filter, helmet, and other eye protection must remain in usable condition.
When flying particles are a hazard, a welding helmet may not be the only eye protection you need. OSHA guidance states that safety glasses with side shields or goggles may also be required under the helmet. You can read more about proper welding eye protection.
A clear view is a safety condition, not a cosmetic preference.
Warning: Cleaning does not make a cracked, deeply scratched, pitted, warped, or malfunctioning component safe. Replace damaged cover plates and stop using a damaged auto-darkening filter.
Identify the Parts Before Cleaning
Before you clean anything, confirm which part you are touching. Helmet designs vary, but many auto-darkening models contain three separate viewing components.
Outer Cover Plate
The clear outer cover plate sits in front of the auto-darkening filter. It takes most of the spatter, sparks, smoke film, grinding dust, and handling scratches. It is normally a replaceable wear part.
Inner Cover Plate
The inner cover plate sits between your face and the auto-darkening filter. It protects the filter from dust, moisture, and contact from inside the helmet. It must be correctly seated before you weld.
Auto-Darkening Filter
The auto-darkening filter, often called the ADF, is the electronic optical assembly that changes from a light state to a selected dark shade. Its sensors, controls, seals, and electronics need gentler care than a removable cover plate. Do not take the filter apart, immerse it, or apply an unapproved chemical.
Passive Filter Lens
A passive helmet uses a fixed-shade filter instead of an electronic ADF. It may still have replaceable protective plates. Follow the helmet maker’s instructions for the filter material and its covers.
Note: Do not weld with a required inner or outer cover plate missing. A missing plate can expose the filter to spatter and may prevent the helmet from performing as designed.
Choose the Right Welding Helmet Lens Cleaner
The safest cleaner is the one allowed by the manual for your exact helmet and lens part. Manufacturer instructions differ because cover plates can use different plastics, hard coatings, anti-fog treatments, and sealing systems.
Many cover plates can be cleaned with a soft cloth lightly dampened with clean water or a mild soap-and-water solution. Some manufacturers recommend a specific cleaning wipe. Use an optical cleaner only when its label and your helmet instructions confirm compatibility with the material and coating.
Apply liquid to the cloth rather than flooding or spraying the assembled helmet. This gives you better control and reduces the chance of liquid entering buttons, battery compartments, sensor openings, or the edges of the filter.
Products Worth Considering
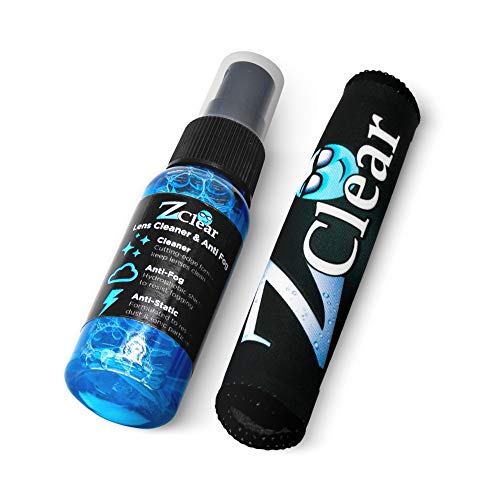
DEFOGGING EYEGLASS CLEANER FOR INSTANT CLARITY: ZClear is formulated with cutting-edge technology using hydrophobic spray that actively prevents fog from forming for up to three days. It can be reapplied as often as needed to reinforce its fog-fighting properties or to throgoughly remove dirt and debris. Some anti-refelctive and polarized lens may still fog.

LARGE VIEW WINDOW: This welding lens has large view window, which provides clear and larger viewing perspective, and reduce fatigue of eyes.

Packing List Includes 2PCS 4-1/2" x 5-1/4" Gold Welding Lens
Safe Cleaning Supplies
- A clean hand bulb blower for loose dust.
- Two clean, soft, lint-free cloths.
- Clean water, mild soap solution, or the cleaning wipe approved by the helmet maker.
- A clean towel or pad on which to place removable parts.
- The correct replacement cover plate for your helmet model.
Products to Avoid
- Acetone, paint thinner, lacquer thinner, gasoline, and other solvents.
- Brake cleaner, carburetor cleaner, strong degreasers, and harsh shop chemicals.
- Abrasive powders, scouring pads, dirty rags, and stiff brushes.
- Razor blades, scrapers, picks, or metal tools on the viewing surface.
- Toothpaste, headlight-restoration compounds, plastic polish, and buffing compounds.
- Paper towels that feel rough or contain trapped shop debris.
- High-pressure air from an oily or wet shop-air line.
These products can scratch plastic, attack coatings, leave haze, damage seals, or alter the optical surface. If the manual does not approve a product, do not experiment on safety equipment.
Clean Your Welding Helmet Lens Step by Step
What You’ll Need Before Cleaning
- Your helmet’s user manual.
- A clean work area away from welding and grinding dust.
- A hand bulb blower.
- Two clean lint-free cloths.
- The approved cleaning liquid or wipe.
- Replacement inner or outer cover plates when needed.
Wipe the Lens Without Scratching
- Stop work and let the helmet cool. Move away from active welding, grinding, sparks, and hot metal.
- Turn the helmet off when applicable. Follow the manual’s shutdown or battery procedure before removing electronic parts.
- Wash and dry your hands. Oil, metal dust, and grit on your fingers can mark a clean surface.
- Identify the part. Confirm whether you are cleaning an outer cover, inner cover, passive filter, sensor area, or auto-darkening assembly.
- Remove the cover plate when the manual permits it. Place it on a clean towel. Do not force retaining tabs or bend a rigid component.
- Lift loose dust first. Use a hand bulb blower or gently touch the particles with a clean dry cloth. Do not rub visible grit across the surface.
- Clean the cover plate. Lightly dampen a soft cloth with the approved solution and wipe with light, overlapping strokes. Avoid heavy pressure.
- Clean the filter and sensors separately. Unless the manual says otherwise, use a clean soft dry cloth on the electronic filter and sensor windows. Do not let liquid run into the assembly.
- Dry and inspect every part. Use the second cloth or allow the component to air-dry in a clean area.
- Reinstall the parts correctly. Make sure the covers sit flat, the seals and retainers are secure, and no protective shipping film remains.
- Perform the model’s pre-use test. Check the power indicator, battery warning, mode, shade, delay, sensitivity, and darkening response as directed by the manufacturer.
Pro Tip: Keep the correct inner and outer cover plates in a sealed bag near your work area. Replacing a damaged cover takes less time than trying to see through a badly pitted surface.
Remove Stubborn Residue and Handle Scratches
Smoke film, fingerprints, and light grime often come off after a second pass with a fresh section of damp cloth. If residue remains, let the approved cleaning solution soften it briefly, then wipe again with light pressure.
Do not scrape hardened spatter from a plastic cover plate. A blade or pick can create a gouge, and aggressive rubbing can leave permanent haze. Replace the cover when spatter, pitting, or embedded debris interferes with your view.
Products Worth Considering

FRONT OUTSIDE COVER LENS Need an outside replacement lens for a helmet that uses the KLEARVIEWLO part reference? This 10 pack is designed for compatible front lens holders that match the same number, dimensions, and outside position.

UPGRADED TO 1.2MM (0.048") THICK POLYCARBONATE SAFETY PLATE.

AQBB 5 Pack 06-0200-51 Outside Protection Plate for 9100 Series Welding Helmet,9100 Welding Helmet Outside Protection Lens Replace,Fits Model 9100 FX, 9100 QR, 9100 MP, 9100-Air, 9100, 9100 FX-Air, L-Series37174
What to Do About Scratches
Do not sand, buff, or polish scratches out of a welding helmet cover plate or filter. Even when a polished area looks clearer, the treatment may change the surface, coating, thickness, or optical quality.
- Light mark that does not affect vision: Inspect it before each use and follow the manufacturer’s replacement rule.
- Scratch visible while welding: Replace the cover plate.
- Deep scratch, pit, crack, or warp: Replace the part before welding again.
- Damage to the auto-darkening filter: Stop using the helmet and install the approved replacement or obtain authorized service.
- Clouding that cleaning does not remove: Replace the affected cover or filter component.
Warning: Never test a questionable filter by striking an arc and hoping it darkens. Use the manufacturer’s prescribed test procedure before welding.
Keep Auto-Darkening Parts Working
An auto-darkening helmet depends on clean sensors, the correct operating mode, suitable shade and sensitivity settings, adequate power, and an undamaged filter assembly. Cleaning the viewing surface is only one part of the check.
Before Each Use
- Inspect the shell, headgear, retainers, covers, filter, and controls for damage.
- Confirm that the inner and outer cover plates are installed correctly.
- Make sure every arc sensor is clean and uncovered.
- Check the low-battery indicator or perform the power test described in the manual.
- Select Weld, Cut, or Grind mode correctly. Do not weld while the helmet is in Grind mode.
- Set the shade for the welding or cutting process and current.
- Adjust sensitivity for the process and surrounding light.
- Confirm that the filter switches as the manufacturer describes.
For more background on modes and controls, review how auto-darkening welding helmets operate, then use your own manual for model-specific settings.
When to Stop Immediately
Stop welding or cutting if the filter stays light, flickers abnormally during the arc, contains a crack, or shows distinct sections that do not darken. Move the helmet away from the work and follow the troubleshooting procedure in the manual.
Do not open the sealed filter assembly or attempt an electronic repair unless the manufacturer provides an approved service procedure.
Troubleshoot Common Lens Problems
| Problem | What to Check | Safe Response |
| Streaks after cleaning | Dirty cloth, excess soap, hard-water residue, or an incompatible cleaner | Use a fresh cloth and the approved solution. Replace the plate if haze remains. |
| Fogging between parts | Damp parts, a warped plate, incorrect seating, damaged seal, or a trapped protective film | Dry and reseat the correct parts. Replace warped or damaged components. |
| Filter does not darken | Power, battery, operating mode, sensitivity, blocked sensors, or filter damage | Stop immediately and follow the manufacturer’s troubleshooting procedure. |
| Filter flickers during welding | Blocked sensors, low sensitivity, low current, poor sensor angle, dirty cover, or weak battery | Stop and correct the cause using the manual before resuming. |
| Dark or light areas appear separated | Possible cracked or damaged auto-darkening filter | Stop immediately and replace or service the filter as directed. |
Store and Inspect Your Welding Helmet Lens
Store the helmet in a clean, dry, cool area protected from direct sunlight, extreme heat, moisture, impact, and solvent vapors. Use the supplied helmet bag or a clean case when available.
Before storage, make sure cleaned parts are dry. Do not seal a wet cloth inside the helmet bag. Secure the faceplate and retainers so the filter and cover plates cannot shift during transport.
- Inspect for cracks, gaps, damaged retainers, and loose parts.
- Check cover plates for scratches, pitting, warping, and clouding.
- Keep sensor windows unobstructed.
- Follow the manufacturer’s battery instructions for long-term storage.
- Replace worn or damaged parts with components approved for the exact helmet model.
There is no single replacement interval that fits every user. A cover plate may last much longer in clean TIG work than in heavy flux-core welding or grinding. Inspect before each use and replace it whenever damage reduces visibility or violates the manufacturer’s condition requirements.
Frequently Asked Questions
What should you use to clean a welding helmet lens?
Use the method approved in the manual for your helmet. A soft lint-free cloth lightly dampened with clean water, mild soap and water, or a specified cleaning wipe is common for removable cover plates. Electronic filter surfaces and sensors may require a soft dry cloth.
Can you use rubbing alcohol on a welding helmet lens?
Use rubbing alcohol only when the helmet or cover-plate manufacturer specifically approves it. Alcohol can affect certain plastics, anti-fog treatments, coatings, printing, and seals. Mild soap and water or the maker’s cleaning wipe is a safer default when the manual permits it.
Can you use glass cleaner or Windex on a welding helmet lens?
Do not assume household glass cleaner is safe for a plastic or coated cover plate. Check the helmet manual and cleaner label. Never use it on the assembled electronic filter unless the manufacturer expressly allows that method.
Can you clean the lens with a paper towel?
A clean lint-free lens tissue approved by the manufacturer may be suitable, but an ordinary shop or kitchen paper towel can trap grit or feel abrasive on soft plastic. A clean soft cloth is the safer choice.
Can scratches be polished out of a welding helmet lens?
Do not polish, sand, or buff a helmet cover plate or auto-darkening filter. Replace a scratched cover plate when the mark affects visibility or when the manufacturer requires replacement. A damaged electronic filter should be replaced or serviced as directed.
How often should you clean a welding helmet lens?
Inspect the viewing area before each use and clean it whenever dust, smoke film, fingerprints, or spatter reduce visibility. Heavy welding and grinding may require cleaning or cover-plate replacement during the same shift.
Why does the lens fog after cleaning?
Fogging can result from trapped moisture, excess soap, a cover plate that is not seated correctly, a damaged seal, a warped plate, or a protective film left in place. Dry and reinstall the parts according to the manual.
When should you replace a welding helmet lens or cover plate?
Replace a cover plate when it is scratched, pitted, cracked, warped, permanently cloudy, too dirty to clean, or no longer provides a clear view. Stop using an auto-darkening filter that is cracked, damaged, unreliable, or unable to darken correctly.
Final Thoughts on Clean Welding Helmet Lenses
A clean welding helmet lens helps you see the joint and puddle without compromising the equipment around them. Start by identifying the cover plate or filter, use only the cleaning method approved for that component, and keep liquids away from electronic openings.
Do not polish away scratches or continue working through clouding, pitting, cracks, or an unreliable auto-darkening response. Replace damaged wear parts, test the helmet before use, and store it clean and dry so it is ready for the next job.
Sources
- OSHA 29 CFR 1910.133: Eye and Face Protection — requirements for appropriate eye protection, side protection, and welding filter shades.
- OSHA Eye Protection Against Radiant Energy During Welding and Cutting — filter-shade and secondary eye-protection guidance.
- 3M Speedglas G5-03 Care and Maintenance Poster — inspection, soft-cloth cleaning, replacement, sensor, and storage guidance.
- Miller Digital Infinity Series Owner’s Manual — cover-lens cleaning, filter and sensor care, replacement, testing, sensitivity, and troubleshooting.
- 3M Speedglas Inner Cover Plates — cleaning and replacement guidance for dirty, pitted, or damaged inner plates.
- ANSI/ISEA Z87.1-2025 Overview — current voluntary eye and face protection standard and marking context.




