Dust-clogged air vents can make your angle grinder run hot, lose power, and wear out faster. Clean vents help the motor cool itself while you cut, grind, or sand. This guide shows you how to clean angle grinder air vents safely with compressed air, a soft brush, and a few final checks.
Quick Answer
Unplug your angle grinder, let it cool, then blow dust from the air vents with clean, dry compressed air from about 6-12 inches away. Use a soft brush for stuck debris, inspect the vents for cracks or clogs, and avoid water or harsh cleaners.
Key Takeaways
- Unplug the grinder and let it cool before you clean any vent area.
- Use clean, dry compressed air at low pressure to remove loose dust.
- Use a soft-bristle brush to loosen stuck debris without damaging the tool.
- Avoid water, solvents, and harsh cleaners near the grinder’s motor vents.
- Inspect the vents often if you grind metal, masonry, or other dusty materials.
Why Clean Angle Grinder Air Vents Matter
Clean angle grinder air vents help the motor pull in cooling air and push heat away. Clogged vents trap dust around the motor, which can raise heat and reduce grinding power.
Dust and debris can also work into switch areas, brushes, and other sensitive parts. That buildup can shorten tool life and make the grinder less reliable.
Good vent care helps your grinder run cooler, work harder, and last longer. It also helps reduce loose dust around the tool before you store it.
Essential Safety Gear for Cleaning Your Angle Grinder
Wear the right safety gear before you clean your angle grinder’s air vents. Dust, metal particles, and small chips can fly out when you use compressed air.
Products Worth Considering

Dual Protection & Anti-Fog Goggles:This respirator mask integrates safety goggles and a half face cover into one unit, providing all-around protection for your eyes and respiratory system. The goggles feature an anti-fog and anti-splash coating to ensure a clear vision during extended use in dusty environments like wood sanding and polishing.

NIOSH P100 RATED PROTECTION: The P100 Half-Mask respirator with replaceable filters offers reliable protection against dust, metal fumes, and oil mist

Dual Protection for Organic Vapors & Dust :BEESAFETY half face respirator mask features a dual filtration system with A1 organic vapor filters and P2 particle filters, designed to help reduce exposure to paint fumes, solvent vapors, resin fumes and airborne particles such as dust and sanding debris. Ideal as a paint respirator mask, sanding respirator mask and dust respirator for multi-environment use
Recommended Safety Equipment
Use gear that protects your eyes, lungs, hands, and hearing. These items help reduce common cleaning risks:
- Safety glasses: Protect your eyes from dust and loose debris.
- Dust mask or respirator: Help reduce dust inhalation while you clean the vents.
- Heavy leather gloves: Protect your hands from sharp edges and hot parts.
- Hearing protection: Reduce noise exposure if you use a loud air compressor.
- Face shield: Add more protection when dust or chips may blow back toward you.
How to Use Safety Gear Correctly
Put on safety glasses before you touch the tool or air hose. Add a dust mask or respirator before you blow out the vents.
Wear gloves when you handle the grinder, especially near guards, discs, and metal housings. If you use compressed air for several minutes, wear hearing protection too.
Warning: Never clean an angle grinder while it’s plugged in or hot enough to burn your skin.
Before You Begin
Plan on about 10-15 minutes for a basic vent cleaning. You may need more time if the vents have packed-in dust or damaged covers.
Gather clean, dry compressed air, a soft-bristle brush, safety glasses, gloves, and a dust mask. Work in a well-ventilated area where loose dust can move away from your face.
Products Worth Considering

Falcon Dust-Off Aerosol Compressed (152a) Disposable Cleaning duster 3 count 10oz. Contains a bitterant to help discourage inhalant abuse

Powerful Turbo Fan:WOLFBOX MegaFlow 50 electric air duster reaches speeds of up to 110,000 RPM, effectively removing dust and debris. It features three adjustable speed settings to suit different cleaning tasks.
Step 1: Unplug the Grinder and Let It Cool
Before you start cleaning the air vents of your angle grinder, make sure the tool sits unplugged and cool. This step protects you from shock, burns, and accidental start-up.
- Unplug the tool: Remove the plug from the outlet before you handle the vents.
- Let it cool: Wait at least 10-15 minutes after use so hot parts can cool down.
- Inspect the air vents: Look for visible dust, chips, cracks, or blocked openings.
Wear safety glasses and gloves while you inspect the vent area. A quick check helps you spot problems before you blow debris into the air.
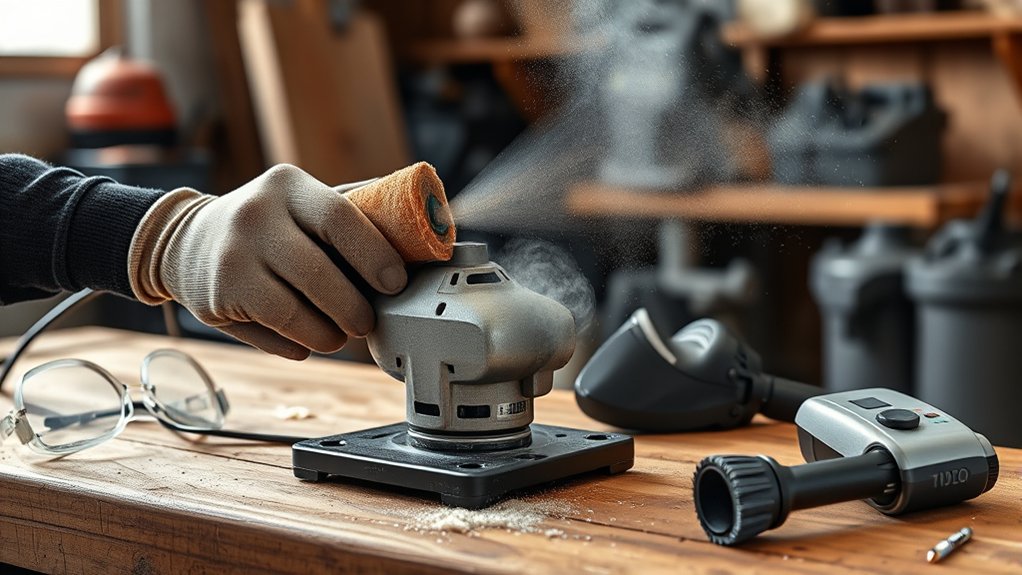
Step 2: Blow Out Dust With Compressed Air
Use clean, dry compressed air to remove loose dust from the vents. Keep the nozzle about 6-12 inches away so you clear debris without forcing dust deeper into the tool.
Compressed Air Safety Precautions
Use compressed air with care because it can send dust and chips toward your face. Follow these steps before you start:
- Wear eye protection: Put on safety glasses before you aim the nozzle.
- Wear a dust mask: Reduce your chance of breathing in fine dust.
- Keep a safe distance: Hold the nozzle away from the vents to reduce force on internal parts.
Direct the airflow across the vent openings instead of straight into one spot for too long. This technique helps lift debris out instead of packing it deeper.
Proper Compressed Air Technique
Set your air compressor to a low, controlled pressure if it allows adjustment. About 30-40 pounds per square inch works well for clearing dust without harsh force.
Use a nozzle extension to guide air into side, rear, and motor housing vents. Move in short bursts and let dust clear before you repeat the pass.
After you finish, look over the vents again. Blow from a different angle if you still see loose debris.
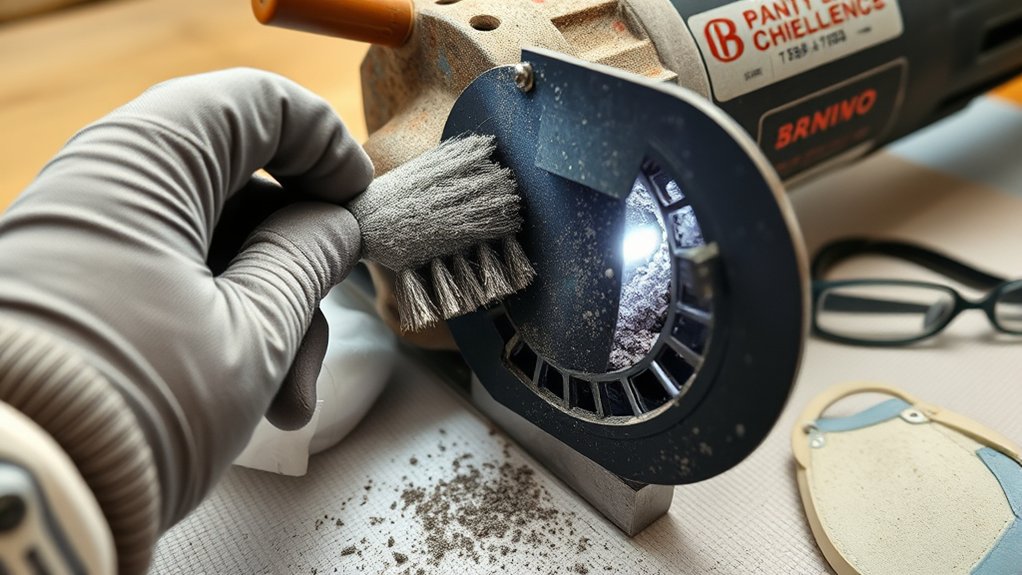
Step 3: Brush Away Stubborn Debris
Use a soft-bristle brush to loosen stuck debris from the angle grinder’s air vents. Brush gently so you don’t push bristles or debris into the motor housing.
- Focus on vent areas where dust collects, such as the side and rear openings.
- Brush lightly to protect vent covers, switches, and nearby plastic parts.
- Use compressed air again after brushing to clear loosened debris.
Regular brushing helps keep airflow open and reduces heat buildup. It also helps you clean tight areas that compressed air alone may miss.
Step 4: Check the Vents for Blockages and Damage
After brushing, inspect the air vents closely for remaining dust, chips, or clogs. Use a flashlight so you can see into small openings.
If you find blockages, blow them out with compressed air while aiming the dust away from your face and body. Do not poke metal tools into the vents because they can damage internal parts.
Check the vent covers for cracks, missing pieces, or warped plastic. Replace damaged parts before you use the grinder again.
Step 5: Avoid Water and Harsh Cleaners
Keep water, solvents, and harsh cleaners away from angle grinder air vents. Moisture can reach electrical parts, and strong cleaners can damage plastic, rubber, or labels.
- Use compressed air to remove dry dust without adding moisture.
- Use only mild cleaning products if the manufacturer recommends them.
- Wipe the outside housing with a barely damp cloth, but keep moisture away from vent openings.
Let the grinder dry fully before storage if you clean the outside case. Never spray cleaner directly into the vents.
Step 6: Make Final Safety Checks Before Use
Final checks help your angle grinder run safely after cleaning. Inspect screws, guards, handles, and the disc area before you plug the tool back in.
Make sure the air vents look clear and dry. Clear vents help the tool cool itself during grinding and reduce the chance of heat-related damage.
Confirm that all safety guards sit firmly in place. If you notice cracked covers, loose parts, burning smells, or unusual sounds, stop and have the grinder checked before use.
How Often Should You Clean Angle Grinder Air Vents?
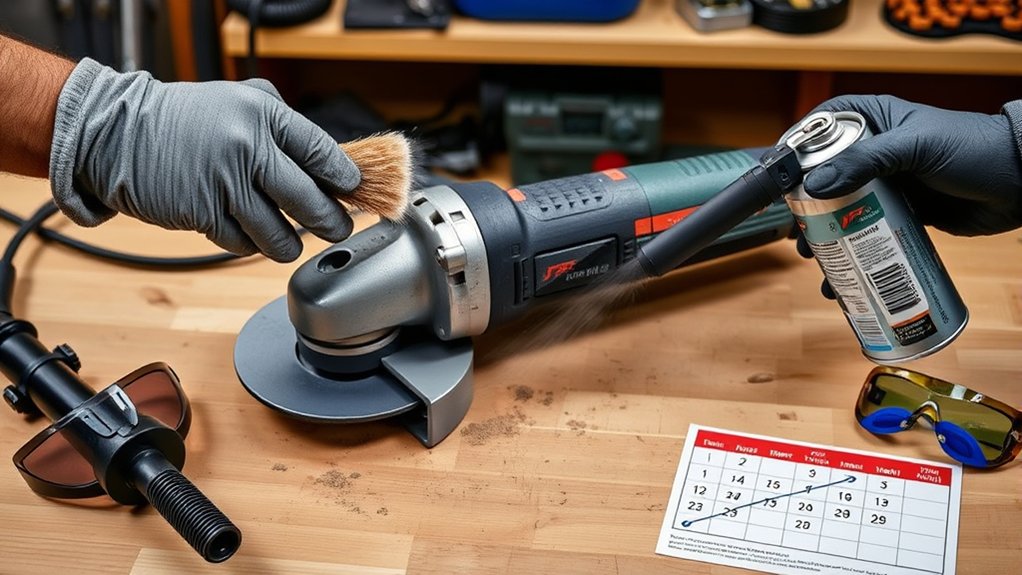
Clean your angle grinder air vents after about every 10 hours of use, or sooner in dusty work. Masonry, concrete, rust removal, and metal grinding can clog vents faster.
- Inspect weekly: Check the vents often if you use the grinder in a dusty shop.
- Clean right away: Clear the vents if the motor loses power, runs hot, or sounds strained.
- Do a deeper check monthly: Inspect the tool more closely if you use it often.
Always follow your owner’s manual before you remove covers or service internal parts. Some grinders need professional service for deeper cleaning.
Pro tip: Clean the vents before storage so dust doesn’t settle deeper into the tool between uses.
Common Mistakes to Avoid When Cleaning Air Vents
A few cleaning mistakes can damage your angle grinder or make the vents harder to clear. Avoid methods that force dust deeper, add moisture, or scrape internal parts.
- Don’t use high-pressure air at close range.
- Don’t spray water, degreaser, or solvent into the vents.
- Don’t use screwdrivers, nails, or wire picks inside vent slots.
- Don’t reinstall a disc or guard until the tool passes a quick safety check.
Gentle cleaning works best for vent areas. If debris won’t come out, let a qualified repair technician inspect the grinder.
Frequently Asked Questions
What safety precautions should you take when using an angle grinder?
Wear eye protection, hearing protection, gloves, and a dust mask or respirator when the job creates dust. Keep the guard in place, use the correct disc, and hold the grinder with both hands.
What OSHA rules apply to angle grinders?
Occupational Safety and Health Administration (OSHA) rules for workplace grinders generally cover guarding, safe tool condition, proper training, and personal protective equipment. Employers must check the rules that apply to their job site, tool type, and work material.
How can you reduce angle grinder dust?
Use dust collection when the grinder supports it, work in a well-ventilated area, and choose the right wheel for the material. Wear a dust mask or respirator when grinding masonry, paint, rust, or other dusty surfaces.
What safety precautions matter most during grinding?
Inspect the disc before use, secure the workpiece, and keep sparks away from flammable materials. Stand to the side when starting the grinder and let the wheel reach full speed before contact.
Can you use a vacuum to clean angle grinder air vents?
You can use a vacuum near the vents to collect loose dust while you brush or blow debris out. Do not force vacuum attachments into the vent openings because they can damage covers or internal parts.
Safety Disclaimer: This article gives general information about angle grinder maintenance. Always follow your tool manual, job site rules, and qualified repair advice before you clean or service power tools.
Conclusion
Clean air vents help your angle grinder stay cooler, run stronger, and last longer. Unplug the tool, let it cool, then use compressed air and a soft brush to clear dust safely.
Make vent checks part of your normal grinder maintenance routine. A few minutes of care can help you avoid overheating, weak performance, and avoidable repairs.


