To get more consistent MIG welds, treat every weld like a controlled process instead of a one-off pass. Start with clean metal, correct machine settings, steady gas coverage, and a repeatable gun position. Then watch the puddle, inspect the bead, test on matching scrap, and change only one variable at a time.
Quick Answer
For more consistent MIG welds, clean the joint, use the welder’s chart as your baseline, keep stickout near 3/8 inch, hold a steady 10–15 degree travel angle, maintain stable gas flow, and test on matching scrap before welding the final part.
Key Takeaways
- Most MIG consistency problems come from dirty metal, unstable stickout, poor gas coverage, wrong settings, or uneven travel speed.
- Use the chart inside your welder as the starting point, then fine-tune voltage and wire feed speed on scrap that matches the real job.
- Keep your torch angle, work angle, contact-tip-to-work distance, and travel speed as repeatable as possible.
- A good-looking bead is not enough. Check fusion, penetration, tie-in, and defects before trusting the weld.
At a Glance
| Time Required | 15–30 minutes for setup and scrap testing before the final weld |
| Difficulty | Beginner to intermediate |
| Tools Needed | MIG welder, matching wire, shielding gas, scrap coupons, wire brush or grinder, clamps, PPE, and a notebook or settings log |
| Cost | Usually low if you already have welding gear; expect consumable costs for wire, gas, tips, and scrap metal |
Start With Safety Before Tuning MIG Welds
Before you chase better bead consistency, make sure your work area and PPE are ready. MIG welding creates arc radiation, heat, sparks, fumes, and shielding gases. Wear a properly rated welding helmet, safety glasses with side shields, welding gloves, flame-resistant clothing, and closed leather footwear.
Warning: Do not weld in a confined or poorly ventilated space without proper training, monitoring, and ventilation. OSHA notes that welding fumes and gases can irritate the eyes, nose, and throat, and some gases can displace oxygen in enclosed spaces.
Use local exhaust or natural airflow to keep fumes out of your breathing zone, but do not let a fan blow shielding gas away from the puddle. Keep flammables away from the weld area, watch for sparks after you finish, and follow your welder’s manual for duty cycle, polarity, grounding, and maintenance.
Clean the Metal and Joint Edges
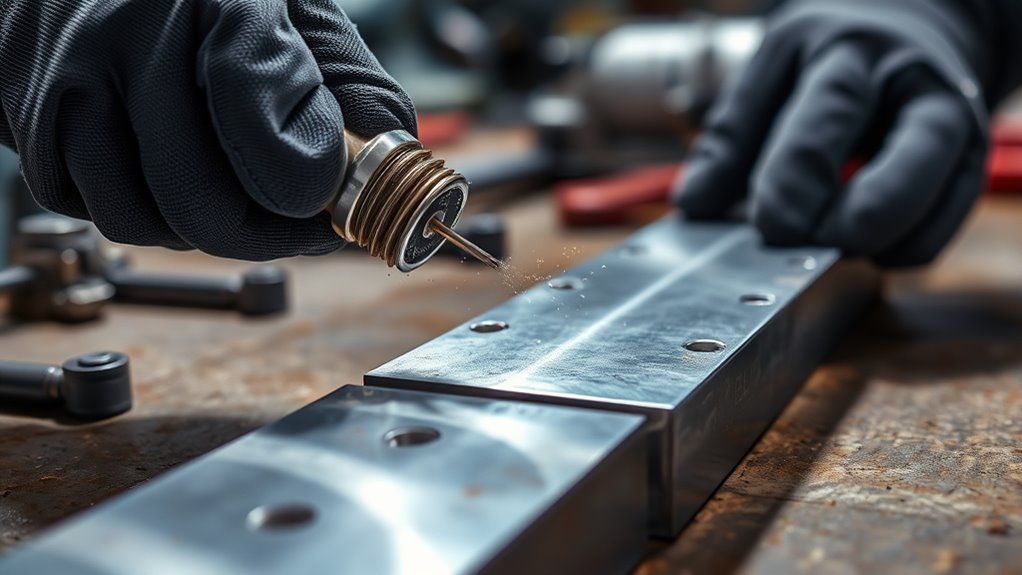
Start with spotless joint prep. Remove oil, grease, rust, paint, mill scale, moisture, and coatings from the weld zone. Dirty metal can trap gas, cause porosity, reduce fusion, and make the arc feel unpredictable.
Use a dedicated wire brush, flap disc, grinder, scraper, or solvent approved for metal prep. Clean both sides of the joint when possible, not just the face you can see. Debris on the back side of thin material can still affect heat flow and weld quality.
Fit-up matters too. Close large gaps, square the edges, clamp the parts, and tack the joint before the final pass. If the parts move while you weld, your stickout, angle, and puddle size change with them.
Pro Tip: Clean first, then grind. If you grind through oil, paint, or solvent residue, you can smear contamination into the surface instead of removing it.
Good prep gives the arc a stable surface to work with. Consistent MIG welds start before you pull the trigger.
Set MIG Settings for Your Material
With the joint cleaned and aligned, set your MIG parameters to match the material. Do not treat voltage and wire feed speed as random knobs. They control arc length, heat input, deposition rate, penetration, and bead shape.
Start with the chart inside your welder or the manufacturer’s setup guide. Most charts ask for material type, material thickness, wire diameter, and sometimes shielding gas. Use that as your baseline, then make short test welds on scrap that matches the real workpiece.
Before welding the final part, confirm these setup points:
- Wire type and diameter: Match wire to the base metal and job. Common mild steel MIG work often uses ER70S wire, but your application may differ.
- Polarity: Solid MIG wire commonly runs DCEP, but always check the wire and machine instructions.
- Contact tip: Use a tip that matches the wire diameter and replace it if the arc wanders.
- Drive-roll tension: Set it tight enough to feed smoothly, but not so tight that it deforms the wire.
- Shielding gas: Make sure the cylinder is open, the regulator is working, and the gas hose has no leaks.
- Ground clamp: Clamp to clean metal close enough to the weld area for a stable circuit.
For many light-duty MIG setups, around 20 CFH is a reasonable shielding gas starting point, but gas flow is not “set and forget.” Too little gas can cause porosity. Too much flow can create turbulence and pull air into the shield. Drafts, nozzle size, gas mix, amperage, and joint shape all affect the final setting.
Set your baseline from the machine chart, test on scrap, and adjust one variable at a time. Random changes make it harder to learn what actually fixed the weld.
Keep a Steady Torch Angle and Stickout
Keep your torch angle steady at about 10–15 degrees in the direction of travel for many flat and horizontal MIG welds. A small travel angle helps you see the puddle and maintain gas coverage. Too much angle can stretch the arc, disturb shielding gas, and make penetration less consistent.
Also hold a consistent contact-tip-to-work distance, often called stickout. For many short-circuit MIG welds with solid wire, a typical starting point is about 3/8 inch, or roughly 10 mm. If the stickout gets too long, the arc can sputter and lose heat. If it gets too short, you can get burnback, spatter buildup, or tip damage.
| Variable | Good Starting Target | Why It Matters |
|---|---|---|
| Travel angle | 10–15 degrees | Helps control puddle shape, visibility, and gas coverage |
| Work angle | 90 degrees for butt joints; about 45 degrees for many fillets | Directs heat into both pieces instead of favoring one side |
| Stickout / CTWD | About 3/8 inch for many short-circuit MIG welds | Keeps heat input, arc sound, and gas coverage repeatable |
| Hand support | Brace both hands when possible | Reduces shaking and keeps travel speed steady |
Train with deliberate repetitions so your hand learns the correct torch angle and stickout without hesitation. Precision here gives you more control over the weld and reduces constant mid-pass correction.
Match Travel Speed to the Weld Puddle
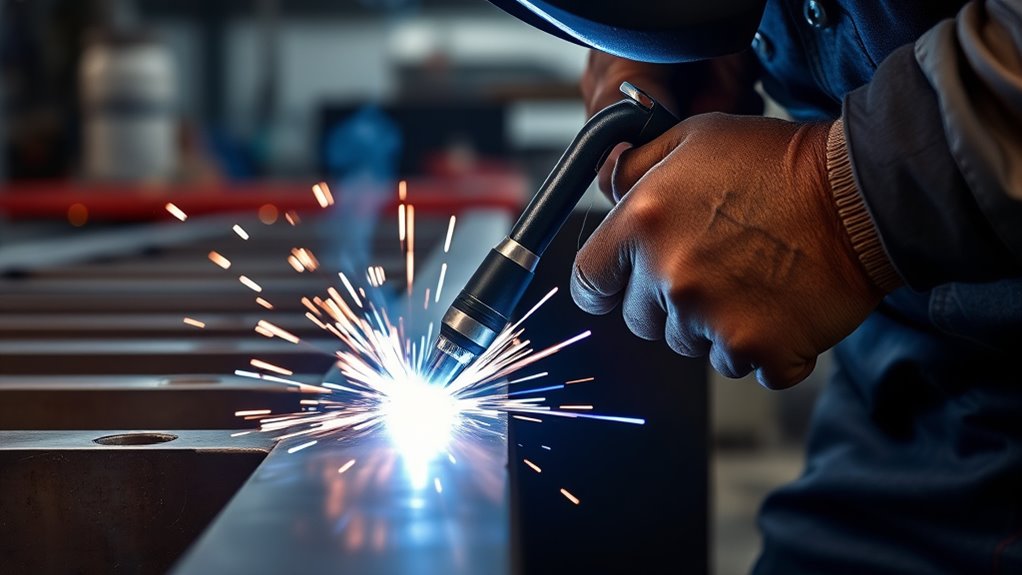
Match your travel speed to the size and behavior of the weld puddle. Speed that is too slow can create an oversized bead, excess heat, or burn-through. Speed that is too fast can reduce penetration, leave undercut, or make the bead narrow and ropey.
Watch the leading edge of the puddle, not only the arc. You want the molten pool to wet into both toes of the joint without piling up behind the arc or outrunning the base metal.
- Slow down only when the puddle is not tying into both sides or the bead is too narrow.
- Speed up when the bead is getting too wide, too tall, or too hot for the material.
- Pause less if you see excessive buildup at the toes or a lumpy ripple pattern.
- Practice on scrap until your travel speed feels repeatable across the same joint type.
Travel speed is not one universal number. It changes with material thickness, wire size, voltage, amperage, joint design, weld position, and the size of bead you need.
Use Bead Shape to Spot Problems Fast
You can read bead shape as a fast diagnostic, but do not use appearance alone as proof of weld strength. A good bead should have steady width, smooth tie-in at the toes, consistent ripple spacing, and no obvious pores, cracks, craters, or severe undercut.
Bead Shape Clues
A quick look at the bead can reveal problems before they become habits. Use the bead as feedback, then confirm with scrap testing when strength matters.
| What You See | Likely Cause | What to Check |
|---|---|---|
| Tall, convex bead | Too cold, too slow, or wire feed too high for voltage | Voltage, wire speed balance, travel speed, and joint prep |
| Very flat or concave bead | Too hot, travel too fast, or excessive voltage | Voltage, travel speed, material thickness, and burn-through risk |
| Undercut at the toes | Too much heat, wrong angle, or moving too fast | Travel angle, work angle, voltage, and pause control |
| Porosity or pinholes | Contamination, gas issue, drafts, or long stickout | Metal cleanliness, gas flow, nozzle, hose leaks, and CTWD |
| Irregular ripple spacing | Uneven travel speed or hand movement | Hand support, body position, and gun motion |
Spotting Weld Issues
Spot weld issues by reading the bead as a diagnostic signal, not just a finished surface. A convex bead often means the weld is running cold or not wetting into the base metal. A concave or washed-out bead often means excess heat, travel speed problems, or a bead that is too wide for the joint.
Check color and surface texture, but be careful with conclusions. A bright, clean bead is a good sign, but it does not guarantee root fusion. A dull or discolored bead may point to contamination, poor shielding, overheating, or base metal issues.
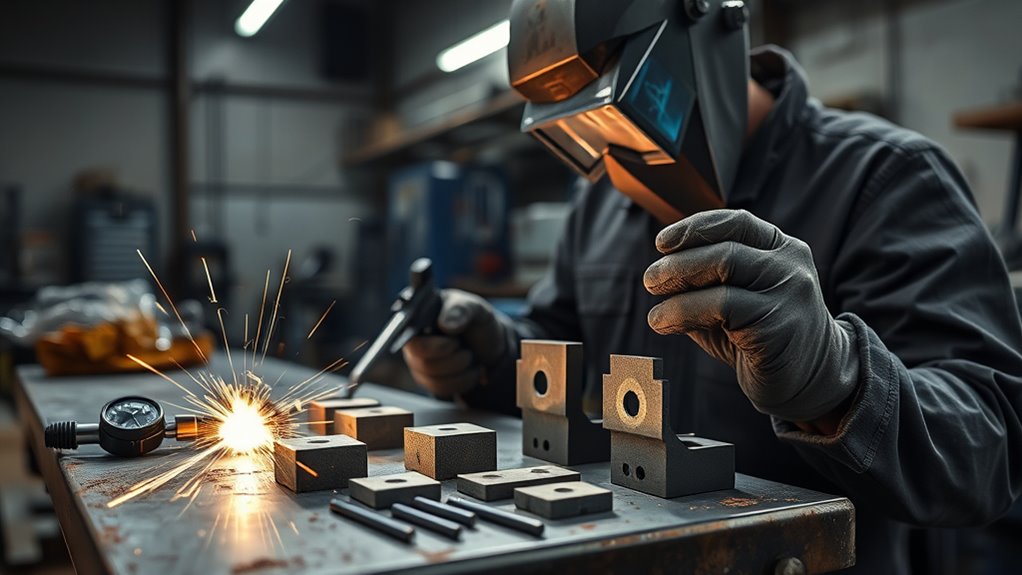
Practice on Scrap Before Real Welds
Before committing to a real joint, practice MIG welds on scrap that matches the thickness, material, coating condition, and joint style of your project. This lets you test voltage and wire feed speed without risking the final workpiece.
- Run short test beads to find the best balance of voltage and wire speed.
- Vary travel speed and torch angle on purpose so you can see how each change affects the bead.
- Inspect each coupon for penetration, tie-in, porosity, undercut, and consistency.
- Write down the settings that worked, including voltage, wire speed, gas flow, wire diameter, metal thickness, and joint type.
Using similar scrap simulates the heat response and fit-up you will face later. Repeated trials build muscle memory, so your hands respond faster and more accurately under pressure.
Note: Do not change voltage, wire speed, travel speed, and angle all at once. Change one variable, run another bead, then compare the result.
Control the Puddle Before Worrying About Appearance
You need to read the puddle continuously because its shape, wetting, and edge stability tell you whether you are moving at the right pace. When you control the puddle first, the bead profile follows that control.
Read The Puddle
The weld puddle is the real-time indicator of MIG consistency. Its size, shape, and movement tell you whether heat, wire feed, and travel speed are in balance.
Watch the puddle edges. They should flow into the base metal instead of sitting on top of it. If the puddle grows too wide, your heat input may be too high or your travel speed too slow. If it stays narrow and ropey, you may be moving too fast or running too cold.
Use these checks:
- Hold travel speed steady from start to stop.
- Keep stickout consistent so the arc does not change length mid-pass.
- Adjust voltage or wire feed only after you know your hand position is stable.
- Match the work angle to the joint so both pieces receive enough heat.
Steady Gun Movement
A steady hand keeps the puddle honest. Support the gun with two hands when possible, brace your elbows or wrists, and position your body so you can complete the pass without stretching at the end.
Use small, controlled movement. A slight weave or small circle pattern can help on some joints, but do not weave so wide that the puddle cools at the toes. For many beginner MIG welds, a steady drag or push motion is easier to repeat than a large pattern.
Shape Follows Control
Good bead shape follows stable puddle control. Do not chase surface shine while ignoring fusion. Hold a steady travel speed and torch angle, then tune wire feed speed and voltage until the puddle stays smooth and predictable.
- Keep motion consistent so the puddle does not outrun fusion.
- Use settings that prevent burn-through, cold lap, and excessive buildup.
- Test welds, then cut, bend, or inspect them to verify the result.
Check Root Fusion With Cut-And-Etch Tests
Visual inspection is useful, but it cannot always prove root fusion. For practice welds, you can cut a sample coupon and inspect the cross-section to see whether the weld fused into the root and tied into both sides of the joint.
A cut-and-etch test, also called a macro-etch, can reveal penetration depth and internal weld shape. However, acid etching should be treated as an advanced shop procedure. Use it only if you are trained, have the correct PPE, understand the chemical, and can handle, neutralize, and dispose of the etchant safely.
Warning: Do not mix or use hydrochloric acid or any etchant casually. Follow the chemical safety data sheet, use ventilation and chemical-rated PPE, and keep acids away from welding sparks and heat.
If you are a beginner, use safer checks first. Cut and polish a sample, perform a bend or break test under supervision, or ask an experienced welder, instructor, or inspector to review the weld. If the section shows thin penetration, lack of fusion, trapped pores, or uneven tie-in, adjust your parameters and test again.
Dial In Flat, Even MIG Beads
Flat, even MIG beads come from keeping your variables tight and repeatable. Lock in a stable travel speed, hold the gun at a consistent angle, and keep stickout near your target distance.
Start from the recommended voltage and wire feed settings for your material. If the bead is too tall and cold-looking, you may need more voltage, less wire feed, slower travel, or better prep depending on what the puddle shows. If the bead is too wide, undercut, or burning through, reduce heat input or increase travel speed carefully.
- Maintain steady speed.
- Keep angle and stickout fixed.
- Tune voltage and wire feed to match the plate.
- Check the bead toes for smooth tie-in.
- Stop and fix problems before repeating the same bad pass.
Practice on scrap metal and inspect each bead’s profile. Small corrections change crown height, edge wetting, penetration, and overall consistency.
Troubleshoot Common MIG Consistency Problems
When your welds are inconsistent, use symptoms to narrow the cause. Start with the simple checks first: clean metal, gas flow, stickout, contact tip, ground clamp, and travel speed.
| Problem | Likely Cause | Fix |
|---|---|---|
| Porosity | Dirty metal, low gas flow, drafts, long stickout, or leaking hose | Clean the joint, check gas flow, block drafts, inspect nozzle and hoses, shorten stickout |
| Undercut | Too hot, too fast, wrong angle, or poor pause at the toes | Reduce voltage slightly, slow down, correct work angle, improve tie-in |
| Cold lap or lack of fusion | Too cold, dirty joint, travel too fast, or poor joint access | Clean better, increase heat input carefully, slow down, improve joint fit-up |
| Burn-through | Too much heat, gap too large, or moving too slowly | Reduce heat, tighten fit-up, increase travel speed, use stitch welds on thin metal |
| Excess spatter | Voltage/wire speed mismatch, dirty tip, poor ground, or wrong polarity | Reset from chart, clean or replace tip, improve ground, verify polarity |
| Wire stubbing into plate | Wire feed too high, voltage too low, or stickout too short | Balance voltage and wire speed, keep steady CTWD |
| Bird-nesting | Drive-roll tension, liner, tip, or feeding issue | Check drive rolls, liner, contact tip size, wire spool tension, and gun cable bends |
Use Feedback From Welders and Your Boss
Ask experienced welders, instructors, inspectors, or your boss for direct, constructive feedback. Do not ask only whether the bead “looks good.” Ask what they see in your travel speed, torch angle, stickout, puddle control, tie-in, and fusion.
Document every comment in a simple welding log. Include:
- Material thickness and joint type.
- Wire diameter and wire type.
- Voltage and wire feed speed.
- Gas type and flow setting.
- Stickout and travel angle.
- Problem seen and correction made.
- Result after the next test weld.
Run controlled test welds after each adjustment to verify whether the suggestion actually improved consistency. This feedback loop helps you break old habits and build a repeatable MIG weld process.
Frequently Asked Questions
How do I get more consistent MIG welds?
Clean the metal, set voltage and wire speed from the machine chart, keep stickout near 3/8 inch, hold a steady 10–15 degree travel angle, use stable shielding gas, and test on matching scrap before welding the final part.
Why are my MIG welds inconsistent?
The most common causes are dirty metal, changing stickout, uneven travel speed, wrong voltage-to-wire-speed balance, poor ground connection, drafts blowing away shielding gas, or a worn contact tip. Check those basics before making major setting changes.
What is the best stickout for MIG welding?
For many short-circuit MIG welds with solid wire, about 3/8 inch, or roughly 10 mm, is a good starting point. Your exact target can change with wire size, transfer mode, material, and machine guidance.
What health risks affect welders?
Welders can be exposed to fumes, gases, UV radiation, heat, noise, and physical strain. Reduce risk with ventilation, proper PPE, safe positioning, fire control, equipment maintenance, and regular training. For workplace welding, follow OSHA rules and your employer’s safety program.
Why can welding damage eyesight?
Arc radiation can injure the eyes if you weld or watch welding without proper filter lenses. Use a welding helmet with the correct shade, wear safety glasses with side shields, and protect nearby observers with screens or distance.
What is the best MIG welder brand?
There is no single best brand for everyone. Choose based on amperage range, duty cycle, material thickness, service support, parts availability, portability, budget, and whether you need features like spool gun support or auto-set controls.
Conclusion
Consistent MIG welding comes from disciplined control of every variable. Clean the metal, confirm the machine setup, use proper PPE, hold a steady torch angle and stickout, and match travel speed to the puddle. Watch bead shape, prioritize puddle control, and verify fusion on scrap before trusting the final weld. When you track your settings and correct one problem at a time, your weld quality becomes more predictable with every pass.
Sources
- MillerWelds — MIG Welding Tips and Techniques for Beginners — supports MIG setup basics, stickout, shielding gas, cleaning, travel angle, and visual weld quality checks.
- OSHA — Controlling Hazardous Fume and Gases during Welding — supports welding fume, gas, ventilation, and confined-space safety guidance.
- OSHA — Eye Protection against Radiant Energy during Welding and Cutting — supports eye protection, helmet shade, and filter lens guidance.
- OSHA — Welding, Cutting, and Brazing Hazards and Solutions — supports the PPE and hazard-control safety notes.


