A damaged abrasive wheel can break apart fast, and the results can be severe. Before you mount or use one, check it with your eyes and your ears. This guide explains how to inspect an abrasive wheel for cracks, how to perform a ring test, and when to discard a wheel.
Quick Answer
To inspect an abrasive wheel for cracks, start with a visual check for chips, cracks, missing pieces, warping, or water damage. Then perform a ring test before mounting the wheel. A clear ringing tone usually means the wheel has no obvious internal crack, while a dull sound means you should discard it.
Key Takeaways
- Inspect every abrasive wheel before you mount it on a grinder.
- Discard any wheel with cracks, chips, missing pieces, or a “do not use” mark.
- Use a non-metallic tool for the ring test to avoid damaging the wheel.
- Do not use a wheel that sounds dull during the ring test.
- Follow the wheel maker’s instructions and your workplace safety rules.
Why Abrasive Wheel Inspection Matters
Inspecting abrasive wheels helps you catch damage before the wheel reaches operating speed. Even a small crack can grow under force and cause the wheel to fail.
A visual check can reveal obvious problems, such as cracks, chips, worn edges, or missing sections. Some internal fractures may not show on the surface, especially in vitrified bonded wheels.
The ring test helps you check for hidden damage before use. A sound wheel usually gives a clear ring, while a cracked wheel often gives a dull or dead sound.
Warning: Never mount or use an abrasive wheel that shows visible damage or fails the ring test.
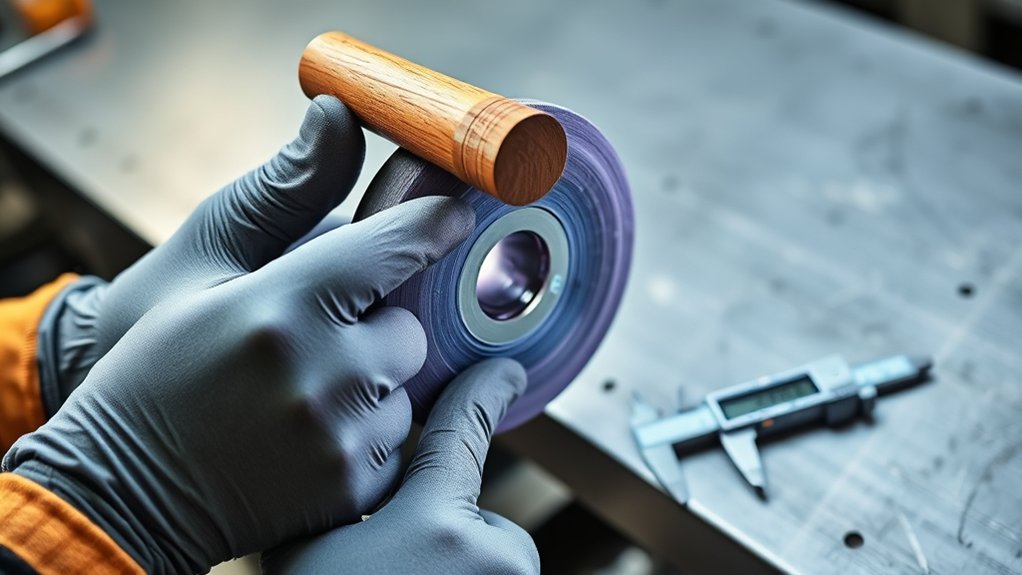
Step-By-Step Visual Inspection Process
Start your inspection before you mount the abrasive wheel. Good lighting and a clean surface make damage easier to spot.
Check For Visible Damage
Look over the entire wheel, including both faces, the edge, and the mounting hole. Check for cracks, chips, lumps, missing pieces, warping, or uneven wear.
Look for discoloration, oil, moisture, or foreign material on the wheel. These issues can affect strength, balance, or performance.
Discard the wheel if you find any serious defect. Do not try to repair, glue, or reshape a damaged wheel.
Validate Expiration Date
Check the wheel label or blotter for a use-by date, shelf-life date, or manufacturer guidance. Some wheels, such as organic bonded wheels, can degrade with age or poor storage.
Do not use a wheel that has passed its stated validity date. Also discard any wheel with a missing or unreadable label when you cannot confirm the wheel type, speed rating, or condition.
Record inspections when your workplace safety program requires it. A simple record can help you track wheel age, storage conditions, and disposal decisions.
How to Perform the Ring Test?
The ring test checks whether a vitrified bonded abrasive wheel may have internal cracks. Perform it before mounting the wheel, after the visual check, and before the wheel reaches the machine.
Do not ring test every wheel type. Some wheels do not produce a useful ring, so you should follow the manufacturer’s instructions for the wheel you use.
Products Worth Considering

Heavy-duty design cracks shells without damaging seafood meat

TRIPLE WEDGE CONSTRUCTION - An optimized design securely fastens the hammer head to its hickory handle.

Durable rubber mallet hammer head for soft blow strike that doesn’t damage
Required Tools And Materials
You need only a few simple items for a basic ring test:
- A clean, dry abrasive wheel that has passed visual inspection
- A non-metallic tool, such as a wooden mallet handle or screwdriver handle
- A quiet work area where you can hear the sound clearly
- A safe surface where the wheel cannot fall or roll
Use a non-metallic object so you do not chip or damage the wheel. Never strike the wheel hard enough to mark it.
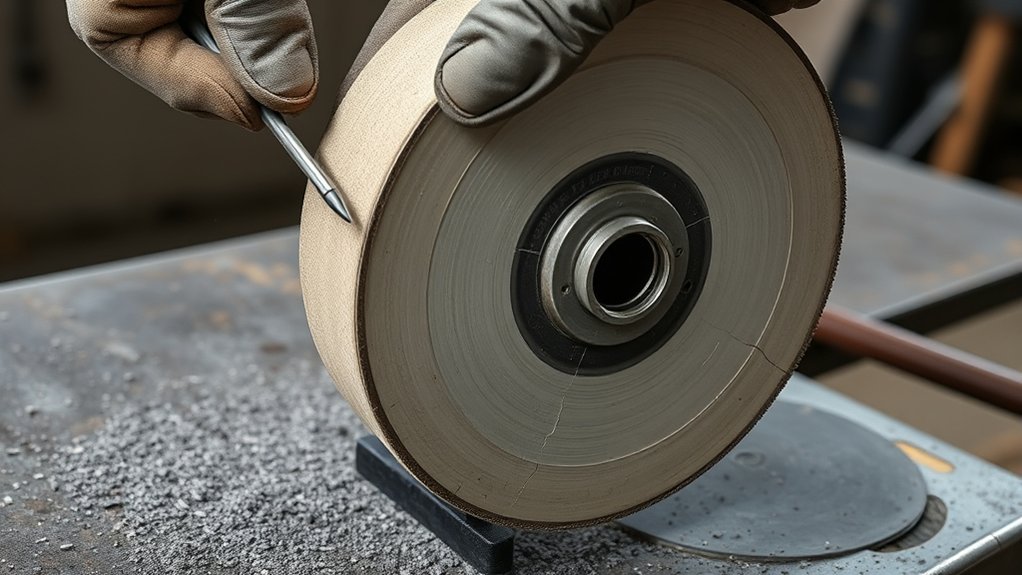
Step-By-Step Procedure
- Clean the wheel. Remove loose dust or debris so the wheel can vibrate freely.
- Support the wheel. Hold smaller wheels through the arbor hole or suspend larger wheels so they hang freely.
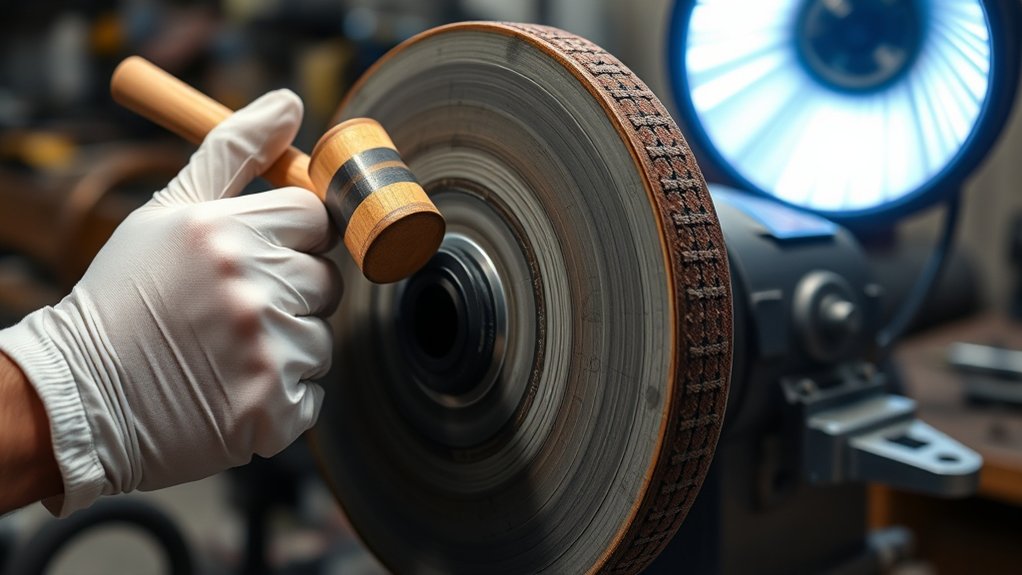
- Tap the wheel gently. Strike the wheel about 45 degrees on each side of the vertical centerline and about 1 to 2 inches from the edge.
- Rotate the wheel. Turn the wheel about 45 degrees and tap it again in the same way.
- Listen to the sound. A clear ring suggests the wheel may be sound, while a dull sound suggests possible cracking.
Do not let the wheel rest flat on a bench during the test. A hard surface can mute the sound and make the result less reliable.
Pro tip: Test the wheel in a quiet area and compare the sound with a known good wheel when you can.
Interpreting The Results
The sound tells you whether the wheel may have hidden damage. Use the test result as a safety screen, not as a guarantee.
| Sound Type | Interpretation |
|---|---|
| Clear, High-Pitched Ring | The wheel may be sound, if it also passed visual inspection |
| Dull Or Dead Sound | The wheel may have internal cracks, so you should discard it |
If the wheel sounds dull, do not mount it. Mark it as unsafe and remove it from service so no one else uses it.
How to Recognize Damaged Abrasive Wheels
Damaged abrasive wheels can show several warning signs. Look for visible cracks, broken edges, missing abrasive, soft spots, water damage, or distorted mounting holes.
Pay close attention to the blotter and label area. Damage around the mounting hole can affect clamping pressure and make the wheel unsafe.
Also watch for signs of poor storage, such as moisture marks, oil stains, crushed edges, or heavy dust buildup. Store wheels flat, dry, and protected from impact.
Products Worth Considering

High performance aluminum oxide grain for long life and high material removal of the grinding wheel


Long life for fewer wheel changes
When to Discard Grinding Wheels
Discard a grinding wheel as soon as you find cracks, chips, missing pieces, warping, or other visible defects. Do not take a chance on a wheel that looks questionable.
Also discard any wheel that fails the ring test or has a dull, dead sound. A dull sound can point to hidden cracks that may not appear during a visual check.
Remove wheels from service when they pass the validity date or lack key markings, such as the speed rating. The grinder’s speed must never exceed the maximum speed marked on the wheel.
Warning: Do not use an abrasive wheel if you cannot confirm its rated speed, wheel type, or safe condition.
Essential Tips for Maintaining Abrasive Wheels
Good storage and handling reduce the chance of wheel damage. Keep abrasive wheels dry, clean, and away from vibration, impact, and extreme temperature changes.
Store wheels in a way that prevents bending, dropping, or edge damage. Keep them in their original packaging when possible, and follow the maker’s storage guidance.
Inspect wheels before each use and after any drop or impact. If a wheel falls, treat it as suspect until it passes inspection and any required test.
- Keep wheels away from oil, grease, and moisture.
- Handle wheels with clean, dry hands or gloves.
- Use the correct wheel for the material and grinder.
- Check the machine guards before you start.
- Let a newly mounted wheel run in a guarded area before work begins.
Safety Tips for Using Abrasive Wheels
Inspection is only one part of abrasive wheel safety. You also need the right wheel, the right grinder, and the right protective gear.
Wear eye and face protection, hearing protection, and other personal protective equipment required for the job. Keep guards in place and stand out of the wheel’s plane during startup.
Match the wheel to the grinder and the material you plan to cut or grind. Check the wheel’s maximum revolutions per minute (RPM) rating before you mount it.
Keep the work area clean and free from trip hazards. A stable setup helps you control the tool and reduces the risk of wheel damage during use.
Why Vitrified Wheels Can Be Risky
Vitrified wheels use a glass-like bond that holds the abrasive grains together. These wheels can perform well, but they can also hide internal cracks.
A visual check alone may not reveal damage inside the wheel. That’s why the ring test matters for wheel types where the maker recommends it.
Use these safety habits with vitrified wheels:
- Inspect before mounting. Check the wheel face, edge, and arbor hole for damage.
- Perform the ring test. Listen for a clear ring before you place the wheel on the machine.
- Check storage history. Do not use wheels that show moisture damage, impact marks, or poor handling.
What to Do Before Mounting the Wheel
After the wheel passes inspection, check the grinder before mounting it. Confirm the guard, flanges, blotters, and spindle all match the wheel and machine.
Make sure the wheel fits freely on the spindle. Do not force it, alter the arbor hole, or use extra pressure to clamp it.
Tighten the mounting nut only enough to hold the wheel securely. Over-tightening can stress the wheel and increase the risk of cracking.
Frequently Asked Questions
How to Ring Test an Abrasive Wheel?
To ring test an abrasive wheel, support it through the center hole or suspend it so it can vibrate freely. Tap it gently with a non-metallic tool and listen for a clear ring.
What Is the Best Method for Inspecting Abrasive Wheels for Cracks?
The best method starts with a careful visual check, followed by a ring test when the wheel type allows it. You should also verify the wheel’s label, speed rating, and validity date.
What Is the OSHA Ring Test for Grinding Wheels?
The Occupational Safety and Health Administration (OSHA) ring test checks grinding wheels for possible cracks before mounting. You tap the wheel gently and listen for a clear ring, while a dull sound means you should not use the wheel.
How Would You Test a New Grinding Wheel for Cracks?
Inspect a new grinding wheel for shipping damage, cracks, chips, and label issues. Then perform the ring test if the wheel type requires it and the manufacturer’s instructions allow it.
Can every abrasive wheel be ring tested?
No, not every abrasive wheel gives a useful ring test result. Always check the manufacturer’s instructions, because some wheel types need different inspection methods.
What should you do if an abrasive wheel fails inspection?
Remove the wheel from service right away. Mark it clearly, discard it according to your workplace rules, and do not leave it where someone else might use it.
Safety Disclaimer: This article is for informational purposes only and does not replace workplace safety training, manufacturer instructions, or OSHA requirements. Always follow your employer’s safety program and consult a qualified safety professional when you are unsure.
Conclusion
Inspecting an abrasive wheel before use helps you prevent cracks from becoming serious hazards. Start with a visual check, then use the ring test when the wheel type allows it.
Discard any wheel that looks damaged, sounds dull, has expired, or lacks key markings. A few minutes of inspection can protect you, your equipment, and everyone nearby.
References
- Abrasive Wheel Machinery Standard 1910.215 — Occupational Safety and Health Administration
- Machine Guarding eTool: Abrasive Wheels — Occupational Safety and Health Administration
- Safety in the Use of Abrasive Wheels — Health and Safety Executive


