How to Inspect Your Angle Grinder Cord Safely
A damaged angle grinder cord can turn a routine job into a shock or fire risk. Before you plug in the tool, take a few minutes to check the cord, plug, and connection points. This guide shows you how to inspect your angle grinder cord safely, what damage to look for, and when to replace it.
Quick Answer
Unplug the angle grinder first, then inspect the full cord for cuts, frays, exposed wires, burn marks, kinks, and stiff spots. Check the plug and the point where the cord enters the grinder for cracks, looseness, or heat damage. Replace the cord before use if you find any visible damage or power problems.
Key Takeaways
- Unplug the grinder before you inspect the cord or plug.
- Look for frays, cuts, exposed wires, cracks, burn marks, and melted insulation.
- Check stress points near the plug and where the cord enters the grinder.
- Replace a damaged cord instead of covering it with tape.
- Ask a qualified technician to repair electrical problems you can’t confirm safely.
Why Inspecting Your Angle Grinder Cord Is Essential
Inspecting your angle grinder cord matters because even small damage can create a serious safety risk. A cut, fray, or exposed wire can lead to electric shock, burns, or fire.
A damaged cord can also interrupt power while the grinder runs. That sudden change can make the tool harder to control, especially during cutting or grinding.
Check the cord before each use, especially if you work in a shop, garage, or outdoor area where cords get dragged across rough surfaces. If you find damage, stop using the grinder until you replace the cord or have it repaired.
Before You Begin: What You’ll Need
Plan on spending about 5 to 10 minutes on a basic cord inspection. If you need to test continuity with a multimeter, the check may take a few more minutes.
Gather these items before you start:
- Safety glasses
- Work gloves
- Good lighting
- A clean, dry work surface
- A multimeter, if you know how to use one safely
Do not inspect or test the cord in a wet area. Keep the grinder unplugged until the inspection ends.
Step-by-Step: How to Inspect an Angle Grinder Cord
- Unplug the grinder. Grip the plug, not the cord, and pull it straight from the outlet.
- Check the full cord. Look along the entire length for cuts, frays, cracks, exposed wires, or crushed spots.
- Inspect the plug. Look for bent prongs, cracks, loose parts, burn marks, or melted plastic.
- Check both stress points. Inspect the area near the plug and the point where the cord enters the grinder.
- Flex the cord gently. Bend small sections by hand and watch for stiff spots, cracks, or power-related symptoms during later testing.
- Test only if you know how. Use a multimeter for a continuity check only when you understand safe electrical testing.
- Replace damaged parts. Do not use the grinder until a damaged cord, plug, or connection has been replaced.
Products Worth Considering

Product Name: Angle Grinder Cordset Power Cord
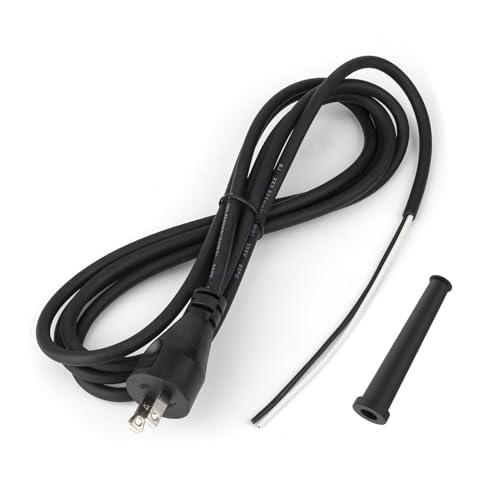
【Compatibility Notes】 33007298 power cord has a wide range of applicable equipment, and is particularly suitable early-designed small and medium-sized power tools, such as electric drills, angle grinders, polishers, electric screwdrivers, and other equipment.

【SUITABLE FOR A WIDE RANGE OF POWER TOOLS】Replacement power cords for drill bits, miter saws, chopper saws, table saws, sanders, grinders, grinders, vacuum cleaners, shop floor vacuum cleaners, kitchen appliances, lights, compressors, motors, and power tools.
First Things First: Unplugging the Grinder
Before you inspect the angle grinder cord, unplug it from the power source. This step cuts the risk of electric shock and prevents the tool from starting by accident.
Never rely only on the grinder’s switch. A failed switch, bumped trigger, or damaged cord can create a hazard while you handle the tool.
Safety Precautions First
Protect yourself before you touch the cord or plug. Wear safety glasses and gloves, then place the grinder on a stable, dry surface.
- Check the full cord for frays, cuts, crushed areas, and exposed wires.
- Inspect the connection points at the plug and grinder housing.
- Look for burn marks, melted plastic, or a hot smell.
Warning: Do not use an angle grinder with exposed wires, melted insulation, or a cracked plug.
Proper Unplugging Technique
Unplugging your angle grinder the right way protects both the cord and the outlet. Pulling on the cord can loosen internal wires and weaken the plug over time.
| Action | Why It Matters |
|---|---|
| Grip the plug, not the cord | Protects the internal wiring |
| Pull straight out | Reduces strain on the plug and outlet |
| Inspect the cord after unplugging | Helps you catch wear before use |
After you unplug the grinder, check the plug and cord before you move on. Look for visible wear, loose parts, or signs of heat damage.
Visual Inspection: Spotting Damage on the Cord
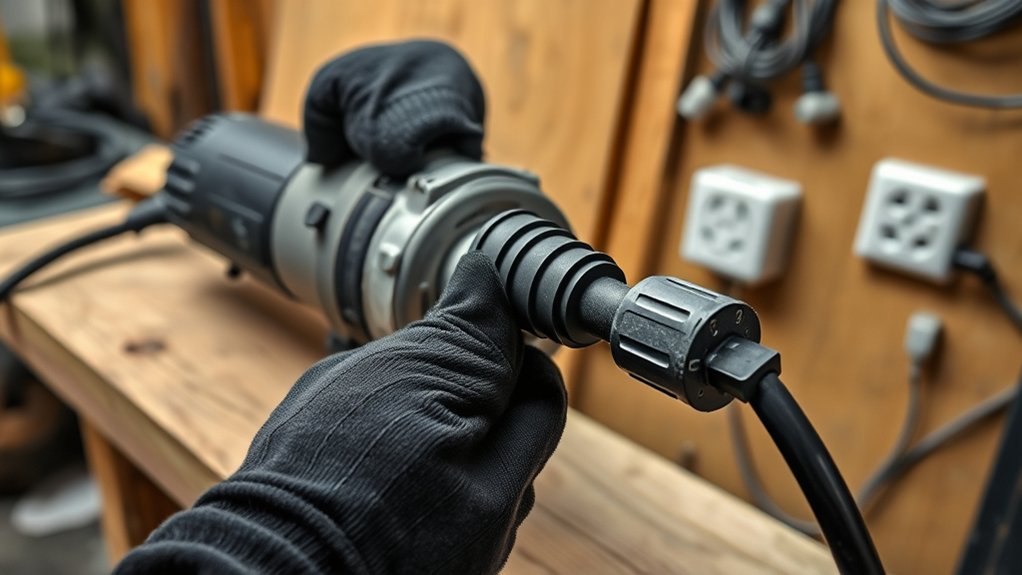
During a visual inspection, start at the plug and work slowly toward the grinder. Turn the cord as you go so you can see every side.
Focus on the areas near the plug and where the cord enters the grinder. These spots bend often and tend to fail first.
Products Worth Considering

Widely used: for Makita various models and other power tool power cord repair,rubber strain relief as well (please check the connector)

【Value Sets】The grinder nut set includes 1 angle grinder wrench and 6 angle grinder nuts (3 inner flange nuts, 3 outer flange nuts). Please check size and compatibility before ordering. Please contact us with any questions or concerns. We prioritize your satisfaction .

VERSATILE VALUE SET: Includes 1 angle grinder wrench and 6 angle grinder nuts (3 inner flange nuts + 3 outer flange nuts), Perfect for a variety of installation and replacement needs.
Common Cord Issues
Common cord problems can affect both safety and tool performance. Watch for these warning signs before you plug the grinder in:
- Frayed insulation that exposes inner wires
- Cuts or abrasions that weaken the cord jacket
- Cracks, chips, or looseness in the plug
- Burn marks, discoloration, or melted insulation
- Stiff, crushed, twisted, or kinked sections
If you find one of these issues, don’t try to keep working. Replace the damaged cord or have the tool serviced.
Inspection Techniques Explained
Use bright light and inspect the cord from end to end. Run your hand along the cord gently, but do not touch exposed wires if you see them.
Avoid quick fixes like wrapping damaged insulation with electrical tape. Tape can hide the problem without fixing the damaged conductor or insulation underneath.
| Inspection Area | What to Look For | Safety Concern |
|---|---|---|
| Entire cord | Frays, cuts, exposed wires | Shock, fire, or tool failure |
| Connection points | Looseness, cracks, strain | Sparking or overheating |
| Insulation | Cracks, stiffness, discoloration | Hidden internal damage |
Common Signs of Wear and Tear: Identifying Damage
Regular cord checks help you catch problems before they cause an injury or damage the tool. Look closely at any area that bends, rubs, or gets pulled during use.
Check for these signs of damage:
- Visible frays or cuts: Exposed wires can create a shock risk.
- Burn marks: Melted or dark areas may point to overheating.
- Kinks or tight bends: Sharp bends can damage wires inside the cord.
- Loose plug parts: A cracked or loose plug can spark or fail.
Pay close attention to the stress points near the plug and grinder housing. Damage often starts there because those areas flex the most.
When to Replace Your Grinder Cord
Replace your grinder cord when you see cuts, frays, exposed wires, melted insulation, or a cracked plug. You should also replace it if the tool loses power when the cord moves.
Loose or damaged connections at either end of the cord can also create heat and sparks. Stop using the grinder until a qualified person repairs the problem.
Frequent breaker trips, flickering power, or a burning smell can point to a cord or internal electrical fault. Treat those signs as safety warnings, not small annoyances.
How to Test for Electrical Issues

Start with a visual inspection before you test anything. If the cord has exposed wires, melted insulation, or severe damage, do not test it with the grinder plugged in.
If you understand multimeter safety, set the meter to resistance, often marked as ohms. A continuity test can help confirm whether the cord has a complete path from one end to the other.
Check both conductors according to the tool’s wiring and your multimeter instructions. A reading that shows an open circuit can mean the cord has a break.
Use extra care with grounded tools. A three-prong plug should have a sound grounding path, and a damaged ground connection needs repair before use.
Note: If you aren’t trained to test electrical tools, ask a qualified technician to check the grinder.
Ensuring a Secure Fit With the Plug and Connections
A secure plug and firm connection help the grinder run safely. Check the plug for cracks, loose parts, bent prongs, fraying, and exposed wires.
The plug should fit snugly into the outlet. A loose fit can cause arcing, heat, or sudden power loss during use.
Next, inspect the connection at the grinder housing. If the cord moves too freely, pulls away, or shows damage near the entry point, stop using the tool.
Tips for Maintaining Your Angle Grinder Cord
Good cord care helps prevent many common failures. Store and handle the grinder in a way that keeps the cord away from sharp edges, heat, and heavy objects.
Maintaining your angle grinder cord helps reduce electrical hazards and keeps the tool ready for safer use.
- Inspect regularly: Check the cord before each use.
- Avoid yanking: Pull the plug instead of the cord.
- Store properly: Coil the cord loosely without tight bends.
- Keep it dry: Store the grinder away from wet floors and damp shelves.
- Protect it from heat: Keep the cord away from sparks, hot metal, and grinding debris.
Pro tip: Coil the cord loosely after each use so tight bends don’t stress the internal wires.
Common Mistakes to Avoid
Small habits can shorten the life of your grinder cord. Avoid dragging the cord across sharp metal, pinching it under heavy tools, or wrapping it tightly around the grinder.
Do not keep using the grinder after you notice flickering power or a hot plug. Those signs can point to a loose connection, damaged cord, or another electrical fault.
Frequently Asked Questions
How do you inspect an angle grinder cord?
Unplug the grinder, then inspect the full cord for cuts, frays, exposed wires, cracks, burn marks, and stiff areas. Check the plug and the cord entry point on the grinder for looseness, heat damage, or strain.
What safety precautions should you take before using an angle grinder?
Wear safety glasses, gloves, and other personal protective equipment required for the task. Check the guard, wheel, switch, plug, and cord before you start the grinder.
What should you check before using a grinding machine?
Check the power cord, plug, guard, wheel condition, wheel rating, switch, handle, work area, personal protective equipment, and power source. Do not use the tool if any part looks damaged or unsafe.
How often should you inspect a grinder cord?
Inspect the cord before each use. Check it more often if you use the grinder outdoors, on rough floors, or around sharp metal edges.
Can you repair a damaged angle grinder cord with tape?
No. Electrical tape can hide damage, but it does not restore the cord’s insulation or internal wiring. Replace the cord or ask a qualified technician to repair the tool.
Safety Disclaimer: This article is for informational purposes only and does not replace professional electrical or tool repair advice. Ask a qualified technician to inspect or repair damaged power cords, plugs, or electrical parts.
Conclusion
A safe angle grinder starts with a sound cord, plug, and connection. Make cord inspection part of your normal setup before every job.
If you spot damage, replace the cord or have the tool repaired before you use it again. A few careful checks can help you work with more control, less risk, and greater confidence.


