Green or blue-green buildup on metal can stop you before you even strike an arc. It usually forms on copper, brass, bronze, or copper-plated parts, and it may block electrical contact, contaminate the weld area, or hide pitting. The safest fix is to identify the metal first, remove the corrosion with the least aggressive method that works, rinse and dry the part, and then prepare the joint to the correct welding procedure.
I recommend treating every green patch as a reason to inspect the part, not as proof that the metal is ruined. Some smooth green patinas are stable, while pale, loose, powdery deposits can indicate active corrosion. The difference matters because unnecessary grinding can damage a thin, plated, decorative, or historically important part.
Quick Answer
Remove loose green corrosion with a dedicated soft brush, wash away dirt and grease, and use a fine compatible abrasive only where needed. Rinse and dry the metal completely, then clean the weld zone with an approved nonchlorinated solvent. Do not weld unknown alloys, coated parts, or metal that remains pitted, powdery, or contaminated.
Last updated: July 19, 2026
Key Takeaways
- Green corrosion usually points to copper or a copper-bearing alloy, but a green coating on steel or aluminum may come from plating, paint, coolant, or transferred contamination.
- A smooth, firmly attached patina may be stable. Loose, rapidly returning, pale-green powder needs closer investigation.
- Start with brushing and mild detergent. Move to powered abrasion or controlled chemical cleaning only when gentler methods fail.
- Do not mix vinegar and baking soda, and do not use salt-based cleaners before welding.
- Use local exhaust, keep flammable cleaners away from hot work, and never use chlorinated brake cleaner or degreaser near an arc.
- Choose the filler, joint geometry, preheat, and machine settings from the exact alloy and an approved welding procedure.
At a Glance
| Time Required | About 20 to 90 minutes for a small part; severe corrosion or drying time may take longer |
| Difficulty | Easy for light surface deposits; advanced for unknown alloys, thin parts, pressure components, or active corrosion |
| Tools Needed | Eye protection, gloves, local ventilation, dedicated brushes, mild detergent, nylon pad or compatible abrasive, clean water, lint-free cloths, and an approved nonchlorinated degreaser |
| Cost | Low for hand-cleaning supplies; moderate or higher if powered tools, local exhaust, testing, or blasting equipment is required |

Image by ThoughtCo
What Causes Green Corrosion on Metal?
Green corrosion forms most often when copper or a copper-bearing alloy reacts with moisture and substances in its environment. Copper, brass, and bronze can develop mixtures of oxides, carbonates, chlorides, sulfates, and other compounds. Humidity, salt spray, fingerprints, acidic vapors, cleaners, and outdoor storage can speed up the reaction.
That green layer is often called verdigris, but the word does not identify one exact chemical. Its color and texture can change with the alloy and exposure. Marine fittings may collect chloride-rich deposits, while indoor brass may react with moisture, fingerprints, polish residue, or acidic vapors.
Do not assume every green surface is active damage. The Canadian Conservation Institute explains that stable copper-alloy patinas can be green, smooth, coherent, and firmly attached. Active corrosion is more likely to appear as loose, pale-green powder that develops rapidly or returns after cleaning.
A green color alone does not tell you whether the surface is stable, actively corroding, plated, painted, or contaminated. Identify the metal and inspect the texture before removing material.
For welding, the concern is the joint area. Oil, grease, paint, dirt, moisture, polish residue, and loose oxides can interfere with arc stability, wetting, fusion, and shielding. The Copper Development Association’s welding guidance recommends cleaning the joint faces and nearby surfaces before welding.
Identifying Green Corrosion on Different Metals
Start by identifying the base metal, coating, plating, and service history. Check drawings, material markings, purchase records, part numbers, or a known material specification. Do not rely only on color, a magnet, or a spark test.
- Copper: May develop brown, black, blue, or green surface layers. Powdery pale-green spots can indicate active corrosion.
- Brass: Contains copper and zinc. Green deposits may form, while pink or copper-colored areas can also suggest selective zinc loss.
- Bronze: Covers several copper-alloy families. The exact alloy may include tin, aluminum, silicon, lead, or other elements, so weldability varies.
- Copper-plated or chrome-plated parts: Green corrosion may come through damaged plating from a copper layer beneath it.
- Steel: Ordinary iron corrosion is usually red, orange, brown, or black. Green material may instead be paint, coolant residue, transferred copper salts, or corrosion from copper-containing plating.
- Aluminum: Typical aluminum corrosion is white or gray. A green deposit may indicate contact with copper, a coating, or external contamination.
Warning: Do not sniff unknown corrosion or grind unidentified scrap. Older parts may contain lead, cadmium, beryllium, zinc coatings, hazardous paint, or other materials that require special controls.
If the part is plated, painted, lacquered, decorative, antique, part of a pressure system, or difficult to identify, stop before aggressive cleaning. A metal conservator, welding engineer, inspector, or qualified fabrication shop may need to identify it.
Why Clean Corrosion Before Welding Copper Alloys?
A weld needs clean, dry, correctly prepared surfaces. Loose corrosion can enter the molten pool, block electrical contact, disrupt shielding, or hide defects. Grease, cleaner residue, polish, paint, and moisture can also contribute to porosity and erratic arc behavior.
Cleaning serves another purpose: it exposes the condition of the base metal. Once the green deposit is gone, you may find pits, cracks, pinholes, dezincification, thinning, or damaged plating. These defects can change the joint design or make the part unsuitable for repair.
Do not select filler from color or appearance. Copper, brass, bronze, copper-nickel, aluminum bronze, and silicon bronze require different procedures. A filler that works on one copper alloy may crack, vaporize alloying elements, or produce poor properties on another.
For structural, pressure-retaining, lifting, fuel-system, electrical, or safety-critical parts, cleaning alone is not enough. Confirm the alloy, applicable code, engineering requirements, joint design, filler classification, shielding gas, preheat, heat input, and inspection method before welding.
Mechanical Methods for Removing Green Corrosion
Mechanical cleaning is usually the best first choice for a weld zone because it does not intentionally add acid or salt. Start gently and increase the cutting action only when needed.
- Remove dry loose material with a dedicated soft brush and a suitable vacuum or controlled collection system.
- Wash grease and dirt with mild detergent and clean water.
- Use a nylon abrasive pad, scraper, fine abrasive paper, or a dedicated nonferrous-metal brush for remaining deposits.
- Use powered abrasion only on a part thick and strong enough to tolerate it.
- Inspect often so you do not thin, gouge, smear, or overheat the base metal.
Keep brushes and abrasives dedicated to the alloy family. A carbon-steel brush used on copper can leave embedded iron particles. A brush previously used on oily or painted metal can transfer contamination back to the joint.
Pro Tip: Mark dedicated brushes and abrasive tools by material, such as copper alloys, stainless steel, aluminum, and carbon steel. Store them separately so they do not pick up foreign particles.
Grinding Techniques for Weld Prep
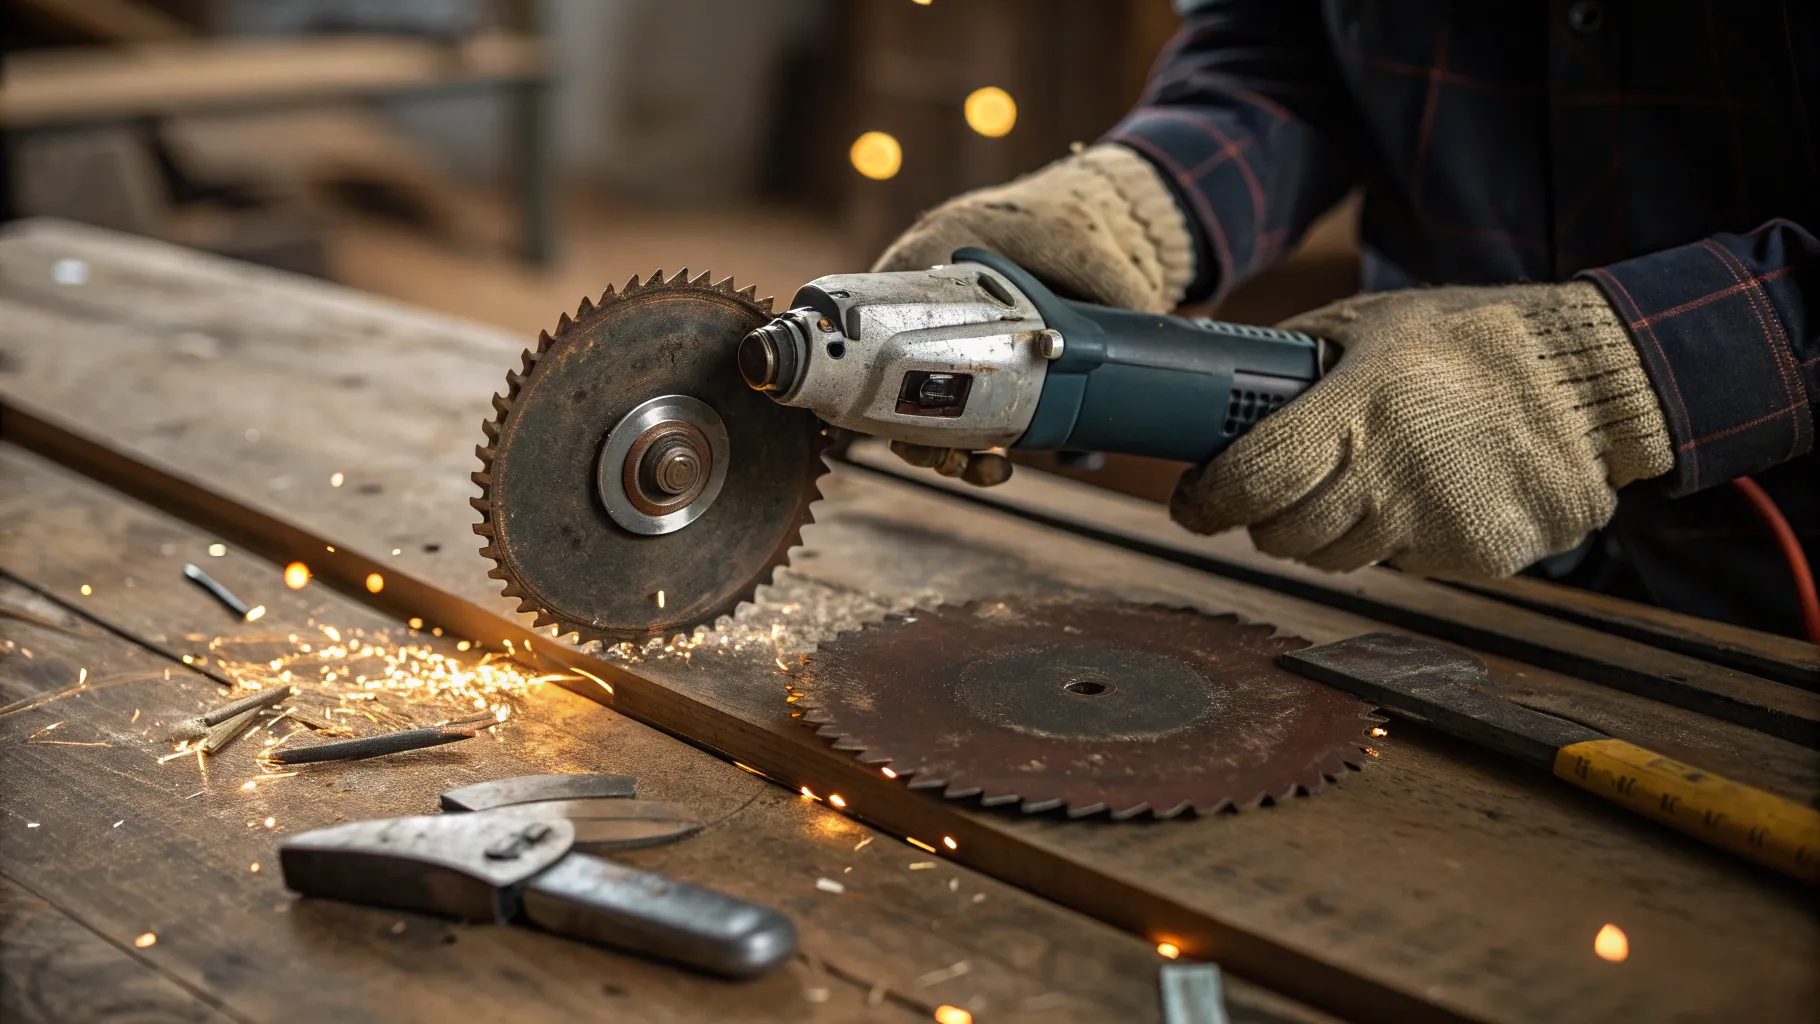
Use an angle grinder only when hand cleaning cannot remove the corrosion efficiently and the workpiece can tolerate powered abrasion. Choose an accessory approved for both the tool and the metal. Never exceed the wheel’s rated speed or use a wheel that is damaged, glazed, contaminated, or the wrong size.
Begin with the least aggressive abrasive that will cut the deposit. Use light pressure, keep the tool moving, and stop frequently to check temperature and wall thickness. Soft copper alloys can load an abrasive quickly, and excessive pressure can smear metal over pits instead of exposing them.
Do not use a universal grinder angle, speed, grit, or removal-depth limit. The correct setup depends on the wheel design, grinder speed, alloy, part thickness, joint requirements, and manufacturer instructions.
After grinding, inspect the brightened zone under good light. Remove all loose particles and check for cracks, laminations, pinholes, deep pits, or remaining green material. Cleaning that reveals substantial wall loss is a reason to stop and reassess the repair.
Sandblasting Basics for Corrosion Removal
Abrasive blasting can clean large, sturdy copper-alloy parts, castings, or batches, but it is not automatically safe for every surface. Media type, particle size, pressure, nozzle distance, angle, and dwell time all affect the result.
Use a test area first and follow the blasting-equipment and media suppliers’ instructions. Select media that will not embed harmful particles or remove excessive base metal. Thin sheet, plated parts, precision fits, sealing faces, soft decorative metal, and historic objects may be damaged by blasting.
Control airborne dust with an enclosed cabinet or suitable engineering controls. Do not assume a general shop respirator is adequate. Abrasive blasting can require specialized respiratory protection based on the media, coating, corrosion product, and exposure level.
Chemical Methods to Dissolve Green Corrosion
Chemical cleaning can reach crevices that brushes cannot, but it also introduces new risks. Acids may attack brass, change the appearance, remove a stable patina, damage plating, or leave residue that continues reacting after cleaning.
Start with mild detergent and water. Consider an acid or commercial cleaner only when the metal is positively identified, the part is uncoated, the product is approved for that alloy, and mechanical cleaning alone is not practical.
White vinegar can loosen some copper corrosion products on plain copper or brass, but it should not be treated as harmless. Use short, controlled contact instead of an unattended soak. Test a small area, scrub with a nylon brush, rinse with several changes of clean water, and dry immediately. Do not use vinegar on unknown alloys, plated parts, antiques, critical components, or surfaces with a finish you need to preserve.
The Canadian Conservation Institute’s brass and copper guidance recommends beginning with the gentlest method and warns that polishing removes surface metal. That same least-aggressive principle is useful when preparing noncritical copper-alloy work for welding.
Homemade Pastes for Targeted Cleaning
Do not mix equal parts vinegar and baking soda for corrosion removal. The acid and base neutralize one another, producing carbon dioxide, water, and dissolved salts. The fizz looks active, but the mixture quickly loses much of the acidity that was doing the cleaning.
For a mild abrasive paste, mix baking soda with a small amount of clean water instead. Apply it with a soft cloth or nylon brush, then rinse the part thoroughly. This may help with light surface dirt, but it will not remove deep active corrosion.
Avoid lemon juice mixed with table salt before welding. The acid can attack the alloy, while chloride residue from salt can encourage further copper-alloy corrosion if it is not completely removed.
Note: Neutralizing a cleaner does not replace rinsing. Dissolved salts and reaction products must still be removed with clean water before the part is dried and mechanically prepared.
Commercial Cleaners for Professional Welders
Use a commercial cleaner only when its current label and safety data sheet list the exact base metal. A product made for iron rust may stain or attack copper alloys. A decorative metal polish may leave wax, silicone, inhibitors, or other films that interfere with welding.
Naval Jelly-style rust removers are not universal verdigris cleaners. Metal polishes such as Flitz may be useful for appearance on approved surfaces, but polishing is not the same as final weld preparation. Any film or residue must be removed before welding.
Follow the product’s dilution, contact-time, ventilation, PPE, rinsing, disposal, and incompatibility instructions. Never mix cleaners unless the manufacturer explicitly directs it.
Step-by-Step Guide to Removing Green Corrosion Before Welding
- Identify the part: Confirm the base metal, alloy, coating, plating, previous service, and whether the part is structural, pressure-retaining, electrical, decorative, or safety-critical.
- Inspect the corrosion: Note whether it is smooth and stable or loose and powdery. Mark cracks, pits, thin areas, and seams that need closer inspection.
- Make the area safe: Isolate the part from power, pressure, fuel, chemicals, and connected equipment. Provide local ventilation and remove combustible materials.
- Remove loose deposits: Use a dedicated soft brush, nylon tool, or suitable vacuum collection. Do not blow unknown dust into the shop.
- Wash the surface: Clean grease, fingerprints, and dirt with mild detergent and clean water. Rinse thoroughly.
- Reduce remaining corrosion: Use a fine compatible abrasive or a controlled cleaner approved for the known alloy. Work gradually and inspect often.
- Rinse and dry: Remove all chemical residue with clean water. Dry with lint-free cloths and clean, controlled air or gentle heat that will not damage the part.
- Prepare the weld zone: Mechanically brighten the joint faces and the surrounding area required by the drawing or WPS. Use dedicated, uncontaminated tools.
- Degrease safely: If the procedure calls for solvent cleaning, use an approved nonchlorinated product. Remove the container from the hot-work area and allow the surface to dry completely.
- Inspect before welding: Check for remaining oxide, powder, cleaner residue, moisture, pits, cracks, pinholes, wall loss, or contaminated tools. Do not weld until the cause of any remaining defect is understood.
- Verify the procedure: Confirm the filler, shielding gas, polarity, preheat, heat input, joint dimensions, and inspection requirements from a valid procedure for the exact alloy.
Warning: Never use chlorinated brake cleaner, trichloroethylene, perchloroethylene, or another chlorinated degreaser where its vapor can reach a welding arc. Heat and ultraviolet radiation can create highly toxic decomposition products.
Tools and Equipment for Effective Corrosion Removal
A basic corrosion-preparation kit should include:
- Safety glasses or goggles and a face shield where flying particles are possible
- Chemical-resistant gloves selected from the cleaner’s safety data sheet
- Local exhaust or another suitable ventilation system
- Dedicated natural-bristle, nylon, brass, or alloy-appropriate brushes
- Nylon abrasive pads and fine compatible abrasive sheets
- A variable-speed grinder only when powered abrasion is justified
- Clean plastic containers for water-based cleaning
- Mild detergent and clean rinse water
- Lint-free cloths
- An approved nonchlorinated degreaser when required by the procedure
- Bright inspection lighting and basic measuring tools
A respirator should not be chosen by guesswork. Grinding creates particles, cleaners may create vapors, and welding produces fumes and gases. Occupational respirator use may require a written program, medical evaluation, fit testing, training, and cartridges or filters selected for the measured hazard.
Products Worth Considering

6 Pack Wire Brush Set: This package includes: 2 pcs carbon steel cup brush, 2 pcs wheel brush, 2 pcs pen brush with 1/4 inch hex shank. Hardened steel wire long maximum 4500 RPM.
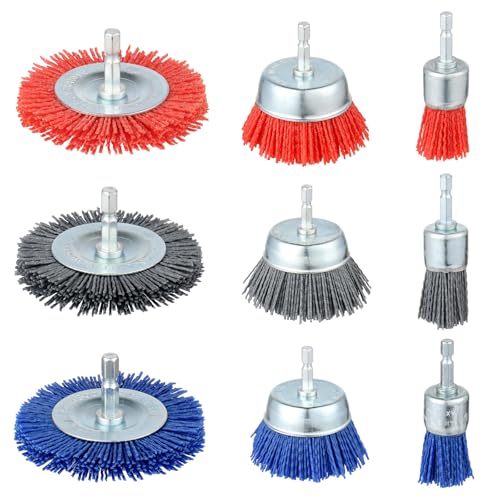
Sturdy and Long Lasting Construction - Constructed with sturdy nylon bristles embedded with abrasive grit, these brushes are built to withstand frequent use almost not shed bristles, maintains shape, and not corrode or rust. The high-quality materials ensure a long service life, reducing the need for frequent replacements

Package:6 pack nylon filament abrasive wire brush set including one pen brush,three size flat brushes,two size bowl brushes
Common Mistakes When Removing Green Corrosion and How to Fix Them
Removing a stable decorative patina: Not every green surface is active corrosion. Clean only the weld zone and areas that must be inspected. Refer decorative or historic objects to a conservator.
Grinding before identifying the alloy: Stop and identify the material first. Unknown scrap may contain hazardous or unweldable elements.
Using a contaminated steel brush: Replace it with a clean, dedicated brush suitable for copper alloys.
Using too much pressure: Switch to a less aggressive abrasive, make light passes, and inspect frequently.
Soaking brass in acid for too long: Use brief, controlled contact only when the alloy and cleaner are compatible. Rinse thoroughly and inspect for color change or surface attack.
Mixing vinegar and baking soda: Use them as separate processes, not one combined paste.
Using salt as an abrasive: Replace it with a chloride-free abrasive or nylon pad.
Leaving cleaner or polish residue: Rinse, dry, mechanically brighten the weld area, and complete the approved final degreasing step.
Welding while the part is damp: Dry the joint fully, including seams, threads, pores, and internal cavities.
Using generic filler or machine settings: Return to the material specification, drawing, filler manufacturer’s data, and qualified WPS.
Pros and Cons of Different Removal Methods
| Method | Pros | Cons | Best For |
|---|---|---|---|
| Hand Brushing and Nylon Abrasion | Good control, low heat, low material removal | Slow on heavy deposits and difficult crevices | Light corrosion, thin parts, first cleaning pass |
| Powered Grinding or Sanding | Fast on robust parts and broad weld zones | Can gouge, overheat, smear, thin, or contaminate soft metal | Known alloys with enough thickness for powered abrasion |
| Controlled Acid Cleaning | Can reach recesses and loosen some copper salts | May attack brass, damage finishes, or leave corrosive residue | Known, uncoated, noncritical parts when the cleaner is approved |
| Abrasive Blasting | Efficient and uniform on large or complex surfaces | Can pit thin metal, embed media, alter dimensions, and create hazardous dust | Large sturdy parts using tested media and controlled equipment |
| Commercial Copper-Alloy Cleaner | Clear instructions and controlled formulation when correctly selected | May leave inhibitors or films and may not suit weld preparation | Parts specifically listed on the product label and SDS |
| Professional Conservation or Chemical Treatment | Protects valuable finishes and treats active corrosion correctly | Requires specialist knowledge and may cost more | Antiques, plated objects, historic metal, and recurring powdery corrosion |
For most routine weld preparation, start with detergent, hand brushing, and light mechanical abrasion. Use acids or blasting only when the alloy, part condition, and process justify the added risk.
Products Worth Considering

Restore - Best for bringing your copper back to its original beauty by erasing the discoloration

Long-Lasting Shine - The finest ingredients keep copper, bronze & brass beautiful for many years to come

【Professional Innovative Design】Keepduty copper pipe cleaning tool, designed to remove dirt, oxidation, and rust from both inside and outside pipes. Use with a power drill to effortlessly restore pipes to pristine condition, preparing them for flawless welding or crimping.
Safety Considerations When Cleaning Corrosion for Welding
Wear eye protection and control dust at the source. Avoid dry sweeping or blowing corrosion particles through the work area. Wash your hands before eating or drinking, and keep contaminated gloves away from your face.
Provide adequate ventilation for both cleaning and welding. OSHA’s welding, cutting, and brazing requirements address ventilation, zinc-bearing metals, hazardous coatings, cleaning compounds, confined spaces, and hot-work precautions.
Brass and some bronzes contain zinc or other alloying elements that can create hazardous fumes when heated. Unknown copper alloys may also contain lead, beryllium, cadmium, nickel, or other elements that change the required controls.
Keep cleaners, solvent containers, rags, paper, and other combustibles outside the hot-work area. Allow flammable solvent to evaporate fully before welding. Follow the cleaner’s safety data sheet and the site’s hot-work permit procedure.
Do not weld a closed tube, tank, drum, pipe, or cavity unless it has been properly isolated, cleaned, tested, vented, and approved for hot work. Heating a trapped liquid, residue, or gas can cause fire, explosion, or toxic exposure.
Preparing Joints After Corrosion Removal
Once the corrosion is gone, prepare the joint to the drawing or approved WPS. Do not apply one bevel angle or root opening to every copper alloy. Material thickness, process, position, access, service, and required penetration all affect the design.
Clean the complete joint face and the surrounding zone required by the procedure. Remove burrs, folded metal, embedded abrasive, polish, marking dye, adhesive, paint, and moisture. Keep your bare hands off the final cleaned surface whenever possible.
Select the filler from the exact alloy and service requirement. Pure copper, silicon bronze, aluminum bronze, phosphor bronze, brass, and copper-nickel are not interchangeable. Dissimilar aluminum-to-copper welding requires an engineered process and should not be attempted using a generic 4043 recommendation.
If cleaning exposes deep pitting, cracks, pinholes, or severe thinning, stop. The repair may require engineering review, removal of more material, an insert, replacement of the part, or a different joining process.
Welding Techniques Optimized for Cleaned Copper Alloys
TIG and MIG are common choices for many weldable copper alloys, but the exact process depends on alloy composition, thickness, joint design, and required properties. Some brasses and free-machining copper alloys are difficult or unsuitable for fusion welding.
Copper carries heat away from the weld quickly. Thick sections may require preheat or a higher-heat-input procedure, while thin parts may not. Use the temperature range and heat-control method stated in the WPS instead of applying one universal preheat.
Brass creates an added concern because zinc can vaporize during welding. Use effective local exhaust, keep your head out of the fume plume, and follow the procedure for the specific brass composition.
Do not substitute carbon-steel electrodes such as E6010 for a copper-alloy filler unless a qualified procedure specifically requires that combination. Match the consumable and shielding gas to the identified metal.
Back purging, pulsing, special shielding-gas mixtures, or heat sinks may help in some applications, but they are process choices rather than automatic steps. Verify them through the procedure and a representative test coupon.
Maintaining Corrosion-Free Metal Post-Weld
After welding, allow the part to cool and complete the required inspection before applying a coating. Remove weld discoloration, flux, spatter, fingerprints, and cleaning residue using a method compatible with the alloy.
A thin microcrystalline wax or suitable clear coating can slow tarnishing on decorative indoor copper and brass. Outdoor, marine, electrical, food-contact, heated, pressure, and high-wear parts need coatings approved for their actual service.
Keep stored metal dry and separated from leaking chemicals, salt, acidic cardboard, wet wood, and dissimilar metals. Handle clean decorative parts with gloves and inspect them periodically for new powdery deposits.
Do not use a monthly vinegar wipe as routine maintenance. Repeated acid cleaning can change the surface and may leave residue. Gentle dust removal, dry storage, humidity control, and a suitable protective coating are safer long-term measures.
Advanced Tips for Professional Weld Certs and Inspections
For controlled fabrication, document the base-metal specification, heat or lot identification, original condition, corrosion-removal method, abrasive or cleaner used, final inspection, WPS number, filler classification, shielding gas, preheat, interpass control, and required examination.
Use the code that actually governs the work. AWS D1.1/D1.1M:2025 is a structural-steel code, not a general copper-alloy welding code. ASME BPVC Section IX governs procedure and personnel qualification when invoked by an applicable construction code; it is not a stand-alone surface-cleaning specification.
Visual examination should confirm that the joint is clean, dry, dimensionally correct, and free from unacceptable damage. Dye penetrant, radiography, ultrasonic testing, leak testing, conductivity testing, or other methods may be required by the drawing, code, service, or engineer.
Keep before-and-after photographs when corrosion depth or wall loss may affect acceptance. Documentation is especially useful for repeat repairs, production work, regulated equipment, and recurring corrosion investigations.
Conclusion
Removing green corrosion before welding starts with identification, not grinding. Confirm that the part is copper or a known copper alloy, decide whether the green layer is stable or active, and check for coatings, plating, hazardous elements, and service-related risks.
Use the least aggressive cleaning method that works. Brush and wash first, use compatible abrasion where needed, control any chemical process, rinse thoroughly, dry the part, and complete the approved final joint preparation. Stop when cleaning reveals serious pitting, cracking, pinholes, or wall loss.
Most importantly, do not guess at filler metal, amperage, preheat, joint geometry, ventilation, or respirator cartridges. A clean surface supports a sound weld only when the rest of the process matches the exact alloy and a valid welding procedure.
Sources
- Copper Development Association: Welding Copper and Copper Alloys — supports cleaning oil, grease, dirt, paint, and oxides from welding faces and nearby surfaces.
- OSHA 29 CFR 1910.252: General Welding, Cutting, and Brazing Requirements — supports ventilation, hot-work, zinc, confined-space, and cleaning-compound precautions.
- Canadian Conservation Institute: Recognizing Active Corrosion — explains stable copper-alloy patinas, active powdery corrosion, chlorides, and acidic-vapor risks.
- Canadian Conservation Institute: Cleaning, Polishing, and Protective Waxing of Brass and Copper — supports gentle cleaning, ventilation, surface protection, and the risks of repeated abrasive polishing.
- AWS D1.1/D1.1M:2025 Structural Welding Code — Steel — confirms the code’s structural-steel scope.
- ASME BPVC Section IX: Welding, Brazing, and Fusing Qualifications — confirms that Section IX addresses procedure and personnel qualification.
Frequently Asked Questions
Is it safe to weld over light green corrosion?
No. Remove corrosion, dirt, grease, polish, paint, and moisture from the joint and surrounding preparation zone. Even a thin film can interfere with fusion or hide pitting. A smooth patina outside the weld zone may be left in place when it is stable and does not affect inspection or service.
Can vinegar damage brass during corrosion removal?
Yes. Long exposure or poor rinsing can attack the surface, change its color, affect zinc-rich areas, or leave acidic residue. Use vinegar only on a known, uncoated, noncritical alloy, keep contact brief, test a small area, and rinse and dry the part completely.
What is the best grinder disc for copper verdigris?
There is no single best disc for every part. Start with a fine nonwoven abrasive or another accessory approved for nonferrous metal. Use the least aggressive option that removes the deposit without smearing, gouging, overheating, or thinning the base metal. Follow the tool and accessory speed ratings.
How do I prevent green corrosion from returning after cleaning?
Remove cleaner residue, dry the part fully, reduce humidity and salt exposure, avoid bare-hand contact, and use a coating approved for the part’s service. Decorative indoor brass may benefit from wax or lacquer, while marine, electrical, hot, food-contact, and pressure parts need service-specific protection.
Does sandblasting work on all types of green corrosion?
No. Blasting may clean sturdy castings or large parts, but it can pit thin metal, remove plating, alter dimensions, embed media, and damage historic finishes. Test the media and settings on a noncritical area and use proper dust controls.
Is every green patina a sign of active corrosion?
No. A smooth, coherent, firmly attached patina can be stable. Active corrosion is more likely to appear as loose, pale-green powder that grows quickly or returns after cleaning. Historic or decorative patinas should not be removed without understanding their purpose.
Can I clean and weld an unidentified piece of scrap metal?
Do not grind or weld it until the alloy and coatings are identified. Unknown scrap may contain zinc, lead, cadmium, beryllium, hazardous paint, plating, trapped chemicals, or an alloy that is unsuitable for fusion welding. Use material records or professional testing first.