How to Clean Mild Steel for Welding
What’s in This Article
- Why Cleaning Mild Steel Matters
- What Is Mild Steel and Why Does It Get Dirty?
- Tools and Materials for Cleaning Mild Steel
- Before You Begin
- Step-by-Step Guide to Cleaning Mild Steel
- Cleaning Methods: Pros and Cons
- Cleaning for Different Welding Processes
- Common Mistakes and Fixes
- Joint Prep and Filler Compatibility
- Real-World Applications
- Advanced Cleaning Tips for Pros
- Frequently Asked Questions
A rushed cleaning job can turn a good weld setup into a weak, porous mess. When you leave rust, mill scale, oil, or paint on mild steel, the arc can sputter, the bead can trap slag, and the joint can lose strength.
You need clean steel before you strike an arc with stick, MIG, or TIG. This guide shows you how to inspect, degrease, grind, sand, wipe, and check mild steel so your weld starts on a clean surface.
Quick Answer
To clean mild steel for welding, remove oil and grease first, then grind away rust, paint, and mill scale near the joint. Smooth the area, wipe it with a clean solvent rag, and let it dry fully before welding. Clean at least about one inch beyond the weld zone when you can.
Key Takeaways
- Clean mild steel before welding to reduce porosity, weak fusion, spatter, and trapped slag.
- Remove grease before grinding so you don’t smear oil into the steel surface.
- Use a flap disc, wire wheel, sanding disc, or sandblaster based on the amount of rust and scale.
- Let solvent dry fully before welding because wet solvent and fumes can create serious safety risks.
- Match your cleaning level to the welding process, since TIG needs cleaner steel than stick welding.
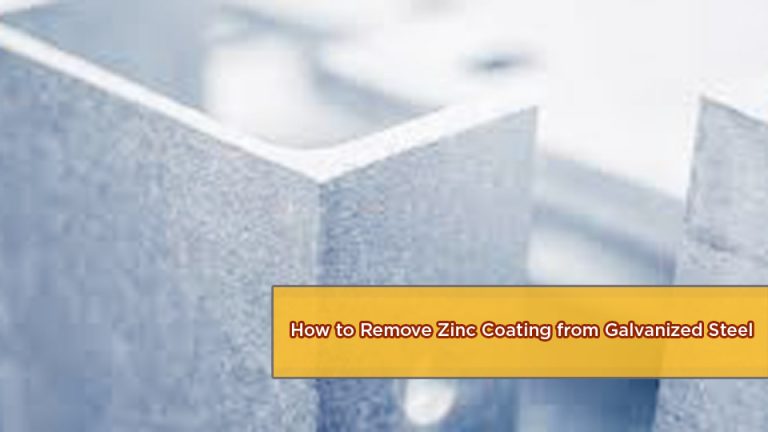
Image by aradbranding
Why Cleaning Mild Steel Matters
Mild steel shows up in many welding jobs, including beams, brackets, trailer frames, automotive parts, and shop furniture. But it also picks up rust, oil, grease, dust, paint, and mill scale. These contaminants can block heat, disturb the arc, and weaken the weld.
A dirty surface can lead to porosity, inclusions, weak fusion, extra spatter, and failed inspection work. Clean steel helps your filler metal bond well, keeps your arc more stable, and gives the weld pool a better chance to tie in at the toes.
If you weld under a code, job spec, or shop procedure, follow that document first. Standards such as AWS D1.1 and ASME procedures often depend on clean joint preparation, but your exact requirements can vary by job.
What Is Mild Steel and Why Does It Get Dirty?
Mild steel, also called low-carbon steel, is tough, affordable, and easy to weld. It usually has low carbon content, which helps it work well with gas metal arc welding (GMAW), gas tungsten arc welding (GTAW), and shielded metal arc welding (SMAW).
The problem starts before the steel reaches your bench. Hot rolling can leave mill scale. Storage can cause rust. Handling, cutting, drilling, and machining can add oil, grease, dust, and cutting fluid.
These contaminants sit between the arc and the base metal. Once you know what you’re fighting, you can choose the right cleaning method for the job.
Common Contaminants on Mild Steel
- Mill scale: A dark oxide layer from hot rolling. It can resist welding heat and hide poor surface prep.
- Rust: Iron oxide from moisture exposure. It can trap moisture and weaken the weld area.
- Oil and grease: Residue from handling, machining, storage, or shop equipment. It can burn and create porosity.
- Paint and coatings: Layers found on reused or coated steel. They can create fumes and contaminate the weld.
- Dirt and dust: Loose material that can affect arc stability and hold moisture near the joint.
Tools and Materials for Cleaning Mild Steel
You don’t need a fancy setup to clean mild steel. You do need the right tool for the contamination level. Light rust needs less work than thick mill scale, old paint, or heavy grease.
Products Worth Considering
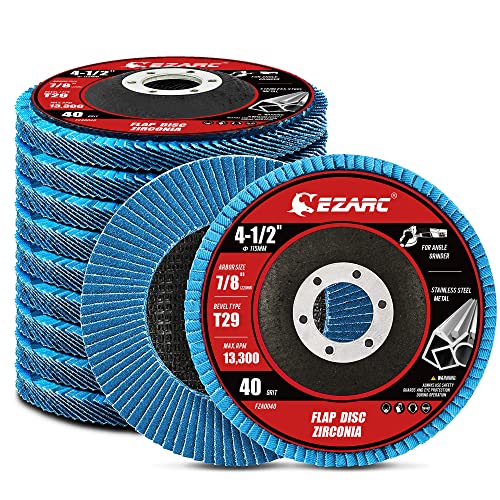
【Great Performance】EZARC flap sanding discs are made of hard zirconia material which lasts longer than standard aluminum oxide abrasive material, built for a more robust and economical grinding wheel

【Professional Grinder Flap Disc】Flap discs 4 1/2 for Angle Grinder with 40/60/80/100/120 Grit T29, 40 packs in total. Includes 20pcs for 40 grit, 10pcs for 60 grit, 5pcs for 80 grit, and 5pcs for 120 grit. A perfect flap disc for cutting various metals and meets all your needs.

STRONGEST FIBER BACKING THAN OTHER PRODUCTS:4 1/2 grinding wheels made for TOP-LEVEL Hard zirconia.Good material for griding wheel. This Flap Disc is constructed of industrial grade high density premium zirconia material, increased durability than standard flap discs, built for a more robust and economical grinding wheel
Essential Cleaning Tools
- Angle grinder: Use a 4.5-inch grinder with a flap disc or wire wheel for rust and mill scale.
- Wire brush: Use it for manual scrubbing, edges, corners, and tight areas.
- Sanding discs: Use 80-grit to 120-grit discs to smooth the surface after grinding.
- Solvent or cleaner: Use acetone, denatured alcohol, or a shop-safe degreaser for oil and grease.
- Shop rags: Use clean, lint-free rags so you don’t leave fibers or smear grease.
- Safety gear: Wear gloves, safety glasses, hearing protection, and a respirator when dust or fumes may build up.
- Sandblaster: Use it for heavy rust or scale on large parts when your shop has the right setup.
Safety First
Cleaning mild steel can create dust, sparks, and fumes. Wear safety glasses and gloves every time you grind or brush. Use hearing protection when you run a grinder for more than a quick pass.
If you use solvents, work with strong ventilation and keep open flames away. Let the surface dry fully before welding. Wet solvent can create fumes and fire risk.
Warning: Remove paint, zinc coating, oil, and solvent residue before welding because fumes can harm your lungs.
Before You Begin
Plan about 10 to 30 minutes for basic cleaning on a small part. Heavy rust, paint, or thick mill scale can take longer. Large parts may need grinding, sanding, or blasting in stages.
Set up your work area before you start. Clamp the part, clear flammable materials, and keep clean rags away from grinder sparks. Keep used solvent rags in a safe container that fits your shop rules.
- Check the steel for oil, rust, paint, mill scale, moisture, and coatings.
- Choose a cleaning method that removes the contaminant without thinning the part.
- Clean both sides of the joint if the weld heat will pull contamination through.
- Follow the welding procedure, job spec, or code requirement when one applies.
Step-by-Step Guide to Cleaning Mild Steel
Use this process for small repairs, fabrication work, and practice coupons. Adjust the grit, cleaning width, and finish based on the weld process and job requirements.
Products Worth Considering

【4 1/2 Flap Disc】The 40 grit flap discs 4 1/2 for angle grinder is 40 packs in total, ideal flap disc for blending and stock removal on metals, rust removal, paint, blending, cleaning, and finishing, etc.

[Various Grit Flap Discs]: Including 4-1 2 inch Flap discs with 40/60/80/120 4 different grits. This angle grinder flap disc set contains 2 x 40 grit, 1 x 60 grit, 1x 80 grit, 1 x120 grit. This sanding discs set is a great choice for grinding various metals, perfectly meets all you need.

Package Include 24 pcs grinding wheels 4 1/2 inch grit 40 60 80 120,6 of each
Step 1: Inspect the Steel
Inspect the workpiece under a bright shop light. Look for rust, oil, paint, mill scale, moisture, and old coating. Check both sides of the joint, not just the face you’ll weld.
Mark problem areas with soapstone or a marker. Salvaged steel often needs more cleaning because it may carry old paint, road grime, or hidden rust.
Step 2: Remove Oil and Grease
Remove oil and grease before you grind. Wet a clean lint-free rag with acetone, denatured alcohol, or a suitable degreaser. Wipe the weld area and at least about one inch beyond the joint.
Use a fresh rag when the first one gets dirty. A dirty rag can spread grease across the steel instead of removing it. Let the surface dry before you move to the next step.
Pro tip: Degrease before grinding so the abrasive does not smear oil into fresh scratches.
Step 3: Remove Rust and Mill Scale
Scrub light rust or loose scale with a wire brush. For heavier buildup, use an angle grinder with a 60-grit to 80-grit flap disc or a wire wheel. Work along the weld area and clean past the joint edges.
Keep the grinder moving so you don’t gouge or thin the steel. Stop often and check your progress. You want clean metal, not a weakened part.
Step 4: Smooth the Surface
Smooth the cleaned area with an 80-grit to 120-grit sanding disc when the surface feels rough. A smoother surface can help with arc control, especially for TIG welding. You don’t need a polished finish for every weld, but you do need clean metal.
For TIG, take more time with this step. Oil, scale, and rough scratches can affect the bead more than they would on many stick welds.
Step 5: Do a Final Wipe-Down
Wipe the cleaned area again with a fresh rag and solvent. This removes grinding dust, loose abrasive, and any oil from your hands or tools. Use light pressure and turn the rag often.
Let the steel dry fully before welding. Moisture and solvent residue can cause porosity, fumes, or other weld problems.
Step 6: Check Your Work
Check the steel under good light before you weld. The surface should look clean and even, with no oil shine, loose rust, paint, wet spots, or dull scale near the joint.
If you weld under inspection, don’t rush this step. A small patch of scale or grease can force you to grind out the weld and start over.
Cleaning Methods: Pros and Cons
Each cleaning method solves a different problem. Use the table below to match the tool to the job before you start removing metal.
| Method | Pros | Cons |
|---|---|---|
| Wire Brush | Cheap, portable, useful for light rust and tight areas | Slow for heavy scale and hard on your hands |
| Angle Grinder | Fast and effective for rust, paint, and mill scale | Creates sparks and dust, with risk of overgrinding |
| Sandblasting | Cleans large areas fast and leaves an even finish | Needs special equipment, creates mess, and may not fit small DIY jobs |
| Chemical Cleaners | Removes oil and grease without abrasion | Creates fumes, needs safe handling, and does not remove heavy rust well |
| Sanding Discs | Smooths surfaces and helps with TIG prep | Works slower than grinding and may need more than one grit |
Cleaning for Different Welding Processes
Your cleaning standard should match the welding process. Stick welding can tolerate more surface condition problems than TIG. MIG sits between the two, but it still needs clean steel for best results.
MIG Welding
Gas metal arc welding (GMAW), often called MIG welding, needs clean steel for steady wire feed, smooth arc action, and lower porosity risk. Remove oil, loose rust, paint, and heavy mill scale with solvent and a grinder.
ER70S-6 wire often works well on mild steel because it handles minor surface contamination better than some other wires. Still, don’t use that as an excuse to weld over dirty steel. For 1/4-inch mild steel, many welders start near 18 to 20 volts and adjust wire speed and amperage to fit the machine, wire size, gas, and joint.
TIG Welding
Gas tungsten arc welding (GTAW), often called TIG welding, needs the cleanest prep. Oil, scale, and grinding dust can cause arc wander, porosity, and a rough bead. Grind or sand the steel clean, then wipe it with acetone before welding.
For mild steel, ER70S-2 filler works well for many TIG jobs. A sharp tungsten and clean argon shielding gas also help the weld pool stay controlled. Set amperage based on thickness, joint design, and your machine.
Stick Welding
Shielded metal arc welding (SMAW), often called stick welding, handles mild steel with more tolerance for rough surfaces. Some rods, such as E6011, can burn through light rust better than low-hydrogen rods. Even so, cleaner steel usually gives you a cleaner weld.
E7018 rods need clean, dry conditions for best results. Brush or grind the joint, wipe away oil, and remove loose rust or scale. Start with the rod maker’s amperage range and adjust from there.
Common Mistakes and Fixes
Small cleaning mistakes can create big weld problems. Use these fixes when your prep starts to slip.
- Mistake: Leaving mill scale because the steel looks clean. Fix: Grind it off near the joint until you reach clean metal.
- Mistake: Using a dirty rag for solvent wiping. Fix: Use fresh, lint-free rags and turn them often.
- Mistake: Overgrinding and thinning the steel. Fix: Move the grinder steadily and check thickness when the part is critical.
- Mistake: Welding before solvent dries. Fix: Let acetone, alcohol, or degreaser evaporate fully before you strike an arc.
- Mistake: Ignoring dust and fumes. Fix: Wear the right respirator and work where air can move safely.
Joint Prep and Filler Compatibility
Cleaning also helps your joint fit and filler choice work as planned. For butt welds on thicker plate, many welders bevel the edges to improve access and penetration. Follow the drawing, weld procedure, or shop rule for the exact bevel angle.
Clean the bevel face after grinding. For fillet welds, check fit-up because gaps can trap dirt, scale, or moisture. Clean filler metal matters too, so store rods and wire where they stay dry and free from shop grime.
Match the filler to the steel, joint, and service needs. ER70S-6 works well for many MIG jobs, ER70S-2 suits many TIG welds, and E7018 fits many strong stick welds. Use the procedure or filler maker’s data when the weld has safety or code requirements.
Real-World Applications
Cleaning mild steel looks different from job to job. The goal stays the same: remove anything that can enter the weld pool or block fusion.
DIY Trailer Repair
For a rusty trailer frame, wire brush light rust and grind heavy spots. Wipe the joint with degreaser and clean about one inch beyond the weld zone. MIG with ER70S-6 can work well when the steel is sound and the joint is clean.
Don’t weld over cracked, thin, or deeply pitted steel without judging the structure first. Trailer repairs can affect road safety, so get qualified help when you aren’t sure.
Structural Steel Fabrication
For A36 beams or similar structural work, follow the approved welding procedure. Grind off mill scale where the procedure requires it, remove oil, and keep the joint dry. Clean prep can help the weld meet inspection needs such as visual testing, ultrasonic testing, or radiographic testing.
Structural welding can carry serious safety rules. Don’t rely on shop habits alone when a code, engineer, or inspector controls the job.
Custom Automotive Work
For tubing, brackets, and custom automotive parts, clean the steel before fitting and again before welding. TIG work often needs a bright, smooth surface and a final acetone wipe. Any oil left behind can hurt both bead appearance and joint quality.
Advanced Cleaning Tips for Pros
For large projects, blasting can save time and create an even surface. Aluminum oxide media often works well on mild steel when your shop setup supports it. Keep blast media clean so you don’t add new contamination to the part.
For precision TIG jobs, some shops use chemical treatment to remove oxides. Only use acid products if you have the right training, personal protective equipment, ventilation, and disposal plan. Follow the product label and your shop safety rules.
Galvanized steel needs extra care because zinc fumes can make you sick. Remove the zinc coating from the weld area, use strong ventilation, and follow a safe welding procedure. When in doubt, ask a qualified welding supervisor before welding coated steel.
Note: Cleaning improves weld quality, but it does not replace correct settings, joint design, filler choice, or skill.
Frequently Asked Questions
Why is cleaning mild steel important before welding?
Cleaning removes rust, mill scale, oil, grease, and paint that can cause porosity, weak fusion, or cracks. A clean surface also helps the arc stay stable and gives the weld pool a better chance to bond with the base metal.
What is the best way to remove mill scale from mild steel?
An angle grinder with a 60-grit to 80-grit flap disc works well for many small and medium jobs. A wire wheel can help on edges and corners. For large parts, sandblasting can clean faster if your shop has the right equipment.
Can you weld mild steel without cleaning it?
You can sometimes strike an arc on dirty mild steel, but the weld may suffer. Rust, oil, paint, and scale can create porosity, lack of fusion, spatter, or poor bead shape. Clean the joint whenever strength, appearance, or inspection matters.
What solvent should you use to clean mild steel?
Acetone and denatured alcohol work well for many final wipe-downs because they evaporate fast. A suitable degreaser can help with heavy grease. Always use clean rags, good ventilation, and enough drying time before welding.
How clean should mild steel be for TIG welding?
TIG welding needs very clean steel. Remove rust, mill scale, paint, oil, and grinding dust, then sand the surface smooth and wipe it with acetone. Small contaminants can cause arc wander, porosity, or a rough bead.
Should you clean both sides of the joint?
Clean both sides when heat, root opening, or joint design can pull contamination into the weld. This matters most on thinner steel, open-root joints, and parts with oil, paint, or rust on the back side.
How far past the weld area should you clean?
Clean at least about one inch beyond the weld zone when space allows. Wider cleaning helps remove nearby oil, dust, and paint that heat can pull toward the puddle. Follow the job procedure when it gives a specific cleaning width.
Can you use the same wire brush for stainless steel and mild steel?
Keep separate brushes for different metals when contamination matters. A brush used on mild steel can carry carbon steel particles onto stainless steel. For mild steel alone, a clean dedicated brush helps prevent oil and dirt transfer.
Clean mild steel gives your weld a better start. Remove grease first, grind away rust and mill scale, smooth the surface, wipe it clean, and check it before you weld.
Your next step is simple: inspect the joint before every weld and clean only as much metal as the job needs. Good prep saves time, reduces rework, and helps your welds hold up under stress.