Learning how to repair rusted metal with holes starts with one rule: you cannot make a dependable weld on metal that has already rusted thin. You must remove paint, scale, coatings, and weak steel until the remaining edge is solid enough to carry the weld. A tiny isolated pinhole in nonstructural sheet may be bridged, but larger or clustered holes need a fitted patch.
The repair also has to match the part. A mailbox, mower guard, body skin, truck bed, frame rail, suspension mount, lifting bracket, and pressure vessel do not have the same safety requirements. Before you cut or weld, identify the metal, inspect both sides, and decide whether the part is suitable for a DIY repair.
Quick Answer
To repair rusted metal with holes, remove every thin, flaky area until only sound metal remains. Bridge only tiny, isolated pinholes in nonstructural sheet. Cut and fit a matching patch for anything larger. Weld with brief, spaced tacks, let the panel cool, then grind, seal, prime, coat, and protect the backside.
Key Takeaways
- Do not weld until grinding and probing reveal clean, full-thickness metal around the damage.
- Use a patch when perforations are larger than a true pinhole, appear in a cluster, or keep growing as you clean them.
- For light-gauge mild steel, gas-shielded short-circuit MIG with small wire usually offers the easiest heat control.
- Use the welder’s setup chart and test on matching scrap instead of copying universal voltage or amperage numbers.
- Do not make generic DIY repairs to vehicle safety structures, lifting equipment, pressure-containing parts, or other critical components.
- Protect both sides of the completed repair. Bare welds and unsealed lap joints can rust again quickly.
At a Glance
| Time Required | About 1–2 hours for a small accessible patch; several hours for cutting, shaping, welding, finishing, and coating a larger repair |
| Difficulty | Intermediate; advanced or professional for structural, coated, high-strength, or hard-to-access parts |
| Tools Needed | Welder, grinder, wire wheel, cutoff tool, clamps, sheet metal, template material, copper backing tool, PPE, fire extinguisher, primer, sealer, and topcoat |
| Cost | Usually modest for sheet metal and consumables when you already own the tools; substantially higher when special coatings, access work, or professional structural repair is required |
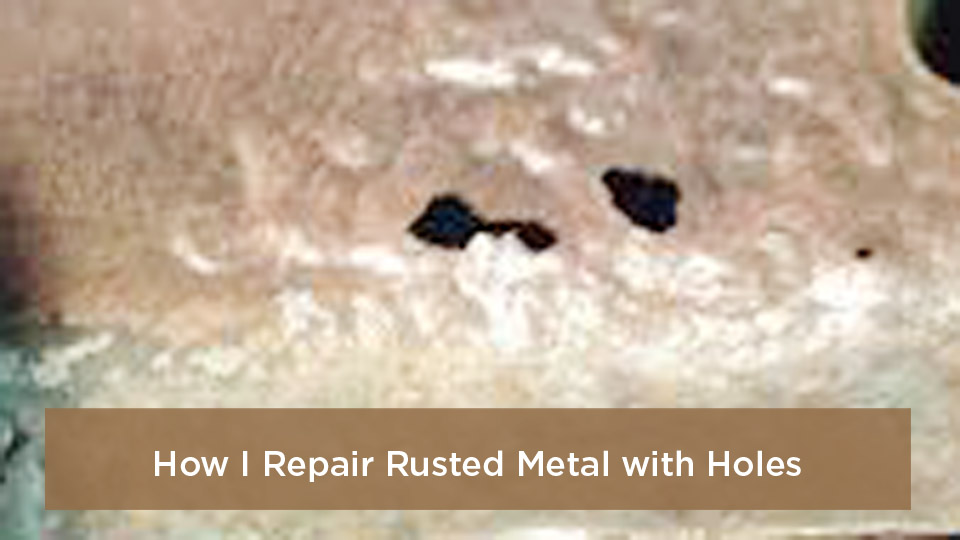
Photo by thesamba
What Causes Rust Holes in Metal?
Rust forms when iron in carbon steel reacts with its environment. Water, oxygen, road salt, trapped dirt, damaged paint, and poor drainage can speed up the corrosion process. The corrosion products occupy and shed material, exposing more steel and gradually reducing the part’s thickness.
A visible hole is often only the center of the damage. The surrounding metal may still look intact while being deeply pitted or thin on the backside. That is why you should inspect beyond the visible opening instead of measuring only the hole.
A rust hole is usually evidence of a larger thickness-loss problem, not an isolated opening that only needs to be covered.
Repairing the area early can keep moisture from spreading under paint and seams. However, welding is only suitable after you have found enough sound metal to support the patch and the stresses placed on the part.
Can the Rust Hole Be Welded Safely?
Start with a visual inspection from both sides whenever possible. Remove loose scale and tap or probe the surrounding area with a pick, screwdriver, or small hammer. Do not strike hard enough to deform good sheet metal. You are checking for soft spots, delamination, cracking, and metal that crumbles under light pressure.
Continue cleaning outward until the grinder reveals bright, consistent steel rather than dark pits, laminations, or paper-thin edges. If the opening keeps growing, that is useful information. It means the weak material needed to come out.
A DIY Weld May Be Reasonable When
- The part is nonstructural mild-steel sheet.
- The damage is accessible from both sides or the backside can be protected after welding.
- Cleaning exposes a continuous border of sound metal.
- You can match the original material thickness closely.
- You can remove or shield nearby combustible materials, wiring, hoses, trim, coatings, and insulation.
- You can practice the setup on scrap of the same thickness before touching the part.
Stop and Obtain a Qualified Repair Procedure When
- The rust affects a vehicle frame rail, rocker reinforcement, pillar, suspension mount, steering mount, seat-belt anchor, roll structure, or safety-cell component.
- The part supports a load, lifts people or material, contains pressure, or controls a machine.
- The metal may be high-strength steel, heat-treated steel, cast iron, aluminum, or an unidentified alloy.
- The part has carried fuel, oil, solvent, gas, combustible dust, or another flammable substance.
- Rust extends into a boxed section that cannot be inspected or protected.
- A code, engineer, manufacturer, insurer, or inspection authority controls the repair.
Warning: Do not use this general sheet-metal method as a substitute for an engineered weld procedure or vehicle body-repair manual. Current AWS structural welding requirements and vehicle-specific OEM procedures may control the material, joint location, welding process, filler, heat input, inspection, and corrosion protection.
Tools and Safety Equipment for Rust Repair
A controlled setup matters more than buying a particular brand of welder. Gather the tools you need before creating sparks so the panel does not sit unfinished or exposed.
Products Worth Considering
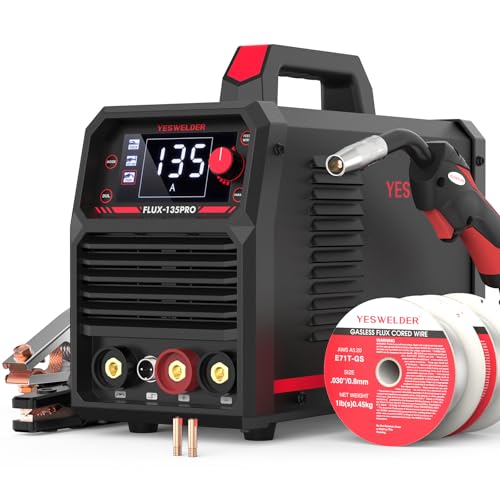
READY OUT OF THE BOX: Start welding immediately! It masterfully handles Gasless Flux Core MIG, Stick, and Lift TIG (Extra Lift TIG torch required). This budget-friendly 3-in-1 machine includes extra E71T-GS .030''&.035'' flux core wires, known for its smooth arc and high feedability. Say goodbye to heavy shielding gas cylinders—perfect for outdoor, windy, or all-position welding.
Basic Tools and Materials
- MIG or TIG welder suited to the material and thickness
- Correct wire, rod, shielding gas, contact tip, and polarity
- Angle grinder with suitable grinding, flap, and wire-wheel accessories
- Cutoff wheel, body saw, shears, nibbler, or plasma cutter suited to the part
- Cardboard or poster board for a patch template
- Replacement sheet metal that closely matches the original thickness and alloy
- Clamps, locking pliers, panel clamps, magnets, or temporary fasteners
- Clean copper backing spoon or copper bar for isolated pinholes
- Hammer and dolly for controlled shaping of nonstructural sheet
- Degreaser approved for pre-weld surface preparation
- Primer, seam sealer, topcoat, underbody coating, and cavity protection suitable for the application
Personal and Hot-Work Protection
- Welding helmet with a filter shade selected for the process and amperage
- Safety glasses under the helmet
- Hearing protection while grinding and cutting
- Flame-resistant clothing, leather gloves, and closed leather footwear
- Suitable ventilation or local exhaust
- Respiratory protection when required by the coating, metal, process, or exposure assessment
- A suitable fire extinguisher ready for immediate use
- Fire-resistant blankets or shields for nearby surfaces
OSHA’s welding, cutting, and brazing requirements call for combustible materials to be removed or protected, suitable extinguishing equipment to be ready, and a fire watch when the surrounding conditions create more than a minor fire risk. Sparks can pass through floor openings, panel seams, holes, and wall cavities.
Warning: Before welding a vehicle panel, inspect behind it for the fuel tank, fuel and brake lines, wiring, electronic modules, glass, upholstery, sound deadener, seam sealer, foam, and undercoating. Follow the vehicle maker’s battery, electronics, and welding-ground procedure. Place the work clamp on clean metal close to the repair without routing current through bearings, wiring, hinges, or control modules.
Identify the Metal and Coating Before Welding
The correct repair depends on what you are welding. Mild steel body sheet is different from galvanized sheet, stainless steel, aluminum, cast iron, or high-strength automotive steel.
- Painted mild steel: Remove paint, filler, sealer, oil, and rust from the weld zone.
- Galvanized or zinc-coated steel: Remove the coating from the weld area using an appropriate controlled method, provide effective ventilation, and restore corrosion protection afterward.
- Stainless steel: Identify the alloy and use compatible filler and shielding gas. Stainless welding can create chromium-containing fume.
- Aluminum: Confirm the alloy and approved filler. Aluminum requires different preparation, tooling, shielding gas, and welding technique.
- High-strength vehicle steel: Do not assume it can be heated, sectioned, or welded like ordinary mild steel. Follow the body-repair manual.
- Unknown coatings: Stop until the coating is identified. Old paint, plating, sealers, residues, and primers may create hazardous fumes.
Working outdoors or standing upwind does not automatically provide adequate fume control. Keep your head out of the plume and use local exhaust or other controls appropriate to the material and work area.
Cleaning and Preparing Rusted Metal
Good preparation does not mean polishing the visible surface while leaving weak metal underneath. The goal is to expose a stable edge that remains solid during fitting and welding.
- Remove nearby components. Take out trim, liners, insulation, wiring clips, rubber plugs, and other heat-sensitive items when possible.
- Degrease before grinding. Remove oil, wax, fuel residue, and grease so the abrasive does not spread contamination across the surface.
- Strip the coating. Clean paint, rust, scale, filler, and plating from the weld zone and enough surrounding area to inspect the steel.
- Probe both sides. Look for pitting, swelling between layers, soft edges, and hidden corrosion under seams or braces.
- Mark the sound-metal boundary. Draw a simple repair shape around the weak area. Rounded corners are easier to fit and less likely to concentrate stress than sharp inside corners.
- Cut out perforated steel. Use a cutoff wheel, body saw, shears, or another controlled tool. Protect anything behind the cut.
- Deburr the opening. Remove sharp edges without thinning the remaining panel.
- Clean the backside. Remove loose rust and burned coating anywhere the heat-affected zone will form.
Do not leave rust converter, paint, oil, or general-purpose primer inside the fusion area. A rust-treatment product may be useful on inaccessible, non-welded surface rust only when its technical data sheet permits that use.
Note: A mild acid bath may help descale a small removable noncritical part, but it does not restore lost thickness. Rinse or neutralize the part as directed, dry it completely, and mechanically clean the actual weld area before welding.
How to Repair a Tiny Rust Pinhole With MIG
Direct bridging is suitable only for a true isolated pinhole in nonstructural sheet when the surrounding metal remains full thickness after cleaning. If several pinholes appear, the opening has irregular thin edges, or the hole grows during preparation, stop trying to fill it and install a patch.
Step 1: Prepare a Copper Backing Tool
Clamp a clean copper spoon or substantial copper bar tightly against the backside. Copper helps absorb heat and supports the molten filler without becoming part of the steel weld.
Do not substitute household aluminum foil, adhesive tape, wet rags, or combustible backing material.
Step 2: Choose the Starting Setup
For light-gauge mild steel, short-circuit gas-shielded MIG usually gives good control. Miller’s sheet-metal welding guidance recommends small-diameter wire for thin material, commonly .023 or .024 inch, with .030 inch becoming practical on some 18-gauge and thicker applications.
Use DCEP, or electrode positive, for gas-shielded solid steel wire. Set the shielding-gas flow and machine controls according to the welder’s chart, wire data sheet, joint, and working conditions. Test the setup on matching scrap first.
Step 3: Build the Edge With Brief Tacks
- Place one brief tack at the edge of the pinhole.
- Release the trigger before the surrounding metal overheats.
- Move to the opposite side and place another tack after the area cools.
- Continue adding separate tacks around the edge.
- Let each new tack overlap solid metal or a previous sound tack.
- Stop immediately if the opening grows faster than you can support it.
Step 4: Close the Center
Once the edge has become stable, add brief overlapping tacks toward the center. Do not run a continuous bead or weave across thin sheet. The completed area should fuse to sound steel without leaving visible pinholes.
Step 5: Inspect Before Grinding
Allow the repair to cool naturally. Remove the backing tool and inspect the backside for fusion, excessive penetration, cracks, and missed holes. Shine a bright light from one side to help find pinholes.
Pro Tip: Practice on a scrap coupon that matches the panel’s thickness, joint, position, and backing. Adjust one variable at a time until the tack lies flat and fuses without dropping through.
How to Patch a Larger Rust Hole
A fitted patch restores missing base-metal thickness more reliably than piling filler into a large opening. The patch material should closely match the original steel in alloy and thickness unless an approved repair procedure states otherwise.
Step 1: Cut Back to Sound Metal
Mark a simple shape around all weak and perforated material. Before cutting, inspect behind the panel and shield anything that could be damaged. Cut slowly enough to avoid removing braces, inner panels, wiring, or hoses.
Step 2: Make a Template
Hold cardboard or poster board over the opening and trace the shape. Trim the template until it follows the opening accurately. Transfer the template to the replacement sheet.
Step 3: Cut and Shape the Patch
Cut the patch slightly large, then trim it in small steps. Form curves before welding with a hammer and dolly, shrinker/stretcher, brake, slip roll, or other suitable sheet-metal tool.
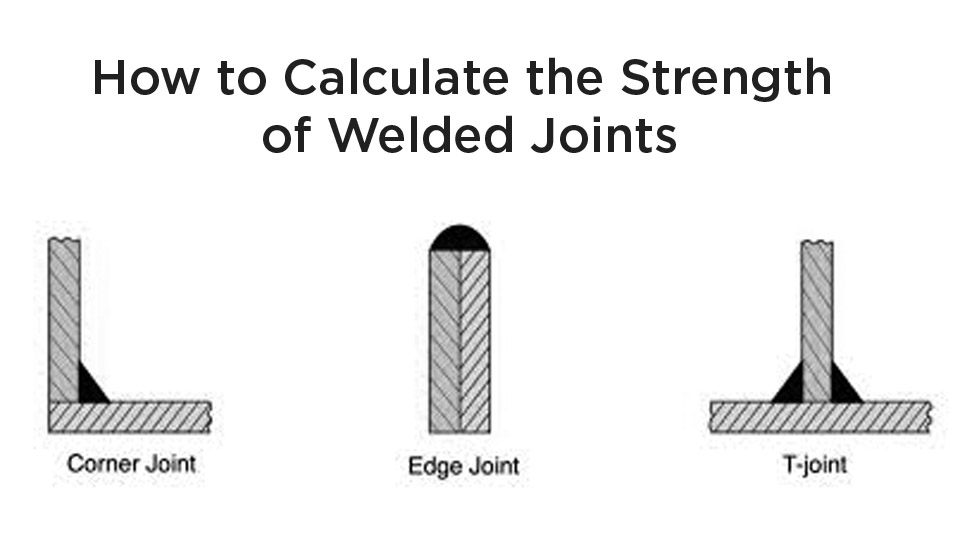
For a cosmetic butt patch, aim for an even, close fit around the perimeter. Large gaps invite burn-through and require excess filler. A lap patch may be easier in some nonstructural applications, but the overlap can trap moisture unless both sides and the seam are protected. Use the joint required by the applicable repair procedure.
Step 4: Prepare Inaccessible Mating Faces
Where a lap or plug-welded joint will hide bare mating surfaces, apply an approved weld-through coating only when the repair procedure and coating manufacturer permit it. Follow the preparation, film thickness, drying time, and welding instructions.
The SEM Weld-Thru Primer technical data sheet, for example, identifies the product as a coating for bare-metal welded substrates and specifies applying it before welding. A weld-through coating is not a replacement for the primer and corrosion protection applied after the repair.
Step 5: Hold the Patch Securely
Use panel clamps, locking pliers, magnets, or temporary fasteners to keep the patch flush. Check the fit from several angles. Correct gaps and panel tension before adding more heat.
Step 6: Tack the Patch in Sequence
- Place initial tacks at widely separated points around the patch.
- Check alignment after each group of tacks.
- Add new tacks between existing tacks rather than welding around the opening in one direction.
- Move to a distant, cooler part of the patch after each tack.
- Pause before the panel becomes too hot to control.
- Continue until the tacks join into a sealed seam where a continuous seam is required.
Do not use long half-inch or one-inch beads as a default on thin automotive sheet. Short, spaced welds reduce localized heat, but the exact sequence depends on the part, material, joint, and required weld type.
Step 7: Inspect Both Sides
Look for pinholes, cracks, incomplete fusion, excessive penetration, trapped slag, and undercut. If a defect is present, remove only the defective material and reweld it. Do not hide a questionable weld under filler or seam sealer.
| Repair Method | Appropriate Use | Main Limitation |
|---|---|---|
| Bridge an Isolated Pinhole | A tiny perforation surrounded by verified sound, nonstructural sheet metal | Fails quickly when the surrounding metal is thin or deeply pitted |
| Butt-Fitted Patch | Flush cosmetic sheet-metal repairs where access and fit-up allow it | Requires accurate cutting, close fit-up, and careful heat control |
| Lap or Flanged Patch | Approved nonstructural joints or a repair procedure that specifies an overlap | The overlap can trap moisture and must be sealed and protected |
| Engineered or OEM Repair | Frames, vehicle safety structures, lifting equipment, pressure parts, and coded work | Requires the specified material, joint, procedure, qualification, and inspection |
Choosing the Welding Process, Wire, or Rod
The process and filler must match the base metal, thickness, joint, position, and governing repair procedure. Filler metal cannot restore strength when it is deposited onto rust, scale, paint, or metal that has already lost most of its thickness.
For ordinary mild-steel sheet, ER70S-6 is a common solid MIG wire. Its manganese and silicon deoxidizers improve wetting and help it tolerate light surface contamination. Lincoln Electric’s ER70S-6 data sheet still describes the wire as a general-fabrication consumable. You should continue cleaning the joint to sound metal rather than depending on the wire to overcome active corrosion.
| Process | Typical Mild-Steel Consumable | Polarity or Gas | Best Use and Limitation |
|---|---|---|---|
| Short-Circuit MIG | ER70S-6; small wire for light-gauge sheet | DCEP with shielding gas specified by the wire and machine | Good general choice for clean mild-steel sheet; test settings on matching scrap |
| TIG | ER70S-2 or filler specified for the identified alloy | Normally 100% argon for steel TIG | Precise on clean, well-fitted metal but less forgiving of rust and contamination |
| Self-Shielded Flux-Core | Exact wire classification specified by its manufacturer | Follow the wire label; many common self-shielded wires use DCEN | Useful outdoors on suitable thicker material but often adds too much heat and cleanup for thin body sheet |
| Stick | Electrode selected by the approved procedure and material | Depends on the electrode | Better suited to thicker steel; generally a poor choice for thin perforated sheet |
| MIG Brazing or Silicon Bronze | Specified silicon-bronze wire | Procedure-specific | A brazing process, not a universal substitute for steel fusion welding; use only when the repair procedure permits it |
Do not publish or rely on one voltage-and-amperage table for every welder. Machine output, wire feed calibration, wire diameter, shielding gas, electrical supply, joint design, and actual metal thickness all affect the result. Start with the chart inside the machine or its current manual, then make a test weld.
Products Worth Considering

High-quality: ARCCAPTAIN's ER70S-6 mig welding wire .035" meets industry standards(Net Weight: 10lbs), ensuring consistent performance, superior strength. With its smooth feeding and stable welding parameters, you can achieve optimal penetration, high deposition rates, and exceptional overall welding performance.

ER70S-6 MIG WIRE: It's the most common wire of the copper-coated mild steel GMAW (MIG) wires for single or multiple pass welding.

High-quality: ARCCAPTAIN's ER70S-6 mig welding wire .030" meets industry standards(Net Weight: 10lbs), ensuring consistent performance, superior strength. With its smooth feeding and stable welding parameters, you can achieve optimal penetration, high deposition rates, and exceptional overall welding performance.
Common Problems and How to Correct Them
| Problem | Likely Causes | Correction |
|---|---|---|
| The Hole Keeps Growing | Metal remains too thin, excessive heat, poor backing, or a gap is too large | Stop adding filler, cut back to sound metal, fit a patch, and retest the setup on scrap |
| Porosity | Rust, paint, oil, moisture, coating, drafts, poor gas coverage, or a dirty nozzle | Remove the defective weld, clean both sides, correct shielding, and reweld |
| Panel Distortion | Long beads, repeated welding in one area, poor fit-up, or excessive grinding heat | Use shorter tacks, spread the sequence, pause for cooling, and correct fit before continuing |
| Tall or Rope-Like Tacks | Poor fusion, incorrect machine balance, excessive stickout, contamination, or poor gun angle | Check the machine chart, polarity, wire feed, voltage, stickout, work connection, and preparation |
| Cracks After Cooling | Contamination, wrong filler, restrained fit-up, unsuitable base metal, or an unsafe joint design | Remove the crack completely and identify the material and correct procedure before rewelding |
| Pinholes After Grinding | Porosity, missed gaps, or grinding through shallow weld metal | Clean the defect, place a controlled tack, inspect both sides, and avoid overgrinding |
Grinding and Finishing the Weld
Grinding should level the repair without removing the weld or thinning the surrounding panel. Start with a suitable abrasive and light pressure. Keep the grinder moving and check the surface often.
- Remove only proud weld metal.
- Stop if the repair changes color rapidly or becomes too hot.
- Use a finer abrasive as the weld approaches the panel surface.
- Check for pinholes after each grinding stage.
- Do not grind structural welds flush unless the approved procedure requires and permits it.
- Use controlled hammer-and-dolly work only on suitable nonstructural sheet with proper backside support.
A smooth surface is not proof of a strong repair. Excessive grinding can make a weld look neat while removing the section that provides strength.
Priming, Sealing, and Preventing New Rust
The completed weld and heat-affected area have lost their original coating. Protecting only the visible face leaves the backside, seam, or enclosed cavity vulnerable.
Recommended Protection Sequence
- Clean the completed repair. Remove grinding dust, slag, spatter, residue, and contaminants.
- Inspect for remaining defects. Repair pinholes and cracks before applying coatings.
- Apply the specified direct-to-metal or epoxy primer. Follow the paint-system manufacturer’s surface-preparation and recoat instructions.
- Seal seams and overlaps. Use compatible seam sealer after the primer stage specified by the product or OEM procedure.
- Apply the finish coating. Restore paint, chassis coating, or underbody protection as appropriate.
- Protect enclosed cavities. Apply approved cavity wax or corrosion-protection material after painting when the procedure permits it.
- Inspect drainage paths. Do not block drain holes that prevent water from collecting inside a panel.
Weld-through primer belongs on approved inaccessible mating surfaces before welding. It is not the final primer for the exposed weld face. Likewise, rust converter, aerosol undercoat, and cavity wax should never be applied in the active weld zone.
Pro Tip: Use a mirror, inspection camera, or access opening to confirm that the backside received full coating coverage. A repair often begins rusting again from the side you cannot see.
When a No-Weld Repair Is Acceptable
Metal-filled epoxy, panel adhesive, fiberglass cloth, and mesh-backed repair products can close minor cosmetic openings when the product is approved for that substrate and service environment. They do not rebuild a structural steel section in the same way as a properly designed metal repair.
A no-weld repair may be reasonable for a nonstructural cover, decorative panel, enclosure, or temporary prototype when:
- The remaining metal is stable after all loose rust is removed.
- The repair does not carry a meaningful load.
- The area does not reach temperatures above the product’s service limit.
- The part does not contain pressure, fuel, or hazardous material.
- The repair will not hide continuing corrosion in a safety-critical component.
- The adhesive or resin manufacturer approves the substrate and joint design.
Do not use fiberglass or general-purpose epoxy to repair a frame, suspension point, lifting device, pressure vessel, seat mount, seat-belt anchor, roll structure, or another part whose failure could injure someone.
Conclusion
A lasting rust-hole repair begins by removing weak metal rather than trying to weld over it. Once you reach sound steel, choose between bridging a true isolated pinhole and fitting a replacement patch. Keep the fit tight, use the welder’s current setup guidance, test on matching scrap, and control heat with brief, widely spaced tacks.
The work is not finished when the weld looks smooth. Inspect both sides, correct every defect, and restore primer, seam sealer, paint, underbody protection, and cavity protection where required. For structural, vehicle-safety, load-bearing, pressure-containing, or regulated parts, use the applicable engineered or manufacturer-approved repair procedure.
Frequently Asked Questions
Can I weld over rust without cleaning it first?
No. Rust, paint, oil, moisture, scale, and coatings can contaminate the weld and hide metal that is too thin to support it. Remove the damaged material and clean both sides to sound metal before welding.
What is the best welder for a beginner repairing rust holes?
A gas-shielded MIG welder with short-circuit capability is usually the easiest option for ordinary mild-steel sheet. Use small wire where appropriate, follow the machine chart, and practice on matching scrap. The best process still depends on the metal, thickness, access, and repair requirements.
How do I prevent rust from returning after welding?
Remove all defective metal, repair pinholes, clean the weld, and protect every exposed surface. Apply the specified primer, seal seams and overlaps, restore the finish or underbody coating, and protect enclosed backsides with an approved cavity treatment.
Is TIG better than MIG for patching rust holes?
TIG provides precise heat and filler control on very clean, well-fitted metal, but it is less forgiving of contamination. Short-circuit MIG is often faster and easier for mild-steel body patches. Neither process can compensate for rusted-thin base metal.
How thick should the replacement patch metal be?
Match the original material’s alloy and thickness as closely as practical unless an approved repair procedure specifies something different. A thicker patch can be harder to shape and may concentrate stress, while a thinner patch can distort or burn through.
Can I fill a one-inch rust hole with MIG wire?
A one-inch opening should normally receive a fitted patch. Depositing enough filler to bridge that distance adds excessive heat and does not restore the missing sheet section as reliably as replacement metal.
Can I weld a rusted vehicle frame at home?
Do not use a generic sheet-metal patch method on a vehicle frame. Frame and structural repairs may involve restricted materials, sectioning locations, reinforcements, welding procedures, corrosion protection, and inspections. Follow the model-specific repair manual and local inspection rules or use a qualified repair facility.
Sources
- OSHA 29 CFR 1910.252: Welding, Cutting, and Brazing — ventilation, zinc-bearing materials, fire prevention, PPE, and hot-work controls
- Miller: Successfully Welding Sheet Metal With MIG and TIG — thin-sheet wire selection, fit-up, polarity, backing bars, and heat control
- Lincoln Electric S6 ER70S-6 Data Sheet — filler classification, shielding gases, deoxidizers, and intended applications
- American Welding Society D1 Structural Welding Codes — scope and current structural welding-code information
- I-CAR Structural Sectioning Procedures — vehicle-specific repair procedures, structural components, and OEM requirements
- SEM Weld-Thru Primer Technical Data Sheet — preparation and application of weld-through coating on bare-metal mating surfaces