A welder’s daily work involves far more than striking an arc. A typical shift includes checking hazards and equipment, reviewing drawings and welding procedures, identifying materials, preparing and fitting parts, selecting consumables, making welds, inspecting the results, documenting the work, and cleaning the station.
The exact routine depends on the workplace. A production welder may repeat qualified joints at a fixed station, while a structural, pipe, maintenance, or repair welder may spend more time measuring, fitting, troubleshooting, and coordinating with other trades. In every setting, safe preparation and consistent quality are as important as the time spent welding.
Quick Answer
A welder spends a typical day reviewing work instructions, checking safety controls, preparing and fitting metal, setting up equipment, making qualified welds, and inspecting the finished joints. Welders also clean slag and spatter, document completed work, report defects, maintain equipment, and coordinate with fitters, supervisors, and inspectors.
Key Takeaways
- A shift normally begins with a job briefing, hazard review, PPE check, and equipment inspection.
- Welders use drawings, weld symbols, work orders, and Welding Procedure Specifications to control fit-up and welding variables.
- Cleaning, measuring, cutting, beveling, fitting, clamping, and tack welding can take as much time as laying the final welds.
- Machine settings, filler metals, joint gaps, travel techniques, and inspection methods must match the job—not a universal rule of thumb.
- Inspection, documentation, housekeeping, and communication are essential parts of professional welding work.
At a Glance
| Time Required | Usually a full work shift. Schedules vary by employer, project, industry, and overtime needs. |
| Difficulty | Skilled trade work requiring training, safe work practices, coordination, and process-specific qualification. |
| Tools Needed | Job instructions, PPE, measuring and layout tools, preparation tools, clamps, welding equipment, approved consumables, ventilation, and inspection tools. |
| Cost | Employers commonly provide production equipment and required workplace PPE. Personal tools, training, testing, and specialty gear vary by job. |
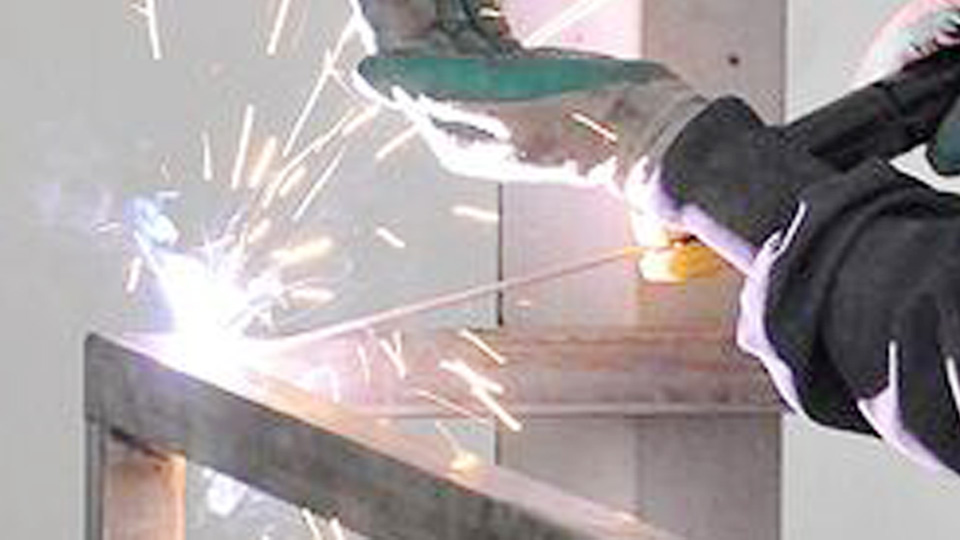
Image by workerscomp-buffalo
Starting Your Shift as a Welder
A welder usually begins by clocking in, reviewing the shift handoff, and checking the day’s production schedule or repair list. Start times and schedules vary. Many welders work full time, and some jobs require overtime, nights, weekends, rotating shifts, or four-day schedules. The U.S. Bureau of Labor Statistics notes that welders work in both indoor and outdoor settings and may work more than 40 hours per week.
The first job is not immediately turning on the power source. Before work begins, the welder reviews the hazards, puts on the required PPE, checks the work area, and confirms that the equipment is safe to use.
Warning: Arc welding exposes workers to intense light, hot metal, sparks, electrical energy, fumes, and fire hazards. Wear safety glasses with side protection under a welding helmet fitted with the correct filter shade. Use flame-resistant clothing, suitable gloves, protective footwear, and any additional PPE required by the employer’s hazard assessment.
A pre-use equipment check may include the power cord or input connection, electrode holder or gun, work lead and clamp, torch body, hoses, regulators, wire feeder, cooling system, and safety guards. Gas cylinders should be upright, secured against falling, correctly identified, and protected from damage. Damaged insulation, loose fittings, leaking hoses, blocked vents, or an unreliable work connection must be corrected before welding begins.
The welder also confirms that ventilation or local fume extraction is operating and that screens protect nearby workers from arc radiation and sparks. This preparation may take only a few minutes on a familiar station, but it can prevent injuries, defects, equipment downtime, and wasted material.
Maintaining Workplace Safety Protocols
Safety controls continue throughout the shift. The Occupational Safety and Health Administration identifies burns, eye damage, electric shock, fumes, ultraviolet radiation, cuts, and crushed fingers or toes among the hazards associated with welding, cutting, and brazing.
Before hot work begins, the crew may need to complete a permit or authorization process. Combustible materials must be removed, shielded, or otherwise controlled. Openings that could allow sparks to reach another level should be covered, and a suitable extinguisher must be available. A trained fire watch may be required during the work and for the period specified by the site’s procedure afterward.
Ventilation must do more than move air around the room. Local exhaust should capture fumes close to the arc without disturbing the shielding gas. The welder should keep their head out of the plume and reposition the hood or fume-extraction nozzle as work progresses. OSHA’s welding-fume guidance explains that respiratory protection may be required when engineering controls and work practices do not reduce exposure sufficiently.
A tight-fitting respirator is not a casual substitute for ventilation. When one is required for work, the employer must select an appropriate NIOSH-certified model and provide the medical evaluation, fit testing, training, maintenance, and written program required by the applicable respiratory-protection rules.
Confined spaces need additional authorization, atmospheric testing, ventilation, communication, rescue planning, and equipment controls. Wet conditions, tanks, coated metals, stainless steel, galvanized steel, lead- or cadmium-containing materials, and unknown repairs may introduce hazards that require a supervisor, safety professional, or industrial hygienist to evaluate the job before work starts.
Reviewing Work Orders and Blueprints
Professional welders study the job instructions before cutting or fitting metal. A work order may describe a production assembly, structural component, pipe spool, machine repair, trailer bracket, or damaged farm implement. The welder confirms the part number, quantity, material, revision, dimensions, due date, and required inspection hold points.
Drawings provide dimensions, joint details, weld symbols, locations, lengths, sizes, contours, and finishing requirements. Welders may also use a Welding Procedure Specification, or WPS. The American Welding Society explains that qualified welding procedures control the variables needed to produce repeatable welds that meet defined requirements.
A WPS may specify the welding process, base-metal group, filler classification, position, joint design, electrical characteristics, shielding gas, preheat, interpass temperature, travel requirements, and other essential variables. The welder checks that the document applies to the actual material and joint and that the current revision is being used.
Layout work often includes measuring, calculating angles, reading tolerances, transferring dimensions, marking cut lines, and tagging parts. A drawing that calls for a 1/8-inch fillet weld is not simply asking for a bead that looks close to that size. The finished weld must meet the drawing and applicable acceptance criteria without creating prohibited undercut, overlap, porosity, cracks, or dimensional distortion.
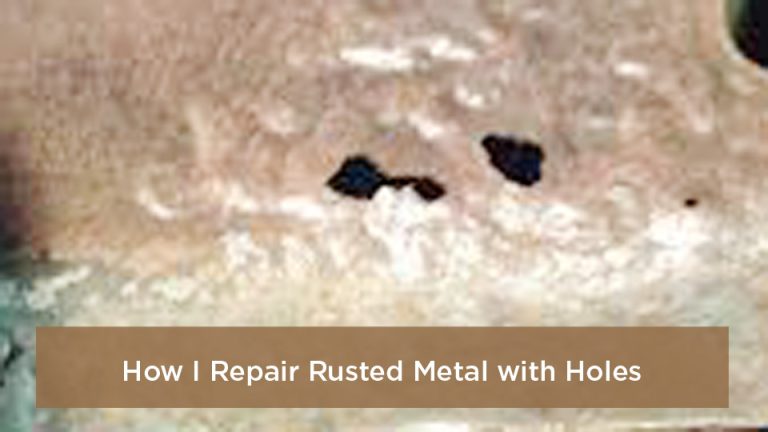
Prepping Materials for Welding
Surface and joint preparation strongly affect weld quality. The welder first confirms the material type and checks for paint, plating, oil, rust, moisture, mill scale, cutting residue, or an unknown coating. Heating an unidentified coating can generate hazardous fumes, so coated material should not be welded until the coating and required controls have been evaluated.
Approved wire brushes, grinders, scrapers, machining tools, or cleaning products may be used to prepare the joint. Stainless steel and aluminum often require dedicated cleaning tools to avoid cross-contamination from carbon steel. Any solvent must be suitable for the material, used according to its label and safety data, and allowed to evaporate completely before welding.
Warning: Do not weld where vapors from chlorinated degreasers or unknown cleaning products can reach the arc. OSHA requires cleaning-compound precautions and separation of chlorinated-hydrocarbon vapors from welding operations.
Joint preparation comes from the drawing or WPS. Some groove welds require a bevel, root face, root opening, backing, or back-gouging operation. Other joints may require square edges or a tight fit. Metal thickness alone does not establish one bevel or gap for every job.
The parts are then aligned, leveled, spaced, clamped, and tack welded in a sequence that controls movement. The welder checks fit-up dimensions after clamping because heat and tack welds can pull the assembly out of position.
Pro Tip: Measure the assembly before tacking, after tacking, and again before the final passes. Small fit-up errors are easier to correct before heat and weld metal lock the parts in place.
Choosing the Right Welding Process
The process must suit the material, joint, thickness, position, environment, productivity target, and governing procedure. Welders commonly work with shielded metal arc welding, gas metal arc welding, gas tungsten arc welding, and flux-cored arc welding, but many workplaces also use submerged arc, resistance, robotic, laser, oxyfuel, brazing, or other specialized methods.
| Process | Advantages | Limitations | Common Uses |
|---|---|---|---|
| Stick (SMAW) | Portable, no external shielding gas, suitable for many outdoor jobs | Frequent electrode changes, slag removal, more operator-dependent | Field repair, structural work, pipe, maintenance |
| MIG (GMAW) | Continuous wire feed, high productivity, relatively little cleanup with solid wire | External shielding gas can be disrupted by wind; setup depends on transfer mode and material | Shop fabrication, manufacturing, automotive and equipment work |
| TIG (GTAW) | Precise heat and filler control, clean process, suitable for many alloys | Lower deposition rate, sensitive to contamination, high coordination requirement | Thin material, stainless steel, aluminum, pipe roots and precision fabrication |
| Flux-Cored (FCAW) | High deposition potential and good capability on thicker material | Produces slag and fumes; gas-shielded wire still requires external shielding gas | Structural fabrication, heavy equipment and field work with suitable self-shielded wire |
Note: FCAW has two main forms. Self-shielded FCAW does not use an external shielding-gas cylinder, while gas-shielded FCAW does. Wind resistance depends on the exact wire and procedure, not merely the words “flux-cored.”
Products Worth Considering
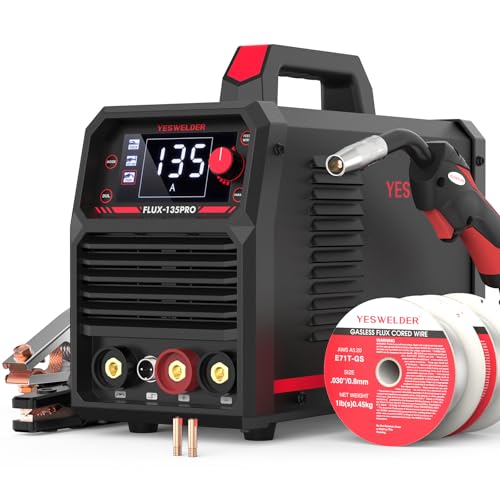
READY OUT OF THE BOX: Start welding immediately! It masterfully handles Gasless Flux Core MIG, Stick, and Lift TIG (Extra Lift TIG torch required). This budget-friendly 3-in-1 machine includes extra E71T-GS .030''&.035'' flux core wires, known for its smooth arc and high feedability. Say goodbye to heavy shielding gas cylinders—perfect for outdoor, windy, or all-position welding.

【EASY TO USE】: The welding machine has included with voltage control knob,wire speed adjustment knob and with synergic control, automatic change of the voltage & wire feeding speed by adjusting the amperage or choosing different thicknesses. Even beginners can use it easily.

WELD ANYWHERE: Plug in the Weld-Pak 90i FC wire feed welder anywhere 120V input power is available; It’s a versatile, user-friendly welding machine that welds up to 1/4"and can be used anywhere, from home workshops to construction sites
Selecting Welding Rods or Fillers
The filler metal must match the base material, mechanical-property requirements, service environment, process, polarity, position, and applicable code or procedure. Welders verify the complete classification on the package rather than choosing a rod or wire only because it is familiar.
E6010 electrodes are known for a forceful, deeply penetrating arc and are commonly associated with pipe root passes and field work where the procedure permits them. E7018 is a low-hydrogen classification often used for structural and general fabrication applications, but its use depends on the approved procedure and required properties.
ER70S-6 is a common solid wire classification for carbon-steel GMAW and GTAW applications. ER308L is commonly used with compatible 18-8 stainless steels, including many 304 and 304L applications. Neither classification is automatically correct for every mild-steel or stainless-steel repair.
Consumables must be dry, clean, correctly stored, and within any exposure limits set by the manufacturer, code, or employer. Low-hydrogen electrodes may require controlled storage and handling, but the required oven temperature and reconditioning rules depend on the product and governing specification. Welders should never place an unidentified or unsuitable electrode in an oven based on a generic rule.
Diameter also affects current range, deposition rate, access, position, and heat input. The welder checks the WPS and consumable data instead of assuming that one diameter belongs to all “light” or “heavy” material.
Products Worth Considering

E7018 Welding Rod: Diameter: 1/8"; Length: 14"; Weight: 5 lb.

PRODUCT:E7018 is a high quality carbon steel electrode with a low hydrogen potassium iron powder type flux. It can be used for AC and DC, and can be used for all-position welding

Designed for welding hardenable steels
Setting Up Your Welding Machine
Machine setup is based on the approved procedure or, for non-code practice work, the power source’s parameter chart and consumable recommendations. There is no single voltage, amperage, wire-feed speed, or gas-flow setting for all pieces of the same thickness.
Variables that may change the setup include:
- Base-metal type, thickness, and condition
- Joint design, root opening, backing, and fit-up
- Wire or electrode classification and diameter
- Polarity and current type
- Shielding-gas composition and delivery system
- Welding position and transfer mode
- Required preheat, interpass temperature, and heat input
- Travel speed, contact-tip-to-work distance, and technique
For GMAW, voltage influences arc length and bead shape, while wire-feed speed is closely related to welding current on common constant-voltage systems. For SMAW and GTAW, the current range must suit the electrode, material, position, and procedure. Aluminum GTAW may use argon in many applications, but current type, tungsten, balance, frequency, amperage, and gas flow depend on the equipment and joint.
Note: Check the power source’s duty-cycle chart in the operator’s manual. If a thermal-protection indicator activates, stop welding and follow the manufacturer’s cooling instructions rather than repeatedly resetting or overriding the machine.
When permitted, a test coupon made from matching material and prepared like the actual joint can help confirm arc stability, bead profile, penetration pattern, and handling before production begins. A test bead does not replace a required WPS, procedure qualification, or production inspection.
Root openings and fit-up tolerances must match the drawing or procedure. A 1/16-inch gap may be correct for one qualified joint and unacceptable for another.
How to Perform the Weld
Once fit-up, safety controls, consumables, and parameters are confirmed, the welder follows a controlled sequence:
- Position the work and body: Arrange the part, leads, torch, and body support so the joint can be completed without losing control or contacting hot metal.
- Confirm tack welds and sequence: Check tack quality, alignment, restraint, and the planned order of welds to manage distortion.
- Start the arc correctly: Use the starting method required by the process while protecting the joint from arc strikes outside the weld area.
- Maintain process-specific control: Hold the required arc length or contact-tip-to-work distance, work angle, travel angle, and filler position.
- Watch the weld pool: Adjust within the permitted range to maintain fusion at the joint edges, a stable bead, and the required profile.
- Control travel and heat: Avoid moving so quickly that fusion is lost or so slowly that excessive reinforcement, burn-through, or distortion develops.
- Clean between passes: Remove slag, oxides, or contamination as required and inspect the joint before covering the previous pass.
- Complete the termination: Fill the crater using the specified technique and avoid abrupt stops that can contribute to cracking.
A weave is not automatically better than a stringer bead. The permitted bead style and width depend on the process, position, electrode, heat-input limits, and WPS. Similarly, “push” and “pull” techniques are selected for the actual process and desired result rather than used as universal rules.
Arc sound can help an experienced welder recognize changes. A steady sizzling sound is commonly associated with some well-tuned short-circuit GMAW conditions, but spray transfer, pulsed GMAW, FCAW, GTAW, and SMAW sound different. Sound alone cannot confirm penetration, fusion, mechanical properties, or code acceptance.
Inspecting and Finishing Your Work
Inspection begins during welding, not only after the part cools. The welder checks each pass for visible cracks, slag entrapment, porosity, undercut, overlap, incomplete fill, incorrect bead placement, arc strikes, and excessive distortion. Any unacceptable condition is reported and repaired using an approved method.
After the weld reaches a safe handling temperature, slag and loose residue are removed with tools suitable for the process and material. Stainless-steel work should use dedicated brushes and abrasives where contamination control is required.
Grinding is performed only when the drawing, finishing requirement, or repair procedure allows it. Aggressive grinding can reduce weld size, remove base metal, conceal a defect, or create a new stress concentration. The finished contour and remaining weld dimensions must still meet the acceptance criteria.
Critical work may require qualified nondestructive examination such as liquid penetrant, magnetic particle, ultrasonic, or radiographic testing. The correct method depends on the material, joint, code, and defect type. A casual hammer tap is not proof that a weld has acceptable internal fusion or strength.
The welder may record the part number, weld identification, WPS, date, shift, consumable lot, preheat or interpass readings, repair status, and inspector acceptance. These records help maintain traceability and reveal recurring production problems.
Handling Common Challenges on the Job
Welders regularly adjust to changing conditions, but corrective actions must stay within the approved procedure.
| Problem | Likely Checks | Typical Response |
|---|---|---|
| Porosity | Gas flow, leaks, drafts, dirty material, damp consumables, excessive nozzle distance | Stop, find the cause, remove the defective area as authorized, and restore shielding and cleanliness. |
| Wind disrupting shielding | Wind speed, screen placement, gas coverage, approved process | Use suitable wind protection or an approved self-shielded process; do not simply increase gas flow without evaluation. |
| Distortion | Fit-up, restraint, sequence, heat input, travel speed, intermittent welding | Use the approved sequence, balanced welding, fixtures, backstepping, or cooling intervals permitted by the procedure. |
| Unstable arc or wire feeding | Work connection, polarity, liner, drive rolls, contact tip, cable condition, parameter match | Stop and correct the equipment or setup problem before covering it with additional weld metal. |
| Power source overheats | Duty cycle, blocked vents, ambient temperature, fan operation, input power | Stop welding, leave the unit in the manufacturer-specified cooling state, and report repeated thermal shutdowns. |
Cooling vents and internal equipment should be maintained only according to the operator’s manual and workplace energy-control procedure. Compressed air can drive conductive dust deeper into a machine or create an exposure hazard if it is used carelessly.
How Daily Duties Change by Welding Job
The phrase “welder” covers several work environments, so two qualified welders may have very different days.
- Production welder: Loads fixtures, verifies part numbers, repeats approved welds, checks gauges, tracks output, and responds to quality alerts.
- Structural or construction welder: Works with fitters, lifts and positions members, follows site hot-work controls, welds in multiple positions, and deals with weather and access limits.
- Pipe welder: Checks bevels, high-low alignment, root openings, purge arrangements, preheat, position, pass sequence, and procedure-specific inspection points.
- Maintenance or repair welder: Identifies the failed material, removes damaged metal, determines whether repair is authorized, fabricates replacement sections, and confirms that equipment is isolated before work.
- Precision TIG welder: Spends more time controlling cleanliness, fit-up, purge quality, filler handling, heat input, appearance, and dimensional accuracy.
- Robotic welding technician or operator: Loads parts, verifies programs and fixtures, monitors the cell, changes consumables, investigates faults, and checks automated weld quality.
The current O*NET occupation profile includes selecting tools and filler materials, marking parts, setting up equipment, and joining or repairing metal components. In some shops, fitting and layout are separate jobs; in others, one welder performs the entire fabrication sequence.
Documentation, Teamwork, and Ongoing Training
Welders rarely work in complete isolation. They coordinate with fitters, fabricators, machine operators, supervisors, engineers, quality personnel, safety staff, crane operators, and other trades. Clear communication is especially important when a drawing is unclear, a material is unidentified, fit-up is outside tolerance, or a repair would change the approved joint.
Daily records may include completed quantities, weld maps, inspection results, rework, downtime, material heat numbers, filler-lot information, gas changes, equipment defects, and shift-handoff notes. Accurate records prevent the next shift from repeating a problem and allow quality teams to trace a part after it leaves the station.
Professional welders also maintain qualifications and learn new procedures. A welder may be qualified for one process, position, material group, thickness range, or joint type but not another. Employers may require periodic testing, continuity records, safety refreshers, equipment training, or additional certification before assigning unfamiliar work.
Wrapping Up the Shift
At the end of the shift, the welder finishes required records and inspects the area for hot metal, sparks, smoldering material, gas leaks, and other remaining hazards. Any required fire watch or post-work check must be completed for the specified period rather than ending automatically when the arc stops.
Cables and hoses are arranged to prevent damage and trip hazards. Reusable consumables are returned to their approved storage, cylinder valves are handled according to site procedure, scrap is sorted, and the welding station is cleaned. Damaged equipment is tagged or reported instead of being left for the next person.
Machine cleaning and maintenance follow the operator’s manual and the workplace’s electrical-safety or energy-control procedure. The shift handoff should identify unfinished work, rejected welds, equipment problems, procedure changes, and any part awaiting inspection.
Welding can involve heat, awkward posture, lifting, bending, and prolonged standing. Hydration, planned breaks, mechanical lifting aids, good body positioning, and light movement between tasks can help reduce fatigue without replacing the employer’s ergonomic controls.
Frequently Asked Questions
What are the main types of welding processes?
Common arc-welding processes include shielded metal arc welding, gas metal arc welding, gas tungsten arc welding, and flux-cored arc welding. The correct process depends on the material, joint, position, environment, productivity target, and applicable welding procedure. Other workplaces may use submerged arc, resistance, robotic, laser, or oxyfuel processes.
How many hours do welders typically work?
Most welding jobs are full time, but schedules vary by employer and industry. A welder may work an eight-hour shift, four 10-hour shifts, nights, weekends, rotating schedules, or overtime during shutdowns and busy construction periods. The schedule should not be assumed from the job title alone.
What safety gear is essential for welders?
Typical PPE includes safety glasses with side protection, a welding helmet with the correct filter shade, flame-resistant clothing, suitable welding gloves, and protective footwear. Hearing protection, face shields, fall protection, respiratory protection, and other equipment may be required after the employer evaluates the process and workplace hazards.
What skills do you need to become a welder?
Useful skills include hand control, visual attention, measurement, blueprint and weld-symbol reading, basic math, mechanical awareness, problem-solving, communication, and the ability to follow procedures. Welders also need enough physical control to work safely in the positions required by their jobs.
What common mistakes do beginners make in welding?
Common mistakes include welding unidentified or dirty material, using the wrong polarity or consumable, copying settings without checking the machine chart, ignoring fit-up, losing shielding gas, holding an inconsistent arc length, and covering a defective pass. Beginners should train under qualified supervision and practice on suitable material before attempting a safety-critical repair.
Do welders spend the entire shift welding?
Usually not. Measuring, layout, cutting, grinding, cleaning, fitting, clamping, moving material, changing consumables, waiting for inspection, completing records, troubleshooting equipment, and cleaning the station may occupy a large part of the day.
Can a welder use the same machine settings for every job?
No. Settings change with material, thickness, joint design, filler size, polarity, shielding gas, transfer mode, position, equipment, and the required procedure. Professional work should follow the applicable WPS. Practice work should begin with the manufacturer’s chart and approved consumable data.
A professional welder’s routine combines preparation, technical control, safety awareness, quality inspection, and teamwork. Strong welds begin before the arc starts and remain the welder’s responsibility after it stops. Following the drawing, current WPS, equipment instructions, and workplace safety program helps reduce defects, exposure, downtime, and costly rework.
Sources
- U.S. Bureau of Labor Statistics: Welders, Cutters, Solderers, and Brazers — occupational duties, work settings, and schedules.
- O*NET: Welders, Cutters, Solderers, and Brazers — current task and equipment profile.
- OSHA: Welding, Cutting, and Brazing Hazards and Solutions — welding hazards and protective measures.
- OSHA 29 CFR 1910.252: General Welding Requirements — fire prevention, eye protection, ventilation, cleaning compounds, and hot-work controls.
- American Welding Society: Standard Welding Procedure Specifications — procedure qualification and controlled welding variables.
- Miller: Flux-Cored Welding Basics — differences between self-shielded and gas-shielded FCAW.