Flux core welding can feel rough at first. The arc is bright, the wire can spit, slag hides the bead, and thin steel can burn through quickly. The good news is that most beginner problems come from a small group of causes: the wrong wire or polarity, poor metal preparation, an unstable gun position, or settings that do not match the machine and material.
Once you learn to read the wire label, start from your welder’s setup chart, keep a steady drag angle, and inspect each practice bead, self-shielded flux-cored arc welding becomes a practical process for outdoor repairs and general mild-steel fabrication. It does not require an external shielding-gas cylinder, but it still demands clean work, proper ventilation, and careful technique.
This guide covers the flux core welding tips for beginners that matter most, including wire selection, machine setup, safety, stickout, travel angle, thin-metal control, position welding, defect diagnosis, and a repeatable practice routine.
Quick Answer
For better flux core welds, use the exact polarity and settings listed for your wire, clean the joint, keep the work clamp on bright metal, drag the gun about 5 to 15 degrees, and hold the recommended wire extension. Practice on matching scrap, change one setting at a time, then remove the slag and inspect the bead.
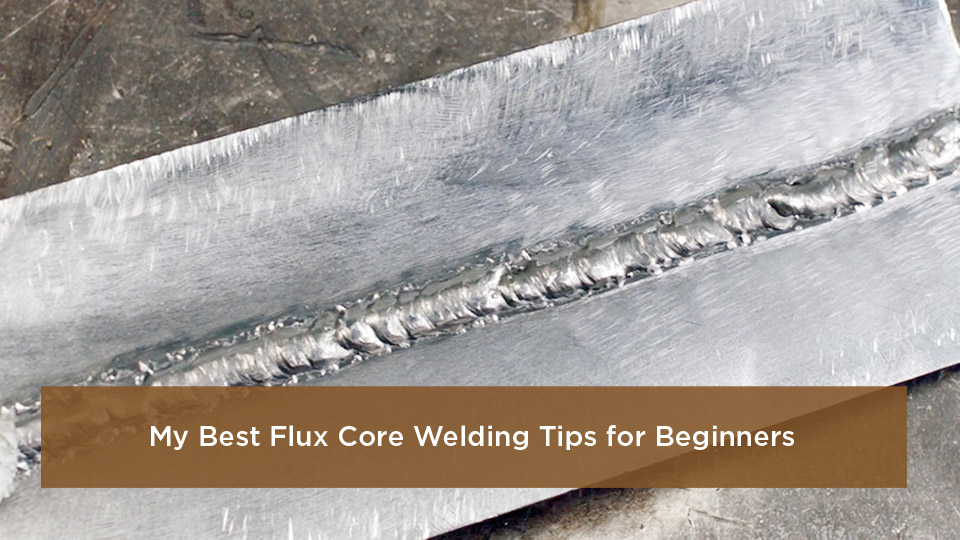
Photo by tookd
Key Takeaways
- The wire label and welder chart control polarity, shielding gas, pass limits, and starting settings.
- Self-shielded flux core usually works best with a drag technique and a longer wire extension than solid-wire MIG, but the wire manufacturer’s range comes first.
- Clean steel, a solid work connection, correct drive-roll pressure, and dry wire prevent many feeding and porosity problems.
- Use short practice beads on scrap that matches the real joint, then chip the slag and inspect before changing one variable at a time.
- Do not treat beginner settings as approval for structural, vehicle-safety, pressure, lifting, or other critical welds.
At a Glance
| Time Required | About 30 to 60 minutes for setup and a first practice session |
| Difficulty | Beginner for flat-position practice; intermediate for thin, vertical, overhead, or critical work |
| Tools Needed | Flux-core-capable welder, approved wire, matching drive roll and contact tip, helmet, safety glasses, gloves, flame-resistant clothing, chipping hammer, wire brush, clamps, and clean scrap |
| Cost | Varies by machine and PPE; ongoing consumables include wire, contact tips, abrasives, and cleaning tools |
What Is Flux Core Welding and Why Start With It?
If you are searching for flux core welding tips for beginners, start with the process itself. Flux-cored arc welding, or FCAW, feeds a tubular electrode through a welding gun. Ingredients inside the wire help shield and shape the weld. The arc melts the wire and base metal, while a slag layer forms over the cooling bead and must be removed afterward.
There are two broad process families. Self-shielded FCAW does not use an external shielding gas. Gas-shielded FCAW, often called dual-shield in shop conversation, uses a separate gas selected for that wire. Both are flux-cored processes, but their polarity, equipment, applications, and operating ranges can differ.
People sometimes call self-shielded FCAW “gasless MIG,” but that nickname is imprecise. The wire still creates shielding compounds as it burns, and the process produces slag. The more useful distinction is whether the wire is self-shielded or requires external gas.
Self-shielded wire is useful outside because it is more tolerant of moving air than gas-shielded MIG. It is also convenient when you do not want to move a cylinder. However, wind can still affect the arc and shielding, and flux core is not an excuse to weld through heavy rust, paint, oil, moisture, or unknown coatings. Miller’s flux-cored welding guide also emphasizes correct positioning, technique, and setup.
Note: Flux core can be beginner-friendly because the gun feeds wire continuously, but it is not automatically easier on every job. Thin sheet, overhead welds, unknown coatings, and critical joints raise the difficulty quickly.
Types of Flux Core Wire and Which One to Pick
Picking the correct wire is more important than choosing a familiar brand. Start with four questions: Does the wire require gas? What polarity does it require? Is it approved for single-pass or multipass welding? Which positions and base-metal thicknesses does its data sheet allow?
Products Worth Considering

E71T-GS FLUX CORE WIRE: This self-shielding, AWS E71T-GS flux-cored wire excels due to its advanced core design, delivering exceptional arc stabilization and high feedability for effortless welding. The core also incorporates powerful deoxidizing agents, ensuring clean, reliable welds even when welding through light rust or mill scale.

Effortless and Efficient Welding: Hassle-free experience with our AWS E71T-GS 0.030" Flux Core welding wire (Net Weight: 10lbs). No shielding gas needed, install and weld in any position. Perfect for strong T-joints, butt welds, and lap welds.

High Quality & Reliable Welds: VEVOR 0.03" 2 lbs E71T-GS flux core MIG welding wire ensures steady arc performance with low spatter for smooth, clean weld beads. Suitable for thin-gauge carbon steel and delivers consistent results across various metal fabrication tasks
Self-Shielded Flux Core Wire
Self-shielded wire carries its shielding ingredients inside the tubular electrode. It is the common choice for portable 120-volt hobby machines, outdoor maintenance, gates, brackets, and general mild-steel practice. Common diameters on small machines include .030 and .035 inch, but the correct diameter depends on the welder’s output range, drive system, available contact tips, and the thickness you need to weld.
A smaller diameter may give a small machine more usable adjustment on thinner stock, while a larger diameter may suit higher-output work. Do not assume that .035-inch wire protects better in wind simply because it contains more material. Wind tolerance and operating limits come from the wire design and data sheet, not diameter alone.
Gas-Shielded Flux Core Wire
Gas-shielded flux core uses an external shielding gas, commonly carbon dioxide or an argon-carbon dioxide blend when specified by the manufacturer. It is widely used in production fabrication because certain wires offer high deposition rates, good positional capability, and strong mechanical properties. It normally requires a suitable feeder, gas system, and machine output, so it is not the default choice for every beginner unit.
How to Read the Wire Label
Classifications such as E71T-11 describe a specific electrode type and usability category. For example, Lincoln Electric lists Innershield NR-211-MP as a self-shielded FCAW wire with defined diameter, thickness, position, and pass limitations. Another E71T-11 or E71T-GS product may have different instructions.
- Match the base metal: Use carbon-steel wire only on compatible carbon or mild steel unless the manufacturer approves another application.
- Check pass limits: Some hobby wires are intended for single-pass work; others permit limited multipass welding.
- Check position: A wire may be all-position, flat and horizontal only, or limited by diameter.
- Check polarity: Never set polarity from memory. Follow the spool label, data sheet, and machine manual.
- Check storage: Keep the spool clean and dry. Rust, shop dust, damaged wire, and moisture can cause feed and weld problems.
Pro Tip: Photograph the wire label before installing the spool. You will have the polarity, classification, diameter, lot information, and operating range available even after the label is hidden inside the machine.
Essential Equipment for a Flux Core Welding Setup
You need a constant-voltage wire feeder or welder approved for the selected flux-cored wire. Some MIG machines can run self-shielded wire after the polarity leads, drive roll, tip, and settings are changed. Others cannot provide the required polarity, wire size, or output. Confirm compatibility in the owner’s manual instead of assuming every MIG machine converts easily.
- Correct drive roll: A knurled roll is commonly used for soft tubular wire because it grips without requiring excessive pressure. Install the groove that matches the wire diameter.
- Correct contact tip: Match the tip marking to the wire diameter and replace a worn, burned, or obstructed tip.
- Clean liner and guides: Dirt, rust, and a kinked liner increase feeding resistance.
- Sound work clamp: Attach the work clamp to clean, bright metal as close to the weld as practical. “Ground clamp” is common slang, but “work clamp” is the more accurate term.
- Slag tools: Keep a chipping hammer, hand wire brush, and grinder with the correct guard and wheel nearby.
- PPE: Use a welding helmet with the filter shade selected for the process and amperage, safety glasses with side protection, leather welding gloves, hearing protection when needed, high-top leather footwear, and flame-resistant clothing.
Products Worth Considering
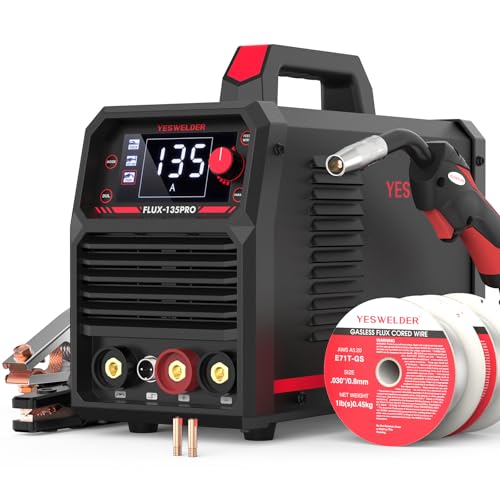
READY OUT OF THE BOX: Start welding immediately! It masterfully handles Gasless Flux Core MIG, Stick, and Lift TIG (Extra Lift TIG torch required). This budget-friendly 3-in-1 machine includes extra E71T-GS .030''&.035'' flux core wires, known for its smooth arc and high feedability. Say goodbye to heavy shielding gas cylinders—perfect for outdoor, windy, or all-position welding.


E71T-GS FLUX CORE WIRE: This self-shielding, AWS E71T-GS flux-cored wire excels due to its advanced core design, delivering exceptional arc stabilization and high feedability for effortless welding. The core also incorporates powerful deoxidizing agents, ensuring clean, reliable welds even when welding through light rust or mill scale.
Power Supply and Duty Cycle
Check the welder’s input-voltage requirements, plug, extension-cord limits, branch-circuit rating, and duty cycle. A long or undersized extension cord can cause voltage drop and poor machine performance. Duty cycle tells you how long the machine can weld within a stated test period before it needs to cool. Stop if the thermal protection activates, and never bypass it.
Helmet Shade Selection
A fixed statement such as “use shade 10 to 13” is not enough. The minimum protective shade depends on the welding process and arc current. Use your helmet manual and the current OSHA eye and face protection table, then choose a shade that protects your eyes while still allowing you to see the joint and puddle.
How to Set Up Your Welder for Flux Core
Most setup failures happen before the trigger is pulled. Work through the machine in the same order every time.
- Disconnect input power: Turn the machine off and unplug it before opening the wire compartment or changing internal polarity leads.
- Confirm the wire: Read the spool label for diameter, shielding method, polarity, positions, and pass limits.
- Set polarity: Connect the gun and work lead exactly as the wire and machine instructions show. Many small self-shielded wires use DC electrode negative, while gas-shielded flux-cored wires commonly use DC electrode positive. The exact wire controls.
- Install the drive roll and tip: Use the correct groove and contact-tip size. Align the inlet and outlet guides without forcing the tubular wire.
- Load the spool: Set spool-brake tension just high enough to prevent overrun when feeding stops.
- Set drive-roll pressure: Start light and increase only until the wire feeds without slipping. Excess pressure can deform the wire and create metal shavings.
- Trim and feed the wire: Keep the gun cable as straight as practical while feeding. Never point the gun toward your hand or another person.
- Attach the work clamp: Clamp to clean metal, not paint, rust, a loose bench connection, or a bearing path.
- Choose starting settings: Use the door chart, owner’s manual, or wire data sheet for the exact wire diameter and material thickness.
- Run a test bead: Use scrap with the same type, thickness, joint, and position as the real work.
Generic numbers such as 18 to 20 volts and 250 to 300 inches per minute may be wrong for your machine, wire, joint, and electrical supply. Treat any published numbers as examples only when they come from the exact manufacturer chart for your setup.
Pro Tip: Mark your successful voltage and wire-feed settings on a scrap coupon with a paint marker. Include the wire classification, diameter, metal thickness, joint, and position so you can repeat the setup later.
Safety Considerations Before You Strike an Arc
Flux core produces intense ultraviolet and infrared radiation, hot spatter, fumes, slag, noise, and electric-shock hazards. The OSHA welding hazards guidance identifies burns, eye damage, electrical shock, and metal-fume exposure among the major risks.
Warning: Do not weld on sealed containers, fuel tanks, drums, wheels, pressurized parts, or metal with unknown coatings or residues. Cleaning a container does not automatically make it safe. Hot work on these items can cause fire, explosion, or toxic exposure and requires a qualified procedure.
Control Welding Fumes at the Source
Work in a space designed for hot work and use local exhaust ventilation that captures fumes near the arc without pulling shielding away from the weld. A household fan that only blows fumes across the room is not a complete control. OSHA’s general welding requirements explain that ventilation and respiratory protection depend on the material, coating, location, and exposure conditions.
Keep your head out of the plume. The updated NIOSH welding-fume guidance notes that metal-fume exposure can affect respiratory health. A respirator is not a universal substitute for ventilation. It must be selected for the specific hazard, medically cleared when required, fit-tested, maintained, and used within a proper respiratory-protection program.
Galvanized, Painted, and Coated Steel
Welding galvanized steel can generate zinc oxide fume, which can cause metal fume fever. Paints and plated coatings may contain other hazardous substances. Remove coatings from the weld zone using a controlled method, identify the material first, provide effective ventilation, and restore corrosion protection after welding. Do not promise that any respirator will “prevent” illness without a hazard assessment.
Fire and Electrical Safety
- Remove combustibles from the spark path and check the other side of walls, floors, and panels.
- Keep the correct fire extinguisher nearby and maintain a fire watch when conditions require it.
- Wear dry gloves and clothing. Do not weld while standing in water or touching the electrode circuit with bare skin.
- Protect nearby people with welding curtains and warning signs.
- Allow hot metal to cool in a controlled area and mark it so nobody grabs it.
- Keep compressed-gas cylinders secured and away from the welding circuit when using gas-shielded FCAW.
Preparing Your Metal for the Best Welds
Flux core can tolerate light surface contamination better than some gas-shielded processes, but clean steel is still the best starting point. Grind or wire-brush the joint to bright metal. Remove rust, paint, mill scale, moisture, grease, and plating far enough from the joint to prevent them from entering the puddle.
Use cleaners only as their safety data and label permit. Let flammable solvents evaporate completely before welding, keep them away from ignition sources, and never use chlorinated cleaners around arc welding or hot metal. Blow off grinding dust with a safe method, then inspect both sides of the joint.
Fit-Up and Joint Preparation
Clamp the work so the joint cannot move. Fit-up depends on the joint design, metal thickness, required penetration, and wire. Thick butt joints may require a bevel, root face, and root opening, but “45 degrees on anything over 1/4 inch” is not a universal rule. Use a proven joint design, drawing, welding procedure specification, or manufacturer recommendation for critical work.
- Lap joint: Keep both surfaces tight and aim the arc toward the thicker member when thicknesses differ.
- T-joint: Hold the gun near the angle bisector unless heat needs to favor one member.
- Butt joint: Maintain a consistent gap and edge preparation. Tack both ends and add tacks as needed to control movement.
- Outside corner: Watch the edge closely because it melts faster and can burn away.
Basic Techniques for Flux Core Welding
Use a Drag Angle
With a slag-producing process, the usual beginner rule is “if there is slag, drag.” Point the gun back toward the completed bead and move away from it. A travel angle of about 5 to 15 degrees is a useful starting range, but the joint, position, and wire instructions may require an adjustment.
Control Stickout and Contact-Tip-to-Work Distance
Flux-cored wire commonly uses a longer wire extension than solid-wire MIG. Miller gives about 3/4 inch as a general starting point for flux core, but the exact range depends on wire diameter and type. Keep it consistent. Moving the gun closer or farther changes electrical resistance, current, arc behavior, and heat at the work.
Watch the Joint and Puddle Edges
Do not stare only at the bright arc. Focus on the leading edge of the puddle and both toes of the weld. You should see the puddle tie into each side without rolling ahead of the arc. If the slag catches the arc or runs in front of the puddle, check travel angle, speed, and settings.
Keep Travel Speed Steady
Moving too slowly makes a wide, high-heat bead and can cause burn-through or excessive reinforcement. Moving too quickly can leave a narrow bead with poor tie-in or undercut. Brace your forearms, support the gun cable, and make a dry run before welding so your body does not run out of comfortable movement halfway through the joint.
Start With Stringer Beads
Practice straight stringers before trying a weave. A wide weave can trap slag and increase heat input. When a wider bead is truly needed, keep the movement controlled, pause briefly at the toes, and follow the wire data sheet or welding procedure.
Step-by-Step Guide to Your First Flux Core Weld
Use this practice sequence on noncritical mild-steel scrap. Do not use a first practice weld on a load-bearing part.
- Choose matching scrap: Use two clean pieces of the same steel type and thickness.
- Prepare the area: Remove combustibles, set ventilation, place screens, and keep an extinguisher nearby.
- Gear up: Put on safety glasses, helmet, dry gloves, hearing protection as needed, flame-resistant clothing, and leather footwear.
- Verify the setup: Check wire type, diameter, polarity, drive-roll groove, contact tip, work connection, and machine chart.
- Set and tack the joint: Clamp the pieces and add small tacks so the gap cannot change.
- Position the gun: Use the correct work angle for the joint, a slight drag angle, and the wire extension listed for the electrode.
- Start the arc: Lower the helmet, place the wire at the start point, pull the trigger, and establish a stable puddle without lingering.
- Travel steadily: Keep the arc on the leading edge of the puddle and watch both toes fuse into the base metal.
- Finish the bead: Pause briefly or make a small backstep if needed to fill the end crater, then release the trigger.
- Let it cool safely: Treat the entire coupon as hot and move it only with suitable tools.
- Remove slag: Wear safety glasses, chip away from your body, and brush the bead clean.
- Inspect and repeat: Look for uniform width, smooth toes, a filled crater, and no visible cracks, pores, undercut, or trapped slag. Change only one variable before the next coupon.
How to Set Voltage and Wire Feed Speed
There is no universal setting table that works across all 120-volt and 240-volt machines. The displayed voltage may be a true voltage value, a tapped switch position, or a manufacturer-specific number. Wire-feed speed also interacts with wire diameter, polarity, extension, joint, and input power.
Use this tuning order:
- Start with the exact machine chart or wire data sheet for material thickness and wire diameter.
- Hold gun angle, stickout, and travel speed as consistently as possible.
- Run a short bead on matching scrap.
- Listen and watch for a stable arc, but judge the cleaned bead and fusion instead of relying only on sound.
- Change one control by one small step and label the result.
| What You See or Hear | Possible Direction | What to Check First |
|---|---|---|
| Wire repeatedly drives into the plate and the gun kicks back | Wire feed may be high for the available voltage, or the arc may be too short | Polarity, chart setting, stickout, and work connection |
| Long, harsh arc with heavy spatter | Voltage may be high, wire feed may be low, or stickout may be inconsistent | Wire label, voltage, wire feed, and contact-tip distance |
| Rounded bead sitting on top with poor toe fusion | Heat at the joint may be low or travel may be too fast | Joint cleanliness, work angle, settings, and travel speed |
| Wide, flat bead or burn-through | Heat input may be high, travel may be slow, or the gap may be too large | Material thickness, fit-up, chart setting, and travel speed |
Joint Preparation and Filler Compatibility
The filler metal must be compatible with the base metal and the service requirements. A casual rule such as “use E71T wire for A36 steel” leaves out impact requirements, hydrogen limits, joint restraint, code provisions, temperature, coating, and approved welding procedures.
For gates, art, and noncritical shop projects, the wire manufacturer’s application list is a useful first filter. For trailers, lifting points, vehicle suspension or steering parts, pressure-containing equipment, structural members, roll cages, and other safety-critical work, use an engineered design, qualified welding procedure, approved consumable, qualified welder, and required inspection. A bead that looks smooth is not proof of adequate fusion or strength.
How to Weld Thin Metal Without Burning Through
Thin steel is one of the hardest jobs for self-shielded flux core because the process can concentrate more heat and spatter than a low-amperage solid-wire MIG setup. Use the smallest approved wire your machine feeds reliably, start at the manufacturer’s lowest suitable setting, and keep the joint tight.
- Practice first on the exact gauge and coating condition.
- Use short, separated welds instead of one continuous bead when the joint design allows it.
- Move around the joint so heat does not build in one spot.
- Let each tack cool before placing the next nearby tack.
- Use a copper backing bar only when it is safe, accessible, and appropriate for the joint.
- Do not grind thin steel aggressively; removing too much base metal makes burn-through more likely.
If the machine’s minimum output is still too hot, change the process or equipment instead of forcing the weld. Solid-wire MIG, TIG, brazing, resistance spot welding, or panel-bonding methods may be more suitable depending on the material and repair standard.
Flat, Horizontal, Vertical, and Overhead Technique
Flat and Horizontal
Learn flat beads first because gravity makes the puddle easier to read. On horizontal fillets, adjust the work angle slightly toward the upper member if the puddle sags, but keep both toes fused. Use stringers until you can hold a consistent bead width.
Vertical
Only use a vertical direction approved for the wire and procedure. Vertical-up can provide better control and penetration on thicker joints, while vertical-down may reduce penetration and is not allowed for every wire or application. Keep the puddle small, use a short controlled pattern, and pause at the toes rather than making a wide weave.
Overhead
Overhead flux core exposes you to falling slag and spatter. Wear complete PPE, button collars and cuffs, use the approved settings and position, and keep the puddle small. Beginners should practice under qualified supervision before attempting overhead work.
Common Mistakes Beginners Make and How to Fix Them
- Assuming all flux core uses DCEN: Read the wire label. Incorrect polarity can cause unstable arc behavior, spatter, poor penetration, and bad bead shape.
- Welding over contamination: Remove rust, paint, oil, moisture, mill scale, and coatings from the joint.
- Pushing the puddle: Start with a slight drag angle so slag stays behind the arc.
- Changing angle and stickout while traveling: Brace your hands and make a dry run before striking.
- Overtightening the drive roll: Use only enough pressure to feed without slipping.
- Using generic internet settings: Start with your machine and wire chart, then test on matching scrap.
- Welding over slag: Chip and brush completely between passes, and confirm that the wire permits multipass welding.
- Judging through the slag: Clean the bead before deciding whether the settings worked.
- Ignoring duty cycle: Allow the welder to cool according to its manual.
- Practicing on a real repair: Learn on coupons before welding a useful or safety-related part.
Troubleshooting Porosity, Spatter, and Other Issues
| Problem | Likely Causes | Corrections |
|---|---|---|
| Porosity | Dirty or wet metal, damp or rusty wire, excessive wind, wrong gas for gas-shielded wire, long or unstable arc | Clean and dry the joint, replace damaged wire, control drafts, verify gas and polarity, and hold the specified extension |
| Excessive spatter | Wrong polarity, poor work connection, voltage and wire-feed mismatch, inconsistent stickout, dirty steel | Verify the wire label, clean the clamp point, return to chart settings, and stabilize gun position |
| Birdnesting | Excess drive pressure, blocked tip, dirty or kinked liner, wrong roll groove, cable bent sharply | Cut power, clear the wire safely, replace damaged parts, straighten the cable, and reset pressure |
| Burnback | Wire feed too low for voltage, tip too close, damaged tip, feed interruption | Replace the tip if needed, restore smooth feeding, use the specified extension, and rebalance voltage and wire feed |
| Slag inclusion | Slag left between passes, pushing instead of dragging, low heat at the toes, wide uncontrolled weave | Clean every pass, use the approved drag angle, improve toe fusion, and use controlled stringers |
| Lack of fusion | Cold settings, fast travel, poor work angle, heavy scale, wrong joint preparation | Clean to bright metal, correct the angle and preparation, and increase heat only within the approved range |
| Undercut | Voltage too high, travel too fast, excessive angle, poor pause at the toes | Return to chart settings, reduce travel speed as needed, flatten the angle, and watch both toes |
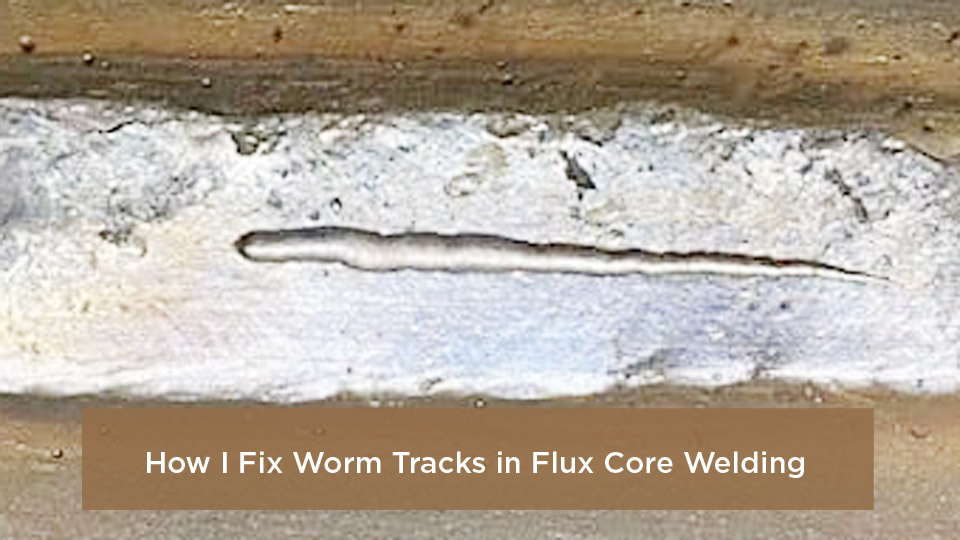
| Worm tracks | Voltage too high, contaminated material, moisture, or gas escaping through solidifying slag | Dry and clean the work, use fresh wire, reduce voltage within the data-sheet range, and maintain consistent travel |
Troubleshoot one variable at a time. If you change polarity, voltage, wire speed, angle, extension, and travel speed together, you will not know which change solved the problem.
Pros and Cons of Flux Core vs. Other Processes
No process wins every category. Choose according to the material, location, quality requirement, and operator skill.
| Aspect | Self-Shielded Flux Core | Gas-Shielded MIG | Stick |
|---|---|---|---|
| Outdoor use | Good wind tolerance, but shielding can still be disturbed | Shielding gas is vulnerable to drafts | Commonly used outdoors with the correct electrode |
| Setup | No external gas cylinder; still requires correct polarity and wire setup | Requires gas, regulator, hose, and correct flow | Simple lead setup; electrodes must be changed and stored correctly |
| Cleanup | Slag and spatter must be removed | Usually little or no slag with solid wire | Slag and spatter must be removed |
| Thin sheet | Possible with the right machine and technique, but burn-through can be difficult to control | Often easier with low settings and small solid wire | Usually more difficult for beginners |
| Deposition and thicker steel | Good productivity within the wire and machine range | Good productivity with suitable transfer mode and gas | Useful for repair and field work, but electrode changes reduce continuous deposition |
| Typical limitations | Fumes, slag, spatter, wire-specific restrictions | Gas cost, wind sensitivity, cylinder handling | More starts and stops, electrode waste, steeper learning curve for arc length |
Advanced Tips for Better Weld Quality
Use Multipass Welding Only When Approved
Do not place a second bead over a wire intended for single-pass welding. When multipass welding is permitted, remove all slag, inspect the first pass, and grind defects before continuing. Keep the interpass area clean and follow any preheat, interpass-temperature, and sequence requirements in the procedure.
Control Distortion
Use balanced tack placement, short weld segments, backstep or skip sequences when appropriate, and rigid clamping that does not create a dangerous release of stored stress. Do not quench a weld unless the procedure specifically allows it because rapid cooling can change properties and increase cracking risk.
Keep Consumables Dry and Clean
Store wire indoors in its original packaging when possible. Cover the machine between uses, avoid touching the wire with dirty gloves, and replace a spool that is rusty, contaminated, or damaged. If a wire manufacturer gives specific storage or reconditioning instructions, follow them.
Inspect Beyond Appearance
A smooth bead can still have incomplete fusion or internal slag. On practice coupons, section, bend, or break samples using a safe method so you can see penetration and fusion. Critical welds require the inspection method and acceptance criteria specified by the applicable code or design.
A Simple Practice Plan for Beginners
- Pad of beads: Run parallel stringers on flat plate. Focus on consistent width, stickout, and travel speed.
- Lap joints: Practice aiming at the joint root and tying into both plates without excessive buildup.
- T-joints: Make fillet welds while holding a steady work angle and checking both toes.
- Restart practice: Stop midway, clean the restart area, and blend the next bead without leaving a crater or cold lap.
- Position practice: Move to horizontal and then vertical only after flat beads are repeatable and the wire permits the position.
Keep a notebook with the machine, wire, polarity, thickness, joint, position, settings, extension, and result. Photos of cleaned beads help you compare progress instead of relying on memory.
Real-World Applications for DIY and Professional Work
Flux core is useful for noncritical brackets, gates, shop carts, lawn-equipment repairs, farm maintenance, art, and general fabrication when the wire and machine suit the base metal. It is also widely used by professionals in construction and heavy fabrication with qualified procedures, higher-output equipment, gas-shielded or self-shielded wires, and formal inspection requirements.
Automotive panels and furniture can be welded with flux core, but thin material and appearance may make another process easier. Trailer hitches, suspension parts, steering components, lifting lugs, pressure vessels, structural frames, and code work should not be presented as casual beginner projects. Use a qualified professional when failure could injure someone.
Wrapping Up: Key Takeaways for Flux Core Success
Good flux core welds begin before the arc starts. Read the wire label, verify machine compatibility and polarity, clean the joint, attach the work clamp to bright metal, and start from the manufacturer’s chart. During the weld, hold a steady drag angle and wire extension while watching the puddle tie into both sides of the joint.
After every practice bead, remove the slag and inspect the cleaned weld. When a defect appears, change one variable at a time and record the result. This method builds real control faster than copying one set of numbers from another machine. Keep your first projects noncritical, respect hot-work and fume hazards, and involve a qualified welder or engineer whenever a joint carries people, pressure, loads, or legal code requirements.
Frequently Asked Questions
What size flux core wire is best for beginners?
Many small hobby welders accept .030-inch or .035-inch self-shielded wire. The best choice is the diameter listed in your welder’s chart for the metal thickness and output range. Smaller wire can offer more control on thinner stock, but machine design and wire classification matter more than a universal size rule.
Why do my flux core welds have holes?
Visible holes are usually porosity. Common causes include rust, paint, oil, moisture, damaged wire, excessive wind, wrong shielding gas on a gas-shielded wire, incorrect polarity, or an unstable arc. Clean and dry the joint, verify the wire setup, hold the specified extension, and test again on scrap.
Can I use flux core welding outdoors?
Self-shielded flux core is a strong outdoor option because it does not depend on a separate shielding-gas cloud. It is more tolerant of moving air than gas-shielded MIG, but strong wind can still disturb the arc and shielding. Use screens when safe, keep fumes out of your breathing zone, and postpone welding in unsafe weather.
How do I reduce spatter in flux core welding?
First verify polarity, wire classification, work-clamp contact, voltage, wire-feed speed, and stickout. Clean the steel and hold a steady drag angle. Anti-spatter products can reduce cleanup on nearby surfaces, but they do not correct an electrical or technique problem and must be kept out of the joint.
Is flux core welding good for thin metal?
It can weld thin steel when the machine has a low enough output and the wire is approved for that thickness. Keep the fit tight, use the manufacturer’s low-end setting, make short separated welds, and control heat. If burn-through continues, a lower-heat MIG, TIG, spot-welding, brazing, or approved bonding process may be better.
Does all self-shielded flux core wire use DCEN?
Many common hobby self-shielded wires use DC electrode negative, but you should never rely on that as a universal rule. Read the spool label and data sheet, then connect the machine exactly as instructed. Gas-shielded flux-cored wires often use DC electrode positive.
Why is slag trapped inside my flux core weld?
Slag inclusions often come from welding over unremoved slag, pushing the gun, using a wide uncontrolled weave, or failing to fuse the toes. Clean every pass completely, use the approved drag angle, keep the puddle manageable, and confirm that the wire allows multipass welding.
Sources
- Miller, Flux-Cored Welding: The Basics for Mild Steel – process setup, drag technique, stickout, and position guidance
- Lincoln Electric, Innershield NR-211-MP – example of wire-specific classification, diameter, application, and thickness limits
- OSHA, Welding, Cutting, and Brazing Hazards and Solutions – welding health and safety hazards
- OSHA 29 CFR 1910.252 – ventilation, fire prevention, and general welding requirements
- OSHA 29 CFR 1910.133 – eye and face protection and filter-lens selection
- NIOSH, Welding Fumes and Manganese – current information on welding-fume exposure and respiratory health