Welding 22-gauge steel with flux core is possible in limited situations, but it is one of the hardest ways to join sheet this thin. Twenty-two-gauge steel heats quickly, and self-shielded flux-cored wire generally produces more heat, spatter, and cleanup than solid-wire MIG. That combination makes burn-through and panel distortion likely.
The most important decision is not a magic voltage or wire feed speed. It is whether your welder and the exact wire on the spool are rated for material this thin. Generic settings from a flux-core welding amperage chart cannot replace the door chart, owner’s manual, and wire data sheet for your equipment.
This guide explains where self-shielded flux-cored arc welding can work, how to reduce heat input, and when gas MIG or TIG is the safer and more controllable choice.
Quick Answer
You may be able to weld 22-gauge steel with small self-shielded flux-core wire, but many manufacturers do not recommend FCAW-S below 20 gauge. Use only a machine-and-wire combination that supports the thickness, make brief spaced tacks on matching scrap, and switch to gas MIG or TIG when clean appearance or reliable heat control matters.
Key Takeaways
- Twenty-two gauge is thinner than the normal FCAW-S range listed by many compact-welder manufacturers.
- There is no universal voltage or wire-speed setting. Use the exact machine chart and wire data sheet.
- Keep butt-joint edges square, clean, tightly fitted, and supported by a copper or aluminum backing bar when possible.
- Use widely spaced tacks or very short stitch welds, allowing the panel to cool fully before filling the next area.
- Gas MIG with 0.023- or 0.024-inch solid wire is usually easier to control on light-gauge sheet.
- Do not use an unqualified DIY procedure for structural, pressure-containing, safety-critical, hybrid, or electric-vehicle work.
At a Glance
| Time Required | About 45–90 minutes for setup, scrap tests, tacking, cooling, cleaning, and inspection |
| Difficulty | Advanced for FCAW-S; gas MIG is normally easier on this thickness |
| Tools Needed | Low-output wire welder, supported FCAW-S wire, matching scrap, clamps, wire brush or grinder, pliers, chipping tool, PPE, ventilation, fire extinguisher, and optional copper or aluminum backing bar |
| Cost | Roughly $10–$40 for wire and consumables when the welder, PPE, clamps, and ventilation equipment are already available |
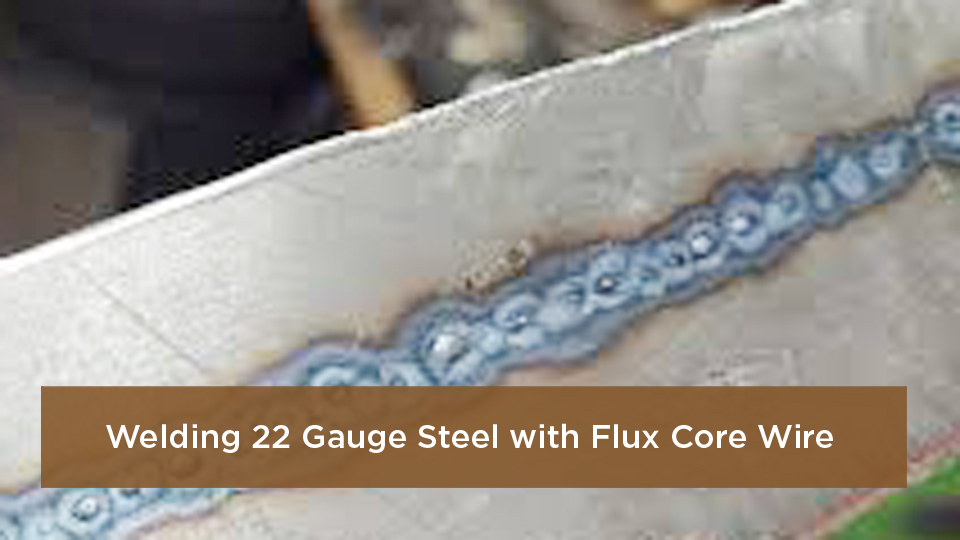
Image by Reddit.
Can You Actually Weld 22-Gauge Steel With Flux Core?
It can sometimes be done, but “possible” and “recommended” are not the same thing. Lincoln Electric notes that self-shielded flux core is generally recommended only on material as thin as 20 gauge. Miller advises against using flux-cored wire on thin sheet because the process puts more heat into the base metal. Twenty-two gauge is thinner than 20 gauge, so it falls outside the normal comfort zone for many FCAW-S setups.
A successful tack on scrap also does not prove that the procedure is suitable for a finished repair. Machine minimum output, wire diameter, wire classification, joint type, fit-up, panel coating, access to the back side, and required strength all matter.
Flux core is most defensible on 22 gauge when the work is noncritical, appearance is secondary, wind makes shielding gas impractical, and the machine and wire manufacturers specifically support the application. Even then, expect to use a series of short tacks rather than a continuous bead.
Warning: Do not use an improvised 22-gauge flux-core procedure for structural members, suspension or steering parts, roll cages, pressure vessels, fuel tanks, load-rated trailer components, or any weld governed by an engineering drawing, repair manual, contract, or welding code.
On 22-gauge sheet, process selection and heat control matter more than chasing a perfect-looking continuous bead.
Why Flux Core Works for Mild Steel—and Where It Struggles on Thin Sheet
Self-shielded flux-cored arc welding uses a tubular electrode containing flux. As the wire melts, the flux helps protect the weld pool and leaves slag over the bead. It does not need an external gas cylinder, so it works better than gas MIG in wind and is more tolerant of limited surface contamination.
Those strengths become disadvantages on very thin sheet. Flux-cored wire usually needs more energy than the small solid wire commonly used for auto-body and light fabrication work. It also creates slag and spatter that must be removed before another tack is placed over the area.
Flux core can tolerate some rust or mill scale, but that does not mean the joint should be welded dirty. Paint, oil, rust, seam sealer, plating, and scale can cause porosity, unstable arc behavior, fumes, and weak fusion. Clean both sides of the joint whenever they are accessible.
| Aspect | Potential Advantage | Problem on 22 Gauge |
|---|---|---|
| Portability | No shielding-gas cylinder is required. | Portability does not offset the higher risk of burn-through. |
| Outdoor use | The shielding system is less vulnerable to wind than gas MIG. | Wind can still spread sparks and fumes and make puddle control harder. |
| Surface tolerance | More tolerant of light contamination than solid-wire MIG. | Paint, heavy rust, oil, zinc, and seam sealer still need attention. |
| Penetration | Useful on thicker material and some outdoor fabrication. | The narrow margin between fusion and a hole makes thin edges difficult. |
| Cleanup | Slag can help shape and protect the cooling deposit. | Slag and spatter slow down tack-by-tack sheet-metal work. |
Picking the Right Flux-Core Wire for Thin Sheet-Metal Jobs
Do not choose wire by diameter alone. Read the spool label and product data sheet for the classification, polarity, supported positions, contact-tip-to-work distance, operating range, base-metal limitations, and storage instructions.
E71T-11 is a common general-purpose self-shielded classification for mild steel. A 0.030-inch diameter may be the smallest practical FCAW-S option supported by some compact welders, and it normally requires less heat than 0.035-inch wire. That does not mean every 0.030-inch E71T-11 wire is approved for 22-gauge material.
Avoid substituting gas-shielded flux-core wire. It is a different consumable that requires the specified shielding gas and operating conditions. Likewise, do not assume that every self-shielded wire uses the same polarity merely because many E71T-11 products run on direct-current electrode negative.
- Classification: Match the wire to mild steel and the intended application.
- Diameter: Use the smallest size supported by both the welder and the wire manufacturer.
- Polarity: Follow the spool label or data sheet exactly.
- Drive roll: Install the roll type and groove specified by the welder manufacturer.
- Contact tip: Match the tip to the wire diameter and replace it if worn.
- Storage: Keep the spool dry, enclosed, and protected from rust and shop contamination.
Pro Tip: Keep a photograph of the spool label and data-sheet settings with the machine. That prevents polarity and stickout errors after the welder has been changed between solid wire and flux core.
Products Worth Considering

E71T-11 FLUX CORE WIRE: Known for its smooth arc action and minimal spatter, it operates efficiently without the need for external shielding gas, making it ideal for outdoor use or drafty environments where gas-shielded processes might struggle. This electrode offers excellent slag removal and good weld penetration.
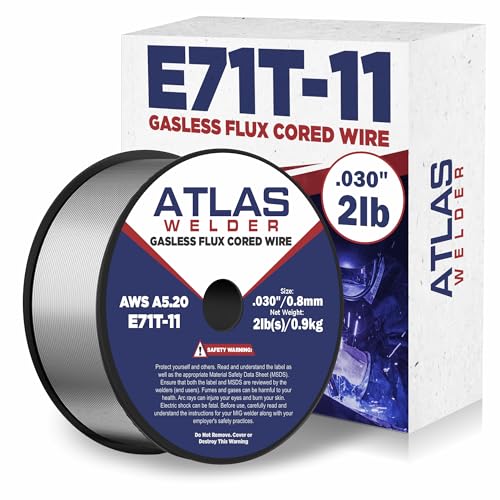
PREMIUM FLUX-CORED WELDING WIRE: E71T-11 self-shielding flux core wire designed for gasless MIG welding applications, eliminating the need for external shielding gas

Gasless Flux Core Welding Wire: E71T-11 flux core MIG wire designed for gasless welding applications, eliminating the need for external shielding gas and suitable for outdoor or drafty environments.
Setting Up Your Welder for Flux Core on 22-Gauge Steel
There is no safe universal voltage and wire-speed recipe for this job. Two machines displaying the same number may not produce the same output, and some compact welders use numbered voltage taps instead of actual voltage values.
Begin with the chart inside the welder or the owner’s manual. Select the entry for the exact wire type, diameter, joint, and nearest listed material thickness. If the chart does not list 22 gauge with that flux-core wire, treat that omission as a limit—not permission to invent a lower setting on the finished panel.
| Machine | What to Verify | Guidance for 22 Gauge |
|---|---|---|
| Hobart Handler 140 | Serial-specific manual, door chart, polarity, wire diameter, and drive-roll groove | Do not reuse settings from another revision. If FCAW-S on 22 gauge is not listed, use solid-wire MIG or another supported process. |
| Lincoln Power MIG 140 | Exact model manual and the Lincoln wire’s product data | Lincoln’s general comparison places the normal thin limit for FCAW-S at about 20 gauge. Test only within documented equipment limits. |
| Eastwood MIG 135 | Manual chart, minimum output, polarity, contact tip, and feed system | If the manual does not support the thickness and wire combination, do not infer settings from another brand. |
| Titanium 140 | Door chart, selected process mode, polarity, inductance or arc-control setting, and wire specification | Use matching scrap for every adjustment. Switch processes if the lowest stable setting still melts the edge away. |
For most self-shielded E71T-11 wires, the machine is configured for DC electrode negative, but the wire manufacturer’s instructions control. Confirm the leads physically; do not rely only on the position of a process selector.
Use the recommended contact-tip-to-work distance. Flux-core stickout is often longer than solid-wire MIG stickout, but shortening or lengthening it outside the wire’s specified range can destabilize the arc and change heat input.
Place the work clamp on clean metal near the joint without interfering with the weld. Inspect cables, the gun liner, contact tip, work lead, and connections before energizing the machine.
Products Worth Considering
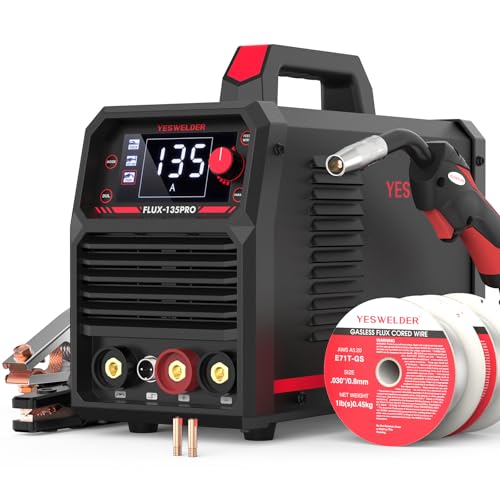
READY OUT OF THE BOX: Start welding immediately! It masterfully handles Gasless Flux Core MIG, Stick, and Lift TIG (Extra Lift TIG torch required). This budget-friendly 3-in-1 machine includes extra E71T-GS .030''&.035'' flux core wires, known for its smooth arc and high feedability. Say goodbye to heavy shielding gas cylinders—perfect for outdoor, windy, or all-position welding.

WELD ANYWHERE: Plug in the Weld-Pak 90i FC wire feed welder anywhere 120V input power is available; It’s a versatile, user-friendly welding machine that welds up to 1/4"and can be used anywhere, from home workshops to construction sites

EASY TO USE: This 120V FC-I MIG welder uses 0.030" and 0.035" flux core wire. It has infinite voltage and wire feed speed control so you can dial in the ideal welding! Even beginners can use it easily
Preparing a 22-Gauge Joint Without Making Burn-Through Worse
Do not bevel a 22-gauge butt joint. Keep both edges square, remove burrs, and fit them as tightly as the repair design permits. Even a small gap removes metal that could have absorbed heat and gives the arc an open edge to melt.
Remove paint, rust, oil, plating, adhesive, and seam sealer from the weld zone and from the work-clamp location. Check the back of the panel as well. Coatings hidden on the opposite side can produce fumes or catch fire even when the visible face looks clean.
Clamp the pieces so the surfaces remain flush. Where access allows, place a clean copper or aluminum backing bar behind the seam. These metals draw heat away and help support the molten puddle without becoming fused to mild steel under normal conditions.
Note: Do not clean the joint with chlorinated brake cleaner or another chlorinated solvent. Heating chlorinated residues can create extremely hazardous decomposition products. Use a cleaner specifically approved for pre-weld surface preparation and allow it to evaporate fully.
Step-by-Step Guide to Welding 22-Gauge Steel With Flux Core
- Decide whether FCAW-S is appropriate. Confirm that the repair is noncritical and that the machine and exact wire support the material. Use gas MIG or TIG when the documentation does not support 22 gauge.
- Prepare a safe workspace. Remove or shield combustibles, inspect the opposite side of the panel, provide suitable fume extraction, and keep an appropriate fire extinguisher ready.
- Prepare matching test coupons. Use the same steel thickness, coating condition, joint type, welding position, backing, and fit-up as the finished part.
- Set up the machine. Install the correct drive roll and contact tip, set the polarity specified on the wire, and begin with the manufacturer’s lowest supported setting for the nearest listed thickness.
- Clamp the joint tightly. Keep butt-joint edges square and nearly gap-free. Add a dry copper or aluminum backing bar when practical.
- Make the first test tacks. Use a brief trigger pull and move to a distant part of the coupon. Do not hold the arc in one spot while waiting for a large puddle.
- Tune one variable at a time. If the wire repeatedly stubs into the work, the relationship between voltage and wire speed may be too cold or feed-heavy. If the edge disappears or the coupon warps quickly, reduce heat input or abandon FCAW-S for a more controllable process.
- Tack the finished joint in a skip pattern. Place widely separated tacks, then return to fill spaces only after the panel has cooled. Do not attempt a long continuous bead.
- Remove slag between deposits. Let the tack solidify, chip and brush the slag away, and inspect the area before placing another tack against it.
- Finish and inspect. Confirm that the joint is fused at both edges without cracks, visible porosity, undercut, large pinholes, or excessive distortion. Grind only as much as necessary because grinding heat can also warp the panel.
Pro Tip: Cut several identical coupons before touching the finished part. A setting that produces one acceptable tack is not proven until it can repeatedly make clean tacks without enlarging the gap or distorting the sheet.
Techniques That Reduce Burn-Through and Warping
Use a drag or pull technique for self-shielded flux core unless the wire manufacturer specifies otherwise. Hold a modest travel angle, commonly about 5–15 degrees, and keep the gun aimed so the wire enters the joint rather than wandering onto an unsupported edge.
- Tack instead of running a bead: Build the seam from separate deposits rather than trying to travel continuously.
- Skip around: Move to a distant, cool area after every tack.
- Let the panel cool: Do not keep adding weld because the previous tack has merely stopped glowing.
- Use a chill bar: Dry copper or aluminum backing absorbs heat and supports the joint.
- Keep fit-up tight: Large gaps require more filler and expose the edges to direct heat.
- Avoid weaving: Side-to-side motion increases arc time and heat input. Use only the movement needed to tie both edges together.
- Aim toward the heavier piece: When joining different thicknesses, place more arc energy on the thicker member while washing the puddle toward the thin edge.
- Reposition when possible: Flat welding is easier to control. A vertical-down progression may reduce penetration on thin sheet, but only when the wire and procedure permit it.
Do not use a wet rag as a routine quench. Uneven rapid cooling can move the panel in unexpected ways, and water should not be introduced around energized welding equipment. Control the heat before it enters the panel instead.
Common Mistakes When Flux-Core Welding Thin Steel
| Symptom | Likely Causes | Correction |
|---|---|---|
| Burn-through | Unsupported thickness, excessive output, long trigger time, poor fit-up, or no backing | Stop and let the panel cool. Tighten fit-up, add a chill bar, shorten the tack, or switch to gas MIG/TIG. |
| Rope-like tack with poor edge fusion | Output too cold, excessive stickout, poor work connection, or travel too fast | Verify the clamp and stickout, then adjust within the manufacturer’s supported range on scrap. |
| Wire stubbing into the work | Too much wire feed for the selected voltage, feed restriction, or unstable contact | Check the tip, liner, roll tension, and chart settings. Change only one setting at a time. |
| Porosity or pinholes | Oil, paint, rust, moisture, slag trapped between tacks, excessive wind, or contaminated wire | Remove the defective deposit, clean both sides, replace damaged wire, and protect the work area. |
| Excessive spatter | Wrong polarity, unstable voltage/feed relationship, excessive stickout, dirty metal, or worn tip | Verify polarity first, then inspect consumables and retest within the data-sheet range. |
| Panel distortion | Tacks placed consecutively, inadequate clamping, excessive grinding, or insufficient cooling | Use a wider skip sequence, allow complete cooling, support the panel, and reduce grinding heat. |
| Wire-feeding problems | Wrong drive roll, excessive roll tension, liner damage, wrong contact tip, or rusty wire | Install the specified feed components and replace damaged or contaminated consumables. |
Safety First on Thin-Metal Flux-Core Jobs
Flux-core welding creates ultraviolet radiation, hot slag, sparks, noise, electric-shock hazards, and welding fumes. Thin sheet does not make those hazards minor.
- Wear an approved welding helmet with the filter shade selected for the process and current, plus safety glasses underneath.
- Use flame-resistant clothing, dry welding gloves, cuffless pants, and leather footwear. Do not wear melting synthetic fabric.
- Remove movable combustibles and shield anything that cannot be moved. Inspect openings and the opposite side of walls, floors, ducts, and panels.
- Keep suitable fire-extinguishing equipment ready. Use a fire watch when required by the work conditions or applicable rules.
- Keep your head out of the fume plume. Use local exhaust ventilation positioned to capture fumes without pulling the arc or slag toward your face.
- Do not assume a disposable dust mask is adequate. Workplace respirator use requires hazard evaluation, correct selection, medical clearance, fit testing, and a compliant respiratory-protection program.
- Inspect the electrode holder, gun, cables, work lead, plug, and receptacle. Keep gloves and the work area dry.
- Never weld a closed container, tank, drum, pipe, or hollow structure that may contain pressure, fuel, solvent, or combustible residue.
Warning: Welding fumes contain a mixture of metals and other compounds. NIOSH notes that most welding fumes contain some manganese. Use source capture and adequate ventilation; do not place a fan where it merely blows fumes across another person or disrupts safe control of sparks.
Special Safety Notes for Galvanized, Painted, and Coated Steel
Galvanized steel releases zinc oxide when heated, and zinc exposure can cause metal-fume fever. Paints and primers may contain additional hazardous metals or decomposition products. Unknown coatings should be treated as hazardous until identified.
Consult the product safety data sheet and the applicable repair or fabrication procedure. Remove coatings far enough from the joint when the procedure permits, capture fumes at the source, and restore corrosion protection after the weld has cooled and passed inspection.
Do not weld through seam sealer, undercoating, body filler, adhesive, grease, or paint simply because flux core can tolerate more contamination than gas MIG. These materials can burn, create porosity, and release dangerous fumes.
Special Safety Notes for Vehicle Panels
Before welding a car or truck, identify the exact year, make, model, powertrain, and VIN. Use the current manufacturer body-repair and service information for that vehicle. Battery-disconnection instructions, module protection, weld-through primer use, approved joint locations, and sectioning procedures vary by model year.
- Inspect both sides of the panel for fuel lines, brake lines, wiring, batteries, airbags, seat-belt pretensioners, insulation, carpet, trim, adhesives, and seam sealer.
- Follow the OEM procedure for isolating the 12-volt electrical system and protecting electronic modules. Do not assume disconnecting one battery cable is sufficient for every vehicle.
- Do not weld on or near a fuel tank, fuel line, vapor line, pressurized component, or unknown container.
- Do not substitute a homemade patch or weld pattern in a crush zone, structural rail, rocker reinforcement, pillar, suspension mount, restraint mounting point, or advanced high-strength-steel component.
- Protect the opposite side of the panel from sparks and heat, and maintain a fire watch after welding.
High-Voltage Warning: Electric and hybrid vehicles contain high-voltage components that can cause severe injury or death. NHTSA recommends service by technicians with specialized EV-specific high-voltage training, proper test equipment, and appropriate PPE. Do not begin welding until the VIN-specific OEM procedure has been followed and absence of hazardous voltage has been verified by a qualified person.
When to Ditch Flux Core and Use Gas MIG for 22 Gauge
Gas MIG is normally the better choice for clean indoor work on 22-gauge mild steel. Miller recommends 0.023- or 0.024-inch solid wire for most light-gauge sheet-metal work. The smaller wire melts with less heat and gives the operator a wider margin before the base metal burns away.
A common mild-steel combination is ER70S-6 solid wire with an argon-rich shielding gas such as 75% argon and 25% carbon dioxide. Use the machine’s chart for the exact starting parameters; do not copy a generic voltage and IPM value.
Switch to gas MIG or TIG when:
- The FCAW-S chart does not list the material thickness.
- The lowest stable FCAW-S setting still blows holes or warps the coupon.
- The joint must be flush-finished with minimal grinding.
- The work is indoors and can be protected from drafts.
- Appearance, low spatter, and low cleanup time matter.
- The joint is on an exterior body panel where distortion is difficult to correct.
- The applicable OEM repair procedure specifies a different process or weld type.
AWS D1.1 does not “favor MIG” for auto-body work. It is a structural-steel code used when a project specification, contract, engineer, or authority invokes it. Auto-body repairs instead require the vehicle manufacturer’s current repair procedures and any applicable collision-repair requirements.
Flux Core vs. Other Processes for Thin Fabrication
| Process | Suitability for 22 Gauge | Heat Control | Main Trade-Off |
|---|---|---|---|
| Self-shielded flux core | Difficult fallback when specifically supported | Limited | Portable and wind-tolerant, but hot, spattery, and prone to burn-through |
| Short-circuit gas MIG | Usually the practical first choice | Good | Needs shielding gas and protection from drafts |
| TIG | Excellent for precision work in skilled hands | Excellent | Slower and more demanding of cleanliness and operator control |
| Resistance spot welding | Excellent where the joint design and equipment permit it | Localized | Requires access to both sides or specialized single-sided equipment |
| Stick welding | Poor choice | Low | Electrodes and arc output are generally unsuitable for sheet this thin |
Real-World Applications: Auto Repairs, HVAC, and Light Fabrication
Twenty-two-gauge steel appears in body panels, cabinets, enclosures, ductwork, guards, decorative projects, and other light fabrication. The correct joining method depends on the function of the part—not simply its thickness.
For auto-body patches, follow the VIN-specific manufacturer procedure. Cosmetic skin panels, floor sections, structural reinforcements, and advanced high-strength-steel components may require different joint designs and processes.
HVAC ductwork is commonly joined with seams, fasteners, sealants, spot welds, or other specified methods. A visually continuous flux-core seam should not be assumed airtight or suitable for pressure service. Follow the duct design, project specification, and applicable mechanical code.
For cabinets and hobby projects, consider lap joints, flanges, plug welds, rivets, screws, brazing, or structural adhesives where suitable. Redesigning the joint can produce a better result than forcing a continuous butt weld into unsupported 22-gauge sheet.
Trailer bodies and agricultural equipment need special care. A thin outer skin may be nonstructural, while a nearby frame, rail, crossmember, or load attachment is safety-critical. Do not transfer a sheet-metal tack procedure to a load-bearing component.
Advanced Tips for Cleaner, Stronger Flux-Core Tacks
- Listen for consistency, not a particular slogan: Arc sound varies with the machine and wire. Sudden popping, stubbing, or repeated burnback indicates a setup or feeding problem.
- Watch both edges: A tack sitting on top of one sheet is not a sound joint. Both edges should wet into the deposit without disappearing.
- Clean every restart: Slag trapped between overlapping tacks can create inclusions and pinholes.
- Use one variable at a time: Changing voltage, feed speed, stickout, angle, and trigger time together makes diagnosis impossible.
- Avoid multi-pass welding: A 22-gauge joint should not need multiple structural passes. If it does, the process or joint design is wrong.
- Control grinding heat: Use light pressure, short contact periods, and cooling breaks.
- Do not reach for a spool gun: A spool gun is commonly used for soft aluminum wire and is not the normal cure for small steel flux-wire feed problems. Correct the drive roll, liner, contact tip, tension, and spool condition first.
- Record successful tests: Note the machine, input voltage, wire brand and lot, diameter, polarity, controls, joint, position, backing, and tack duration.
For any weld whose failure could injure someone or cause major property damage, visual appearance and a hand bend on scrap are not enough. Use the qualified welding procedure, inspection method, and acceptance criteria required by the governing design or standard.
Wrapping It Up: Tackle 22 Gauge With Realistic Expectations
Welding 22-gauge steel with flux core is a specialized workaround, not the default sheet-metal process. The combination can succeed on small, noncritical joints when the equipment documentation supports it, the fit-up is tight, and the seam is built from short, widely spaced tacks.
The safest path is to test the exact setup on matching scrap, keep the edges square, use backing where possible, remove slag between deposits, and let the panel cool fully. If the lowest stable FCAW-S setup still burns through or distorts the coupon, stop fighting the process and switch to small-diameter solid-wire MIG or TIG.
Above all, keep the procedure within its limits. Vehicle structures, pressure-containing parts, fuel systems, regulated fabrication, and hybrid or electric vehicles require current manufacturer instructions, qualified personnel, and the correct engineering or code requirements.
Frequently Asked Questions
What wire size should I use for flux core on 22-gauge steel?
Use only a self-shielded wire diameter supported by both the welder and wire manufacturer for the material. A 0.030-inch E71T-11 wire may be the smallest supported option on some compact machines, but that does not automatically make it suitable for 22 gauge. Verify the spool data sheet and machine chart.
How do I avoid burn-through when flux-core welding thin metal?
Use tight, square-edge fit-up, a dry copper or aluminum backing bar, very brief tacks, a wide skip sequence, and full cooling intervals. Test every adjustment on matching scrap. When the lowest supported setting still melts the edge, switch to gas MIG or TIG rather than continuing to lower the machine outside a stable range.
Is flux core better than gas MIG for outdoor 22-gauge repairs?
Flux core is less vulnerable to wind because it does not depend on an external shielding-gas cloud. However, gas MIG gives better heat control on 22-gauge sheet. The better solution may be to move the work indoors or install an appropriate wind screen rather than use an excessively hot process.
Can beginners weld 22-gauge steel with flux core?
It is not a good first thin-sheet exercise. Practice first on thicker material that falls within the machine’s documented FCAW-S range, then move to matching 22-gauge coupons only after wire feeding, polarity, stickout, gun angle, and tack timing are consistent. Twenty-four gauge is thinner and more difficult, not easier.
What is the best technique for vertical 22-gauge flux-core welds?
A controlled vertical-down progression may reduce penetration because it allows faster travel, but the wire must be approved for that position. On 22 gauge, use separate short tacks rather than a weave or long downhill bead, and practice in the same position on scrap first.
Should I bevel the edges of a 22-gauge butt joint?
No. Beveling removes material from an edge that is already easy to melt. Keep the edges square, deburred, clean, and tightly fitted. Use backing and clamps to support the joint.
Can I flux-core weld galvanized 22-gauge steel?
The zinc coating creates additional fume and contamination hazards, while the thin base metal remains highly vulnerable to burn-through. Follow the product and project procedure, remove coating where permitted, use effective local exhaust ventilation, and restore corrosion protection afterward. A different joining method may be safer and cleaner.
Sources
- Lincoln Electric: GMAW vs. FCAW-S Process — process differences and practical material-thickness guidance
- Miller: Flux-Cored Welding Basics for Mild Steel — wire selection, polarity, drive rolls, stickout, angles, and technique
- Miller: Successfully Welding Sheet Metal With MIG and TIG — small-wire selection, skip welding, tight fit-up, and backing bars
- OSHA 29 CFR 1910.252 — welding fire prevention, ventilation, fumes, and hot-work precautions
- CDC/NIOSH: Welding Fumes and Manganese — welding-fume composition, manganese exposure, and control resources
- NHTSA: Electric and Hybrid Vehicle Safety — high-voltage service risks and qualified-technician guidance