Stretched auto body sheet metal can become loose, wavy, or unstable after a collision, welding, grinding, or too much hammer work. Shrinking removes a small amount of excess surface area, but heat is not safe for every panel. Before starting, you must identify the material, confirm that the part is non-structural, and follow the vehicle maker’s repair procedure.
Quick Answer
To shrink stretched auto body sheet metal, first confirm that the panel is repairable, non-structural mild steel and that the vehicle maker allows heat. Correct the basic shape, apply one small temperature-controlled heat spot, use light off-dolly taps to gather the metal, cool it as the OEM permits, and recheck before repeating.
Key Takeaways
- Use heat only when the vehicle-specific OEM procedure permits it for that exact panel and material.
- Do not heat structural parts, intrusion beams, restraint mounting areas, or unknown high-strength steel.
- Measure panel temperature with an approved indicator instead of relying only on metal color.
- Use light, controlled off-dolly or gathering taps; repeated direct on-dolly blows can stretch the panel again.
- Inspect the back of the panel for wiring, foam, adhesive, trim, glass, fuel components, and heat-sensitive systems.
- Make one small shrink at a time, allow the panel to settle, and stop as soon as the surface becomes stable.
At a Glance
| Time Required | About 30 to 90 minutes for a small repair, not including refinishing or corrosion-protection work |
| Difficulty | Advanced; hands-on training and practice on scrap metal are strongly recommended |
| Tools Needed | OEM repair information, approved heat source, temperature indicator, body hammer, dolly, slapper, inspection light, marker, PPE, ventilation, and fire extinguisher |
| Cost | Low consumable cost if you already own approved equipment; professional torch, induction, ventilation, and measuring equipment can be a major purchase |
What’s in This Article
- What Heat Shrinking Does to Sheet Metal
- When Heat Shrinking Is Allowed
- Tools for Heat Shrinking Sheet Metal
- Before You Begin
- Heat Shrinking Sheet Metal Step by Step
- Control High Spots and Stretches
- Oxy-Fuel Torch Tips That Work Best
- Hammer, Dolly, and Slapper Use
- Heat-Shrinking Troubleshooting
- Common Heat Shrinking Mistakes to Avoid
- Frequently Asked Questions
- Sources
- Conclusion
What Heat Shrinking Does to Sheet Metal
Sheet metal becomes stretched when impact, welding heat, grinding heat, or heavy hammering increases its surface area. The panel may then develop a raised crown, a loose section that pops in and out, or a broad wave that will not stay in shape.
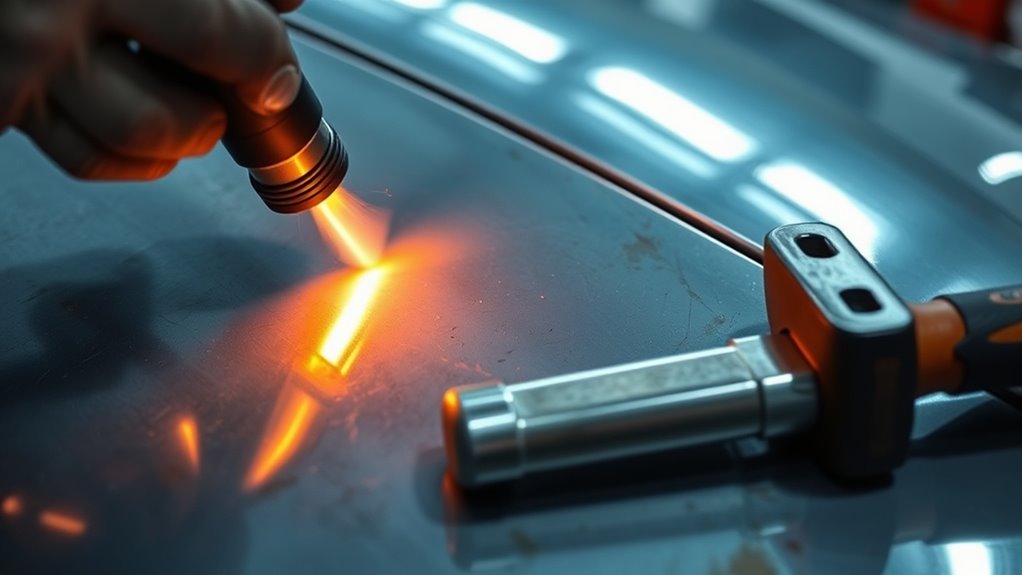
A controlled shrink uses localized heat to expand a small spot while the cooler metal around it provides resistance. Light gathering work moves the raised hot metal inward. As the spot cools, it contracts and can leave the panel with slightly less surface area.
This method does not restore heat treatment or strength to a panel that the vehicle maker classifies as non-repairable. It is a shape-correction method for approved material, not a way to rescue every damaged steel or aluminum component.
Metal color is not a universal temperature gauge. The OEM’s permitted temperature, heat source, heating time, and number of heat cycles always take priority.
When Heat Shrinking Is Allowed
Before heating a vehicle panel, identify the exact component and material through vehicle-specific repair information. A magnet can help distinguish some aluminum panels from steel, but it cannot tell mild steel from high-strength steel and must not be your only test.
I-CAR’s steel repairability guidance explains that some modern exterior door skins and quarter panels are made from high-strength steel. A panel’s location or appearance does not prove that it is ordinary mild steel.
| Panel or Material | Heat-Shrinking Guidance |
|---|---|
| Verified non-structural mild steel | Heat may be usable when the vehicle maker permits it and the approved temperature and method are followed. |
| HSS, AHSS, UHSS, boron, or press-hardened steel | Do not heat unless the exact OEM procedure permits it. Some applications prohibit heat or require replacement after heat exposure. |
| Aluminum outer panel | Use a separate aluminum procedure with much lower temperatures and approved equipment. Do not apply the steel torch method. |
| Structural or safety-related component | Do not use this general procedure. Follow the OEM repair-or-replace instructions and use a qualified collision technician. |
For example, the Stellantis Use of Heat Position Statement permits properly controlled heat on some non-structural mild-steel components but says a structural HSS, AHSS, or UHSS component that is heat-straightened must be replaced. Honda also publishes material-specific instructions and, for an example 440 MPa steel, permits certain flameless heat sources but no open flame.
Warning: Do not apply heat near intrusion beams, bumper reinforcements, restraint or seat-belt mounting areas, airbag components, roof rails, pillars, rocker reinforcements, fuel-system parts, high-voltage components, or any panel whose repairability and material are unknown.
Products Worth Considering

Powerful Flame Temperature Heat up to 5252°F (2900°C)

【PREMIUM QUALITY】This tip cleaner wires are made from premium quality Stainless Steel and Enclosed in a Sturdy Aluminum Casing. The stainless steel Sheet Metal Gauge and the tip cleanner are all rust-proof, non-deforming with good elasticity.

Complete Kit: Ideal for HVAC & Light Duty Brazing - Designed specifically for light-duty brazing and welding jobs, this kit is your go-to tool for HVAC repairs, metal crafts, and other precision tasks. Its portable design is perfect for on-the-go professionals
Tools for Heat Shrinking Sheet Metal
The correct tool depends on the panel material, the type of stretch, available backside access, and the vehicle maker’s repair instructions.
- Vehicle-specific OEM repair information: Use it to identify the component, material, permitted repair method, maximum temperature, heating time, and allowed number of heat cycles.
- Approved heat source: This may be an induction heater, stud-welder shrinking tip, shrinking disc, heat gun, copper heating tool, or oxy-fuel welding or heating torch.
- Temperature-control tool: Use the method required by the OEM, such as a temperature crayon, heat stick, thermal label, or suitable contact probe.
- Body tools: Use clean, smooth body hammers, correctly shaped dollies, a slapper, and suitable low-crown finishing tools.
- Inspection tools: Use a long reflection light, flexible straightedge, contour gauge, marker, and a clean body file or abrasive block used lightly to read the surface.
- Safety equipment: Use flame-resistant clothing, heat-resistant gloves, suitable shaded eye protection, safety glasses, local exhaust ventilation, a fire extinguisher, and equipment-specific gas safety devices.
Different shrinking tools create different heat patterns. A shrinking disc uses friction to warm high spots over a broader area. A stud-welder shrinking tip concentrates heat at a small contact point. An induction heater can localize heat without an open flame. An oxy-fuel torch heats quickly but also creates the greatest open-flame and backside-fire concerns.
Note: A non-contact infrared thermometer may give a poor reading on shiny bare steel or aluminum because surface emissivity affects the result. Follow the OEM’s temperature-monitoring method and use temperature crayons, labels, or another approved contact method when required.
Before You Begin
Estimated total time: Plan on about 30 to 90 minutes for a small stretched section. A large oil-canned area, welded panel, aluminum panel, structural component, or panel without backside access may require professional repair or replacement.
- Obtain the repair procedure. Confirm the vehicle year, model, panel name, construction material, and heat restrictions.
- Inspect both sides. Remove or protect trim, wiring, modules, adhesive, foam, seam sealer, sound deadener, glass, weatherstrips, and nearby coatings.
- Follow depowering instructions. Use the OEM procedure for the 12-volt system, supplemental restraints, hybrid system, or high-voltage battery when the work area is nearby.
- Prepare the surface. Remove paint, filler, rust, oil, and coatings only as required for the approved repair. Do not heat an unknown coating.
- Make the area fire-safe. Remove combustibles, shield anything that cannot be moved, keep an extinguisher ready, and arrange a fire watch when heat could reach hidden areas.
- Set up ventilation. Position local exhaust close enough to capture smoke and fumes without pulling the torch flame across the panel.
- Practice first. Test the heat source, temperature indicator, hammer angle, and cooling method on similar scrap metal before touching the vehicle.
OSHA’s hot-work requirements call for welding, cutting, and heating areas to be made fire-safe. OSHA also requires effective ventilation where fumes and smoke must be controlled at their source.
Warning: Stop if you cannot inspect the back of the proposed heat area. Hidden foam, adhesive, wiring insulation, trim, seam sealer, or sound deadener can smolder after the visible flame has been removed.
Products Worth Considering

Heavy Duty Torch Kit: The RX WELDER Easy Kit is for the amateur metalworker/experienced professional. These gas torch kits are all easy to use and allow you to cut, weld, braze and solder with precision and efficiency

PRODUCT APPLICATION SCOPE: This torch kit works for welding, brazing, jewelry processing, crafts, metal engraving and glass blowing. It’s light, has 1.5m flexible hoses and a 360° rotatable barrel, so it’s easy to use in narrow areas, both indoors and outdoors.

Transparent Fuel Gauge: Keep track of your gas supply with the easy-to-read fuel gauge on the bottom of our cooking torch; The gauge also serves as a reminder to avoid overfilling, With a 10g capacity that lasts up to 50 minutes, you can easily manage your cooking creations.
Heat Shrinking Sheet Metal Step by Step
The following procedure applies only to a repairable, non-structural mild-steel panel when the vehicle maker permits localized heat shrinking. Do not transfer these steps to aluminum, high-strength steel, structural parts, or safety-related components.
- Confirm repairability. Verify the material, approved heat source, maximum temperature, heating time, and heat-cycle limit in the OEM procedure.
- Map the damage. Use your hand, a reflection light, and a flexible straightedge to identify the original low area, displaced crown, sharp highs, and genuinely loose or stretched section.
- Restore the basic shape first. Use controlled off-dolly work or an approved pulling method to return the panel close to its intended contour. Do not shrink a large misplaced crown that should first be moved.
- Mark the smallest shrink point. Select the peak of the stretched area rather than heating the entire loose section.
- Prepare the backside. Position the dolly so it supports the intended contour without trapping the hot spot directly between the hammer and dolly.
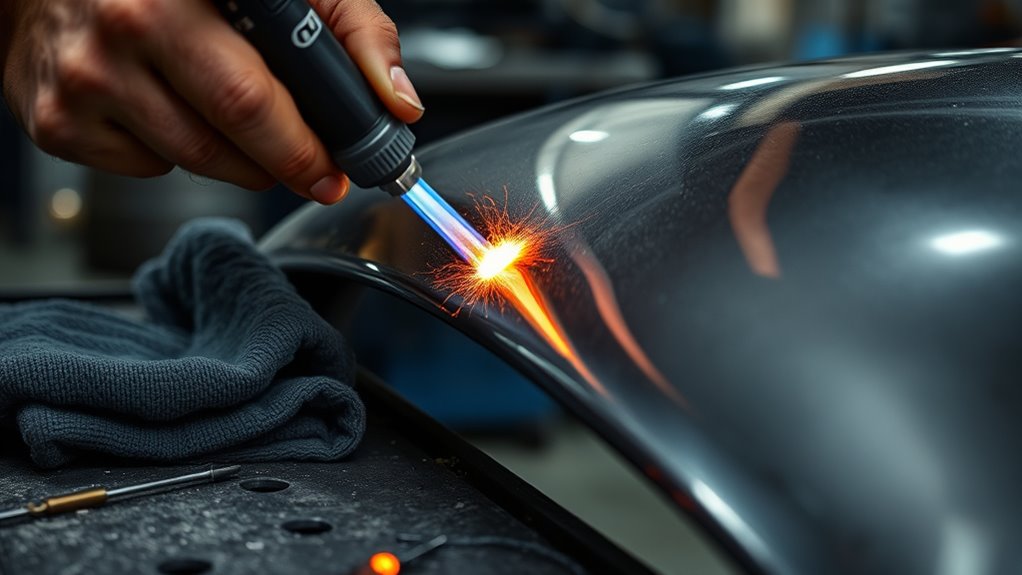
- Apply one controlled heat spot. Heat only the marked area with the approved tool while monitoring temperature. Stop at the OEM limit; do not rely on cherry-red color as your primary control.
- Gather the raised metal. As the spot rises, use very light taps directed toward the center. Keep the dolly slightly off the direct hammer line unless the repair procedure calls for another technique.
- Cool as directed. Allow natural cooling or use the approved air or water-cooling method. Keep water away from electronics, cavities, unprotected seams, and areas where it can become trapped.
- Recheck the entire panel. Feel beyond the shrink point and read the reflection from several angles. Confirm that the high has dropped without creating a low or moving the crown.
- Repeat only when necessary. Allow the area to return to a stable temperature before adding another small, separated shrink. Record or track the number of heat cycles when the OEM limits them.
- Finish and protect the repair. Perform only the minimum final planishing needed, clean the metal, restore corrosion protection and seam sealer, and complete the approved refinishing process.
| Stage | Action | Stop or Continue Check |
|---|---|---|
| Shape correction | Move the displaced crown and lows with approved cold-working methods. | Do not heat until the panel is close to its intended contour. |
| Localized shrink | Heat one small target and gather the raised spot with light taps. | Stop immediately at the permitted temperature or if coatings smoke. |
| Cooling | Use the OEM-approved cooling method. | Wait until the panel stabilizes before judging the result. |
| Inspection | Check contour, panel tension, backside condition, and remaining highs. | Repeat only if a clearly identified stretched area remains. |
Pro Tip: Put the heat source down after every shrink and inspect a much larger area than the hot spot. A successful shrink can move tension several inches away, so chasing only the original mark may cause over-correction.
Control High Spots and Stretches
A high spot is not always the same as stretched metal. A dent can push the surrounding crown outward, causing a raised area even when the metal has not gained enough surface area to need shrinking. Shrinking the wrong point can pull the panel farther out of shape.
Locating High Spots
Start with a clean panel and a long reflection light. Sweep your open hand across the surface from several directions. Use the light movement to find a sharp peak, broad crown, low valley, or loose section.
| Check | What It May Show | Next Step |
|---|---|---|
| Hand sweep | Sharp rise, broad crown, or low valley | Mark the shape, not just the highest point. |
| Reflection-light movement | Distorted lines or a break in the reflection | View from several angles before choosing a shrink point. |
| Gentle push test | Oil canning or unstable tension | Check whether the crown is misplaced before assuming the metal is stretched. |
| Flexible straightedge | Overall contour compared with nearby undamaged areas | Correct broad shape before localized finishing. |
A clean body file can also reveal high contact points, but use it lightly as an inspection tool. Do not remove enough metal to thin the panel or hide the true shape.
Managing Metal Stretches
Correct the original impact sequence as far as practical before shrinking. Move displaced lows and crowns with controlled cold work. When a loose section remains after the basic contour is restored, mark the most stretched peak and make one small shrink.
Space later shrink points apart instead of stacking repeated heat in the same location. Let each spot cool and settle before deciding where the next shrink belongs. Stop when the panel holds its contour with light hand pressure.
Do not force a perfectly flat result while the panel is hot. Heat temporarily changes the contour, and the final shape cannot be judged until the surrounding area has cooled.
Tapping With Heat
The hot spot often rises slightly because it expands against cooler surrounding metal. Use light taps to lower and gather that raised area before it cools. Keep the dolly close enough to support the intended shape but offset from the direct hammer strike when possible.
Heavy blows can mark the panel, drive the spot too low, or stretch the steel between the hammer and dolly. A broad-faced slapper may spread force more gently than a small hammer face during final correction.
Stop tapping as soon as the hot spot settles. More hammering does not create a better shrink and may undo the reduction in surface area.
Oxy-Fuel Torch Tips That Work Best
Use an oxy-fuel torch only on verified material when the vehicle maker permits an open flame. Some OEM procedures require a flameless source even when controlled heating is allowed.
- Use a welding or approved heating attachment. Do not use a cutting attachment to shrink thin body sheet metal.
- Select the smallest suitable tip. The tip must heat the target promptly without soaking a wide section of the panel.
- Use the manufacturer’s pressure settings. Match the exact torch, fuel gas, regulator, hose, check valve, flashback arrestor, and tip instructions.
- Inspect for leaks before lighting. Remove damaged equipment from service and use an approved spark lighter rather than a match or cigarette lighter.
- Set the correct flame. A neutral flame is commonly used for controlled steel heating, but the equipment maker’s directions take priority.
- Monitor actual temperature. Do not use a fixed one- or two-inch torch distance or visible color as a substitute for the approved temperature-control method.
- Protect the back of the panel. Shield or remove anything that can burn, melt, release fumes, or transfer heat into a restricted component.
- Follow the proper shutdown sequence. Close valves and bleed or secure the system according to the torch manufacturer’s manual.
The Victor/ESAB torch guidance demonstrates equipment-specific lighting, neutral-flame adjustment, and shutdown. Do not substitute generic pressure or valve instructions for the manual supplied with your equipment.
Note: Traditional restoration work on older, verified mild-steel panels may use a small visible-red heat spot. That visual method is not a safe universal standard for modern vehicles and must never override a lower OEM temperature limit.
Hammer, Dolly, and Slapper Use
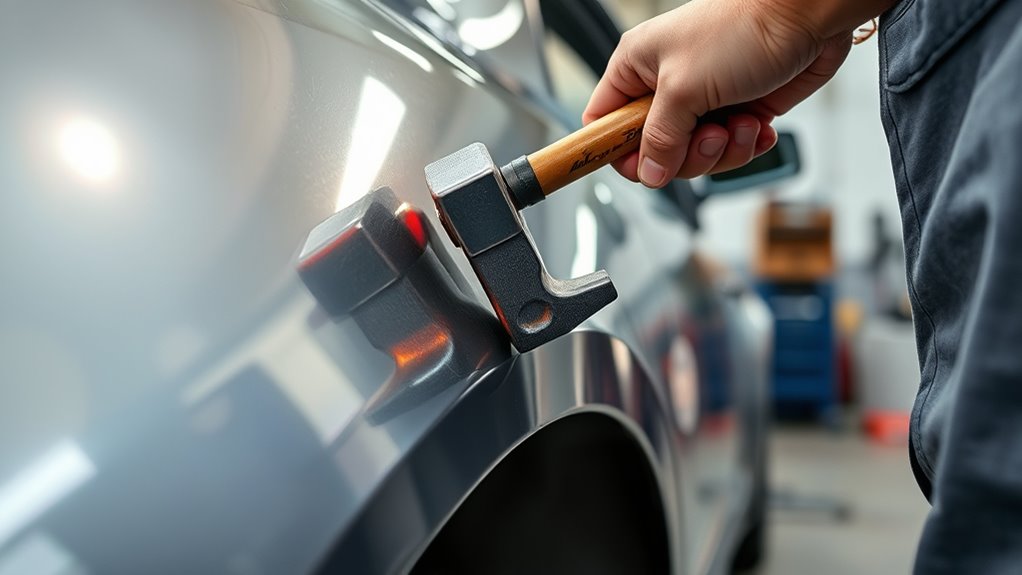
The hammer moves metal from the front while the dolly supports or redirects force from the back. Where the dolly sits in relation to the hammer strike changes the result.
| Technique | Typical Effect | Best Use |
|---|---|---|
| Off-dolly hammering | Moves a high toward a supported low with less direct pinching | Early shape correction and controlled gathering around a heat spot |
| On-dolly hammering | Planishes and can stretch or thin the metal | Limited final smoothing when stretching is intended or acceptable |
| Slapper work | Spreads force across a wider contact area | Gentle high-spot correction and surface refinement |
| Shrinking hammer or dolly | May gather or texture the surface depending on tool design and technique | Small corrections by an experienced technician after testing on scrap |
The dolly is not simply a backing block. Its position controls where the force goes and whether the panel is moved, planished, or stretched.
Keep hammer and dolly faces clean and smooth. Dirt, weld spatter, sharp edges, and damaged tool faces can print marks into thin sheet metal that require more work to remove.
Use the slapper only after the main contour and panel tension are close. Long sessions of final planishing can put surface area back into the panel and recreate oil canning.
Heat-Shrinking Troubleshooting
| Problem | Likely Cause | Corrective Action |
|---|---|---|
| Panel still oil cans | A crown or low remains displaced, or the shrink missed the truly stretched area | Re-map the whole panel and correct its basic contour before adding heat. |
| A new low appears | Too much shrink, too much hammer force, or the wrong shrink point | Stop heating. Allow full cooling, reassess the crown, and use minimal approved cold correction. |
| Panel becomes broadly wavy | The heated zone was too large or repeated heat spread into surrounding metal | Stop and let the panel cool completely. Professional correction or replacement may be safer. |
| Metal blisters, scales, or heavily discolors | Excess temperature, oxidizing flame, or prolonged heating | Stop immediately and review OEM repairability. The panel may no longer be repairable. |
| Smoke or odor comes from behind the panel | Hidden coating, foam, adhesive, trim, insulation, or seam sealer is heating | Shut down the heat source, inspect the cavity, extinguish any smoldering material, and ventilate the area. |
| The shrink has little effect | Wrong target, insufficient gathering, incorrect method, or a panel that is not suitable for heat shrinking | Do not keep raising the temperature. Recheck material, repairability, shape, and tool choice. |
Common Heat Shrinking Mistakes to Avoid
Heating before identifying the metal is the most serious mistake. A steel-looking outer panel may be HSS, while an aluminum panel requires a separate low-temperature procedure. Check the OEM information first.
Using visible color as the only temperature guide can overheat modern material. Use the required temperature indicator and stop at the permitted limit even when the metal never glows.
Heating a wide area spreads distortion. Shrink one clearly identified point and inspect the whole panel after it cools.
Hammering directly on the dolly for too long can stretch the metal again. Use off-dolly correction for most shape movement and reserve on-dolly planishing for limited final work.
Shrinking a misplaced crown treats the symptom rather than the damage sequence. Correct the basic contour before deciding that excess surface area remains.
Quenching automatically ignores material, corrosion, adhesive, wiring, and OEM requirements. Use only the approved cooling method.
Ignoring the backside can start a hidden fire or damage foam, adhesive, modules, wiring, glass, or safety systems. Maintain access and inspect the cavity during and after hot work.
Repeating heat until the panel looks flat while hot often causes over-shrinking. Let the panel stabilize before judging each result.
Skipping corrosion protection leaves bare and heat-affected metal vulnerable. After shaping is complete, clean the area and restore the required primer, cavity protection, seam sealer, and refinishing materials.
Frequently Asked Questions
How do you shrink sheet metal on an auto body panel?
First confirm that the panel is repairable, non-structural mild steel and that the OEM permits heat. Restore the basic contour, mark the smallest stretched high, heat it to the permitted temperature, gather it with light controlled taps, cool it as directed, and recheck before making another shrink.
Can you use a torch on modern auto body panels?
Only when the vehicle-specific repair procedure permits an open flame on that exact component and material. Some high-strength steels cannot be heat-straightened, while other OEM procedures permit heat only within a stated temperature range or require a flameless source.
Can you shrink an aluminum body panel the same way as steel?
No. Aluminum moves heat differently, requires much lower temperature control, and may have nearby structural adhesive that heat can damage. Use the vehicle maker’s aluminum repair procedure and approved equipment, which may include an aluminum-capable induction heater.
Does putting metal in the freezer shrink it enough for body repair?
No. Cooling causes a small temporary dimensional change, but a household freezer does not remove the permanent excess surface area from a stretched auto body panel. The shape normally returns as the panel warms.
What does the 4T rule mean in sheet metal work?
In some fabrication references, 4T describes a bend radius equal to four times the sheet thickness. It is not an auto body heat-shrinking formula and does not tell you where to heat, how hot to make the panel, or how much it will shrink.
Should you quench sheet metal after heating it?
Use the cooling method stated in the approved repair procedure. Some traditional mild-steel techniques use a light water spray or cool air, while other repairs call for natural cooling or restrict rapid cooling because of the material, coatings, adhesive, electronics, or corrosion risk.
Can a heat gun shrink auto body sheet metal?
A standard heat gun usually lacks the concentrated heat needed for traditional mild-steel shrinking. However, some OEM procedures permit a heat gun for specific materials or straightening operations. Follow the exact vehicle and component procedure instead of assuming that a heat gun is always suitable or unsuitable.
When should a stretched panel be replaced instead of shrunk?
Replacement may be required when the OEM prohibits straightening, the part is structural or safety-related, the metal is torn or sharply kinked, heat limits have been exceeded, adhesive or coatings are damaged beyond the approved repair, or the panel no longer holds its contour after reasonable correction.
Safety Disclaimer: This article is for general information and does not replace vehicle-specific OEM repair procedures, collision-repair training, equipment manuals, or workplace safety requirements. Torch work can cause fire, burns, toxic-fume exposure, hidden vehicle damage, and loss of structural performance. Use qualified professional help whenever material identity, repairability, backside access, temperature control, or vehicle-system isolation is uncertain.
Sources
- I-CAR — Steel Repairability — backs material identification and the need for vehicle-specific OEM repair information.
- Stellantis — Use of Heat Position Statement — distinguishes heat repair of non-structural mild steel from restrictions on structural high-strength steel.
- I-CAR — Straightening and Heat: Honda/Acura — supports material-specific temperatures and open-flame restrictions.
- I-CAR — Aluminum Heat Shrinking — supports separate aluminum temperature, equipment, and adhesive considerations.
- OSHA 1910.252 — General Hot-Work Requirements — supports fire prevention, hot-work-area preparation, and protection of combustibles.
- OSHA 1926.353 — Ventilation and Protection — supports local exhaust and control of smoke and fumes near their source.
Conclusion
Good sheet metal shrinking starts with the repair decision, not the torch. Confirm the panel material, obtain the OEM procedure, inspect both sides, and rule out structural or safety-related parts before applying heat.
On an approved non-structural mild-steel panel, restore the broad shape first. Then use one small, measured shrink, light gathering taps, the approved cooling method, and a full inspection before repeating. Stop as soon as the panel becomes stable, and finish by restoring every coating and corrosion-protection layer disturbed during the repair.


