Smoothing sharp metal edges with an angle grinder can make a rough workpiece safer to handle and easier to finish. The key is to use the right disc, keep the grinder under control, and remove metal in light passes instead of forcing the tool. This guide shows you how to smooth sharp edges safely, choose the right disc, avoid common mistakes, and care for your grinder after the job.
What’s in This Article
- Essential Safety Gear for Using an Angle Grinder
- What You Need Before Smoothing Sharp Edges
- Step-by-Step Angle Grinder Process for Smoothing Sharp Edges
- How to Keep Control and Precision When Smoothing Edges
- Cleaning and Maintaining Your Angle Grinder After Use
- Rust Prevention for Metal Edges
- Avoiding Common Mistakes in Edge Smoothing
- Selecting the Right Grinding Disc for Edge Smoothing
- Tips for Ensuring Safe and Effective Grinding
- Frequently Asked Questions
Quick Answer
To smooth sharp edges with an angle grinder, secure the workpiece, wear full safety gear, and use a grinding wheel or flap disc rated for your grinder. Hold the tool with both hands, use light pressure, and keep the disc moving along the edge. Start with coarse grit for shaping, then finish with finer grit for a smoother feel.
Key Takeaways
- Wear eye, face, hand, ear, and breathing protection before you start grinding.
- Secure the workpiece with clamps or a vise so it can’t shift during the cut.
- Use a grinding disc, flap disc, or sanding pad that matches the material.
- Keep the grinder moving with light pressure to avoid gouges and overheating.
- Clean the grinder and protect bare metal edges after each job.
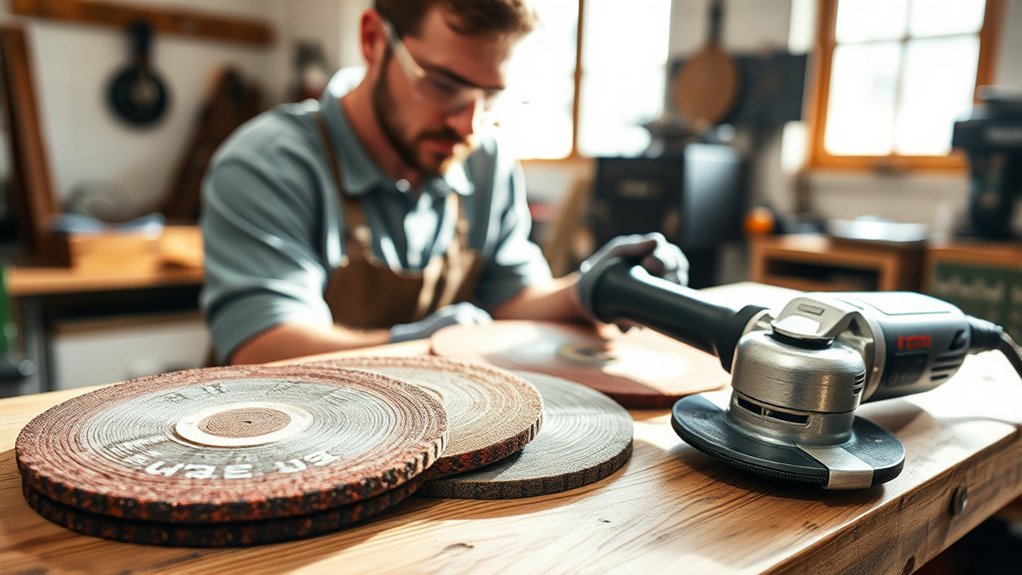
Essential Safety Gear for Using an Angle Grinder

When you use an angle grinder, the right safety gear helps protect you from sparks, dust, noise, and sharp metal. Wear safety glasses under a full face shield to protect your eyes and face from flying debris. Use a dust mask or respirator when grinding metal, paint, rust, masonry, or any material that creates fine dust.
Use hearing protection because angle grinders can reach harmful noise levels. Earplugs or earmuffs help protect your hearing during long grinding sessions. For your hands, choose leather or cut-resistant gloves that can handle heat, sharp edges, and rough metal.
Wear long sleeves made from safe work fabric, and avoid loose clothing that can catch in the tool. Choose sturdy footwear so sparks, sharp offcuts, and falling metal don’t injure your feet. Good gear won’t replace safe technique, but it gives you a strong first layer of protection.
Warning: Never use an angle grinder without the guard installed and positioned between you and the disc.
What You Need Before Smoothing Sharp Edges
Before you start, gather everything you need so you don’t stop halfway through the job. A clean setup helps you work with better control and fewer risks.
- Estimated time: About 10 to 30 minutes, depending on edge length and material thickness.
- Tool: Angle grinder with a working guard and side handle.
- Disc: Grinding wheel, flap disc, or sanding pad rated for your grinder.
- Holding method: Clamps, vise, or a solid workbench.
- Safety gear: Safety glasses, face shield, gloves, hearing protection, and dust protection.
- Finishing items: Fine-grit sandpaper, clean rag, and rust-inhibiting oil or spray for bare metal.
Step-by-Step Angle Grinder Process for Smoothing Sharp Edges
Use this simple process to smooth sharp edges with better control. Set up the work area first, choose the right disc, then grind in light passes. Check the edge often so you remove only the amount of material you need.
Prepare Your Workspace Properly
A well-prepared workspace helps you smooth sharp edges safely and cleanly. Clear the area of loose items, dust, and flammable materials before you start. Use a sturdy workbench, then clamp the metal piece so it can’t move during grinding.
Put on your personal protective equipment (PPE), including safety glasses, a face shield, gloves, hearing protection, and breathing protection. Before you power the tool, inspect the angle grinder, guard, power cord, switch, and disc for damage. Stand slightly to the side and aim sparks away from your body, cords, gas cans, paper, wood dust, and other fire risks.
| Task | Importance | Safety Tip |
|---|---|---|
| Clean workspace | Prevents hazards | Remove flammable items |
| Secure metal piece | Stability | Use clamps or a vise |
| Wear PPE | Protection | Always use safety glasses |
Select the Appropriate Grinding Disc
Choose a grinding disc that matches the material you need to smooth. For metal edges, a grinding wheel or flap disc works well. For softer materials or light finishing, a sanding pad can give you more control.
Check the disc’s revolutions per minute (RPM) rating before you install it. The disc rating must meet or exceed your angle grinder’s maximum speed. This step helps reduce the risk of disc failure during use.
Start with a coarse grit disc for rough smoothing, then switch to a finer grit for a polished finish. Attach the disc only while the grinder is unplugged or the battery is removed. Tighten it properly, then spin it briefly in a safe direction before touching the workpiece.
Execute the Smoothing Technique Safely
- Put on your safety gear. Wear eye, face, hand, ear, and breathing protection before you start the grinder.
- Start the grinder away from the edge. Let the disc reach full speed before it touches the material.
- Hold the grinder with both hands. Keep one hand on the rear handle and one hand on the side handle.
- Set the disc at a shallow angle. Use about a 5° to 10° angle for light edge smoothing and better control.
- Move the grinder along the edge. Use light pressure and steady motion so the disc doesn’t dig into the metal.
- Make several shallow passes. Remove small amounts of metal at a time to reduce heat, gouges, and discoloration.
- Check the edge often. Stop the tool, let it come to rest, then feel the edge carefully with a gloved hand.
- Finish with finer grit. Use a fine flap disc, sanding pad, or hand sanding for a smoother final feel.
Do not force the grinder into the edge. Let the tool and disc speed do the work. Forced grinding can overheat the workpiece, damage the disc, and increase kickback risk.
How to Keep Control and Precision When Smoothing Edges
Good control comes from your grip, body position, disc angle, and pressure. You should guide the grinder instead of fighting it. Slow, steady movement helps you create an even edge without removing too much metal.
Proper Grip Techniques
A firm grip on the angle grinder helps you control the tool when smoothing edges. Always use both hands, with one hand on the rear handle and the other on the side handle. This stance gives you better stability and helps you react if the disc catches.
Keep your grip firm but not tense. A stiff grip can tire your hands and reduce control. Move your arms and body with the grinder instead of twisting your wrists along the edge.
Steady Pressure Application
Steady pressure helps you create smooth, even edges without damaging the workpiece. Use light pressure and let the grinding wheel or flap disc cut at its own pace. If the grinder slows down or jumps, reduce pressure and check your angle.
Keep the grinder moving across the edge instead of holding it in one spot. This reduces heat buildup and helps prevent uneven marks. For precision work, use a shallow angle and finish with finer grit after the sharp edge disappears.
Tool Positioning Strategies
Proper tool positioning helps you keep the edge straight and even. Position the grinder so the working part of the disc contacts the edge without catching. For general grinding, a 20° to 30° angle can remove material faster, but a lower 5° to 10° angle works better for light edge smoothing.
Let the grinder reach full speed before it touches the metal. Move it back and forth in controlled passes, and keep sparks away from your body. Use the guard to shield yourself from debris and never remove it to reach a tight area.
Pro tip: Mark the sharp edge with a marker before grinding so you can see where you’ve already worked.
Cleaning and Maintaining Your Angle Grinder After Use

Clean your angle grinder after each use so it runs safely and lasts longer. Unplug the cord or remove the battery before you touch the disc, guard, or vents. Let the disc cool before you remove it.
Use a brush or compressed air to clear dust and metal particles from the vents and housing. Inspect the power cord, switch, guard, side handle, and attachments for wear or damage. Replace damaged parts before the next use.
Follow your tool manual for lubrication, because not every grinder needs oil in the same places. Store the grinder in a dry, dust-free area with the disc removed. This helps protect the tool, the disc, and the spindle from damage.
Rust Prevention for Metal Edges
Freshly ground metal can rust faster because grinding removes old coating, paint, scale, or oil. After you smooth the edge, wipe away dust and grit with a clean rag. Keep the surface dry before you apply any protective coating.
For shop tools or non-food metal parts, use a rust-inhibiting spray, light machine oil, primer, paint, or another coating that matches the job. For kitchen tools or food-contact items, use only a food-safe oil or finish that suits that material. Do not use shop oil on anything that touches food.
Check the edge later and reapply protection when needed. Stainless steel and galvanized metal resist rust better than untreated steel, but grinding can still expose areas that need care. Good rust prevention keeps the edge safer, cleaner, and easier to maintain.
Avoiding Common Mistakes in Edge Smoothing
One common mistake is using the wrong type of disc. A cutting wheel is made for cutting, not side grinding or edge smoothing. Use a grinding wheel, flap disc, or sanding pad that matches the task and material.
Another mistake is pressing too hard. Heavy pressure can overheat the metal, wear out the disc, and make the grinder harder to control. Use light pressure and make several passes instead of trying to finish the edge in one pass.
Do not grind a loose workpiece. Clamp the part before you begin so it can’t shift, twist, or fall. Also inspect the disc before each use, because a cracked or worn disc can fail at high speed.
- Use the right disc for the material.
- Keep the guard in place.
- Clamp the workpiece before grinding.
- Let the grinder reach full speed before contact.
- Use light pressure and steady movement.
- Stop if the disc chatters, catches, or vibrates.
Selecting the Right Grinding Disc for Edge Smoothing
Selecting the right grinding disc for edge smoothing helps you get a clean finish with less effort. A flap disc with 40 to 60 grit works well for the first smoothing pass on many metal edges. Then you can move to 80 to 120 grit for a cleaner final surface.
Use a grinding wheel made for metal when you need faster material removal. Use a flap disc when you want a smoother blend and better control. Use a sanding pad for softer materials or final finishing, when you need to reduce gouging.
Always check the maximum RPM rating on the disc before you install it. The disc must match or exceed your grinder’s speed rating. Install the disc while the grinder is unplugged, tighten it correctly, and confirm that it spins freely before use.
Note: Never use the side of a cutting wheel for grinding unless the wheel label clearly says it supports that use.
Products Worth Considering
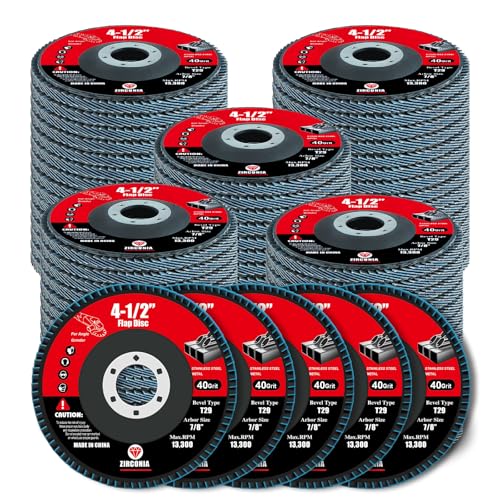
【Package Include】60-Pack Set with 40 Grit T29 Flap Disc—is ideal for your grinding needs of multiple scenarios

40PCS 60 Grit assorted pack,4-1/2 Inch Diameter, 7/8 Inch Arbor

PREMIUM QUALITY: These angled flap discs, also known as cut off wheels 4 1/2 inch, are constructed with industrial grade premium zirconia abrasive for strength, durability, and extended disc life as it holds up to high temperatures and pressure.
Tips for Ensuring Safe and Effective Grinding
Safe grinding starts before the disc touches the workpiece. Check your setup, protect your body, and control where the sparks go. A few simple habits can prevent most common problems.
- Inspect the angle grinder: Check the grinder, guard, cord, switch, and disc before each use.
- Check the RPM rating: Make sure the disc rating meets or exceeds the grinder speed.
- Secure the workpiece: Use clamps or a vise to stop movement while grinding.
- Maintain a firm grip: Hold the grinder with both hands and use the side handle.
- Use light pressure: Let the disc cut without forcing it into the edge.
- Control the sparks: Aim sparks away from your body, cords, sawdust, and flammable items.
Stop grinding if you feel strong vibration, hear cracking, or notice the disc wearing unevenly. Let the tool stop fully before you set it down. Replace damaged discs instead of trying to finish the job with unsafe equipment.
Frequently Asked Questions
How do you use an angle grinder step by step?
Secure your workpiece, put on safety gear, install the right disc, and let the grinder reach full speed. Hold it with both hands, use light pressure, and move it steadily across the edge. Stop often to check the result and switch to finer grit for finishing.
What safety precautions should you take before using a grinding machine?
Wear eye protection, a face shield, gloves, hearing protection, and a dust mask or respirator. Inspect the tool, disc, guard, cord, and switch before use. Clear flammable items, clamp the workpiece, and keep sparks pointed away from your body.
Should you push or pull a grinder?
Use the direction that gives you the best control while keeping sparks and kickback risk away from you. For many edge-smoothing tasks, a controlled push can feel steadier than pulling. Keep both hands on the tool and avoid any movement that makes the disc catch.
What is the best angle for smoothing sharp edges?
For light edge smoothing, use a shallow angle of about 5° to 10°. For faster material removal, a 20° to 30° angle can work, but it needs more care. Start shallow if you want better control and a smoother finish.
Can you use a cutting disc to smooth edges?
You should not use a standard cutting disc for side grinding or edge smoothing. Cutting discs are thin and can break if you apply side pressure. Use a grinding wheel, flap disc, or sanding pad instead.
How do you know when the edge is smooth enough?
The edge should no longer feel sharp, jagged, or likely to cut your hand during normal handling. Check it with a gloved hand after the grinder stops fully. For a cleaner finish, use finer grit or hand sanding after the main grinding pass.
Conclusion
Smoothing sharp edges with an angle grinder works best when you focus on safety, control, and light passes. Choose the right disc, clamp the workpiece, and keep the grinder moving so you don’t overheat or gouge the metal. After grinding, clean the tool and protect bare metal from rust. With steady practice, you’ll get safer edges and cleaner results on each project.


