Prep the welded seam by removing all primer, grinding it smooth, checking for pinholes, and wiping it clean with lacquer thinner. Apply seam sealer on the backside, then spread body filler thinly and evenly at least 3 inches beyond the repair. Let it cure, then block sand with long and short blocks until the seam is level. Use a guide coat to find low spots, fill flaws, then prime with epoxy for paint-ready protection and better results ahead.
Prep the Welded Seam for Filler
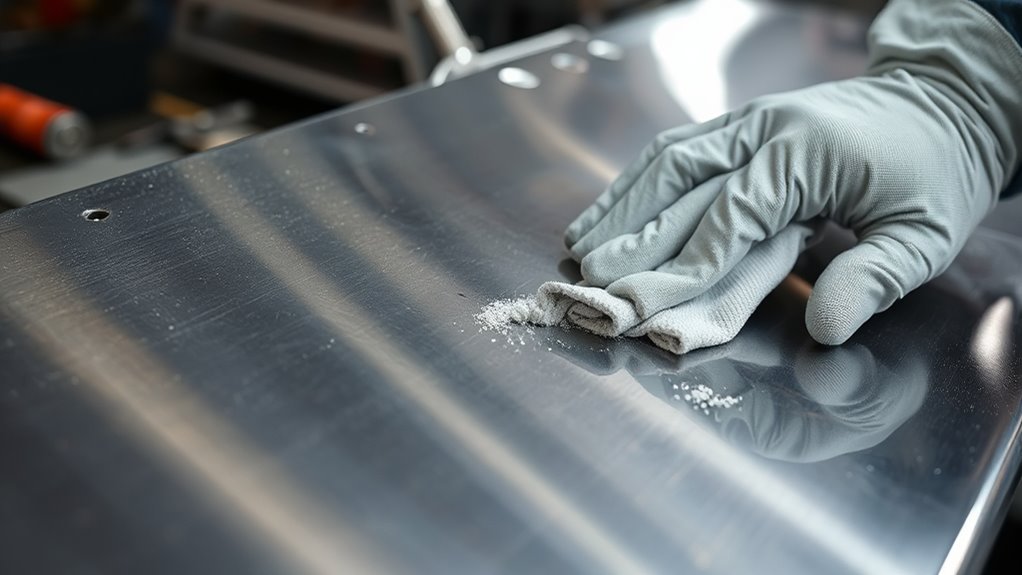
Before you apply body filler, make sure the welded seam is fully prepped for proper adhesion. Remove every trace of primer from the welded seam so the filler can bond cleanly.
Inspect for pinholes, then grind them down until you have a smooth surface. If the panel includes lead, lightly sanded it with 36 grit to roughen it without gouging the metal.
Use a hammer behind the seam to push out low spots and even the panel before you fill it. This step helps you work with the metal, not against it.
On the reverse side, apply a seam sealer to block moisture and reduce corrosion risk. Additionally, ensure you’re wearing flame-resistant clothing to protect yourself during the process.
When you finish, the area should feel solid, clean, and ready for body filler. Good prep gives you stronger adhesion and lets you reclaim the panel with less grinding later.
Products Worth Considering

For professional use only – not for retail sale
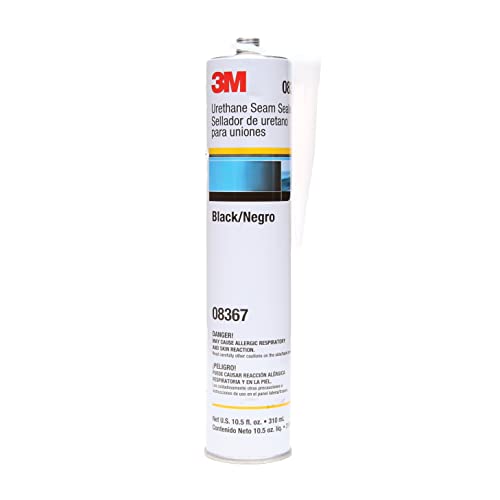
SINGLE COMPONENT FORMULA: Adheres well to bare metal, primed metal and painted surfaces
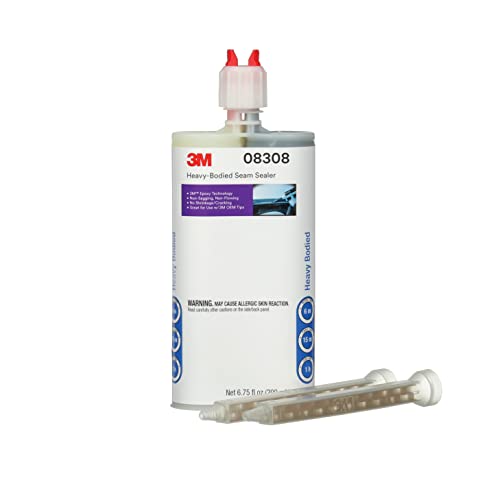
HIGH-PERFORMANCE: Two-part epoxy seals vertical and horizontal seams to match OEM seals
Spread Body Filler Across the Seam
Spread the body filler evenly across the welded seam, and extend it at least 3 inches beyond the repair area so you get a smooth blend and strong adhesion.
Use a plastic scraper to spread the body filler in firm, even passes; this gives you control, cuts waste, and limits sanding later. Keep the application thin and consistent over the welded seam, then let it cure fully before you touch it.
Once hardened, inspect for imperfections such as pinholes, edges, or low spots that need more filler or light sanding. Your goal is a seamless shift into the surrounding metal, not a hard ridge.
If the repair looks sound, apply a high build primer to improve adhesion and help level minor flaws before paint. Additionally, ensure the surface is clean and free of moisture to promote better adhesion of the filler.
Work clean, stay precise, and trust the process—your panel can return to a smooth, liberated finish without excess material or unnecessary labor.
Products Worth Considering
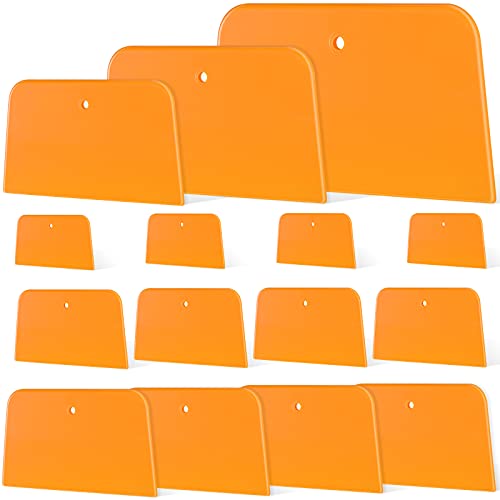
What You Will Receive: you will receive 2 sets of body filler spreaders with the shape of trapezoid, each set of 3 pieces, 6 pieces in total; The body filler spreaders are sufficient to meet your various applying needs, and you can share them with your family members

Basic tools for better application of products

What You Will Receive: you will receive 3 sets of body filler spreaders with the shape of trapezoid, each set of 4 pieces, 12 pieces in total; The body filler spreaders are sufficient to meet your various applying needs, and you can share them with your family members
Block Sand Until the Seam Is Level
Block the filler with a sanding board until the seam is level with the surrounding metal, using long, short, and flexible blocks to match the panel’s shape. You’ll sand with light pressure and steady strokes so you don’t carve dips into the filler or work-harden the metal.
- Use a long block on broad areas to keep the repair flat.
- Switch to a short block near edges and tight curves.
- Keep your motion consistent and check the seam often for imperfections.
- Stop when the metal just shows through, leaving the filler level or slightly low.
A thin contrasting color coat, like black paint, can reveal missed spots after sanding.
Reblock any low areas with the same controlled pressure, then sand again until the repair feels even to your hand and eye. Remember that proper surface preparation is essential for achieving a smooth finish.
Use a Guide Coat to Find Low Spots

Lightly mist a contrasting guide coat, such as black spray paint, over the sanded filler so low spots stand out as you block sand. On welded panels, this thin guide coat helps you read the body filler surface fast and with control.
Mist a contrasting guide coat over sanded filler to reveal low spots fast and keep block sanding under control.
Use a long block and even pressure; the guide coat disappears first on highs, while low spots keep color. Stop often and inspect the surface under good light. If you still see imperfections, add more filler, let it cure, and sand again.
Keep the pattern flat so the repair stays level with the surrounding metal and the finish stays smooth. Don’t chase every mark—chase the shape. Remember, ensuring that all zinc residues are removed before applying filler can significantly enhance adhesion and overall finish quality.
When the guide coat is fully removed, you know the panel is ready for primer. That final check protects your paint work and keeps hidden flaws from showing later.
Fill Pinholes With Stopper Putty
Inspect the cured body filler for pinholes, then seal any defects with stopper putty before sanding.
Use a plastic scraper to apply a thin knifing layer over the repair, keeping the coat even and localized.
After it dries, wet sand with 240-grit paper and recheck for any remaining imperfections. Additionally, ensure that the surface is clean and free of contaminants to promote better adhesion of the properly prepared welds.
Inspect And Seal Pinholes
Check welded seams carefully for pinholes by shining a light from the reverse side to expose any defects before you apply filler.
You inspect, seal, and free the surface from weak spots so your repair can hold. Clean the area, then use a plastic scraper to press stopper putty into each pinhole without excess buildup.
- Inspect the welded panel under backlight.
- Clean debris so the stopper putty bonds.
- Seal pinholes with a thin, controlled pass.
- After cure, sandpaper the surface lightly with 240 grit.
Keep checking as you work; if any pinholes reappear, reapply stopper putty and level them again.
This keeps the filler foundation durable, smooth, and ready for the next stage without surrendering to defects.
Apply Thin Stopper Layers
Spread a thin layer of stopper putty over the filled areas with a plastic scraper, pressing it into any remaining pinholes so it bonds to the body filler.
On welded panels, inspect the repair first, then apply the stopper putty only where you see defects.
Keep the stroke even and light so you build a thin layer that levels low spots without adding extra sanding work.
Work in one pass to chase a smooth finish and let the putty cure fully before wet sanding with 240-grit paper.
If pinholes or low spots still show, repeat the repair with another controlled application.
This method helps you refine the surface, protect your labor, and keep the panels ready for the next stage without losing control of the finish.
Prime the Repaired Panel for Paint
Inspect the repaired panel for any low spots, scratches, or dust, and block sand it smooth so the primer will bond properly.
Choose an epoxy primer for strong adhesion and moisture protection, then apply it in light, even coats and let each coat dry fully.
Before paint, check the surface again and fine-sand any flaws until you’ve got a clean, paint-ready finish. Additionally, ensure the surface is free from contaminants like moisture that could affect adhesion and finish quality.
Surface Inspection
Once you finish block sanding, mist the repaired area with a light coat of black paint so you can spot low spots, pinholes, or other imperfections.
This surface inspection lets you confirm the body filler is sanded and smooth across the work surface. Watch the repair area from different angles; the black paint reveals low points that need more filler or sanding before you move on.
Keep the panel clean, then apply a primer coat over the whole repair to support paint adhesion and lock in a uniform base.
Check that every section feels even so your final paint job won’t show defects.
- Inspect for flaws.
- Correct low points.
- Clean the work surface.
- Seal the repair area.
Primer Selection
After you’ve checked the filler work and the panel feels uniform, choose an epoxy primer to lock in adhesion over repaired areas, especially where you used filler or worked over lead seams.
Your primer selection should prioritize bonding and corrosion resistance, not shortcuts. Wipe the surface with lacquer thinner to remove contaminants, then spray an even coat at 1-2 mils with a gun. Keep the film thin enough to preserve shape and detail.
Respect the full cure time, usually 24 hours, so the primer hardens before paint application. After it cures, inspect for imperfections. If you spot them, lightly sand with 400 grit to build a smooth base.
That preparation gives you control, consistency, and a clean foundation for the finish.
Paint-Ready Finish
Block sand the repaired panel until it’s smooth and even, then spray a high-build primer over the filled area to improve adhesion and create a uniform base for paint.
Your body filler on the welded panel should now form a smooth surface that supports the next stage of the repair process.
Use block sanding to level highs and lows, then inspect imperfections under good light.
Apply high build primer in even coats to boost paint adhesion and seal the panel.
Keep the area clean so dust won’t compromise the flawless finish.
Let the primer cure for the full drying time, usually 24 hours, before you sand again or lay down paint.
- Level the panel
- Prime evenly
- Inspect imperfections
- Respect drying time
Frequently Asked Questions
Can You Put Body Filler Over Welds?
Yes, you can, if you use proper weld preparation techniques, surface cleaning, and choosing fillers. Apply thin layers, respect curing times, then use sanding techniques for repair durability, paint compatibility, weather considerations, and cost implications.
When Not to Use Body Fillers?
Never use body fillers on rust, flexing panels, or structural repairs. Guarantee proper surface preparation, adhesion techniques, curing times, application tools, paint compatibility, sanding methods, cost considerations, drying conditions, and repair techniques.
Can You Apply Body Fillers Over Bare Metal?
Yes, you can apply body fillers over bare metal if you choose proper body filler types, use careful surface preparation, apply adhesion techniques, respect curing times, sand correctly, check paint compatibility, and account for temperature effects with suitable application tools and repair techniques for clean finishing touches.
What Primer to Use Under Body Fillers?
Use epoxy primer under body fillers; it offers strong adhesion properties, filler compatibility, and durability factors. Prep the surface carefully, respect curing time, and use high-build primer only if needed before sanding methods and finishing products.
Conclusion
You’ve now got the welded seam prepped, filled, sanded, and checked for low spots. If you worked carefully, the panel should feel flatter than a glass table and be ready for final primer. Don’t rush the last inspection: fix any pinholes with stopper putty, then re-prime to lock in a smooth surface. With solid prep and patient block sanding, you’ll set yourself up for a clean, durable paint finish that blends the repair properly.


