Bending auto body panels with a sheet metal brake is mostly about layout, setup, and sequence. Measure from fixed reference points, mark each bend line clearly, set the brake for the sheet thickness, make a test bend on scrap, and then form the real panel in controlled steps. That approach helps you avoid crooked flanges, stretched edges, cracked bends, and panels that fight the vehicle opening.
Quick Answer
To bend auto body panels with a sheet metal brake, mark accurate bend lines, match the brake setup to the sheet thickness, clamp the panel evenly, test springback on scrap, and bend the largest sections first. Keep your hands clear of pinch points and check fitment after each bend.
Key Takeaways
- Use the same sheet thickness as the original panel whenever possible, and check your brake’s rated capacity before bending heavy stock.
- Measure from fixed datum points, mark fine bend lines, and test the bend on scrap from the same sheet before bending the real panel.
- Set clamp pressure evenly across the full width so the panel cannot creep, twist, or slip during the bend.
- Bend large flanges and wide areas first, then finish smaller returns, hems, boxes, and pans.
- Wear eye protection and gloves, keep fingers out of pinch points, and use ventilation if the panel will be welded, cut, or heated later.
At a Glance
| Time Required | 30 minutes to 2 hours for a simple panel, longer for boxes, pans, or test-fit work |
| Difficulty | Moderate; accurate layout and careful setup matter more than force |
| Tools Needed | Sheet metal brake, tape measure, calipers, square, Sharpie or fine marker, angle gauge, scrap test piece, deburring tool, gloves, and safety glasses |
| Cost | Low if you already own the brake; material cost depends on sheet size, steel type, and gauge |
Warning: A sheet metal brake creates pinch points at the clamp bar and bending leaf. Keep fingers away from the bend line, support long panels before clamping, and wear safety glasses with side protection when cutting, deburring, drilling, or grinding sheet metal.
Measure and Mark Bend Lines
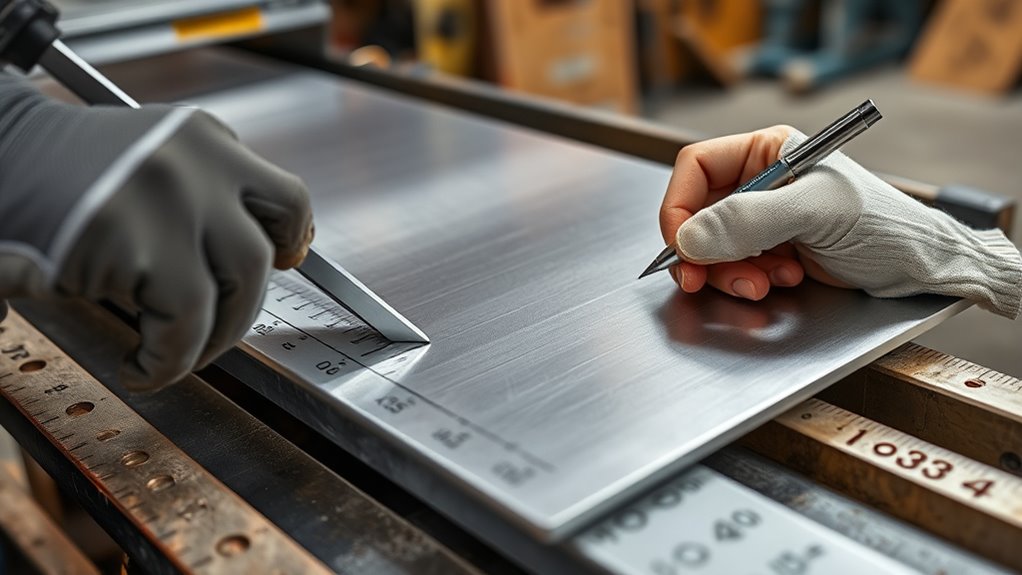
Start by measuring the auto body opening or the original panel, then transfer those dimensions to the replacement sheet. Use one fixed edge as your datum so every measurement comes from the same reference point. That prevents small errors from stacking up across the panel.
Use a tape measure for rough layout, calipers for critical dimensions, and a square to keep bend lines straight. Mark with a fine Sharpie line or a light layout mark. Avoid wide marker strokes because the clamp bar needs a clear line to register against.
Check the panel thickness before you commit. Thicker sheet needs more forming force and usually needs a larger inside bend radius than thinner sheet. If you are matching an existing auto body panel, use the same thickness when possible so the new panel welds, fits, and moves like the surrounding metal.
Keep each mark legible and separate from trim lines, cut lines, and flange lines. Label bend direction if the panel has several bends. A simple “up,” “down,” or arrow mark can save you from bending a flange the wrong way.
Choose the Right Sheet Metal and Bend Radius
Auto body panels are usually made from thin steel, but the correct gauge depends on the vehicle, the panel location, and the original part. Many patch panels and non-structural body skins are near 20-gauge, while some stronger repair areas may use 18-gauge or thicker material. Do not guess when the old panel is available. Measure it with calipers after removing paint, rust scale, seam sealer, or heavy coating from the measuring spot.
Before you bend, check three things:
- Material type: mild steel, galvanized steel, aluminum, and stainless steel behave differently.
- Material thickness: thicker sheet needs more force and may not form tightly in a light-duty brake.
- Brake rating: a brake may handle a short piece of heavier sheet but not the same gauge across its full width.
The inside bend radius should not be forced smaller than the sheet and brake can handle. If the bend cracks, looks stretched, or leaves a sharp crease where you wanted a smooth radius, use a larger radius, reduce the bend severity, or remake the panel from a more suitable material.
Note: Gauge numbers are not universal across all metals. Steel, galvanized steel, stainless steel, and aluminum can have different actual thicknesses for the same gauge number. Measure the sheet instead of relying only on the gauge label.
Set the Sheet Metal Brake
Set the sheet metal brake on a stable, level surface before you load the panel. A brake that rocks or twists can pull the bend out of square. If the machine is designed for bench or floor mounting, secure it before bending large panels.
Clean the bed, clamp bar, and bending leaf so dirt or weld spatter cannot dent the sheet. Then slide the panel into the brake and align the bend line with the brake edge. On many leaf brakes, the bending leaf edge is set slightly below the bed edge for clearance, but the exact setting depends on the brake design. Follow the brake manual when it gives a specific clearance.
Set the stop rod or angle stop to the target angle if your brake has one. For most auto body flanges, 90 degrees is common, but you may need a slight overbend to compensate for springback.
Measure and Align Metal
Measure the sheet metal’s length and width before clamping. Confirm that it matches the panel pattern and that the edge sits parallel to the clamping bar. Use a square at both ends instead of trusting your eye.
| Checkpoint | What to Confirm |
| Length | The blank is long enough after bend allowance and trimming |
| Width | The flange or panel face matches the repair area |
| Squareness | The bend line is square to the panel edge unless the design calls for an angle |
| Support | Long or flexible panels are supported so they do not sag during clamping |
Once the sheet reads true, pull the clamping handles down evenly. If one end clamps first and the other floats, reset the panel before bending.
Adjust Clamp Pressure
Adjust clamp pressure so the brake grips the metal without marking, crushing, or letting it slip. Tighten or loosen the linkage nuts in small steps, then check whether the clamp bar contacts evenly across the full width.
Use lighter pressure on thin sheet and firmer pressure on thicker sheet, but stay within the brake’s rated capacity. Do not force 12-gauge steel in a light-duty brake unless the manufacturer rates that brake for the material, width, and bend angle you are attempting.
After each change, test on scrap from the same sheet. If the scrap creeps, twist appears in the bend, or the line shifts, increase pressure slightly or correct the alignment before bending the real panel.
Set Bend Angle
Use an angle gauge or protractor to set the target bend angle. A stop rod helps repeat the same angle, but it does not replace measuring. Make one test bend, remove the scrap, measure the final angle, and note how much springback occurred.
- Set the brake for the planned angle.
- Bend scrap from the same sheet.
- Measure the final angle after springback.
- Adjust the stop toward a slight overbend if the part springs open.
- Repeat until the test piece matches the required angle.
This test-bend step is especially important for replacement panels, because even a few degrees can make a flange fight the rocker, quarter panel, floor edge, or wheel opening.
Dial In Clamp Pressure
Clamp pressure controls whether the panel stays fixed during the bend. Too little pressure lets the sheet walk. Too much pressure can dent thin body steel, flatten a bead, or leave clamp marks on an exterior surface.
Match the pressure to the material thickness, surface finish, and bend length. Use clean scrap, masking tape, thin cardboard, or soft protective sheet only when it does not reduce grip or change the bend location. For show surfaces, test first so the clamp does not print into the panel.
Set Even Clamp Pressure
Set even clamp pressure by adjusting both ends of the clamp bar until the sheet grips consistently from left to right. Watch for gaps under the clamp bar. A gap near one end can cause the bend to start crooked and grow worse as the leaf rises.
- Clamp a scrap piece the same width as the workpiece when possible.
- Check that the scrap cannot slide under hand pressure.
- Inspect both ends for clamp marks, slip, or uneven pressure.
If the brake uses set screws, cap screws, or link nuts, tighten them evenly. Loose hardware can make one bend good and the next bend wrong.
Match Pressure to Thickness
Thin sheet metal needs enough pressure to stay put, but not so much that the clamp bar leaves a crease. Heavier sheet needs more pressure and more brake capacity. When you change from 20-gauge to 18-gauge, or from mild steel to aluminum, reset the brake instead of using the last setting.
A feeler gauge can help you check gaps when the brake design allows that adjustment. If the panel slips, increase clamp pressure in small steps. If the panel shows clamp damage, reduce pressure, clean the clamp faces, or protect the surface with a thin test-proven barrier.
Prevent Slip and Distortion
To prevent slip and distortion, keep the clamp bar parallel to the bending leaf and support the panel on both sides. Long panels can sag outside the brake and pull the bend out of line. A helper or roller stand can keep the sheet level.
- Check alignment before every bend.
- Support long panels so their weight does not twist the bend.
- Use the stop rod or angle stop for repeat bends.
- Stop immediately if the sheet creeps during the pull.
Do not try to correct a slipping bend while the leaf is moving. Lower the leaf, unclamp the panel, realign the sheet, and reset the pressure.
Make Your First Clean Bend

Before bending the actual panel, practice on a scrap strip cut from the same sheet. Mark one line, clamp it, bend it, and measure the final angle. This tells you how the material behaves in your brake.
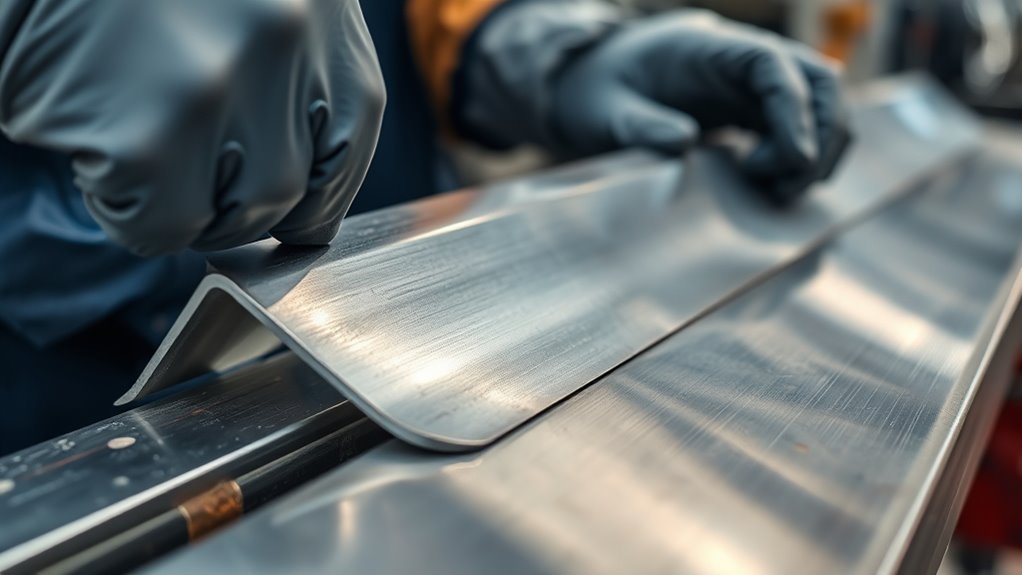
When you are ready for the real bend, place the bend line at the brake edge and check that the panel is fully supported under the clamp bar. Tighten the clamp evenly, hold the bending leaf with steady pressure, and pull through the bend in one smooth motion.
Do not jerk the leaf upward. A sudden pull can shift thin sheet or leave a wavy bend line. A smooth, controlled pull gives the metal time to form along the full bend.
Pro Tip: Write the test-bend result directly on the scrap, such as “92 degrees on brake = 90 degrees after springback.” Keep that strip until the panel is finished so you can repeat the setup.
Bend Auto Body Panels in Order
Bend auto body panels in a planned sequence. Start with the largest surface or longest flange first because it is easiest to control while the panel is still flat. Save small return flanges, hems, and boxed corners for later.
A good sequence looks like this:
- Mark every bend line and bend direction.
- Make a scrap test bend and adjust for springback.
- Form the widest or longest bend first.
- Test-fit the panel against the vehicle opening.
- Form secondary bends, smaller returns, and corner details.
- Deburr and check the final fit before welding or fastening.
After each bend, hold the panel in place on the vehicle or against a template. It is easier to correct a small angle now than to fight a fully formed panel later.
If the part will be welded and the metal is galvanized, remove the zinc coating from the weld area and use proper ventilation. OSHA addresses ventilation requirements for welding or cutting zinc-bearing materials, and CDC/NIOSH notes that welding fumes are composed of metals and exposure can increase in confined spaces.
Keep Bends Tight and Accurate
Accurate bends come from accurate setup. Read the panel twice, align the brake once, and avoid bending until the sheet sits exactly where it should. If the bend line is off by even a small amount, the flange may miss the mating edge or create a gap you cannot hide with weld.
Use setback to control where the bend forms relative to the brake edge. The setback depends on material thickness, bend radius, and the finished flange dimension. For repeated parts, make one sample flange and compare it with the vehicle before cutting all your blanks.
Do not repeatedly bend and unbend the same area. Each correction stretches and work-hardens the metal. If a bend is badly misplaced, it is often cleaner to remake the piece than to force a damaged flange into shape.
Understand Springback, Bend Allowance, and Setback
Springback is the amount a bend opens after the brake pressure is released. Mild steel, aluminum, stainless steel, and galvanized sheet can all spring back differently. The same metal can also behave differently when you change bend radius, bend length, or grain direction.
Bend allowance is the material length used through the bend. If you ignore it, a flange can end up too short or too long after forming. For simple repair patches, you can often control this with a test strip and careful trimming. For precise boxes, pans, brackets, and repeat parts, calculate or test the flat pattern before cutting the final blank.
Setback is the distance that helps place the bend line so the outside dimensions finish correctly. When fitment matters, test first, measure the result, and adjust the layout before bending the real panel.
A scrap test bend is faster than repairing a bad panel. Use the same metal, same bend length if possible, and the same brake setting before forming the finished piece.
Form Hems and Flanges
Flanges add stiffness and give you a surface for welding, spot welding, bonding, or fastening. Keep flange width wide enough for the brake to grip and for the repair method you plan to use. A very narrow flange is harder to clamp and easier to distort.
To form a hem, bend the edge past 90 degrees first, then flatten it in a second operation if your brake is designed for that work. Do not crush the hem so hard that it cracks the outer edge. If the hem will be visible, test the fold on scrap first.
- Mark the flange or hem line clearly.
- Clamp the panel with even pressure.
- Make the first bend smoothly.
- Check angle and edge straightness.
- Finish the hem or flange only after the test piece looks right.
For repair panels, a clean flange is more useful than an overly sharp one. The goal is a straight, consistent edge that fits the vehicle and gives you enough surface for the next operation.
Shape Boxes and Pans
Boxes and pans need more planning than a single flange. Lay out the part on paper or cardboard first, then make a cardboard mockup. A mockup lets you check width, height, flange direction, and corner clearance before cutting metal.
Mark the pattern on the sheet and remove the corner waste that will not be part of the finished shape. Keep flanges wide enough for the brake to clamp securely. For small pans, a 1-inch flange is often easier to control than a very narrow edge.
Make the first two bends on opposite sides when the design allows it. Then form the remaining sides while checking that the part stays square. If you use a box-and-pan brake, arrange the fingers so they clear already formed sides.
After bending, secure the corners with the method that fits the repair: plug welds, spot welds, seam welds, rivets, or panel bonding adhesive where appropriate. If welding galvanized or coated metal, remove coating from the weld zone and use adequate ventilation before heating the metal.
Fix Bowing, Creeping, and Overbending
If the panel comes out wrong, diagnose the setup before blaming the sheet metal. Most bending problems come from uneven clamping, poor alignment, unsupported sheet weight, wrong angle stops, or a brake that is out of adjustment.
| Problem | Likely Cause | Fix |
| Bend bows in the middle | Brake flex, long bend, or material near capacity | Check brake rating, shorten the bend if possible, or use heavier equipment |
| Sheet creeps during bending | Clamp pressure too light or clamp faces dirty | Clean clamp faces and increase pressure in small steps |
| Angle is too open | Springback not compensated | Test on scrap and set a slight overbend |
| Bend is twisted | Panel was not square or was unsupported | Realign with a square and support long sheet outside the brake |
| Outer bend edge cracks | Radius too tight, metal too hard, or repeated re-bending | Use a larger radius, replace damaged metal, and avoid repeated correction bends |
Make one correction at a time. If you adjust clamp pressure, angle, and alignment all at once, you will not know which change fixed the problem.
Maintain the Brake for Better Results
A clean, adjusted brake makes straighter bends. Before each session, wipe dirt from the clamp bar, bed, and bending leaf. Check that the brake sits level and that handles, pivots, bolts, and adjustment screws are tight.
Lubricate moving points according to the brake manufacturer’s instructions. Do not oil clamping faces that need friction to hold the sheet. If the brake starts moving unevenly, bowing, or leaving different angles from one side to the other, stop and adjust the tool before bending finished panels.
Keep the Brake Level
Use a bubble level to check the brake front to back and side to side. Recheck after moving the machine or after bending heavy material. A slight twist in the stand or bench can show up as a crooked bend.
- Check level before bending a finished panel.
- Confirm the brake is mounted securely.
- Support long panels so they do not pull the machine or sheet out of position.
Lubricate and Tighten Regularly
Inspect the brake before each project. Tighten loose hardware, check pivot points, and lubricate only the parts the manufacturer recommends. If the bending leaf or clamp bar is visibly bowed, worn, or damaged, repair the brake before using it on a panel that matters.
Good maintenance reduces drag, protects accuracy, and makes the brake easier to control. It also helps prevent the small setup changes that cause one flange to fit and the next one to miss.
Safety Before Welding, Cutting, or Grinding
Bending is only one part of auto body panel work. If you cut, grind, weld, or heat the panel later, treat that as a separate safety step. Wear safety glasses with side protection when flying particles are possible, and use the correct face, hand, hearing, and respiratory protection for the task.
Use extra caution with galvanized or zinc-coated steel. When zinc-bearing coatings are welded or cut indoors or in confined spaces, ventilation requirements become more serious. Review OSHA welding and ventilation guidance and use local exhaust or approved respiratory protection when required.
Keep flammable materials away from welding and grinding. Deburr sharp edges before handling the panel repeatedly, and do not hold small parts near the brake’s pinch area with your fingers.
Frequently Asked Questions
What gauge sheet metal should I use for auto body repair?
Use the same thickness as the original panel whenever possible. Many non-structural body patches are near 20-gauge, while some stronger areas may be closer to 18-gauge or thicker. Measure the original clean metal with calipers instead of guessing from a gauge chart.
What are common mistakes when using a sheet metal brake?
Common mistakes include marking a wide or crooked bend line, clamping with uneven pressure, bending without a scrap test, ignoring springback, forcing metal beyond the brake’s capacity, and forming small bends before large bends. Support long panels so their weight does not twist the bend.
How does a sheet metal brake work?
A sheet metal brake clamps the sheet under a top bar. The hinged bending leaf then lifts the exposed section of metal and forms it along the clamp edge. The bend angle depends on alignment, material thickness, bend radius, brake setup, and springback.
What is the Rule of 8 on a press brake?
The Rule of 8 is a press-brake guideline that often refers to choosing a lower V-die opening about eight times the material thickness for mild steel air bending. It is not a bend-length limit, and it does not directly apply to every manual leaf brake.
Can I bend galvanized sheet metal for auto body work?
Yes, you can bend galvanized sheet if the brake is rated for the thickness and width. The bigger concern comes later if you weld, cut, or heat the coating. Remove coating from the weld area and use proper ventilation because zinc-bearing fumes can be hazardous.
Why did my bend spring back after I released the brake?
Springback happens because part of the bend is elastic. After you release the brake, the metal relaxes slightly. Make a test bend on scrap, measure the final angle, and set a controlled overbend if you need the finished panel to land at 90 degrees.
Conclusion
A clean auto body bend starts before the sheet ever moves. Measure carefully, mark fine lines, match the brake setup to the sheet thickness, and test springback on scrap. Keep the brake level, clamp the panel evenly, and bend large sections before small returns. When you work in that order, the panel fits better, the flange stays straighter, and you spend less time correcting mistakes.
Sources
- OSHA 1910.212, General Requirements for All Machines — supports machine guarding and point-of-operation safety guidance.
- OSHA 1910.133, Eye and Face Protection — supports eye protection guidance for flying particles and related hazards.
- OSHA 1910.252, Welding, Cutting, and Brazing General Requirements — supports ventilation guidance for welding and cutting zinc-bearing materials.
- CDC/NIOSH Welding Fumes and Manganese — supports welding-fume exposure and confined-space caution.


