Stick welding an exhaust pipe is possible, but it is one of the harder ways to repair thin automotive tubing. Your best chance of success comes from cutting back to solid metal, making a close-fitting joint, using the smallest suitable electrode, running only enough current to maintain a stable arc, and welding in short sections so the pipe can cool.
Quick Answer
To weld an exhaust pipe with a stick welder, remove the damaged metal, clean the joint to bright steel, clamp a tight-fitting butt or sleeve joint, and test the smallest compatible electrode on matching scrap. Tack the pipe at several points, then complete the joint with short, spaced welds while controlling heat and removing slag between restarts.

Stick welding can repair an exhaust pipe, but thin tubing requires clean fit-up, low heat input, and short welds.
Key Takeaways
- Replace metal that is deeply pitted, flaky, or too thin to hold a tack weld.
- A close-fitting sleeve joint is usually easier to stick weld than a wide-gap butt joint.
- E6013 is generally easier to control on clean mild steel; E6011 has a more forceful, penetrating arc.
- Use the current and polarity listed for the exact electrode product. Do not copy a generic low-amperage setting that falls outside its approved range.
- Control distortion with evenly spaced tacks and short welds placed around the pipe in a skip sequence.
- Remove all slag and perform a proper leak inspection before returning the vehicle to service.
At a Glance
| Time Required | About 1–3 hours, depending on access, rust, removal, fit-up, and leak testing |
| Difficulty | Intermediate to advanced, especially on thin original-equipment tubing |
| Tools Needed | Stick welder, suitable small electrodes, grinder or pipe cutter, clamps, wire brush, PPE, ventilation, fire extinguisher, and jack stands if the vehicle must be raised |
| Cost | Usually low if you already own the equipment; replacement tubing, a sleeve, abrasives, electrodes, and finishing products are the main costs |
Warning: Never work beneath a vehicle supported only by a jack. Use wheel chocks and correctly rated jack stands on solid ground. Do not weld near leaking fuel, fuel vapor, an unshielded fuel tank, fuel or brake lines, wiring, undercoating, upholstery, or other combustible material.
Can You Stick Weld an Exhaust Pipe?
You can stick weld solid mild-steel or stainless exhaust tubing, but the process has limits. Stick welding creates more concentrated heat, slag, and arc force than most beginners can comfortably control on thin pipe. It works best when the damaged section has been removed, the remaining wall is sound, and the joint fits closely.
If the tubing is paper-thin, heavily pitted, coated in deep rust, or surrounded by components that cannot be protected from heat and sparks, replacing the section or using MIG or TIG is usually the better decision. A repair is only worthwhile when there is enough solid metal on both sides of the joint to support a continuous, gas-tight weld.
The electrode may be strong enough for the job while still being too large and too hot for the pipe. On thin exhaust tubing, heat control matters more than the electrode’s advertised tensile strength.
When to Repair the Pipe and When to Replace It
Inspect a wide area around the leak before cutting or welding. Exhaust tubing often rusts from the inside, so a small visible hole may be surrounded by metal that has already lost much of its thickness.
- Repair the section when the surrounding pipe is solid, maintains its shape during cleaning, and can accept a tack without collapsing.
- Replace the section when rust flakes away in layers, the pipe crushes easily, pinholes continue to appear after grinding, or the damage extends around most of the circumference.
- Replace a failed flex joint rather than welding across its braided or corrugated flexible section.
- Inspect nearby hangers because a broken hanger can overload the repair and cause the new weld to crack.
- Use a qualified exhaust shop when the repair is close to a catalytic converter, fuel system, complex electronic equipment, or a structural attachment point that you cannot protect properly.
Pro Tip: Clean a test area several inches from the visible hole. If bright metal cannot be reached without opening more pinholes, stop patching and replace a longer section.
Identify the Exhaust Material Before Choosing an Electrode
Exhaust systems may use plain carbon steel, aluminized steel, several stainless grades, or specialty alloys. Appearance and magnet response can provide clues, but neither is a reliable grade test. Check the replacement-part description, service information, markings, or known tubing specification whenever possible.
Mild or Aluminized Steel
Mild steel is commonly repaired with a mild-steel electrode. Aluminized tubing has a metallic coating that should be removed from the weld zone so it does not contaminate the puddle or create unnecessary fumes. Grind both the outside and accessible inside edges to clean base metal.
Stainless Steel
Do not treat every stainless exhaust as the same alloy. A 308L filler is commonly matched to 304 stainless, while 309L is commonly used when joining austenitic stainless to carbon steel. Ferritic exhaust grades, including some 400-series tubing, may need a different filler or procedure. Confirm the base metal before selecting an electrode.
Use tools dedicated to stainless steel. A carbon-steel wire brush or an abrasive previously used on mild steel can embed free iron and create rust staining.
Unknown or Specialty Alloy
If the pipe may be titanium, a nickel alloy, or another specialty material, do not guess. An incorrect electrode can produce a brittle joint, poor corrosion resistance, or cracking. Identify the alloy and follow a qualified procedure.
Choosing the Best Stick Electrode for Exhaust Pipe
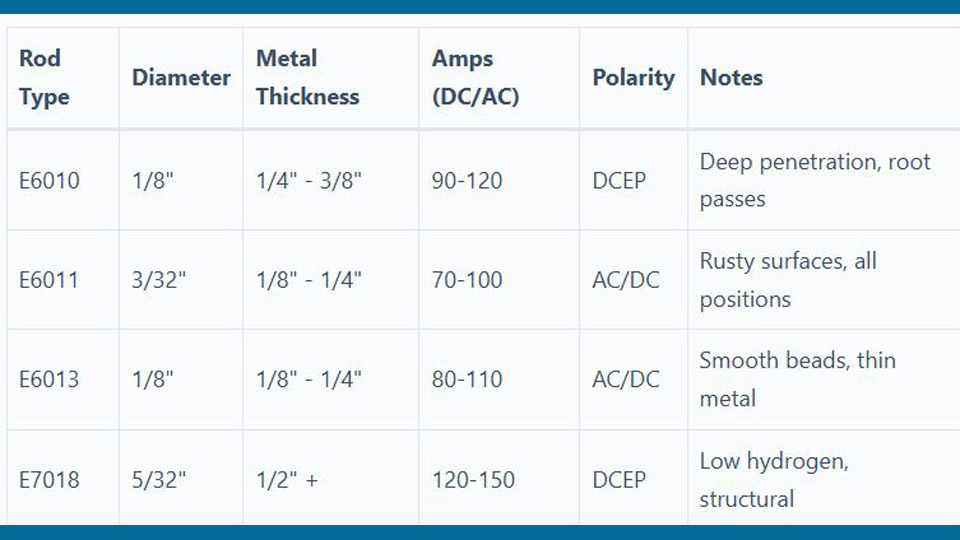
Electrode classification alone does not provide a safe current setting. Diameter, coating formulation, polarity, power-source characteristics, welding position, and manufacturer all affect the usable range. Read the label or product data sheet for the exact electrode you have.
| Electrode | Best Use | Thin-Pipe Considerations |
|---|---|---|
| E6013 | Clean mild steel, sheet-metal repairs, short welds, and operators who want a smoother, less forceful arc | Often the first mild-steel electrode to try. Use the smallest diameter available for your product and machine. |
| E6011 | Maintenance work where a forceful arc and stronger penetration are needed | Its penetrating arc can open holes quickly. Clean the metal anyway and practice before using it on thin tubing. |
| E7018 | Sound structural mild-steel work requiring a low-hydrogen electrode | Usually not the first choice for thin exhaust. Common 3/32-inch products require more current than many exhaust walls tolerate. |
| Stainless electrode | Known stainless-to-stainless or stainless-to-carbon-steel joints | Match the filler to both base metals. Do not use E309L as a universal answer for every stainless exhaust. |
Products Worth Considering

Product Introduction: E6013 welding rod is suitable for both AC and DC applications and can be used for all position welding

Product Introduction: E6013 welding rod is suitable for both AC and DC applications and can be used for all position welding

Diameter 1/16-Inch
Why the Electrode Diameter Matters
A smaller electrode generally needs less current and creates a smaller puddle. That gives you more control on thin tubing. However, not every classification or brand is sold in 1/16-inch diameter. Some E6013 products begin at 5/64 inch, and many commonly stocked rods begin at 3/32 inch.
For example, the current Lincoln Fleetweld 37 E6013 data sheet lists 45–75 amps DC for its 5/64-inch rod and 70–105 amps DC for its 3/32-inch rod. Its AC ranges are slightly higher. The Lincoln Fleetweld 180 E6011 data sheet lists 40–80 amps DC for 3/32 inch.
Note: These figures are manufacturer operating ranges, not universal settings. If the lowest stable setting for your available rod burns through the pipe, the correct fix is a smaller compatible electrode, a sleeve joint, thicker replacement tubing, or a different welding process.
Electrode Storage
Keep all electrodes clean and dry in accordance with the manufacturer’s storage instructions. Low-hydrogen electrodes such as E7018 have stricter exposure and redrying requirements than ordinary maintenance electrodes. Do not assume that a plastic box and desiccant restore a damp low-hydrogen electrode to specification.
Safety Before Welding an Exhaust System
Exhaust repair combines arc-welding hazards with vehicle, fire, lifting, coating, and fume hazards. Set up the job before striking an arc.
Support the Vehicle Correctly
- Park on a firm, level surface.
- Apply the parking brake and chock the wheels that remain on the ground.
- Use lifting points specified by the vehicle manufacturer.
- Lower the vehicle onto correctly rated jack stands.
- Shake-check stability before going underneath.
- Never rely on a hydraulic or scissor jack as the only support.
Remove the Exhaust When Practical
Removing the damaged section gives you better access, allows you to rotate the pipe, and keeps sparks and heat away from fuel lines, wiring, undercoating, the floor, and interior materials. Mark the pipe’s orientation before removal so hangers, flanges, oxygen-sensor bungs, and bends return to the correct position.
Protect the Vehicle’s Electrical System
If welding on the vehicle cannot be avoided, follow the model-specific service procedure. Depending on the vehicle, that may include switching off the ignition, waiting for modules to power down, disconnecting one or more battery cables, or protecting sensitive modules.
Attach the welding work clamp to clean metal on the same exhaust section and as close to the weld as practical. Do not allow welding current to travel through wheel bearings, hinges, electronic modules, braided straps, or unrelated assemblies. Vehicle-manufacturer instructions take priority over generic advice.
Control Fire Hazards
Move flammable liquids, oily rags, paper, sawdust, fuel containers, and other combustible material away from the work. Shield anything that cannot be moved, inspect the opposite side of panels or floors, and keep suitable extinguishing equipment ready. OSHA’s hot-work requirements provide useful fire-prevention principles, including added controls when combustible material could be exposed to sparks or heat.
Use the Correct PPE
- An arc-rated welding helmet with a filter shade suitable for the electrode size and current
- Safety glasses with side protection under the helmet
- Dry welding gloves
- Flame-resistant long sleeves and trousers without cuffs
- Leather footwear that covers the ankle
- Hearing protection when grinding or cutting
OSHA’s filter-lens table lists a minimum shade 7 for SMAW below 60 amps and shade 8 from 60 to 160 amps. Begin with a darker shade and lighten only enough to see the puddle without going below the applicable minimum.
Control Fumes and Coating Exposure
Use local exhaust or effective cross-ventilation that moves the plume away from your breathing zone. Do not weld in a closed garage or confined space. Outdoor work does not guarantee adequate ventilation if the fume rises directly into your helmet.
Remove paint, oil, rust scale, zinc, aluminized coating, sealant, and other contamination from the heat-affected area. Stainless welding can generate hazardous chromium compounds, including hexavalent chromium. Review OSHA’s guidance on controlling welding fumes and gases.
Warning: Never clean a weld area with chlorinated brake cleaner or another chlorinated solvent. Heat and ultraviolet radiation can break down chlorinated vapors into extremely hazardous compounds. Use a suitable non-chlorinated cleaner, keep it away from ignition sources, and let the surface dry completely before welding.
Tools and Materials
- Stick welder capable of running the selected electrode at a stable current
- The smallest suitable electrodes allowed by the electrode manufacturer
- Replacement tubing or a close-fitting repair sleeve made from compatible metal
- Angle grinder with a cutting wheel and suitable flap disc, or a pipe cutter
- Dedicated stainless abrasives and stainless wire brush when working on stainless
- Hand wire brush and chipping tool for slag removal
- Exhaust clamps, chain clamp, V-blocks, or another secure fit-up system
- Tape measure, marker, straightedge, and caliper if available
- Welding PPE, ventilation equipment, fire-resistant shielding, and extinguisher
- Wheel chocks and rated jack stands when the vehicle must be raised
- Leak-detection solution, low-pressure smoke equipment, or another controlled exhaust-leak testing method
Prepare the Exhaust Pipe
1. Inspect Beyond the Visible Damage
Brush and tap the surrounding area lightly with a hand tool to locate thin metal, but do not use a hammer test as proof of weld strength. Check seams, hangers, bends, flanges, muffler shells, and the opposite side of the pipe.
2. Remove the Damaged Section
Cut back to metal that keeps its full shape and thickness. Make the cuts square so the replacement piece can fit evenly around the circumference. A crooked cut creates gaps that are difficult to bridge with a stick electrode.
3. Clean the Inside and Outside
Remove soot, rust, paint, scale, plating, aluminized coating, oil, and road contamination from both sides of the joint where accessible. Clean a separate spot for the work clamp. Let any approved cleaner evaporate completely before welding.
4. Choose the Joint
A close-fitting sleeve joint is often the most forgiving arrangement for a thin exhaust repair. The sleeve supports the pipe edge and reduces the need to bridge a gap. Use compatible tubing with enough overlap to hold alignment without covering active rust.
A butt joint can produce a cleaner repair, but it demands accurate cuts and a nearly uniform fit. Avoid a wide root gap. Do not grind a heavy bevel into very thin tubing because that removes the metal you need to control the puddle.
5. Align and Clamp the Parts
Check the complete exhaust path before tacking. The tubing must clear the body, suspension, driveshaft, brake lines, fuel lines, and heat-sensitive components. Hangers should sit naturally without pulling the repair sideways.
Pro Tip: Draw alignment marks across the original pipe before cutting. Transfer the marks to the replacement section so bends, hangers, and sensor locations stay correctly clocked.
Set Up the Stick Welder
Follow the Electrode’s Polarity Requirements
Read the electrode label or current data sheet. Some E6011 and E6013 products run on AC and either DC polarity. Many E7018 products use DCEP or AC. Do not assume one polarity is correct for every brand or that DCEP automatically prevents burn-through.
Start Within the Manufacturer’s Current Range
Begin near the lower end of the approved range and test the combination on scrap of the same material, thickness, joint type, and position. The arc should start and remain stable without repeatedly sticking. The puddle should wet both edges without causing the pipe to collapse.
If the current required for a stable arc overheats the scrap, do not keep lowering it until the electrode barely functions. Change to a smaller compatible rod, improve the joint support, use thicker replacement tubing, or use MIG or TIG.
Place the Work Clamp Correctly
Clamp onto bright, clean metal close to the repair. A poor connection can cause difficult starts, arc instability, excess heat at the clamp, and current paths through parts that should not carry welding current.
How to Weld the Exhaust Pipe Step by Step
1. Practice on Matching Scrap
Use the same electrode, polarity, angle, position, and approximate joint design planned for the repair. Test several short welds, let them cool, remove the slag, and inspect both sides when possible.
2. Hold the Correct Angles
Set the work angle so the electrode points into the center of the joint. Use only a slight travel angle, generally dragging the electrode in the direction of travel unless the consumable manufacturer specifies otherwise. Keep the arc tight, normally no longer than the exposed electrode core diameter and often shorter on thin metal.
3. Tack the Joint Evenly
Place a small tack at the top, then another on the opposite side. Add tacks at the remaining quarter points and between them if needed. Recheck alignment after every few tacks. Stop and correct the fit if the pipe pulls out of position.
4. Weld in Short Sections
Do not attempt one continuous trip around thin tubing. Make a short weld, stop before the pipe overheats, then move to a cooler area on the opposite side. Continue skipping around the circumference so heat does not build in one location.
Use a narrow stringer rather than a wide weave. Watch the leading edges of the puddle. Both pieces should melt into the weld without the puddle becoming so large that it sags through the pipe.
5. Remove Slag Between Restarts
Let each section solidify, then chip and brush away the slag before overlapping the next weld. Welding over trapped slag can leave inclusions and leak paths. Clean the end crater as well as the bead surface.
6. Close Small Unwelded Areas Carefully
As the joint becomes nearly complete, the remaining sections may heat faster because they sit between previous welds. Use shorter arc-on time and allow more cooling. Do not chase a growing hole with a long arc or a wide circular motion.
7. Let the Pipe Cool Naturally
Do not quench the weld with water. Sudden cooling can distort the tubing, trap moisture under slag, and make inspection harder. Allow the assembly to cool in still air before cleaning and testing it.
How to Avoid Burn-Through
- Cut back to solid metal instead of trying to weld across thin rust.
- Use the smallest electrode approved for the selected product.
- Use a sleeve joint when it will provide useful backing and alignment.
- Keep the joint gap small and uniform.
- Use a tight arc instead of increasing arc length.
- Make short welds and move to a cooler section.
- Avoid wide weaving.
- Allow the pipe to cool between groups of welds.
- Practice on matching scrap before touching the actual exhaust.
- Switch to MIG or TIG when the pipe cannot tolerate the lowest stable stick-welding current.
Common Problems and Fixes
| Problem | Likely Causes | Corrective Action |
|---|---|---|
| Electrode keeps sticking | Current too low, poor work connection, weak starting technique, low machine OCV, or damp electrode | Verify the approved current range, clean and reposition the clamp, improve the start, and use a dry electrode. Increase current only within the manufacturer’s range. |
| Burn-through | Thin rusted metal, oversized electrode, excessive current, long weld time, wide gap, or long arc | Cut back farther, use a smaller rod or supported sleeve joint, shorten arc-on time, and let the pipe cool. |
| Cold, rounded bead | Insufficient current, travel too fast, poor angle, contamination, or an electrode operating below its stable range | Clean the joint, correct the angle, verify current, and retest on scrap. |
| Porosity | Oil, moisture, paint, coating, rust, damp electrode, or excessive arc length | Grind out the defective area, clean and dry the joint, replace questionable electrodes, and maintain a tight arc. |
| Slag inclusion | Welding over unremoved slag, poor angle, wide weaving, or incomplete overlap cleaning | Remove the defect, chip and brush every restart, and use narrow stringers. |
| Pipe pulls out of alignment | Too few tacks, poor clamping, or concentrated heat | Add balanced tacks, improve support, and weld in an alternating sequence. |
| Crack appears after installation | Exhaust misalignment, failed hanger, flex-joint movement, excessive grinding, or an unsuitable filler | Correct the mechanical load, replace damaged supports, and remake the joint with compatible materials. |
Finish and Inspect the Weld
Remove All Slag
Chip and wire-brush the entire circumference. Slag can hide pinholes, undercut, cracks, incomplete tie-ins, and missed sections. Wear eye protection because slag can release suddenly while cooling or chipping.
Grind Only When Necessary
Use a flap disc lightly to remove sharp projections or create needed clearance. Do not grind the bead flush simply for appearance. Thin exhaust tubing has little extra material, and aggressive grinding can turn an acceptable weld into a weak or leaking joint.
Protect Mild Steel
After the weld is clean, dry, cool, and verified, apply a coating specifically approved for exhaust temperatures and the pipe material. Follow the coating manufacturer’s surface-preparation, curing, and temperature instructions. Paint does not seal porosity or repair a defective weld.
Clean Stainless Correctly
Remove slag and contamination with stainless-only tools. Heat tint can indicate an oxidized, chromium-depleted surface. A stainless brush may remove superficial color but does not necessarily restore full corrosion resistance.
The IMOA and Nickel Institute stainless-fabrication guidance explains that passivation removes light iron contamination but does not remove oxide scale or the chromium-depleted layer. Depending on the alloy and service requirement, proper treatment may involve controlled pickling, electrochemical cleaning, electropolishing, or mechanical finishing followed by a suitable passivation process.
Warning: Stainless pickling products may contain highly hazardous acids, including hydrofluoric acid. Use only a commercial process with the required training, PPE, ventilation, neutralization, rinsing, and disposal controls, or send the part to a qualified finishing service.
Test the Exhaust for Leaks
A smooth-looking bead is not proof that the joint is gas-tight. Test only after the weld has cooled and all slag has been removed.
- Inspect visually: Look for pinholes, cracks, undercut, missed starts, slag pockets, and incomplete sections around the entire circumference.
- Check alignment: Verify clearance from the body, fuel and brake lines, wiring, suspension, and driveshaft. Confirm that hangers support the system without forcing the repair sideways.
- Use controlled leak detection: With the exhaust removed, use low-pressure smoke or another suitable low-pressure method. Do not seal and heavily pressurize a muffler or catalytic converter.
- Recheck after installation: Start the engine outdoors, keep the vehicle securely supported if raised, and listen for ticking or hissing. Keep your face and hands away from hot or moving parts.
- Watch for soot: A dark soot trail around the repair after operation can indicate a small leak.
Warning: Never run the engine in a closed garage to test the repair. Exhaust gases can contain carbon monoxide, which is colorless, odorless, and dangerous.
Stick vs. MIG, TIG, and Flux-Core for Exhaust Repair
| Method | Advantages | Limitations on Exhaust Tubing |
|---|---|---|
| Stick | Portable, no shielding-gas cylinder, works outdoors, simple equipment | Hardest to control on thin wall, creates slag, and many common rods require more current than the pipe tolerates |
| MIG | Easy starts, short trigger-controlled tacks, good productivity, well suited to mild-steel exhaust | Gas-shielded MIG is affected by wind and still requires clean metal and correct wire selection |
| TIG | Precise heat and filler control, clean appearance, useful for quality stainless work | Slower, less tolerant of contamination, and requires more operator skill and equipment |
| Self-shielded flux-core | No gas cylinder and useful outdoors | Many wires run aggressively, create spatter and slag, and are difficult to use on very thin exhaust tubing |
Stick welding makes sense when it is the equipment you have, the tubing is sound enough to accept it, and you can practice first. When the pipe is extremely thin or the repair must be neat and distortion-free, MIG or TIG usually offers better control.
Products Worth Considering
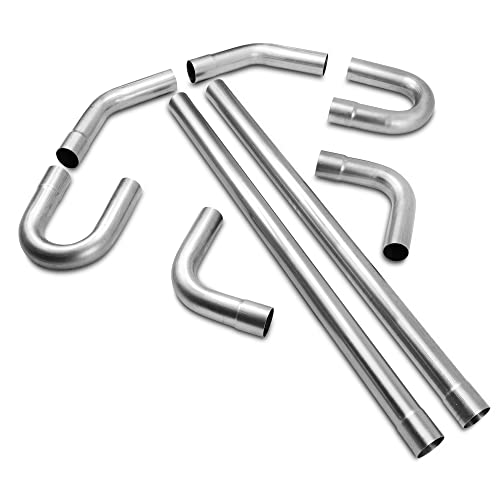
This Universal Custom Exhaust Kit Made of High Quality Mild Steel with Computerized Mandrel-Bends for Strength and Durability, 16-Gauge Piping Walls

MODEL: E308L-16 is for stainless steel welding, widely used in metal fabrication, maintenance and repair work.

【LOW SPATTER & EASY CLEANUP】Minimal Spatter, Flawless Beads: Experience exceptionally low spatter and minimal post-weld cleanup. This ER70S-6 solid wire allows you to achieve smooth, visually appealing beads with ease, saving both time and grinding effort on your metal fabrication.
Why This Skill Matters
Exhaust repair forces you to learn fit-up, arc-length control, heat management, sequencing, and defect inspection. Those skills carry into other maintenance and fabrication work. The lesson is not that a stick welder can solve every exhaust problem. It is that careful preparation and process limits matter more than forcing the wrong electrode to complete the job.
A successful repair should be supported by solid base metal, aligned without stress, completely fused, free of slag and pinholes, and verified for leakage. If those conditions cannot be achieved, replacing the section or changing processes is the professional choice.
Conclusion
You can weld an exhaust pipe with a stick welder when the pipe is still sound, the joint fits tightly, and your electrode can run stably without overwhelming the thin wall. Start by removing rusted metal, identifying the material, protecting the vehicle, and testing your settings on matching scrap. Tack evenly, use short stringer welds, move around the pipe to spread heat, and clean every restart before continuing.
Do not rely on an unusually low setting, a hammer tap, paint, or a rough-looking bead that merely covers the gap. The finished repair must be mechanically aligned, visually sound, fully cleaned, and tested for leaks. When the pipe is too thin for the smallest suitable stick electrode, switching to MIG, TIG, or a replacement section is the safer repair.
Frequently Asked Questions
What is the best stick electrode for mild-steel exhaust pipe?
A small E6013 is often easier to control on clean mild-steel tubing because it has a smoother, less forceful arc than E6011. The best choice still depends on the available diameter, the exact product’s operating range, pipe thickness, joint design, position, and your machine.
Is E6011 or E6013 better for thin exhaust?
E6013 is usually easier to control when the pipe is cleaned to bright steel. E6011 has a more forceful, penetrating arc that can help on maintenance work but can also burn through thin exhaust quickly. Neither electrode removes the need to clean coatings, oil, and rust.
What amperage should I use for a 3/32-inch rod?
Use the range printed for the exact electrode product. As examples, Lincoln lists 40–80 amps DC for its 3/32-inch Fleetweld 180 E6011, 70–105 amps DC for its 3/32-inch Fleetweld 37 E6013, and 70–110 amps DCEP for its 3/32-inch Excalibur 7018-1. If that range is too hot for your pipe, use a smaller compatible electrode or another process rather than running the rod far below specification.
Can I use E7018 on an exhaust pipe?
It can weld compatible mild steel, but a common 3/32-inch E7018 requires considerably more current than many thin exhaust pipes can tolerate. It also has strict storage requirements. It is normally a poor first choice for ordinary thin-wall exhaust repair.
Can I weld the exhaust without removing it from the vehicle?
Removal is safer and gives better access. If in-place welding is unavoidable, support the vehicle on rated stands, follow the manufacturer’s electrical-system procedure, place the work clamp close to the repair, and protect fuel lines, brake lines, wiring, sensors, the fuel tank, undercoating, and interior materials from heat and sparks.
How do I prevent burn-through?
Cut back to solid metal, make a tight joint, use the smallest suitable electrode, keep a tight arc, and weld in short sections placed around the pipe. A close-fitting sleeve can support thin edges. Stop if the lowest stable current for your electrode is still too hot.
Which electrode should I use for stainless exhaust?
Identify both base metals first. A 308L filler is commonly used for 304 stainless, while 309L is commonly used for joining austenitic stainless to carbon steel. Ferritic exhaust grades may require another filler. Do not select a stainless electrode by appearance alone.
How can I tell whether the weld is leak-free?
Remove all slag and inspect the entire circumference for pinholes, cracks, and incomplete tie-ins. Use controlled low-pressure smoke or another suitable leak-detection method. After installation, run the engine outdoors and check for hissing, ticking, or soot while staying clear of hot and moving parts.
When should I replace the pipe instead of welding it?
Replace the section when the surrounding pipe flakes, crushes easily, develops more pinholes during cleaning, or cannot hold a tack without collapsing. Welding over active rust may hide the hole temporarily, but it does not restore the missing wall thickness.
Sources
- OSHA 29 CFR 1910.252, Welding, Cutting, and Brazing — fire prevention, hot-work controls, PPE, and welding safety requirements
- OSHA 29 CFR 1910.133, Eye and Face Protection — minimum protective filter shades for shielded metal arc welding
- OSHA, Controlling Hazardous Fume and Gases During Welding — ventilation, coating removal, stainless fumes, and hexavalent chromium
- Lincoln Electric Fleetweld 180 E6011 Data Sheet and Fleetweld 37 E6013 Data Sheet — electrode diameter, polarity, and current ranges
- Lincoln Electric Excalibur 7018-1 MR Data Sheet and Stainless Welding Consumables Guide — E7018 operating range and stainless filler selection
- IMOA and Nickel Institute, Practical Guidelines for the Fabrication of Austenitic Stainless Steels — stainless-tool segregation, heat-tint removal, pickling, and passivation