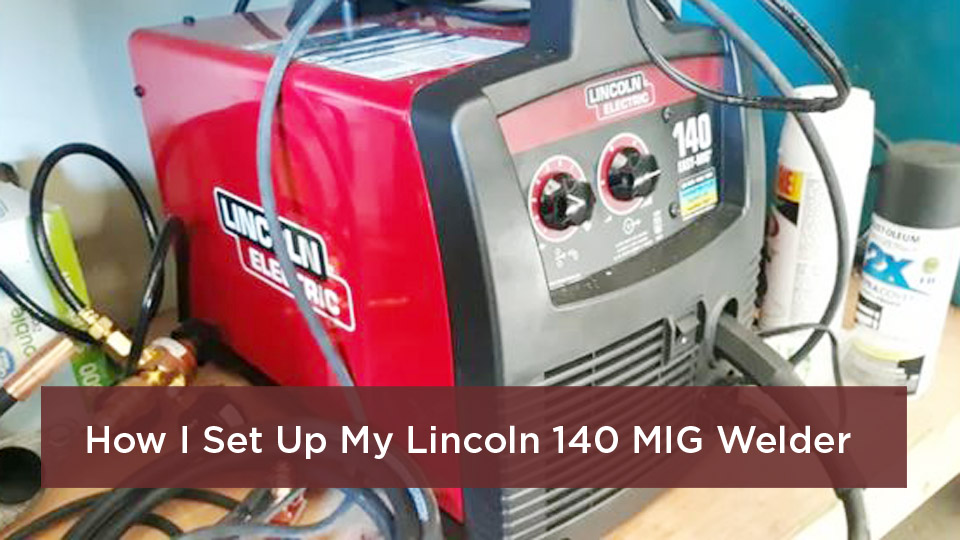
If you’re trying to weld aluminum with a gasless MIG welder, the first step is understanding what the machine can actually do. A typical gasless welder runs self-shielded flux-cored wire made for steel. Common aluminum MIG wires do not create their own shielding, so you need external argon and a wire-feeding system designed for soft aluminum.
Quick Answer
You cannot normally weld aluminum with a gasless-only MIG welder. Standard gasless wire is self-shielded flux-cored wire made for steel, while common aluminum wires such as ER4043 and ER5356 are solid wires that need external argon. Use a gas-capable MIG machine, compatible spool gun or push-pull feeder, 100% argon, and DCEP.
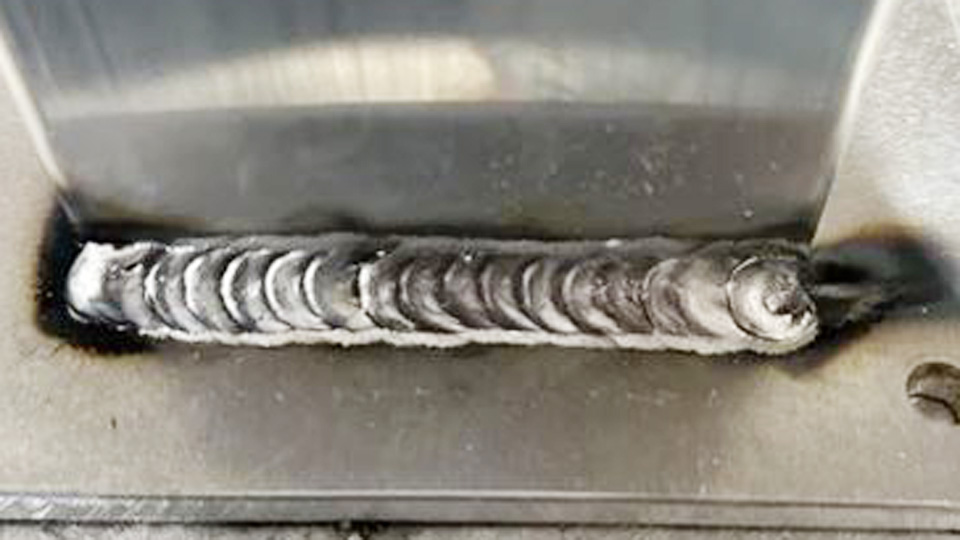
Aluminum MIG welding setup
Key Takeaways
- “Gasless MIG” normally means self-shielded flux-cored arc welding, not aluminum MIG welding.
- ER4043 and ER5356 are common solid aluminum filler wires. They do not replace shielding gas.
- A proper aluminum MIG setup normally uses 100% argon, DCEP, and a spool gun or push-pull feeder.
- Use your machine’s aluminum parameter chart instead of copying universal voltage and wire-speed figures.
- Boat hulls, trailer frames, vehicle parts, pressure vessels, and other critical components require a qualified procedure and proper inspection.
At a Glance
| Time Required | About 30–60 minutes for setup and scrap testing; project time varies |
| Difficulty | Intermediate; aluminum is less forgiving than mild steel |
| Tools Needed | Gas-capable MIG welder, compatible spool gun or push-pull feeder, argon cylinder, regulator or flowmeter, dedicated stainless brush, hand tools, and welding PPE |
| Cost | Varies by machine compatibility; a gun, regulator, argon cylinder, and aluminum wire may be required |
Warning: Do not trust a spool advertised as “gasless aluminum wire” based only on a marketplace title. Check the manufacturer’s technical data sheet. It should identify the wire classification, required polarity, shielding requirements, compatible base alloys, and approved welding process. ER4043 or ER5356 on the label does not mean the wire is self-shielded.
Can You Weld Aluminum With a Gasless MIG Welder?
A standard gasless-only MIG welder cannot normally weld aluminum. The wording causes confusion because “gasless MIG” is a common shop term, but the actual process is usually self-shielded flux-cored arc welding, or FCAW-S.
True MIG welding is gas metal arc welding, or GMAW. It uses an externally supplied shielding gas to protect the molten weld pool from oxygen, nitrogen, moisture, and other contaminants. For aluminum, that gas is normally 100% argon.
Self-shielded flux-cored wire contains ingredients that form shielding around the arc as the wire burns. The small-diameter self-shielded wires sold for hobby welders are generally intended for carbon steel, not aluminum.
Common aluminum filler wires such as ER4043 and ER5356 are solid wires. They need an external inert-gas shield and do not leave a flux slag over the finished bead.
If the wire is labeled ER4043 or ER5356, plan on using argon unless the wire manufacturer’s technical data sheet explicitly states otherwise.
Why Aluminum Needs a Different MIG Setup
Aluminum behaves differently from mild steel in four important ways. Understanding these differences helps you avoid bird-nesting, soot, porosity, burn-through, and lack of fusion.
Aluminum Wire Is Soft
Soft aluminum wire can buckle between the drive rolls and gun liner. This creates a tangled mass commonly called a bird’s nest. A spool gun reduces the feeding distance by placing a small spool at the gun. A push-pull system uses synchronized motors to move the wire through a longer cable.
A conventional gun may work on some properly equipped systems with a short, straight cable, a suitable liner, U-groove drive rolls, and the correct contact tip. However, you should follow the welder manufacturer’s approved setup rather than improvising a conversion.
The Oxide Layer Is Hard to Melt
Aluminum forms an oxide layer almost immediately when exposed to air. That oxide melts at a much higher temperature than the aluminum underneath it. Grease, moisture, oxide, paint, anodizing, and corrosion can all interfere with fusion or add hydrogen to the weld.
Aluminum Moves Heat Quickly
The part may appear cold at first because aluminum carries heat away from the joint. Once the surrounding metal becomes hot, the puddle can grow rapidly and burn through. You need enough initial output to establish fusion, followed by a steady travel speed that prevents heat from building in one area.
Aluminum Is Sensitive to Contamination
Atmospheric contamination and moisture can create porosity. Poor gas coverage, dirty filler wire, a leaking gun connection, excessive gas turbulence, wind, or hydrated oxide can all cause pinholes inside the weld.
Equipment You Actually Need
Before buying a spool gun or gas cylinder, check your welder’s manual. A machine that is marketed as flux-core-only may lack the gas valve, gas fitting, polarity arrangement, output range, or spool-gun control needed for aluminum.
- Gas-capable MIG power source: The machine must support solid-wire GMAW, DCEP, and the output range required for your material.
- Compatible spool gun or push-pull feeder: Use a model approved for your power source.
- 100% argon: Do not use carbon dioxide or a typical 75% argon and 25% CO2 steel mix on aluminum.
- Regulator or flowmeter: Use the type specified for the cylinder and machine.
- Solid aluminum filler wire: ER4043 and ER5356 are common choices, but the correct filler depends on the base alloy and service requirements.
- U-groove drive rolls: These support the wire without shaving or crushing it.
- Correct liner and contact tip: Use components approved for aluminum wire and your chosen diameter.
- Dedicated stainless steel brush: Keep it for aluminum only.
- Nonchlorinated degreaser: Acetone or clean isopropyl alcohol may be suitable when used according to the product safety instructions and allowed to evaporate fully.
- Welding PPE: Use an appropriate welding helmet, flame-resistant clothing, welding gloves, safety glasses, hearing protection when needed, and suitable footwear.
- Ventilation or local exhaust: Keep welding fume out of your breathing zone without pulling shielding gas away from the joint.
Pro Tip: Store aluminum filler wire clean, dry, and sealed until you need it. Oxidized or contaminated wire can feed poorly and create an erratic, sooty, or porous weld even when the machine settings appear correct.
Products Worth Considering
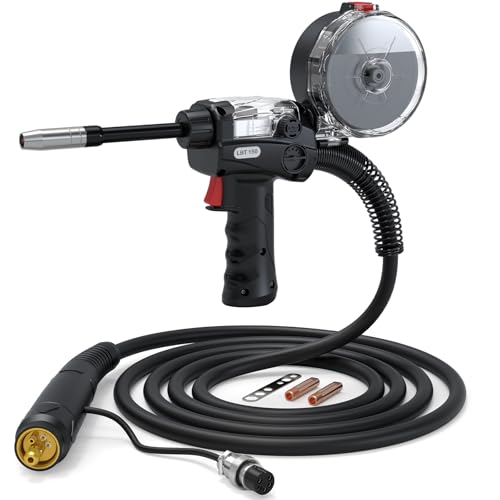
Smooth Wire Feeding: Experience seamless wire feeding with our spool gun. Featuring a 10-foot (3m) cable. Perfect fit for ARCCAPTAIN MIG205MP, MIG205PRO, MIG165PRO ensuring consistent and uninterrupted aluminum welding.

Smooth Welding Performance: Designed to handle 0.030-inch and 0.035-inch wires, our spool gun ensures stable arcs, minimal splatter, and high-precision welds. It is compatible with flux-cored wires, solid wires, and aluminum wires, making it ideal for various materials in automotive, marine, and construction projects.
Check Whether Your Welder Can Be Converted
Use this checklist before ordering accessories:
| Question | What to Confirm |
|---|---|
| Does the machine support solid-wire MIG? | Look for a gas inlet, gas solenoid, regulator connection, and a solid-wire mode in the manual. |
| Can you select DCEP? | Normal solid-wire aluminum MIG uses electrode-positive polarity. Some compact units have internal polarity leads that must be moved. |
| Is a spool gun approved? | Match the exact gun model, connector, control system, amperage rating, and duty cycle to the power source. |
| Does the machine have enough output? | Check the manufacturer’s aluminum thickness range. A machine that performs well on steel may still be underpowered for the same aluminum thickness. |
| Is there an aluminum parameter chart? | Use the chart for the exact filler alloy, wire diameter, base-metal thickness, gun, and input voltage. |
Note: A spool gun does not make a gasless-only machine capable of welding aluminum by itself. The welder must also support the gun, correct polarity, solid-wire GMAW, argon delivery, and the required output.
Products Worth Considering

Replacement: This 150A spool gun is the replacement for the Spoolmate 150 gun (Please confirm the model of the welder and the compatibility of the welding gun before...
How to MIG Weld Aluminum Correctly
Step 1: Identify the Base Alloy and the Job’s Risk
Do not choose filler wire from appearance alone. Identify the aluminum alloy from a material marking, drawing, manufacturer information, or reliable service documentation whenever possible.
Also decide whether the part is suitable for DIY work. Practice coupons, noncritical brackets, decorative pieces, and lightly loaded shop projects are very different from a trailer frame, boat hull, suspension part, bicycle frame, pressure vessel, fuel tank, lifting device, or structural connection.
Warning: Use a qualified aluminum welder and an approved welding procedure for load-bearing, fatigue-sensitive, marine, automotive, pressure-containing, fuel-containing, or life-safety components. A bead that looks smooth can still contain porosity, cracking, or lack of fusion.
Step 2: Choose the Filler Wire
ER4043 and ER5356 are the two common aluminum MIG fillers for general shop work, but they are not interchangeable in every application.
| Filler | General Characteristics | Selection Notes |
|---|---|---|
| ER4043 | Silicon-bearing wire with a fluid puddle and good wetting. It is often easier for occasional aluminum MIG work. | Commonly used with many 6XXX alloys and suitable castings. It is not the correct choice for every high-magnesium base alloy. |
| ER5356 | Magnesium-bearing wire that is stiffer and can provide different strength, ductility, color-match, and corrosion characteristics. | Common with many 5XXX alloys and some 6XXX applications. Confirm compatibility, service temperature, and finishing requirements. |
Use the filler manufacturer’s compatibility chart when the alloy, strength, corrosion exposure, anodizing appearance, or service temperature matters.
Step 3: Install the Gun and Wire Correctly
Disconnect input power before changing internal leads or installing accessories. Follow the welder and gun manuals for every connection.
- Install the approved spool gun or push-pull system.
- Fit the recommended contact tip for the wire diameter.
- Use U-groove rolls where the feeding system requires external drive rolls.
- Apply only enough roll pressure to feed the wire without slipping.
- Keep the gun cable as straight as practical.
- Trim damaged wire instead of forcing it through a restricted liner or tip.
Too much drive-roll pressure can deform or shave the wire. Too little pressure can cause slipping and an irregular arc.
Step 4: Clean the Aluminum in the Correct Order
Cleanliness is essential, but the order matters:
- Remove coatings and heavy contamination. Strip paint, adhesive, anodizing, corrosion, or other material from the weld zone using a method suitable for the part.
- Degrease the joint. Wipe it with a clean, lint-free cloth and a suitable nonchlorinated cleaner.
- Let the cleaner evaporate completely. Do not strike an arc near wet cleaner, pooled solvent, or solvent vapor.
- Brush the oxide. Use a clean stainless steel brush reserved only for aluminum.
- Weld soon after cleaning. Avoid touching the prepared joint with bare, oily hands.
Degrease before brushing. Brushing an oily surface can spread contamination and push it into scratches.
Warning: Never clean a weld area with chlorinated brake cleaner or weld near chlorinated-solvent vapor. Heat and ultraviolet radiation from the arc can create highly hazardous decomposition products. Read the cleaner’s safety data sheet and keep all solvent residue away from hot work.
Step 5: Connect Argon and Set the Correct Polarity
Secure the argon cylinder upright with a chain or approved restraint. Install the correct regulator or flowmeter, check the connections, and route the gas hose where it cannot be cut, crushed, or burned.
Set the machine to DCEP, or direct current electrode positive, for normal solid-wire aluminum MIG. Confirm the polarity in the power-source and filler-wire instructions before welding.
Set argon flow according to the machine or gun manual. Many MIG setups operate in the general area of 25–35 cubic feet per hour, but nozzle size, gun design, transfer mode, joint shape, and surrounding airflow can change the required flow.
More gas is not always better. Excessive flow can create turbulence that pulls surrounding air into the shielding envelope.
Step 6: Use the Machine’s Aluminum Parameter Chart
There is no single voltage and wire-feed setting that works for every 1/8-inch or 1/4-inch aluminum joint. Start with the chart inside the machine, in the owner’s manual, or supplied with the approved spool gun.
Match all of these variables:
- Base-metal thickness
- Base-alloy series when the chart distinguishes it
- ER4043 or ER5356 filler
- Wire diameter
- Joint type
- Welding position
- Input voltage
- Gun model
- Transfer mode
Test on clean scrap that matches the project’s alloy, thickness, joint, orientation, and heat-sinking conditions. A thin coupon lying loose on a bench does not behave like a large casting or assembled frame.
Step 7: Tack the Joint and Control Distortion
Fit the parts tightly and clamp them securely. Use enough tacks to hold the gap and alignment, but avoid placing oversized tacks where they will trap contamination or interfere with the final bead.
For long joints, plan the weld sequence before starting. Alternating locations, allowing controlled cooling, and using suitable fixtures can reduce distortion. Do not quench a hot aluminum weld unless an approved procedure specifically requires it.
Step 8: Use a Push Technique
Point the gun slightly in the direction of travel and push the puddle. A travel angle of roughly 10–15 degrees is a useful starting point, but joint access and the gun manufacturer’s guidance take priority.
- Keep the contact-tip-to-work distance consistent.
- Maintain a short, stable arc without burying the nozzle in the puddle.
- Travel steadily and avoid wide weaving.
- Watch both toes of the bead for fusion.
- Reduce hesitation as the surrounding aluminum becomes hotter.
- Fill the crater before releasing the trigger to reduce end cracking.
The arc should be stable and forceful. Do not rely on the “sizzling bacon” comparison used for short-circuit steel MIG. Aluminum commonly runs with spray or pulsed-spray transfer, which has a different sound and appearance.
Step 9: Inspect the Weld
Proper solid-wire aluminum MIG does not leave flux slag. You may see black soot or oxide deposits around the bead, especially with poor cleaning, excessive gun angle, an overly long arc, or disturbed gas coverage.
After the part cools enough to handle safely:
- Brush away loose soot with the dedicated stainless brush.
- Check the bead toes for a smooth transition into the base metal.
- Look for surface pores, cracks, undercut, excessive reinforcement, and missed sections.
- Check the back of a practice joint for evidence of fusion when the joint design allows it.
- Cut, bend, or break practice coupons when appropriate to assess internal fusion.
Do not grind a questionable critical weld smooth and assume it is repaired. Remove the defective weld using a controlled method, find the cause, prepare clean metal, and follow the approved repair procedure.
Machine Settings and Joint Preparation
Your machine’s chart is the correct starting point. The table below shows how the setup generally changes without pretending that one voltage number fits every welder.
| Condition | Setup Priorities | Main Risks |
|---|---|---|
| Thin sheet | Use an approved small wire, tight fit-up, backing when suitable, short weld lengths, and fast controlled travel. | Burn-through, distortion, oversized tacks, and crater cracks. |
| General shop material | Start from the chart, confirm fusion on matching scrap, and adjust voltage and wire speed together in small steps. | Cold lap, soot, porosity, and inconsistent travel. |
| Thick or highly conductive parts | Use sufficient machine output, proper groove preparation, suitable wire size, multiple passes where required, and a qualified procedure. | Lack of fusion, excessive preheat, distortion, and reduced heat-affected-zone properties. |
| Outdoor welding | Shelter the joint with a safe windbreak and verify gas coverage at the nozzle. | Wind-driven loss of argon and hidden porosity. |
Beveling, root opening, backing, weld size, and included angle must match the joint design and required penetration. Thick aluminum often needs a wider groove than an equivalent steel joint because of its heat flow and filler-metal requirements.
Do not use preheat as a substitute for an underpowered machine. When preheat is part of an approved procedure, measure it with a suitable temperature device and stay within the specified preheat and interpass limits. Uncontrolled heating can reduce strength or distort heat-treated and work-hardened alloys.
Common Problems and How to Fix Them
| Problem | Likely Causes | What to Check |
|---|---|---|
| Bird-nesting | Excessive roll pressure, wrong liner or rolls, restricted tip, bent cable, or damaged wire. | Use the approved spool gun setup, U-groove rolls, light pressure, correct tip, and a straight cable. |
| Black soot | Dirty metal or wire, poor gas coverage, long arc, excessive gun angle, or incorrect settings. | Clean again, inspect gas delivery, shorten the arc, use a push angle, and compare settings with the chart. |
| Porosity | Moisture, hydrated oxide, wind, leaks, turbulence, contamination, or inadequate shielding. | Check the wire, joint, nozzle, hose, gun seating, flow rate, wind protection, and cleaning method. |
| Cold lap or lack of fusion | Low output, excessive travel speed, poor gun position, tight groove, or an underpowered machine. | Return to the chart, verify polarity, improve joint preparation, and test a section instead of judging appearance alone. |
| Burn-through | Too much heat for the thickness, slow travel, a large gap, or heat buildup during a long seam. | Improve fit-up, increase travel speed, use suitable backing, follow the thin-material chart, and change the weld sequence. |
| Crater crack | Stopping abruptly with an unfilled crater. | Use crater-fill controls when available or pause and add enough filler before ending the bead. |
| Unstable arc | Wrong polarity, erratic feeding, poor work connection, oxidized wire, or mismatched voltage and feed speed. | Confirm DCEP, inspect the feeding path, attach the work clamp to clean metal, and start again from the approved chart. |
What to Do If Your Welder Is Truly Gasless-Only
If the machine lacks a gas connection, gas solenoid, solid-wire mode, DCEP arrangement, or compatible aluminum gun, do not try to make it weld aluminum with steel flux-core wire.
Your practical options are:
- Use the machine for compatible steel work. Follow the approved self-shielded wire and polarity listed in its manual.
- Rent or borrow a gas-capable MIG system. Confirm that it includes an approved aluminum feeding setup and argon regulator.
- Have a welding shop complete the repair. This is the best choice for castings, unknown alloys, thin tanks, boat parts, frames, or fatigue-sensitive components.
- Use mechanical fastening for a suitable design. Bolts, rivets, brackets, or inserts may be appropriate when the joint has been designed for them.
- Consider aluminum brazing only for suitable noncritical work. Brazing does not melt and fuse the base metal in the same way as welding. Follow the filler manufacturer’s instructions and do not treat a brazed repair as a structural weld.
Do not use carbon dioxide, C25 steel shielding gas, self-shielded steel wire, or ordinary mild-steel MIG wire on aluminum.
Pros and Cons of a Proper Aluminum MIG Setup
Pros
- High productivity: MIG can deposit filler faster than manual TIG on suitable joints.
- Good for repeated fabrication: A stable machine, gun, and parameter program can produce consistent results.
- Spool-gun convenience: A compact spool gun avoids pushing soft wire through a long conventional liner.
- Suitable for many shop alloys: ER4043 and ER5356 cover a wide range of common applications when selected correctly.
- Less post-weld cleaning than FCAW: Proper solid-wire aluminum MIG does not create a flux slag.
Cons
- External shielding gas is required: You need an argon cylinder, regulator, hose, and safe cylinder storage.
- Wind affects the process: Outdoor work needs effective shelter around the weld zone.
- Equipment compatibility matters: Not every compact MIG or flux-core machine accepts a spool gun.
- Thin aluminum is demanding: Heat can build quickly and cause distortion or burn-through.
- Preparation must be thorough: Contamination and oxide can lead to porosity or lack of fusion.
- Critical work may require qualification: Procedure testing and inspection can be necessary even when the weld looks good.
Safety Considerations
Welding exposes you to ultraviolet radiation, hot metal, electrical energy, fumes, gas-cylinder hazards, fire, and possible explosions. Use the equipment only after reading the power-source, gun, filler-wire, regulator, and cylinder instructions.
- Wear a welding helmet with a shade suitable for the welding current and process.
- Wear safety glasses under the helmet, welding gloves, flame-resistant clothing, and closed protective footwear.
- Remove combustible material from the work area and keep suitable fire-control equipment nearby.
- Clean coatings, paint, oil, solvent residue, and unknown contamination from the hot-work zone.
- Use adequate general ventilation or local exhaust that captures fumes without pulling argon away from the puddle.
- Keep your head out of the fume plume.
- Do not assume that welding outdoors guarantees safe ventilation.
- Do not weld inside a confined space without the required controls, monitoring, permit, rescue plan, and trained personnel.
- Secure shielding-gas cylinders upright and protect the valve from impact.
- Keep oil and grease away from regulators and cylinder fittings.
- Do not weld a sealed container, wheel, tank, casting, pipe, or enclosed section unless it has been made safe using an approved procedure.
- Do not direct a household fan across the joint. It may remove the shielding gas and create porosity.
OSHA’s welding-fume guidance explains that open spaces do not automatically provide adequate ventilation and that local exhaust can help remove fumes from the breathing zone.
Real-World Applications and Limits
A proper argon-shielded aluminum MIG setup can work well for practice coupons, clean shop fabrication, noncritical brackets, equipment guards, furniture, carts, and other projects that match the machine’s approved range.
The same setup may also be used professionally on trailers, boats, vehicles, structural assemblies, and industrial equipment, but those applications require more than owning a spool gun. The operator may need an approved welding procedure, identified base metal, qualified filler, controlled joint preparation, specified weld size, inspection, and code compliance.
AWS D1.2/D1.2M Structural Welding Code—Aluminum covers requirements for structural aluminum fabrication, procedure qualification, welder qualification, and inspection. Pressure vessels and pressure piping are governed by other requirements.
Conclusion
You cannot normally weld aluminum with a standard gasless-only MIG welder. Common self-shielded flux-core wire is intended for steel, while aluminum MIG uses solid filler wire protected by external argon.
The correct path is to check whether your machine supports gas-shielded GMAW, DCEP, and a compatible spool gun or push-pull feeder. Then select the filler for the known base alloy, clean the joint carefully, use 100% argon, start from the manufacturer’s parameter chart, and prove the setup on matching scrap.
For a noncritical shop project, careful preparation and practice can produce a useful aluminum MIG weld. For a trailer frame, boat hull, vehicle component, pressure-containing part, or other safety-critical repair, use a qualified aluminum welder and an approved procedure.
Frequently Asked Questions
Can you weld aluminum with a gasless MIG welder?
Not with a typical gasless-only flux-core machine. Common aluminum MIG filler wires require external inert shielding gas. A machine may weld aluminum only if it supports gas-shielded GMAW, DCEP, adequate output, and a compatible aluminum wire-feeding system.
Is ER4043 aluminum wire flux-cored?
Standard ER4043 MIG wire is solid aluminum-silicon filler wire. It does not create its own shielding gas and is normally used with externally supplied argon. ER5356 is also a solid aluminum MIG filler wire.
Can I use steel flux-core wire on aluminum?
No. Steel flux-core wire is not compatible with aluminum base metal. It will not produce a sound aluminum weld and can contaminate or damage the workpiece.
What shielding gas should I use for aluminum MIG?
Use 100% argon for common aluminum MIG work unless the machine, filler manufacturer, or qualified procedure specifies another inert-gas blend. Do not use CO2 or a normal C25 steel MIG mix.
Can I convert my flux-core welder for aluminum?
Only when the exact machine supports solid-wire MIG, external gas, DCEP, sufficient output, and an approved spool gun or other aluminum feeder. A flux-core-only machine without those features cannot be converted simply by installing aluminum wire.
What polarity is used for aluminum MIG welding?
Normal solid-wire aluminum MIG uses DCEP, which means the welding gun or electrode is positive. Always confirm the polarity in the welder, gun, and filler-wire instructions before striking an arc.
Should I use ER4043 or ER5356?
The answer depends on the base alloy, required strength, ductility, corrosion exposure, service temperature, and finishing method. ER4043 is often easier to run and is common with many 6XXX alloys and castings. ER5356 is common with many 5XXX alloys and some 6XXX applications. Check a filler-selection chart for the exact joint.
Can I MIG weld aluminum outdoors?
You can weld outdoors only when you protect the joint from wind and maintain reliable argon coverage. Use a safe windbreak or welding shelter and verify gas flow at the gun. Do not raise the flow excessively to compensate for strong wind.
Is aluminum MIG as strong as TIG?
The process name alone does not determine weld strength. Base alloy, filler selection, joint design, heat input, procedure qualification, operator technique, and defects all matter. MIG and TIG can both produce acceptable aluminum welds when the procedure is suitable and correctly performed.
Sources
- Miller Electric: What Type of Gas Is Best for MIG Welding? — aluminum shielding gas, gas coverage, flow, and wind protection
- Miller Electric: Selecting an Aluminum MIG Welder, Spool Gun, and Filler Wire — machine compatibility, spool guns, wire size, ER4043, and ER5356
- Miller Electric: Welding Aluminum vs. Steel — cleaning, heat flow, feeding, U-groove rolls, and porosity
- Lincoln Electric: A Guide to Aluminum Welding — aluminum MIG equipment, preparation, shielding gas, and technique
- OSHA: Controlling Hazardous Fume and Gases During Welding — welding-fume hazards, ventilation, local exhaust, and confined-space precautions
- American Welding Society: AWS D1.2/D1.2M Structural Welding Code—Aluminum — structural procedure, qualification, fabrication, and inspection requirements