You can TIG weld without a foot pedal, but you need to know what your machine can control before you strike an arc. A pedal normally gives you live amperage control, so a pedal-free setup depends more on preset current, a compatible torch switch or fingertip remote, 2T/4T functions, pulse settings, clean fit-up, and a controlled start and finish.
This approach is useful when you are working under a vehicle, on a ladder, inside a frame, or anywhere a pedal is awkward. It can also work with basic Lift-Arc or scratch-start machines. The key is to keep the arc short, test every setting on matching scrap, and use the machine’s built-in slope, final-current, and post-flow features when available.
Quick Answer
To TIG weld without a foot pedal, use a compatible fingertip amperage remote, a torch trigger with 2T/4T controls, or fixed-current Lift-Arc or scratch start. Set the current on scrap, keep a short arc, control heat with travel speed and filler timing, and use downslope or final current to prevent an end crater.
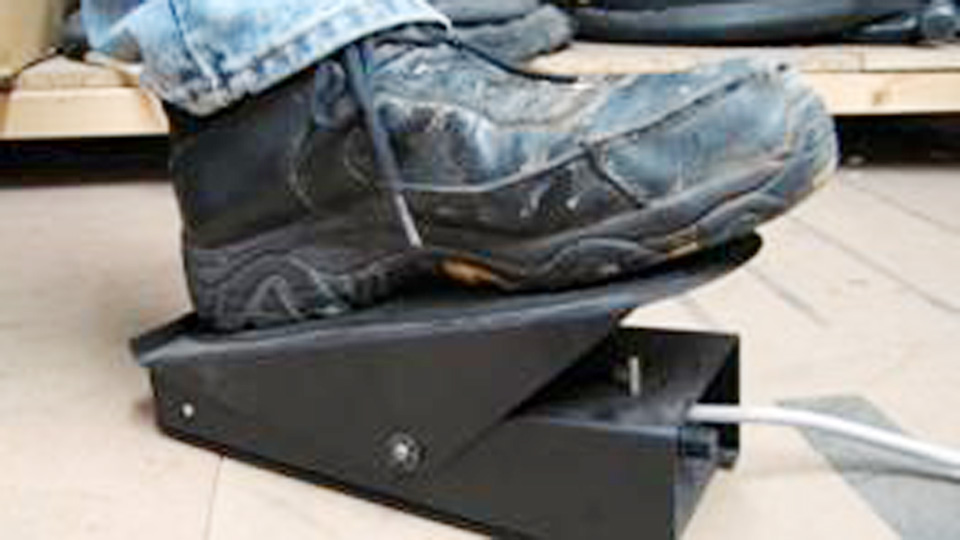
Photo by r-techwelding
Key Takeaways
- A torch button may only start and stop the arc. It does not always provide variable amperage control.
- A compatible fingertip remote gives live current control; 2T/4T modes use programmed current, slope, and final-current settings.
- Pulse reduces average heat input, but it does not replace the ability to raise or lower amperage whenever you choose.
- Keep the arc short and control heat mainly through the preset current, travel speed, filler timing, weld length, and cooling sequence.
- For code or critical work, follow the approved welding procedure and qualification requirements. A pedal-free setup does not automatically make a weld compliant.
At a Glance
| Time Required | About 20 to 40 minutes for setup and test welds; skill development takes repeated practice |
| Difficulty | Intermediate, especially on thin stainless steel or aluminum |
| Tools Needed | TIG-capable power source, compatible torch or remote, regulator/flowmeter, shielding gas, tungsten, filler rod, work lead, PPE, and matching scrap |
| Cost | No added control cost if your machine already supports local current or a torch trigger; a compatible fingertip remote, torch, gas equipment, or AC/DC machine adds cost |
Can You TIG Weld Without a Foot Pedal?
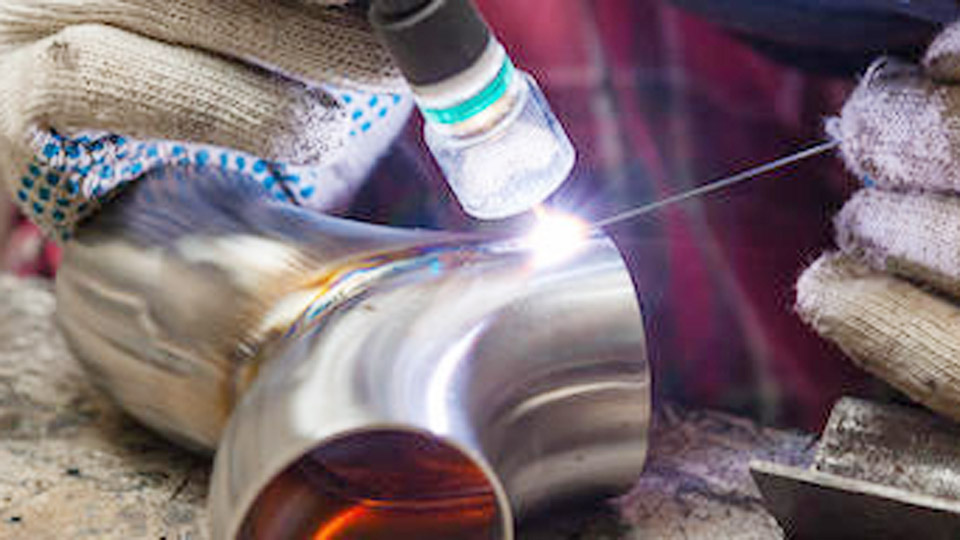
Yes. Gas tungsten arc welding, also called GTAW or TIG, uses a non-consumable tungsten electrode to create the arc while an inert shielding gas protects the hot tungsten and weld pool. Filler metal is added separately when the joint requires it. A foot pedal is one way to control output, but it is not the only way. Manufacturer-supported alternatives include fingertip amperage remotes, torch triggers, 2T/4T operating modes, local panel control, Lift-Arc starting, and pulse functions.
The important distinction is between arc control and amperage control. A simple torch button may only turn the arc on and off. A variable fingertip remote can change amperage during the weld. A 2T or 4T trigger normally follows programmed start current, upslope, main current, downslope, final current, and post-flow settings, depending on the machine.
Note: Remote controls are not universal. Match the connector, resistance range, pinout, torch switch, and machine mode to the exact power-source manual before buying or connecting a control.
Understand the Controls on Your TIG Welder
Local or Panel Amperage Control
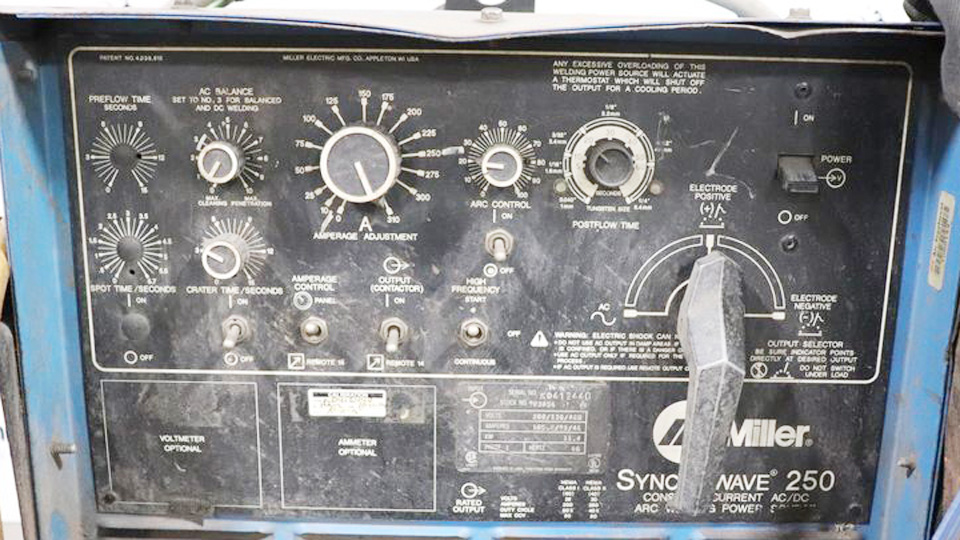
With local control, you set the welding current on the machine and weld at that output. This is common with scratch-start and basic Lift-Arc setups. It works best when the material thickness, joint fit, and weld length are consistent. Because you cannot taper the current by foot, set the current on matching scrap and plan how you will stop the arc without leaving a deep crater.
Torch Switch With 2T or 4T Mode
A torch switch can start and stop the arc without moving your hands to the machine. In 2T mode, you commonly hold the trigger to weld and release it to stop. In 4T mode, you can press and release to start, then press and release again to finish. Exact behavior varies, so follow the machine manual. Machines with programmable upslope, downslope, start current, and final current are much easier to use without a pedal.
Variable Fingertip Amperage Remote
A slider, rotary wheel, or pressure-style fingertip remote can provide live amperage control from the torch. This is the closest hand-operated substitute for a pedal, especially when you are kneeling, standing, climbing, or welding out of position. It takes practice because changing current can disturb torch angle or arc length if you grip the control too tightly.
Lift-Arc TIG
Lift-Arc starts at low current when the tungsten touches the work, then establishes the arc as you lift. It usually creates a cleaner start than scratching the tungsten across the joint. Depending on the machine, you may use fixed panel amperage or combine Lift-Arc with a torch trigger and programmed slope controls.
Scratch-Start TIG
Scratch start uses a live tungsten that you touch and move against the work to establish the arc. It is simple and often available from constant-current power sources, but it gives limited start and stop control. Scratching can contaminate the tungsten or the weld, so use a clean strike area or run-on tab when possible. Scratch start is better suited to forgiving steel work than thin cosmetic stainless or typical thin-aluminum GTAW.
Pulse TIG
Pulse alternates between a peak current and a lower background current at a selected frequency and duty cycle. It can reduce average heat input, help pace filler additions, and make a small puddle easier to read. However, pulse follows a programmed cycle. It does not let you reactively add or remove heat in the same way as a variable foot or fingertip control.
Pulse can manage average heat input, but it does not replace real-time amperage control.
Compare Pedal-Free TIG Methods
| Method | What It Controls | Best Use | Main Limitation |
|---|---|---|---|
| Variable fingertip remote | Arc start/stop and live amperage, if supported | Tight spaces, fieldwork, and out-of-position welding | Requires exact machine compatibility and steady hand control |
| 2T/4T torch trigger | Arc sequence and programmed current stages | Repeatable shop welds and longer runs | May not provide variable current during the main weld |
| Lift-Arc with fixed current | Cleaner contact start with preset output | Mild steel and stainless repairs | Limited ability to respond to heat buildup |
| Scratch start | Basic arc start with preset output | Budget steel setups and non-cosmetic repair work | Contamination risk and weak crater control |
| Pulse with trigger or fixed current | Programmed peak and background current | Thin sheet, repetitive joints, and heat-sensitive work | Not a reactive substitute for a variable remote |
Products Worth Considering

TIG welding hand control for Miller welders (14 pin plug).
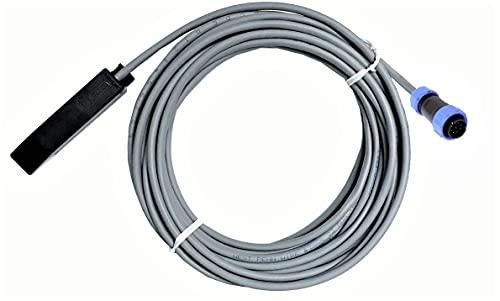
TIG welding hand control for Harbor Freight Vulcan welders (9 pin plug).
TIG welding hand control for Lincoln welders (6 pin plug).
Set Up the Welder Before You Start
Products Worth Considering

【Finger Switch Compatibility】Featured with standard 14-PIN connector for Miller Welders TIG Welding Torches, this finger on/off switch perfectly fits most for Miller welders. Finger welding control. It supports plug-and-play installation with no extra modification, serving as an ideal direct replacement for old or broken torch control switches. Finger switch for tig welder

Welding Accessory --- This welding accessory is suitable for TIG welding torches and plasma cutting torches.The tig torch trigger switch ergonomic micro-switch trigger enhances control during prolonged welding sessions, reducing operator fatigue.
【Finger Switch Compatibility】Featured with standard 14-PIN connector for Miller Welders TIG Welding Torches, this finger on/off switch perfectly fits most for Miller welders. Finger welding control. It supports plug-and-play installation with no extra modification, serving as an ideal direct replacement for old or broken torch control switches. Finger switch for tig welder
Check the Machine and Remote Compatibility
Read the owner’s manual before connecting a torch switch or remote. Confirm the remote socket, connector type, supported control mode, and whether the panel setting becomes a maximum current or a fixed current when a remote is attached. Do not assume that a torch from another brand or model uses the same wiring.
Choose the Correct Current Type and Polarity
- Mild steel and stainless steel: Use DC electrode negative, usually shown as DCEN or DC TIG.
- Aluminum and magnesium: Use an AC-capable TIG machine unless an approved procedure calls for a specialized DC setup.
- Unknown metal: Identify the alloy before selecting current, filler, and cleaning method.
Select Tungsten, Filler, and Cup Size
Use a tungsten type and diameter approved by your machine manufacturer for the current range. A 2% lanthanated electrode is a common versatile choice for modern AC/DC TIG equipment, but the owner’s manual takes priority. Grind the tungsten lengthwise. For DC, use a pointed or truncated tip. For modern inverter AC, a pointed or truncated preparation is often preferred; do not deliberately form a large ball unless the machine manual calls for it.
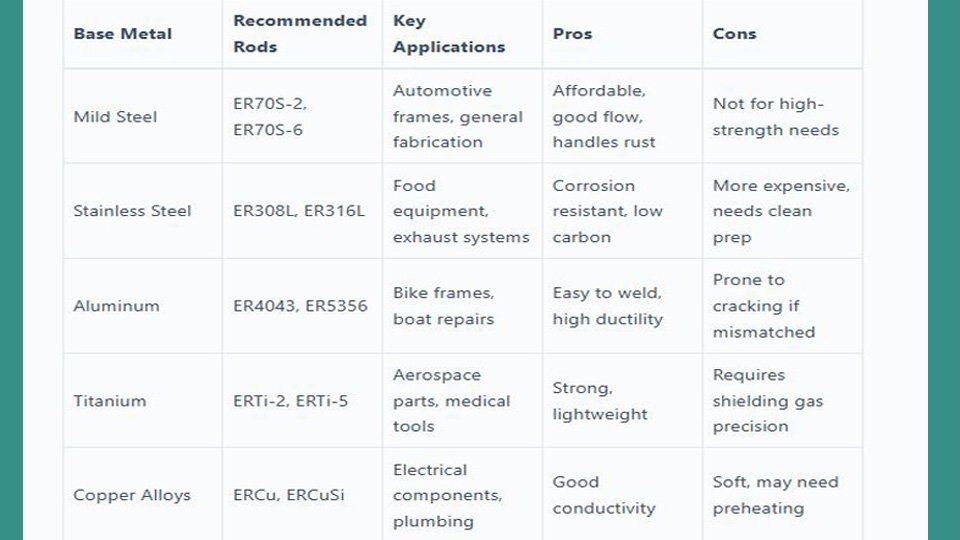
Match the filler metal to the base alloy and service requirements. ER70S-2 is common for clean mild steel, but it is not automatically correct for every steel. Stainless and aluminum filler selection depends on the exact alloy, joint, and service conditions.
Set Shielding Gas and Flow
Use the shielding gas specified for the process and material. TIG commonly uses 100% argon, while argon/helium blends may be used for certain applications. A typical starting flow for a conventional torch is 15 to 20 cubic feet per hour, but cup size, gas lens, stickout, drafts, joint shape, and torch angle can change the requirement. Too much flow can create turbulence and pull air into the shielding envelope.
Program the Start and Finish
If your machine has these controls, set pre-flow, start current, upslope, downslope, final current, and post-flow before welding. The finish settings matter most without a pedal. Downslope and final current let you shrink the puddle gradually and fill the end crater before the arc stops.
Pro Tip: Run the full start, weld, and stop sequence on matching scrap. Many pedal-free problems appear at the last half-inch, when the part is hot and the crater needs controlled fill.
Step-by-Step: TIG Weld Without a Foot Pedal
Step 1: Assess the Joint
Identify the base metal, thickness, joint type, position, required penetration, and whether the weld is cosmetic, structural, pressure-retaining, or code-controlled. Fixed-current welding is easiest when both parts have similar thickness and a consistent fit-up. A thick-to-thin joint needs more planning because the thin edge heats faster.
Step 2: Prepare and Fit the Metal
Remove paint, rust, scale, oil, oxide, moisture, and marker residue from the weld zone. Use cleaning tools dedicated to the metal, especially for stainless steel and aluminum. Fit the joint tightly and clamp it so the gap does not open as the part heats. Bevel thicker joints only when the joint design or procedure requires it.
Warning: Do not clean with chlorinated brake cleaner or weld on unknown coatings. Heat and ultraviolet radiation can create highly hazardous decomposition products. Remove coatings safely and follow the product safety data sheet.
Step 3: Connect the Torch, Work Lead, and Gas
Make every connection with the machine switched off. Connect the torch and work lead exactly as the manual shows, secure the gas hose, open the cylinder correctly, and leak-check the system. Keep the work connection close to the weld on clean metal. Equipment grounding and the welding work circuit are different functions, so do not treat the work clamp as a substitute for the electrical safety ground.
Step 4: Set a Starting Current on Scrap
Use the manufacturer’s setup chart as your starting point, then test on scrap with the same alloy, thickness, joint, backing, and position. For a flat butt joint in 1/8-inch mild steel, many machines land near roughly 100 to 125 amps as a starting range, but joint design and travel speed can move the correct setting. With fixed current, start conservatively and adjust after reading the puddle and back side.
For thin material, make short test beads and let the coupon cool between changes. If the machine has pulse, begin with the manufacturer’s preset or a simple low-frequency setting that lets you see each peak. Change one parameter at a time.
Step 5: Start the Arc Cleanly
For Lift-Arc, touch the tungsten lightly to the start point and lift according to the manual. For scratch start, use a clean run-on area and a brief controlled motion rather than dragging along the finished joint. For a torch trigger, hold the torch steady before starting so the arc begins at the intended location.
Step 6: Establish the Puddle
Keep the tungsten close to the work without touching it. A short arc gives you a focused, stable heat source and better shielding. Hold a consistent torch angle, usually with only a small push angle, and keep the filler rod inside the shielding envelope. If the tungsten touches the puddle or filler, stop and regrind it.
Step 7: Control Heat During the Weld
Without a variable pedal, control heat with the preset current, travel speed, filler size and timing, bead length, tack sequence, and pauses between welds. On a thick-to-thin joint, aim more of the arc at the thicker member and wash the puddle toward the thin edge. Do not deliberately lengthen the arc as your main heat control because a long arc spreads heat, reduces shielding, and makes the puddle harder to control.
Step 8: Finish the Crater
Use downslope and final current when available. Add a small final dab of filler as the puddle shrinks, then let the programmed post-flow protect the hot tungsten and weld. With a basic fixed-current setup, taper out by shortening the last weld segment, adding filler, and using a run-off tab or an approved stop technique. Snapping the torch away can leave a crater, porosity, or oxidation.
Step 9: Inspect and Clean
Look for a consistent bead, complete fusion at both toes, adequate penetration for the joint, and no visible cracks, pinholes, undercut, or tungsten inclusions. Color alone does not prove weld quality. TIG should not create normal MIG-like spatter; scattered particles often point to contamination, unstable shielding, or incorrect setup.
Use visual inspection first. Dye penetrant can reveal surface-breaking discontinuities on suitable nonporous materials, but it cannot prove that a weld is free of internal defects. Critical work may require inspection and testing specified by the governing procedure or code.
How to Control Heat Without a Pedal
Keep the Arc Short
Arc length should remain short and consistent on both thin and thick work. A longer arc raises arc voltage, spreads the heat, and can expose the puddle to air. Use current, travel speed, pulse, filler, and weld sequencing for heat control instead of repeatedly changing arc length.
Use Filler to Support the Puddle
Filler metal can cool and reinforce the leading edge of the puddle, but adding too much can cause lack of fusion. Keep a steady rhythm and feed the rod into the leading edge rather than stabbing the tungsten or dropping filler outside the gas shield.
Break Long Welds Into a Sequence
Use balanced tack locations, short sections, skip welding, and cooling time to limit distortion on sheet metal. A copper backing bar or chill block can help on suitable joints, but it must fit tightly and stay clean. Do not use a chill block where the welding procedure prohibits it.
Use Pulse With a Clear Purpose
Low-frequency pulse can give you a visible rhythm for adding filler. Higher-frequency pulse can tighten the arc on machines that support it. Set peak current high enough to achieve fusion, background current low enough to reduce average heat, and duty cycle long enough to form a stable puddle. Follow the machine manual because pulse controls and percentages are not labeled the same way on every welder.
Material-Specific Guidance
Mild Steel
Mild steel is usually the easiest material for learning pedal-free TIG. Use DCEN, clean metal, appropriate ER70-series filler, and a pointed or truncated tungsten. Lift-Arc or fixed-current TIG works well when the joint is consistent. Watch the end crater and do not grind away undercut or thin the base metal during cleanup.
Stainless Steel
Stainless steel needs tight heat control to limit distortion and oxidation. Use DCEN, filler matched to the alloy and service, clean dedicated tools, and sufficient shielding. On thin stainless, use short welds, pulse if it helps, and allow cooling between sections. Purge the back side when the joint and service require protected root quality.
Aluminum
Typical aluminum TIG welding requires an AC-capable machine, clean oxide removal, suitable filler, and stable shielding. A torch-mounted variable remote or a well-programmed 2T/4T sequence is more forgiving than fixed current because aluminum conducts heat quickly and then becomes easier to overheat as the part warms. Use the machine’s AC balance and frequency guidance, and test on the exact alloy and thickness. Do not assume one amperage or one filler alloy fits every aluminum job.
Common Problems and Fixes
| Problem | Likely Causes | Fix |
|---|---|---|
| Burn-through or oversized puddle | Current too high, slow travel, poor fit-up, or heat buildup | Lower preset current, increase travel slightly, tighten the gap, shorten welds, or use backing where allowed |
| Cold bead or poor toe fusion | Current too low, travel too fast, oversized filler, or arc aimed away from the joint | Increase current on scrap, slow down, use appropriate filler size, and focus the arc at the joint root |
| Black soot, porosity, or unstable arc | Contamination, gas leak, wrong gas, drafts, excessive flow, long arc, or dirty tungsten | Stop, clean and regrind, verify gas and connections, shield the area from drafts, and correct arc length |
| Crater crack or pinhole at the stop | Arc stopped abruptly or crater left unfilled | Use downslope/final current, add a last dab of filler, or use an approved run-off tab or stop method |
| Tungsten keeps sticking | Poor Lift-Arc motion, scratch start dragged too far, unstable hand position, or current outside the electrode range | Brace your hands, practice on scrap, regrind after contact, and check tungsten size and machine settings |
| Stainless turns dark far from the bead | Excess heat, slow travel, poor shielding, or inadequate purge | Reduce average heat, improve gas coverage, shorten weld sections, and purge when required |
Safety Considerations
TIG welding exposes you to ultraviolet and infrared radiation, hot metal, electric shock, fire, compressed gas, and metal fumes. Use a welding helmet with a filter shade selected for the process and current, safety glasses with side protection, flame-resistant clothing, suitable gloves, and closed footwear. Keep combustibles away and have the correct fire extinguisher available.
Provide effective ventilation and local exhaust. Stainless steel welding can expose workers to chromium compounds, including hexavalent chromium, while coated or galvanized metals can create other hazardous fumes. Respiratory protection may be required after a proper hazard assessment. Do not weld in a confined space without the required atmospheric testing, ventilation, permits, attendant, and rescue plan.
Keep the machine, torch, cables, and connectors dry and undamaged. Follow lockout and cylinder-handling rules where they apply. Secure cylinders upright, protect the valve, and keep oil and grease away from gas equipment.
Warning: Welding safety requirements depend on the workplace, material, coating, ventilation, and applicable law. The machine manual, safety data sheets, employer procedures, and local regulations take priority over general guidance.
Where Pedal-Free TIG Works Best
Automotive: A fingertip remote or 2T/4T torch can help when welding exhaust parts, brackets, or tubing under a vehicle where a pedal is difficult to position.
Marine: Torch-mounted control can be useful around railings, compartments, and boat structures, provided the material, ventilation, electrical safety, and procedure are suitable.
DIY and repair: Lift-Arc or scratch-start TIG can handle clean steel brackets, gates, frames, and small repairs when appearance and code requirements are modest.
Industrial and piping: Pedal-free TIG is common in field and out-of-position work, but production or pressure-retaining welds must follow the applicable welding procedure, personnel qualification, inspection, and documentation requirements.
Hobby projects: Fixed-current or torch-trigger TIG can produce clean furniture, sculpture, and fabrication welds after you establish repeatable settings on scrap.
Professional Work and Welding Standards
A pedal-free TIG setup can be used for professional work, but the control method alone does not make a weld acceptable. Aerospace work governed by AWS D17.1/D17.1M:2024 and pressure-related work that uses ASME BPVC Section IX rely on qualified procedures and personnel, along with the inspection and acceptance rules required by the governing construction code or contract.
If a welding procedure specification lists a current range, polarity, shielding gas, filler, joint design, technique, or remote-control requirement, follow it. Do not substitute pulse, scratch start, Lift-Arc, filler, or current type without authorization.
Conclusion
Learning to TIG weld without a foot pedal gives you more options in tight spaces and field conditions. The best setup is usually a compatible fingertip amperage remote or a torch trigger with useful 2T/4T, slope, final-current, and post-flow controls. Fixed-current Lift-Arc and scratch start can also work, especially on consistent steel joints.
Set the machine on matching scrap, keep the arc short, control heat with current, travel, filler, pulse, and weld sequence, then finish the crater carefully. For thin aluminum, stainless, pressure work, aerospace work, or any critical joint, use the correct equipment and follow the approved procedure rather than relying on a general amperage rule.
Frequently Asked Questions
Can you TIG weld without a foot pedal?
Yes. You can use local panel current, a torch switch, 2T/4T controls, a compatible fingertip amperage remote, Lift-Arc, scratch start, or pulse. The exact options depend on the power source and torch.
Does a TIG torch button control amperage?
Not always. A basic button may only start and stop the arc. Variable amperage requires a compatible slider, rotary, pressure, or other remote control supported by the welder.
What is the difference between 2T and 4T TIG?
In a common 2T setup, you hold the trigger while welding and release it to stop. In 4T, you can press and release to start, then press and release again to finish. Machines vary, so check the manual for the exact trigger sequence and slope behavior.
What is the best method for TIG welding aluminum without a foot pedal?
A compatible fingertip amperage remote is usually the most flexible choice. A well-programmed torch trigger with AC, upslope, downslope, final current, and pulse can also work. Test the exact alloy, thickness, joint, and filler on scrap.
Is scratch-start TIG safe?
It can be used safely on suitable equipment when you follow the manufacturer’s instructions and normal welding precautions. Remember that the tungsten may be electrically live, arc starts can contaminate the electrode, and basic setups may have limited gas and crater control.
How do you avoid burn-through without a pedal?
Lower the preset current, tighten the fit-up, move steadily, use suitable filler, shorten the weld sequence, and allow cooling between sections. Pulse, backing, or a chill block may help when the procedure allows them.
How do you stop a TIG weld cleanly without a pedal?
Use programmed downslope and final current, add a small final dab of filler, and hold the torch in place during post-flow. With fixed current, use an approved run-off tab or stop technique and avoid snapping the torch away from a full puddle.
Can pedal-free TIG be used for professional or code work?
Yes, when the equipment and technique comply with the approved welding procedure and the welder is qualified as required. A torch control, Lift-Arc start, or pulse feature does not make a weld code-compliant by itself.
Sources
- Miller Electric: Guide to TIG Welding Basics: TIG process, controls, polarity, tungsten, and shielding-gas guidance
- Miller Electric: Common TIG Welding Problems: troubleshooting gas coverage, contamination, porosity, and arc problems
- Fronius TransTig Operating Instructions: 2-step/4-step trigger behavior, slope controls, and contact ignition
- CK Worldwide: Linear Remote Amperage Control: torch-mounted on/off and variable-current control
- OSHA: Welding, Cutting, and Brazing Hazards and Solutions: welding radiation, fumes, burns, fire, and electrical hazards
- OSHA 29 CFR 1910.133: eye and face protection and minimum filter-shade selection