A diamond blade can make concrete, tile, brick, stone, and other hard materials easier to cut with an angle grinder. Safe results depend on more than fitting a disc to the spindle. The blade, grinder capacity, arbor, speed rating, flange, cutting guard, material, and dust-control method must all be compatible before the tool is switched on.
Quick Answer
Yes—an angle grinder can use a compatible diamond cutting blade for concrete, brick, tile, stone, and masonry. The grinder, cutting guard, flange, blade diameter, arbor, and speed rating must all match. Use dry dust control with a standard grinder; use water only with equipment specifically designed and approved for wet cutting.
Key Takeaways
- Match the blade’s material rating, diameter, arbor, mounting system, and maximum speed to the grinder.
- Use the cutting guard and flanges approved in the grinder manual—not an improvised adapter or an open grinding guard.
- Do not add water to an ordinary electric angle grinder. Choose a dry dust-control system or purpose-built wet cutting equipment.
- Clamp and support the material so the kerf cannot close and pinch the blade.
- Use two hands, stay outside the wheel plane and kickback path, and never twist a cutting blade in the kerf.
- Discard any blade that is cracked, warped, missing a segment, or otherwise damaged.
At a Glance
| Time Required | About 10–20 minutes for inspection and setup, plus cutting time |
| Difficulty | Intermediate; practice on scrap material before making a finish cut |
| Tools Needed | Compatible angle grinder, approved diamond cutting blade, correct cutting guard and flanges, side handle, clamps, marking tools, PPE, and an approved dust-control system |
| Cost | Varies by blade size, material rating, guard, and dust-control equipment |
Warning: Never spray, drip, or pour water onto a standard corded or cordless angle grinder. Use water only with a purpose-built wet saw, wet cutter, or wet-rated grinder whose manufacturer specifically approves the complete water-delivery setup.
Understanding Diamond Blades: What Makes Them Effective?
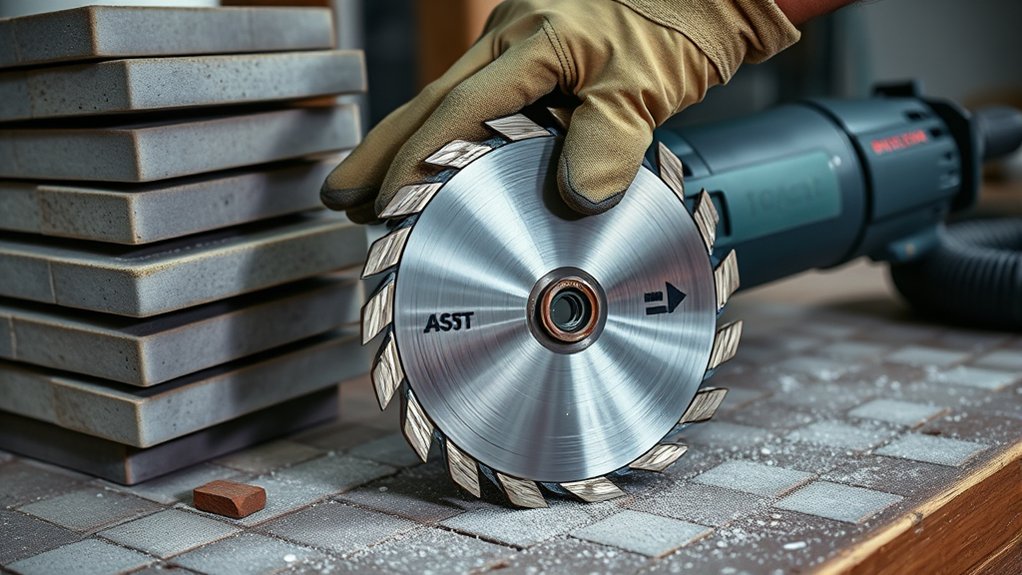
Diamond blades cut hard materials because diamond grit is held in a metal rim or in separate metal segments. The exposed diamonds grind the material into fine particles instead of slicing it with teeth.
As the diamonds wear, the metal bond also wears and exposes fresh cutting points. A blade with the wrong bond can wear too quickly or become glazed and stop cutting well. The blade manufacturer’s material chart should always control your selection.
As a general rule, a harder bond is used for softer, more abrasive materials, while a softer bond is used for dense, hard materials. Norton Abrasives describes this as an “opposites attract” relationship, but blade power, cutting method, aggregate, and material abrasiveness also affect the correct specification. See Norton’s diamond blade guide for a fuller explanation.
Choosing the Right Diamond Blade for Your Grinder and Material
Choosing the right diamond blade affects cut quality, speed, dust, heat, blade life, and safety. A blade is suitable only when its material rating and every mounting specification match the grinder.
| Material or Goal | Common Blade Style | Selection Notes |
|---|---|---|
| Ceramic or porcelain tile | Continuous rim | Designed for smoother edges and less chipping; use only when the label approves the tile type and grinder. |
| Concrete, brick, block, or general masonry | Segmented rim | Segment gaps help clear debris and manage heat during dry cutting. |
| Stone or masonry where a smoother cut is helpful | Turbo rim | Often provides a balance between cutting speed and edge quality. |
| Asphalt or another highly abrasive material | Material-specific hard-bond blade | Do not assume a general concrete blade is suitable; check the exact material list. |
| Metal, plastic, or mixed demolition material | Specialty blade only | Use only when the blade permanently identifies that material and the grinder as approved applications. |
Products Worth Considering

Ultra-Thin Design for Precision - Featuring an innovative X-teeth turbo mesh rim, wet saw for tile cutting ensures efficient and precise cutting with minimal chipping. The super thin design enhances the speed and smoothness of each cut, making it ideal for precise cuting in porcelain, ceramic, and granite.

Ultra-Thin Design for Precision - Featuring an innovative X-teeth turbo mesh rim, 4-1/2" tile cutting disc ensure efficient and precise cutting with minimal chipping. The super thin design enhances the speed and smoothness of each cut, making it ideal for precise cuting in porcelain, ceramic, and granite.

Diamond Cutting Wheel for Angle Grinder: Features 1/4" segment width with 7/8"-5/8" arbor for dry/wet cutting concrete, masonry, brick, and block
Match the Blade to the Material
Start with the exact material you plan to cut. Concrete, green concrete, asphalt, ceramic tile, porcelain, brick, granite, natural stone, and engineered stone place different loads on a blade.
Use a continuous-rim blade when the blade manufacturer recommends it for a cleaner tile cut. Use a segmented blade when the manufacturer lists concrete, brick, block, pavers, or similar masonry.
Do not select a blade by appearance alone. Read the material icons, approved tool type, wet-or-dry marking, rotation arrow, maximum speed, diameter, arbor, and any limits printed on the blade or packaging.
Check Blade and Grinder Compatibility
Complete every check below before mounting the blade:
- Tool approval: Confirm that the grinder manual permits diamond cutting wheels.
- Blade diameter: Never exceed the maximum wheel diameter listed on the grinder nameplate or in its manual.
- Arbor or mounting system: Match the hole, thread, bushing, or tool-free mounting system exactly. Never enlarge a bore or stack improvised washers.
- Speed rating: The blade’s maximum revolutions per minute must equal or exceed the grinder’s maximum no-load speed.
- Guard: Install the specific closed cutting guard or guard attachment required for that grinder and blade.
- Flanges: Use the approved backing and locking flanges in the correct orientation.
- Cutting method: Confirm whether the blade is dry-rated, wet-rated, or approved for both. A wet-rated blade does not make a standard grinder safe for water.
Follow the rotation arrow when the blade has one. The blade must spin in the direction marked by its manufacturer.
Warning: Never use a blade with a lower speed rating than the grinder. Never fit an oversized blade after removing the guard. An accessory that exceeds its rated speed can break apart at operating speed.
Key Factors to Check Before Using the Grinder
Safe cutting starts before the blade touches the surface. Inspect the grinder, guard, blade, workpiece, surrounding area, and dust-control equipment first.
- Blade condition: Look for cracks, missing segments, warping, damaged arbor holes, unusual discoloration, or heavy uneven wear.
- Tool condition: Check the cord, plug, battery, switch, side handle, spindle, guard lock, and ventilation openings.
- Workpiece support: Clamp or support the material so it cannot shift, sag, or close around the blade.
- Cut path: Mark a clear line and verify what is behind or beneath it.
- Hidden services: Check for electrical wiring, gas pipes, water pipes, fasteners, reinforcement, and other concealed hazards before cutting a wall, floor, or enclosure.
- Fire hazards: Remove flammable liquids, vapors, debris, and combustible dust from the area.
- Bystanders: Keep other people outside the debris zone and provide suitable PPE to anyone who must enter.
- Dust control: Connect the approved shroud and extractor before dry-cutting silica-containing material.
Apply light, steady pressure while cutting. Let the blade work at the rate intended by its manufacturer instead of forcing it through the material.
When an Angle Grinder Is the Wrong Tool
An angle grinder is best for short, accessible cuts and trimming work. Choose a tile saw, masonry saw, rail-guided cutter, or another dedicated machine when you need a long straight cut, deep cut, repeated production cuts, integrated wet dust control, or a finish edge that a handheld grinder cannot produce safely.
Do not make a blind plunge cut merely because the grinder can reach the surface. Hidden utilities, unsupported material, restricted guard clearance, and an unclear kickback path can make another tool or a professional cutting service the safer choice.
Proper Installation of a Diamond Blade
Unplug a corded grinder or remove the detachable battery before installing or changing a diamond blade. Wait for the tool and blade to cool before handling them.
- Read the grinder’s accessory chart and confirm the required cutting guard, flanges, blade diameter, arbor, and speed rating.
- Inspect the blade for cracks, missing segments, warping, damaged markings, or heavy uneven wear.
- Install the side handle and the manufacturer-approved cutting guard.
- Clean dust and grit from the spindle, flange faces, and arbor area.
- Remove the arbor nut or locking flange with the correct wrench or tool-free mechanism.
- Place the blade on the spindle with its rotation arrow aligned with the grinder’s rotation.
- Seat the approved flanges flat against the blade in the orientation shown in the grinder manual.
- Tighten the locking hardware securely without using an impact tool or excessive force.
- Turn the blade by hand to confirm that it clears the guard and does not scrape or wobble.
- After reconnecting power, point the blade away from yourself and others. Stand outside the wheel plane and perform the no-load test specified by the grinder manual.
The DeWalt angle-grinder manual reviewed for this guide requires accessories to be rated above the tool speed and specifies a closed, two-sided cutting guard for diamond-coated cutting wheels. Other grinders may use different hardware, so consult the manual for your exact model. See the DeWalt DWE4012 instruction manual for one manufacturer example.
Note: Flange orientation can change with wheel thickness and wheel type. Do not rely on memory or copy another grinder’s setup.
Essential Safety Precautions for Angle Grinder Use
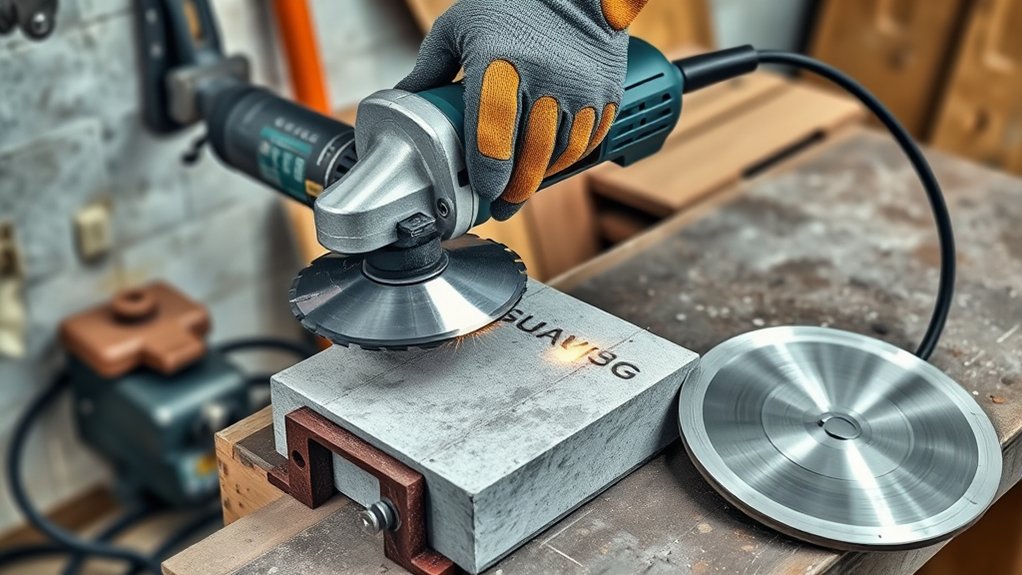
Angle grinders rotate cutting accessories at high speed and can throw dust, fragments, sparks, and pieces of a damaged blade. Use the side handle and keep both hands on the grinder whenever the tool is running.
| Precaution | Description |
|---|---|
| Safety glasses and face shield | Wear impact-rated safety glasses. Add a face shield for extra face protection; a shield does not replace safety glasses. |
| Snug work gloves | Use task-appropriate gloves that fit closely and do not reduce your grip or create loose material near the blade. |
| Hearing protection | Protect against grinder and cutting noise according to the exposure and product instructions. |
| Dust control and respiratory protection | Use an approved shroud and extractor or purpose-built wet equipment. Add a properly selected NIOSH-approved respirator when required. |
| Blade inspection | Check for cracks, missing segments, warping, damaged mounting surfaces, or uneven wear. |
| Clothing and footwear | Wear fitted clothing and sturdy footwear. Secure long hair and remove hanging cords, jewelry, and loose fabric. |
Keep your body outside the wheel plane and away from the direction the grinder could travel during kickback. Position the guard so its closed section is between you and the blade.
Warning: Cutting concrete, mortar, brick, stone, granite, and many tile products can release respirable crystalline silica. Use engineering controls rather than relying on a loose disposable dust mask. Covered workplaces must follow the applicable requirements in OSHA’s respirable crystalline silica standard.
Dust control is part of the cutting setup—not an optional cleanup step after the cut.
Dry Cutting Versus Wet Cutting
For dry cutting with an angle grinder, use a blade approved for dry use and a cutting shroud or dust-collection attachment approved for the grinder. Connect it to a suitable extractor and maintain the filters, seals, hose, and collection container as directed.
Do not use a household vacuum unless the tool and vacuum manufacturers approve the complete setup for the material and dust involved. Fine mineral dust can pass through unsuitable filters, damage equipment, and return to the air.
Purpose-built wet saws and cutters reduce dust by delivering water through a controlled system. OSHA’s handheld power saw silica-control fact sheet describes equipment with integrated water delivery. That guidance does not authorize adding water to a standard dry angle grinder.
How to Cut Safely and Effectively With a Diamond Blade
Good technique helps the blade cut cleaner and last longer. Start with a stable stance, keep the grinder steady, and never twist or lever a cutting blade sideways in the kerf.
Products Worth Considering

【Stone Master】EZARC Segmented diamond saw blade is designed for aggressive cutting of masonry materials such as granite, concrete, sandstone, and limestone. Whether you are a construction worker, plumber, paver, DIY'er this cutting blade is perfect for you.

Universal for dry or wet cutting.

High Performance diamond matrix provides 200x's the life of conventional abrasives and enhanced material removal
Proper Blade Selection
Select the blade before marking the final cut. Continuous-rim blades commonly suit clean tile work, while segmented blades commonly suit concrete and masonry. A turbo-rim design may offer a useful balance between speed and edge quality.
Check whether the blade supports dry cutting, wet cutting, or both. For an ordinary angle grinder, use only a blade and dust-control setup approved for dry operation. Move the job to purpose-built wet equipment when water is needed.
Use a straightedge, square, or chalk line when accuracy matters. A clear line reduces mid-cut corrections that can side-load or bind the blade.
Prepare the Workpiece and Work Area
- Verify the cut location and what lies behind or below it.
- Mark the full cut line before starting.
- Clamp small pieces to a stable work surface.
- Support large panels or slabs on both sides of the cut so their weight does not pinch the blade.
- Plan where the offcut will move when the cut is complete.
- Route the power cord, vacuum hose, and extension cord away from the blade and cutting path.
- Remove bystanders, flammable materials, and trip hazards.
Step-by-Step Cutting Procedure
- Complete the inspection. Confirm the blade, cutting guard, flanges, side handle, dust control, work support, and PPE.
- Take a stable position. Hold the grinder with two hands and stand outside the wheel plane and likely kickback path.
- Start clear of the material. Switch on the grinder without the blade touching the workpiece and allow it to reach operating speed.
- Establish the cut. Bring the blade into the marked line with light, controlled pressure. Keep the blade square to the kerf.
- Follow the line steadily. Do not force the grinder, rock the blade sideways, or use the cutting disc for surface grinding.
- Control cut depth. Do not attempt an excessive depth of cut. Use staged passes only when the grinder and blade instructions permit them.
- Watch the support. Stop if the material moves, sags, vibrates, or begins to close around the blade.
- Handle binding correctly. Release the switch and hold the grinder still until the blade stops. Do not pull a moving blade from the kerf.
- Restart outside the kerf. Correct the cause of binding, allow the blade to reach full speed, and then carefully re-enter the cut. Never restart with the blade trapped in the workpiece.
- Finish safely. Remove the blade from the material before switching off when the tool manual directs. Hold the grinder until the blade stops completely before setting it down.
Pro Tip: Practice your grip, body position, and entry angle on a scrap piece of the same material before making a visible finish cut.
Safety Gear Essentials
Wear impact-rated eye protection, a face shield when appropriate, hearing protection, fitted work clothing, sturdy footwear, and snug gloves that maintain a secure grip. Use a properly selected respirator when the material, exposure, and applicable rules require one.
| Gear Type | Purpose | Why It Matters |
|---|---|---|
| Impact-rated safety glasses | Protect the eyes from debris | Fragments can travel around or beneath a face shield. |
| Snug work gloves | Protect against sharp edges and hot debris | Freshly cut material can be sharp, rough, or hot. |
| Approved dust-control equipment | Capture dust close to the cut | Source capture reduces airborne dust before it reaches the breathing zone. |
| Properly selected respirator | Reduce inhalation when respiratory protection is required | A nuisance dust mask may not provide the required protection or fit. |
| Hearing protection | Reduce noise exposure | Grinding and masonry cutting can produce sustained high noise. |
Note: In covered workplaces, respirator selection, medical evaluation, fit testing, training, and exposure-control duties may apply. Follow the employer’s written program and current regulations.
Common Mistakes to Avoid When Using Diamond Blades
Many blade failures begin with an incompatible accessory, poor support, the wrong guard, or too much force. Avoid these common mistakes:
- Forcing the cut: Heavy pressure increases heat, loading, binding, and loss-of-control risk.
- Using the wrong blade: A general concrete blade may chip tile, wear rapidly in asphalt, or be unsuitable for metal or plastic.
- Using the wrong guard: A grinding guard may not provide the enclosure required for a cutting wheel.
- Removing the guard for clearance: This exposes more of the blade and may allow an oversized accessory to be installed.
- Adding water to a standard grinder: Liquid can create shock, electrocution, tool-damage, and control hazards.
- Ignoring dust: Dry cutting without suitable source control can release hazardous fine dust.
- Side-loading the blade: Twisting, prying, or correcting the angle inside the kerf can bend or break a cutting disc.
- Restarting in the cut: A blade started while trapped in the kerf can climb, bind, or kick back.
- Poor work support: Sagging material can close the kerf and pinch the blade.
- Making an unchecked blind cut: The blade may contact wiring, gas pipes, water pipes, fasteners, or other hidden objects.
- Cutting with a damaged blade: Cracks, wobble, missing segments, a damaged arbor hole, or a warped core mean the blade must be replaced.
Stop cutting if the grinder vibrates, binds, loses speed unexpectedly, produces a new noise, or begins cutting unevenly. Disconnect the power before inspecting the tool or blade.
How to Keep a Diamond Blade Cutting Well
Inspect your diamond blade before and after each job. Look for cracks, worn or missing segments, glazing, uneven wear, heat damage, a distorted core, and damage around the arbor.
Keep the grinder’s ventilation openings clean according to its manual. Do not allow slurry, water, or compressed debris to enter the motor.
Let the blade do the work. Excess pressure can overheat the blade, overload the grinder, polish or glaze the bond, and leave a rough cut.
Store the blade flat or in the manner recommended by its manufacturer. Protect it from impact, moisture, chemical contamination, and loads that could bend the steel core.
Pro Tip: If an intact blade becomes glazed, dress it only with a manufacturer-approved dressing stone or abrasive material. Dressing is not a repair for cracks, missing segments, warping, damaged welds, or an enlarged arbor hole.
Troubleshooting Diamond Blade Problems
Stop the grinder immediately when the cut feels or sounds wrong. Continuing through heat, vibration, binding, or poor support can turn a minor setup problem into a blade failure or loss of control.
| Problem | Likely Causes | Safe Response |
|---|---|---|
| The blade overheats | Too much pressure, a glazed or incorrect blade, blocked airflow, or a cut that exceeds the blade’s dry-use limits | Stop, disconnect power, allow the system to cool, and verify the blade specification and cutting method. Do not add water to a dry grinder. |
| The blade vibrates or wobbles | Dirty or incorrect flanges, damaged arbor, loose mounting hardware, warped blade, or worn spindle components | Stop using the tool. Inspect the complete mounting system and replace damaged parts or have the grinder serviced. |
| The cut chips badly | Wrong rim style, excessive pressure, poor support, or an unsuitable cutting tool | Switch to a blade approved for clean cuts in that material, support the work, or use a tile saw. |
| The blade binds | Closing kerf, twisting, excessive depth, unsupported material, or debris in the cut | Release the switch and hold still until the blade stops. Correct the support or alignment before restarting outside the kerf. |
| Kickback occurs | A pinched, snagged, bounced, or side-loaded blade | Release the switch, maintain control, wait for a complete stop, and inspect the blade, support, guard, and cut path before continuing. |
| The blade spins but cuts slowly | Glazing, wrong bond, worn diamonds, insufficient tool power, or the wrong material rating | Confirm compatibility. Dress an intact blade only if approved; otherwise change to the correct blade. |
| The grinder loses speed | Excess pressure, deep cut, low battery, overloaded motor, unsuitable extension cord, or incorrect blade | Stop forcing the tool and correct the power, blade, or cut-depth issue according to the manual. |
If the blade has cracks, missing segments, a warped rim, damaged welds, or a distorted arbor hole, replace it. Do not try to finish the job with a damaged blade.
Frequently Asked Questions
When should you use a diamond blade?
Use a diamond blade when its label approves the hard, abrasive, or brittle material you need to cut. Common applications include concrete, brick, pavers, ceramic or porcelain tile, stone, granite, block, and masonry.
What is a diamond-blade angle grinder used for?
A compatible diamond blade lets a compact angle grinder make short cuts, notches, trimming cuts, repair cuts, tile cuts, and small masonry cuts. A dedicated saw is usually better for deep, long, repeated, or highly accurate cutting.
How do you choose the right grinder disc?
Choose by material first. Then confirm the blade diameter, arbor or mounting system, maximum speed, tool approval, cutting guard, flanges, rotation direction, and dry-or-wet rating. Every item must match the grinder manual and blade instructions.
What materials should you avoid cutting with a general masonry diamond blade?
Avoid wood, rubber, food products, and any metal or plastic not named on the blade. These materials may bind, melt, load the rim, damage the blade, or create an uncontrolled cut. Specialty blades exist for some metals and plastics, but the permanent blade markings must approve the material and tool.
Can you use water with an electric angle grinder?
Do not use water with an ordinary electric angle grinder. Use a purpose-built wet saw, wet cutter, or wet-rated grinder only when the manufacturer approves the complete tool, blade, water-delivery system, electrical protection, and operating method.
Which way should a diamond blade face?
Align the blade’s rotation arrow with the grinder’s rotation. When no arrow is visible, stop and consult the blade manufacturer rather than guessing. Also confirm that any raised hub and both flanges face the direction shown in the grinder manual.
Why is my diamond blade spinning but not cutting?
The blade may be glazed, worn out, mounted incorrectly, made with the wrong bond, or unsuitable for the material. Disconnect the grinder and inspect the blade and mounting system. Dress only an undamaged blade when its manufacturer permits that method.
Can you cut reinforced concrete with an angle grinder?
Only use a blade that specifically approves reinforced concrete and the grinder model. Expect possible contact with steel reinforcement, greater dust, a higher binding risk, and limited cutting depth. A dedicated concrete cutter may be safer and more effective for deep or structural cuts.
Conclusion
A diamond blade works best when it is designed for the material and installed on a grinder that approves its diameter, arbor, speed, guard, and flange arrangement. Compatibility must be confirmed before every cut.
Inspect the grinder and blade, control silica dust at the source, support the workpiece, use both hands, and keep your body outside the kickback path. Do not introduce water to an ordinary angle grinder, and stop immediately when the blade binds, vibrates, overheats, or shows damage.
Sources
- OSHA-supported Angle Grinder Safety guide — grinder selection, guards, speed ratings, PPE, liquid coolant, and two-handed operation
- OSHA Respirable Crystalline Silica Standard for Construction — workplace dust controls and respiratory-protection requirements
- CDC/NIOSH Silica and Worker Health — silica-containing materials and health hazards from airborne respirable dust
- DeWalt DWE4012 Instruction Manual — accessory ratings, cutting guards, flanges, kickback precautions, binding, and wet-coolant warnings
- Norton Abrasives: Understanding Diamond Blades — diamond grinding action, bond wear, and material-to-bond selection
- Norton Abrasives: Segmented Versus Continuous Diamond Blades — rim-style and material-selection guidance