
A vibrating angle grinder can spoil a cut, wear an accessory unevenly, and make the tool harder to control. A slight hum or small amount of vibration may be normal, but a new wobble, harsh shaking, rattling, or vibration that grows with speed is a stop-and-check warning.
Most problems come from a damaged or poorly mounted disc, dirty or incorrect flanges, a loose guard or side handle, weak workholding, or the wrong accessory for the job. Persistent vibration with a known-good accessory can point to spindle, bearing, gear, fan, or motor damage that needs professional service.
Quick Answer
Stop the grinder and disconnect its power. Inspect the disc for cracks, chips, warping, uneven wear, or a damaged center hole; then verify the wheel rating, flange setup, guard, handle, and workpiece. If a correctly mounted, known-good accessory still causes strong no-load vibration, take the grinder out of service.
Key Takeaways
- A damaged, warped, off-center, or incorrectly mounted accessory is the first thing to check.
- The accessory must match the grinder’s diameter, arbor, guard, application, and maximum speed.
- Vibration only under load often points to technique, binding, a moving workpiece, or the wrong accessory.
- Strong vibration at no load with a known-good disc can indicate spindle or internal tool damage.
- Never keep using a grinder that shakes violently, makes new mechanical noises, overheats, or has visible damage.
At a Glance
| Time Required | About 10–20 minutes for basic inspection and testing |
| Difficulty | Easy for external checks; advanced for internal repair |
| Tools Needed | Grinder manual, supplied wrench, clean soft brush, PPE, and a known-good compatible accessory |
| Cost | Usually no cost for inspection; replacement accessories and professional repairs vary |
What’s in This Article
- Angle Grinder Vibration: Fast Diagnosis
- Safety Checks Before Troubleshooting
- Identifying Common Causes of Angle Grinder Vibration
- Diagnosing Angle Grinder Vibration Issues
- Fixing Excessive Vibration: Step-by-Step Solutions
- Preventing Binding and Stoppage
- Preventing Kickback Risks
- Maintenance Tips for Reducing Vibration
- Vibration Exposure and Operator Comfort
- When Should You Call a Pro for Grinder Issues?
- Frequently Asked Questions
- Conclusion
Angle Grinder Vibration: Fast Diagnosis
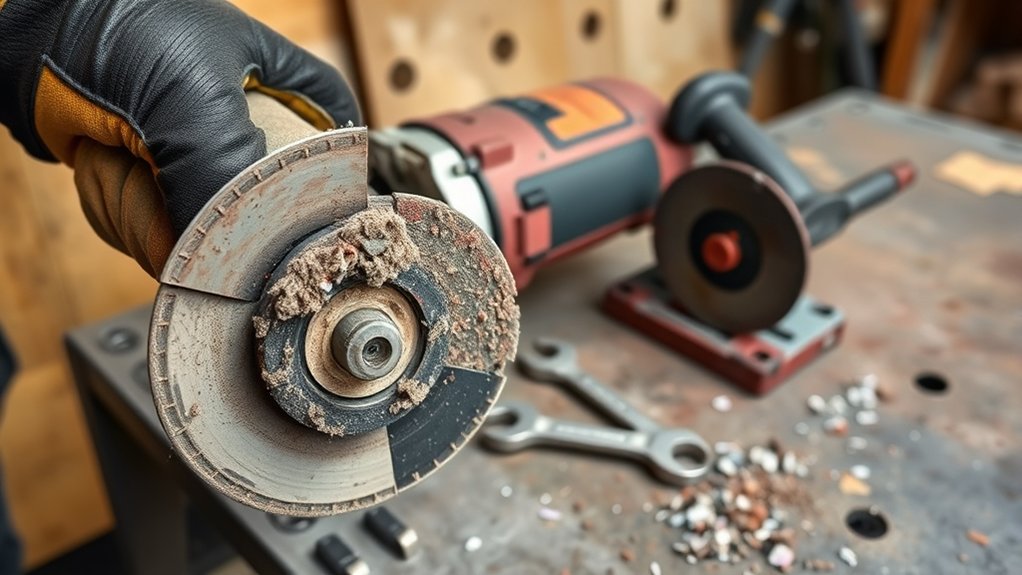
Use when the vibration occurs to narrow the cause. A grinder that shakes before the wheel touches the work usually has an accessory, mounting, spindle, or internal tool problem. A grinder that runs smoothly in the air but chatters on contact more often has a technique, workholding, material, or accessory-selection problem.
| What You Notice | Likely Causes | First Action |
|---|---|---|
| Strong vibration at no load | Damaged or off-center accessory, dirty flange, bent spindle, or internal wear | Disconnect power and inspect the accessory and mounting system |
| Vibration starts only on contact | Wrong angle, too much pressure, loose workpiece, loading, or binding | Secure the work and correct the accessory and technique |
| Pulsing once per revolution | Warped disc, damaged center hole, debris on a flange, or runout | Replace the accessory and clean the mounting faces |
| Rattle, scraping, or growling | Loose guard or handle, bearing wear, gear damage, or cooling-fan damage | Stop use; tighten only user-serviceable parts and arrange service if noise remains |
| Vibration after a drop or wheel strike | Cracked accessory, bent spindle, damaged guard, flange, or housing | Take the grinder out of service until it is fully inspected |
Safety Checks Before Troubleshooting
Warning: Never inspect, adjust, or change an accessory while the grinder is connected to power. Unplug a corded grinder, remove the battery, or isolate the air supply. Wait for all moving parts to stop before touching the wheel.
Wear eye protection during inspection and use the full personal protective equipment required for the material and task during testing. Keep the guard installed and positioned between you and the accessory. Fit the side handle and hold the grinder with both hands whenever the design allows it.
- Do not use a cracked, chipped, warped, water-damaged, or otherwise questionable wheel.
- Do not force a wheel onto the spindle or improvise with washers, bushings, or adapters.
- Confirm that the accessory’s maximum RPM is at least as high as the grinder’s no-load RPM.
- Use the correct guard and flange arrangement for the accessory type.
- Keep bystanders out of the accessory’s plane during a test run.
OSHA’s portable grinder rule requires close wheel inspection, suitable guarding, compatible wheel speed, and clean, flat contact surfaces at the wheel and flanges.
Norton Abrasives notes that doubling wheel speed quadruples the rotational stress on the wheel. Never exceed the speed marked on the accessory.
Identifying Common Causes of Angle Grinder Vibration
Products Worth Considering

[7PCS 5/8"-11 Angle Grinder Nut Wrench Replacement Kit] 1 piece angle grinder wrench and 6 angle grinder nuts (3 inner flange nuts, 3 outer flange nuts) for lock nut removal, wheel/disc replacement.Compatible with most arbor grinders and lock nuts, Perfect for home DIY, workshop projects, and professional grinder parts replacement

Angle Grinder Wrench & Nut Kit, 7-Piece Set: Includes 1 grinder wrench and 6 flange lock nuts (3 inner, 3 outer) for quick wheel changes and arbor nut replacement on 4-1/2", 5", and 7" grinders.

Genuine DeWalt replacement part.
Damaged or Unbalanced Accessory
A cracked, chipped, warped, unevenly worn, glazed, loaded, or poorly manufactured accessory can rotate out of balance. The same problem can occur with a bent backing pad, a wire wheel that has lost many wires on one side, or a diamond blade with damaged segments. Replace a questionable accessory instead of trying to work through the vibration.
A disc can also become unbalanced after it binds, is dropped, is stored badly, or is used for a task it was not designed to perform. According to Bosch, slight idle vibration can be normal, but stronger vibration can result from damage to the blade or spindle.
Incorrect Wheel Mounting or Flange Setup
The accessory must sit flat and centered on clean, undamaged mounting faces. Rust, abrasive grit, metal chips, burrs, a reversed flange, an incorrect lock nut, or a damaged center hole can create runout. Over-tightening can also stress some bonded wheels, while under-tightening may let the accessory slip.
Use only the flange, nut, hub, backing pad, or adapter approved for the grinder and accessory. Follow the diagrams in the grinder and accessory manuals because flange orientation differs by wheel type and tool design.
Worn or Damaged Grinder Parts
Worn bearings, a bent spindle, damaged gears, a cracked cooling fan, or a loose internal part can make a good accessory run unevenly. Warning signs include side-to-side spindle play, a rough feel when the spindle is turned by hand with power disconnected, growling or scraping sounds, oil leakage, overheating, or vibration that remains with a known-good accessory.
Do not open the tool unless the manufacturer permits user service and you have the required training. Internal grinder repairs can affect electrical insulation, alignment, braking, and guarding.
Loose External Parts and Poor Workholding
A loose guard, side handle, removable dust shroud, or accessory hardware can rattle and feel like a motor problem. The workpiece can create the same effect when it flexes, rings, or moves under pressure. Clamp the material so the cut stays open and the offcut cannot pinch the wheel.
Wrong Accessory, Technique, or Material Match
A cutting wheel used for side grinding, a grinding wheel used at the wrong working angle, or an accessory not rated for the material can chatter and overheat. Too much pressure slows the grinder, loads the wheel, and increases the chance of binding. Let the accessory reach operating speed, use light controlled pressure, and follow its marked application.
Diagnosing Angle Grinder Vibration Issues
Work from the accessory inward. Do not skip the basic checks because most vibration problems are easier and safer to correct before the grinder is opened or sent for repair.
- Identify when the vibration starts. Note whether the grinder shakes at startup, at full no-load speed, only during contact, or only in one cutting direction.
- Disconnect power. Unplug the tool, remove the battery, or isolate the air hose. Confirm that the switch is off.
- Inspect the accessory. Look for cracks, chips, warping, uneven wear, missing wire strands, damaged segments, a bent backing pad, or a distorted center hole.
- Check compatibility. Match the accessory to the grinder’s diameter, arbor, guard, flange, material, task, and no-load speed.
- Remove mounting debris. Clean the spindle shoulder, backing flange, lock nut, and accessory contact surfaces with a clean soft brush. Replace burred, cracked, bent, or badly worn parts.
- Check external components. Inspect the guard, side handle, housing, cord or battery mount, spindle lock, and accessible fasteners. Do not press the spindle lock while the spindle is moving.
- Reinstall correctly. Seat the accessory flat, follow the flange orientation in the manual, and tighten only as directed with the supplied tool.
- Make a guarded no-load test. Move to a protected area, keep the guard in place, stand out of the accessory’s plane, and run a newly mounted bonded wheel at operating speed for at least one minute before contacting the work.
- Test on secured scrap. Use the correct working angle and light pressure. Stop immediately if vibration, wobble, noise, or heat returns.
- Escalate the repair. If a known-good accessory still vibrates at no load, tag the grinder out of service and have it inspected by an authorized or qualified repair technician.
Note: A ring test is mainly used for certain vitrified grinding wheels and is not suitable for every thin cut-off wheel, mounted wheel, diamond blade, or coated abrasive. Follow the wheel maker’s instructions rather than tapping every accessory.
Fixing Excessive Vibration: Step-by-Step Solutions
Products Worth Considering


【Value Sets】The grinder nut set includes 1 angle grinder wrench and 6 angle grinder nuts (3 inner flange nuts, 3 outer flange nuts). Please check size and compatibility before ordering. Please contact us with any questions or concerns. We prioritize your satisfaction .

High performance aluminum oxide grain for long life and high material removal of the grinding wheel
Replace a Damaged or Questionable Accessory
Discard an accessory with cracks, chips, warping, uneven wear, a damaged hub, or a distorted center hole. Do not glue, straighten, rebalance, or otherwise repair a bonded wheel. Use a new accessory from a traceable manufacturer and confirm that every marking matches the tool and job.
Correct the Flange and Mounting Setup
Remove grit and burrs from the mounting faces, then install the correct backing flange and lock nut in the orientation shown in the manual. The wheel should fit freely on the spindle without force. Replace a bent flange, damaged nut, worn hub, or improvised adapter.
Tighten User-Serviceable External Parts
Secure the side handle, guard, and approved shroud according to the manual. Check that the guard locks firmly and does not touch the accessory. Do not operate the grinder with a missing, altered, or incorrect guard to gain clearance.
Stabilize the Work and Correct Your Technique
Clamp the workpiece close enough to the cut or grind area to reduce flex, but position the supports so the kerf does not close on the wheel. Hold the tool with both hands, maintain balanced footing, and keep your body out of the likely kickback path. Use light pressure and avoid twisting a cutting wheel in the cut.
Service Spindle, Bearing, Gear, or Motor Faults
Persistent no-load vibration, spindle play, repeated accessory runout, mechanical noise, oil leakage, burning smells, or rapid heating point to a tool fault rather than a simple wheel problem. Stop using the grinder and arrange professional service. Replacing a disc will not correct a bent spindle or damaged bearing.
Pro Tip: Keep one new, compatible accessory in its original packaging for diagnosis. If the grinder vibrates with several used discs but runs smoothly with the known-good one, the accessories or their storage are the likely cause.
Preventing Binding and Stoppage
Binding happens when a cutting wheel is pinched, twisted, or overloaded in the kerf. It can stall the wheel, jerk the grinder, damage the accessory, and trigger kickback. Support and clamp the work so the cut stays open, and never use side pressure to steer a thin cut-off wheel.
Use the Proper Cutting and Grinding Angle
Keep a cutting wheel aligned with the cut and avoid bending it sideways. For grinding, use the working angle specified by the wheel and grinder manufacturer; the correct angle depends on the accessory design. Do not use a thin cut-off wheel for side grinding.
- Let the accessory reach full speed before contact.
- Use smooth, controlled movement instead of forcing the tool.
- Reduce pressure if the grinder slows or the wheel begins to chatter.
- Keep the wheel moving during surface grinding to avoid gouges and heat buildup.
- Stop and reposition the work if the kerf begins to close.
Choose a Suitable Disc
Use a cutting wheel for cutting, a grinding wheel for stock removal, a flap disc for suitable sanding and blending work, and a rated diamond accessory for approved masonry or tile applications. Match the material, diameter, arbor, thickness, wheel type, rotation direction when marked, guard, and speed rating.
The OSHA-supported angle grinder safety guide states that a cutting disc should not be used for grinding and that the accessory RPM rating must exceed the grinder speed.
Preventing Kickback Risks
Kickback occurs when a rotating accessory is pinched or snagged and the tool reacts suddenly. Vibration and chatter can be early signs that the wheel is losing stable contact.
- Secure the workpiece and support both sides of a cut when appropriate.
- Use the correct guard and keep it between your body and the accessory.
- Use the side handle and maintain a firm two-handed grip.
- Keep your body out of the path the grinder may take if the wheel binds.
- Do not restart a cutting wheel while it is still inside the kerf.
- Apply light pressure and never twist or lever a thin cut-off wheel.
Modern grinders may include kickback control, an electronic clutch, a brake, soft start, or restart protection. These features can reduce risk, but they do not replace correct setup, guarding, and technique.
Note: An anti-vibration handle may improve comfort, but it cannot make a damaged wheel, bent spindle, or incorrect mounting setup safe.
Maintenance Tips for Reducing Vibration

Regular inspection helps you find accessory damage, loose hardware, and wear before vibration becomes severe. Follow the service intervals in your grinder manual; the table below is a practical pre-use guide, not a substitute for model-specific maintenance instructions.
| Maintenance Task | Purpose | When |
|---|---|---|
| Inspect the accessory and markings | Find cracks, wear, damage, and rating mismatches | Before each use and after a drop or bind |
| Clean flange and spindle contact surfaces | Prevent off-center mounting and runout | At each accessory change |
| Check guard, handle, cord, battery mount, and housing | Find loose or damaged external parts | Before each use |
| Listen for rough bearings or gear noise | Catch internal wear before failure | During every no-load startup |
| Clear exterior cooling vents as the manual directs | Reduce overheating and protect the motor | When dust buildup is visible |
| Store accessories dry, flat, and protected | Prevent impact, moisture damage, and distortion | After every job |
| Arrange manufacturer-specified service | Maintain bearings, gears, brushes, electronics, and safety systems | At the manual’s interval or when symptoms appear |
Norton Abrasives’ wheel handling guidance recommends inspecting wheels, storing them correctly, keeping the guard in place, and running a newly mounted wheel in a protected area before grinding.
Vibration Exposure and Operator Comfort
Even a properly working grinder transfers vibration to the hands and arms. Long or repeated exposure can contribute to hand-arm vibration problems, especially when the tool is poorly maintained, the accessory is unbalanced, the grip force is high, or the work is done in cold conditions.
- Use a low-vibration grinder or approved anti-vibration handle when practical.
- Keep accessories sharp, balanced, and appropriate for the task.
- Use only the grip force needed to control the tool.
- Break up long grinding sessions and rotate tasks where possible.
- Keep hands warm and dry, and report persistent tingling, numbness, pain, loss of grip, or finger blanching.
For workplace use, employers should assess actual tool vibration and trigger time rather than guessing from total shift length. The UK Health and Safety Executive’s hand-arm vibration guidance explains exposure assessment and control measures.
When Should You Call a Pro for Grinder Issues?
Stop using the grinder and arrange qualified service when basic accessory and mounting checks do not solve the problem. Continuing to test a tool with an internal fault can damage the grinder further or cause an accessory failure.
- Excessive no-load vibration with a new, correct, properly mounted accessory
- Visible spindle wobble, side play, or repeated runout
- Grinding, growling, rattling, scraping, or knocking noises
- A cracked housing, bent guard, damaged spindle lock, or impact damage
- Overheating, burning smells, smoke, sparks from the motor vents, or power loss
- Oil or grease leaking from the gear case
- A brake, kickback system, switch, or restart protection feature that does not work as described
- Vibration that returns immediately after correct setup
A repair technician can measure spindle runout, inspect bearings and gears, check the armature and cooling fan, verify electrical safety, and confirm that the guard and braking systems work correctly.
Sources
- OSHA 29 CFR 1910.243: Guarding of Portable Powered Tools — wheel inspection, speed compatibility, flange condition, and portable-grinder guarding.
- OSHA-supported Angle Grinder Safety guide — correct wheel selection, RPM, guards, two-handed use, PPE, and binding hazards.
- Norton Abrasives: ANSI B7.1 Grinding Wheel Safety — wheel speed, flanges, mounting, guards, inspection, and storage.
- Norton Abrasives: Proper Handling and Storage of Grinding Wheels — inspection, ring-test scope, storage, and protected test running.
- Bosch Professional Diamond Disc Safety and Troubleshooting — damaged blades, RPM limits, guards, and strong idle-vibration causes.
- UK Health and Safety Executive: Hand-Arm Vibration — occupational vibration exposure and control.
Frequently Asked Questions
Why is my angle grinder vibrating so much?
The most common causes are a damaged, warped, off-center, loose, or incorrect accessory. Dirty or damaged flanges, a bent backing pad, loose guard or handle, poor workholding, excessive pressure, spindle damage, and worn internal parts can also cause strong vibration.
What causes excessive motor vibration?
If vibration remains with a known-good accessory, possible internal causes include worn bearings, a bent spindle, damaged gears, a cracked cooling fan, armature imbalance, or loose internal parts. Stop using the grinder and have it serviced rather than opening it without proper training.
What are signs my grinder needs repair?
Repair signs include vibration with a new and correctly mounted accessory, visible spindle wobble, rough bearing or gear noise, overheating, burning smells, oil leakage, power loss, housing damage, or a safety feature that no longer works correctly.
What factors cause chatter in grinding operations?
Chatter can come from wheel imbalance, a loaded or glazed accessory, weak workholding, excessive pressure, an incorrect working angle, a poor material match, spindle runout, or loose tool parts. Correct the setup instead of pressing harder.
Can a bad disc make an angle grinder shake?
Yes. Replace a disc that has cracks, chips, warping, uneven wear, a damaged center hole, a loose hub, missing segments, or other visible defects. Do not attempt to straighten or repair a bonded abrasive wheel.
Is it safe to use an angle grinder that vibrates?
A small amount of normal tool vibration may be expected, but strong, new, pulsing, or worsening vibration is not safe to ignore. Stop, disconnect power, inspect the accessory and mounting parts, and do not resume work until the cause is corrected.
Should an angle grinder vibrate when running with no load?
Slight vibration may be normal, especially with some accessories, but visible wobble or harsh shaking at no load needs investigation. Check the accessory, flanges, and spindle. Persistent vibration with a known-good setup points to a tool fault.
Can the wrong flange cause grinder vibration?
Yes. A reversed, dirty, burred, bent, or incorrect flange can hold the accessory off-center. Use the exact flange and lock-nut setup shown in the grinder manual, and replace damaged mounting parts.
Why does my grinder run smoothly in the air but vibrate on the workpiece?
Load-only vibration usually points to poor workholding, too much pressure, the wrong working angle, a loaded accessory, a material mismatch, or a cutting wheel starting to bind. Secure the work and correct the accessory and technique.
Safety Disclaimer: This article is general information and does not replace the instructions for your grinder, guard, or accessory. Use required PPE, follow workplace rules, and consult an authorized or qualified repair professional when the tool has damage, unusual noise, overheating, failed safety features, or persistent vibration.
Conclusion
Angle grinder vibration usually starts with the accessory, its mounting system, the workpiece, or the way the tool is used. Disconnect power, inspect the wheel, verify its rating and fit, clean the flange faces, secure the guard and handle, and test the grinder in a protected area before returning to work.
If strong vibration remains with a known-good accessory, stop using the grinder. A bent spindle, worn bearing, damaged gear, fan, or motor part needs qualified service. A smooth-running tool gives you better control, cleaner results, and a safer working setup.