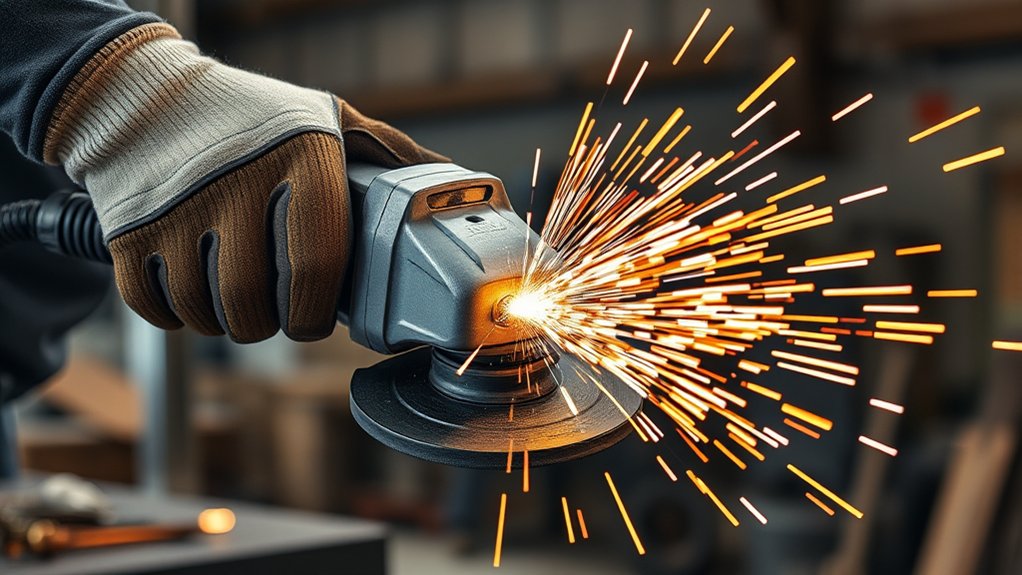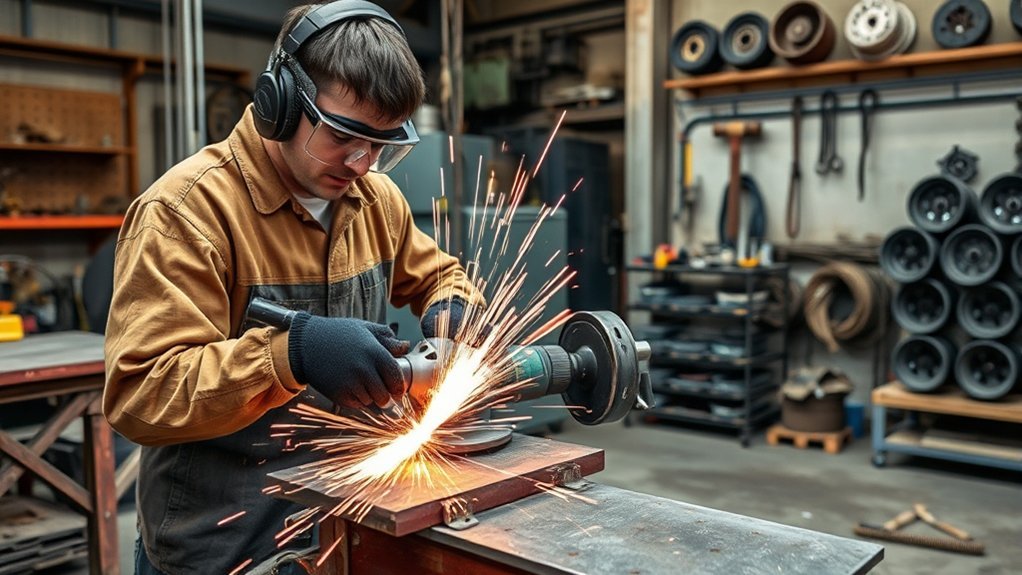
ANSI B7.1 abrasive wheel safety provides a practical framework for selecting, storing, inspecting, mounting, guarding, and operating grinding wheels. The edition currently listed by the Unified Abrasives Manufacturers’ Association is B7.1-2017. It should be used together with applicable OSHA rules, your employer’s procedures, and the instructions supplied with both the grinder and the abrasive product.
Quick Answer
ANSI B7.1 explains how to use and care for abrasive wheels safely. Inspect the wheel, match its maximum RPM to the grinder, use the correct guard and flanges, ring-test only suitable wheel types, run a newly mounted wheel for one minute, and wear PPE selected for the machine, material, and task.
Key Takeaways
- The wheel’s marked maximum operating speed must be equal to or greater than the grinder’s no-load speed.
- Do not use a wheel that has been dropped, cracked, chipped, distorted, contaminated, or stripped of readable safety markings.
- On applicable offhand bench and pedestal grinders, keep the work rest within 1/8 inch and the adjustable tongue guard within 1/4 inch of the wheel.
- A ring test is not suitable for every abrasive product. Use it only when the wheel manufacturer or an approved procedure calls for it.
- Run a newly mounted wheel at operating speed for one full minute with the guard installed while everyone stays outside the wheel’s plane.
- Use impact-rated eye protection and add a face shield when required. Select gloves carefully because stationary grinders can present an entanglement hazard.
At a Glance
| Currently Listed Edition | B7.1-2017, Safety Requirements for the Use, Care and Protection of Abrasive Wheels |
| Related U.S. Rules | Applicable OSHA machine-guarding, portable-tool, PPE, respiratory, and workplace-safety requirements |
| Bench-Grinder Clearances | Work rest: 1/8 inch maximum; adjustable tongue guard: 1/4 inch maximum, where those requirements apply |
| Post-Mounting Test | One full minute at operating speed, guard installed, no load, and no one standing in the wheel’s plane |
Understanding ANSI B7.1: Why It Matters for Safety
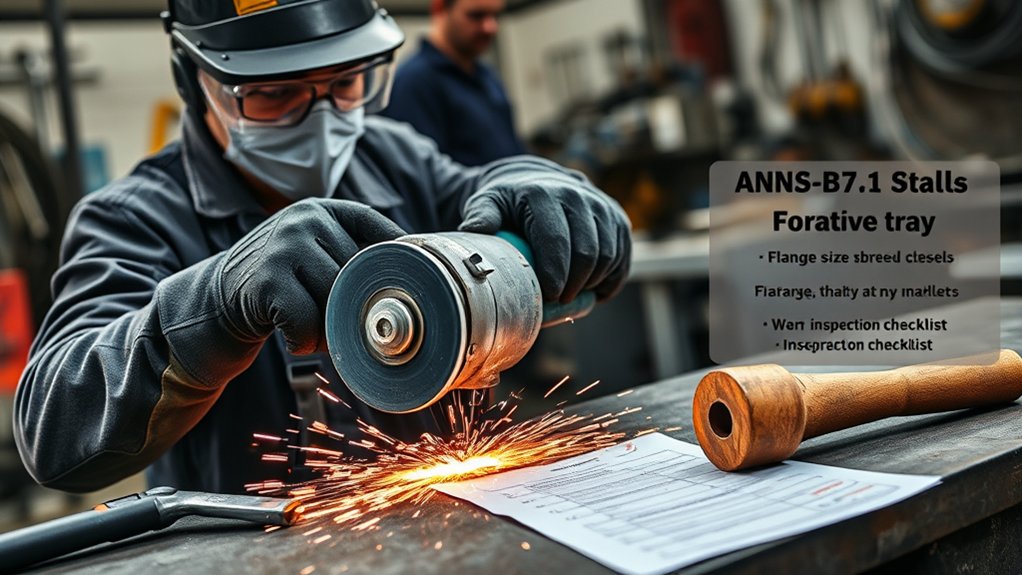
B7.1-2017 is an American National Standard covering the use, care, and protection of abrasive wheels. It addresses wheel selection, handling, storage, inspection, mounting, machine condition, guarding, speed control, operation, and operator training.
The standard exists because abrasive wheels store significant energy while rotating. A wheel that is cracked, oversped, mounted incorrectly, side-loaded, or used on the wrong machine can break apart and release high-speed fragments. Other hazards include direct wheel contact, kickback, sparks, hot workpieces, noise, dust, vibration, and electrical faults.
ANSI B7.1 is an industry consensus standard, not a substitute for workplace law. In the United States, employers may also need to comply with regulations such as OSHA 29 CFR 1910.215 for abrasive wheel machinery and other rules covering portable tools, eye protection, respiratory hazards, electrical safety, and energy control.
Note: Use this guide as a safety summary. The wheel label, safety data sheet, grinder manual, applicable regulations, and your employer’s written procedures control the details for a specific product or workplace.
A safe wheel must be correct for the grinder, correct for the material, undamaged, properly mounted, guarded, and operated within its marked speed and application limits.
Who Is Responsible for Abrasive Wheel Safety?
Abrasive wheel safety depends on more than the person holding the tool. Machine owners, employers, supervisors, maintenance workers, wheel installers, and operators each have responsibilities.
- Manufacturers provide wheel markings, warnings, compatible applications, speed limits, mounting instructions, and storage guidance.
- Machine owners and employers must provide suitable grinders, guards, maintenance, training, PPE, dust controls, and safe work procedures.
- Wheel installers must verify the product, machine speed, arbor fit, flanges, blotters where required, guard, and mounting condition.
- Operators must complete pre-use checks, follow the approved technique, control sparks and dust, and stop when abnormal conditions appear.
Do not allow an untrained person to handle, mount, dress, or operate an abrasive wheel. A worker who is familiar with one grinder may still need instruction before using a different wheel type, guard, mounting system, or machine.
Essential Power, Machine Condition, and Guarding Standards
A grinder should start, run, and stop smoothly. Do not use a machine with unusual vibration, surging, rubbing, loose hardware, damaged controls, a sticking switch, exposed wiring, a cracked housing, or a missing identification plate.
For corded grinders, inspect the plug, cord, strain relief, grounding or double-insulation features, and any extension cord. The extension cord must be suitable for the grinder’s current draw and the work environment. For cordless tools, inspect the battery, battery latch, contacts, and charger. For pneumatic grinders, verify the approved air pressure, hose condition, fittings, and speed-control system.
On portable grinders, inspect the side handle, spindle, spindle lock, guard, guard clamp, flanges, and switch. Never press the spindle lock while the spindle is rotating. Disconnect the power source or remove the battery before installing, removing, or adjusting a wheel.
Bench and Pedestal Grinder Guarding
Bench and pedestal grinders require a setup that limits wheel exposure and prevents the workpiece from becoming trapped. Check the following before use:
| Work Rest | Rigid, securely clamped, and no more than 1/8 inch from the wheel on applicable offhand grinding machines |
| Tongue Guard | Adjusted to no more than 1/4 inch from the wheel where an adjustable tongue guard is required |
| Side Guards | Installed and positioned to cover the spindle, nut, flange projections, and the required portion of the wheel |
| Adjustments | Never adjust the rest, tongue guard, spark deflector, or wheel guard while the wheel is moving |
As the wheel wears, its diameter decreases and the clearances grow. Recheck the work rest and tongue guard regularly rather than waiting until the next wheel change.
Portable Grinder Guarding
Use the guard designed for the grinder, wheel diameter, and wheel type. Secure it firmly and position it between your body and the wheel whenever the design permits. The opening must give the wheel enough room to operate without placing you in the likely fragment path.
Do not remove or modify a guard because it blocks your view or prevents the use of an incompatible accessory. That conflict usually means the accessory, guard, or machine is wrong for the job.
Pro Tip: Make the guard, work-rest, and tongue-guard checks part of every startup. Shared grinders often have unsafe clearances after another user changes or wears down the wheel.
ANSI B7.1 Pre-Use Checks for Abrasive Wheels
Complete the following checks before grinding. Do not rush the inspection to fit an arbitrary time limit.
- Identify the task. Confirm whether you are cutting, surface grinding, edge grinding, sharpening, snagging, or finishing.
- Read the wheel label. Check the wheel type, diameter, thickness, arbor or thread, maximum RPM, material compatibility, warnings, and expiration or use-by date when supplied.
- Inspect the wheel. Look for cracks, chips, gouges, warping, crushed edges, discoloration, moisture damage, contamination, missing sections, or a damaged arbor hole.
- Reject dropped wheels. Do not use a wheel that has been dropped or subjected to a hard impact, even when damage is not immediately visible.
- Verify speed compatibility. The grinder’s no-load speed must not exceed the wheel’s marked maximum operating speed.
- Check the machine. Inspect the spindle, flanges, guard, handle, power source, switch, wheel-clearance area, and mounting surfaces.
- Check the fit. The wheel must fit the arbor or threads freely and correctly. Never force the wheel on or enlarge its hole.
- Use approved mounting parts. Use only the flange, nut, adapter, bushing, backing pad, or hub approved for that grinder and wheel.
- Control the work area. Remove or shield combustibles, protect nearby people, secure the workpiece, and provide dust collection or ventilation.
- Inspect PPE. Make sure eye, face, hearing, respiratory, clothing, hand, and foot protection are suitable and undamaged.
Warning: Never assume a wheel is safe because it is new. Shipping, moisture, storage pressure, temperature changes, or rough handling can damage a wheel before its first use.
How to Do a Ring Test Before Mounting a Wheel
A ring test can reveal cracks in certain vitrified bonded grinding wheels. It is not a universal inspection for all abrasive products. Thin cut-off wheels, organic-bonded wheels, mounted points, diamond or CBN products, and other specialized wheels may require a different inspection method. Follow the wheel manufacturer’s instructions whenever the correct method is uncertain.
- Confirm that the wheel is eligible. Use a ring test only when the manufacturer or approved procedure calls for one.
- Make sure the wheel is clean and dry. Dirt, packaging, moisture, or contact with another object can change the sound.
- Support the wheel so it can vibrate. Support a suitable small wheel gently through the arbor hole or use the approved support method for its size.
- Use a light, non-metallic tool. A wooden screwdriver handle or similar tool is commonly used. Do not strike the wheel with metal.
- Tap gently about 45 degrees to each side of the vertical centerline. Do not tap directly at the bottom, on the arbor hole, or on a fragile edge.
- Rotate the wheel and repeat. Turn the wheel about 45 degrees and test additional positions.
- Listen for consistency. A suitable undamaged vitrified wheel generally produces a clear tone. A dull, dead, uneven, or questionable sound requires rejection.
A successful ring test does not prove that a wheel is ready to use. You must still verify its application, speed rating, dimensions, mounting parts, storage condition, guard, and machine setup.
Note: Do not keep tapping a questionable wheel in search of a better sound. Isolate it so another person cannot mount it, then follow the manufacturer’s disposal or evaluation procedure.
How to Mount and Test an Abrasive Wheel
Mount wheels only when you are trained for the machine and mounting system. Use the following general sequence, then follow any product-specific instructions.
- Isolate the energy source. Unplug the grinder, remove its battery, disconnect the air supply, or follow the required workplace lockout procedure.
- Clean and inspect the spindle and flanges. Remove debris without altering the parts. Reject cracked, warped, burred, mismatched, or damaged hardware.
- Check the wheel fit. The wheel must seat freely without force. Use only manufacturer-approved adapters or reducing bushings.
- Install blotters when supplied or required. Do not remove factory blotters or improvise replacements.
- Install the correct flanges. Use matched flanges with clean, flat bearing surfaces and the correct orientation.
- Tighten only enough to hold the wheel securely. Excessive torque can stress and crack an abrasive wheel.
- Reinstall and adjust the guard. Confirm that the wheel clears the guard and surrounding machine parts through a full hand rotation when the design permits this check.
- Clear the area. Remove tools, flange wrenches, packaging, and loose items.
- Stand outside the wheel’s plane. Keep other people away from the likely fragment path.
- Run the wheel for one full minute. Operate it at normal no-load speed with the guard installed and without contacting a workpiece.
Stop immediately if the wheel wobbles, rubs, vibrates, chatters, produces an unusual sound, or appears out of true. Disconnect the power before investigating.
Essential PPE for Safe Grinding

PPE is the last layer of protection, not a replacement for a correct wheel, guard, inspection, mounting system, work-holding method, or dust control.
- Eye protection: Wear impact-rated safety glasses or goggles with side protection. Abrasive-industry guidance commonly calls for eyewear marked ANSI Z87+.
- Face protection: Add a face shield when fragments, heavy sparks, scale, or chips can strike the face. A face shield is worn over safety glasses or goggles, not by itself.
- Hearing protection: Use suitable hearing protection when the noise assessment, tool instructions, or workplace rules require it.
- Respiratory protection: Control dust at the source first. Use a properly selected NIOSH-approved respirator when required by the material hazard, exposure assessment, employer program, or product instructions.
- Clothing: Wear close-fitting natural-fiber or flame-resistant clothing where sparks are present. Avoid synthetic fabric that can melt, loose sleeves, drawstrings, jewelry, and unsecured long hair.
- Foot protection: Wear stable, closed-toe footwear suitable for hot workpieces, falling objects, and the work area.
Products Worth Considering

Fashionable Design:Professional safety glasses are designed to be sleek, lightweight and worn to fit the contours of the face, ensuring style while providing comfort for all-day wear.

Z87.1 Sunglasses: As SODQW Z87.1 sunglasses for men, these eyewear pieces meet strict Z87.1 safety standards—engineered to resist impact, scratches, and debris. Whether you’re working in outdoor construction, handling mechanical tasks, or engaging in high-intensity sports, the Z87.1 certification ensures reliable protection, making them more than just sun glasses—they’re professional safety glasses you can trust.
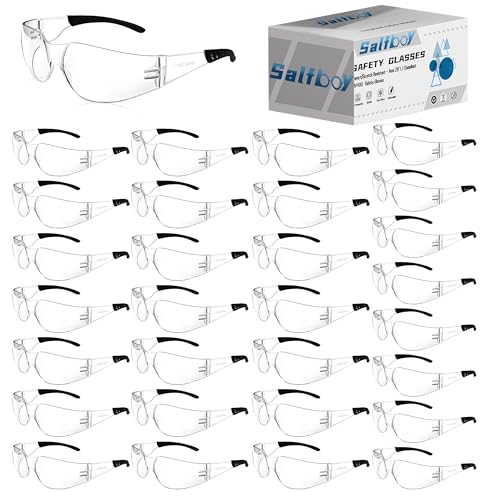
Safety Glasses Design: Safety glasses have a futuristic look and are universal for both men and women. Safety glasses for men women are secure and strong, preventing flying debris and residues from all directions from providing you with clear vision
Gloves and Entanglement
Glove advice depends on the machine. Snug protective gloves can help protect against sparks, sharp edges, and hot workpieces when using a portable grinder and when the wheel or tool manufacturer calls for them.
Stationary bench and pedestal grinders present a different entanglement risk. Do not wear gloves where they could be caught between the wheel, work rest, spindle, or another moving part. Follow the machine-specific risk assessment and keep your hands out of the danger zone.
Dust From Concrete, Stone, and Coatings
Grinding concrete, mortar, brick, stone, and engineered stone can release respirable crystalline silica. Grinding painted, plated, or coated surfaces may also release lead, hexavalent chromium, or other hazardous substances.
Use local exhaust ventilation, a compatible shroud and dust extractor, or an approved wet method where the tool and wheel are designed for it. NIOSH recommends source controls such as local exhaust and water suppression to reduce airborne silica. Never use water with an electric grinder or abrasive product unless the complete system is specifically approved for wet operation.
How to Operate Abrasive Wheels Safely
Pre-Use Inspections
Before every use, inspect the wheel and machine for new damage. A wheel that passed inspection when mounted can still be damaged by impact, incorrect storage, a jam, a fall, or another worker’s use.
Confirm that the guard is secure, the workpiece is stable, the area is clear, the accessory matches the task, and the machine speed remains compatible with the wheel. Never use a grinder that does not display its speed or whose speed cannot be verified.
Safe Operating Practices
- Keep your body and face outside the wheel’s plane during startup.
- Allow the wheel to reach full operating speed before touching the workpiece.
- Use both hands on a portable grinder when the tool is designed for two-hand control.
- Maintain stable footing and plan for torque reaction, kickback, and the direction of sparks.
- Support or clamp the workpiece so it cannot move, pinch the wheel, or fall.
- Apply light, steady pressure. Do not bump, hammer, twist, bend, or jam the wheel.
- Do not force the grinder until its motor slows or stalls.
- Use the wheel at the angle and orientation shown on its label and in the tool manual.
- Do not grind on the side of a cutting wheel. Cutting wheels must travel in a straight cut without side pressure.
- Do not use the side of a straight wheel unless that wheel and machine are specifically designed for side grinding.
- Direct sparks away from your body, hoses, cords, batteries, windows, vehicles, gas cylinders, and combustible materials.
- Keep unprotected bystanders outside the work area.
- Let the wheel stop naturally. Do not press it against material or another object to stop it faster.
| Safety Practice | What to Check | Hazard Controlled |
|---|---|---|
| Inspect the Wheel | Damage, wheel type, application, dimensions, RPM, and readable markings | Wheel breakage and loss of control |
| Set the Guards | Correct guard, secure clamp, work-rest gap, and tongue-guard gap | Fragment, contact, pinch, and jam hazards |
| Control the Work | Secure workpiece, clear spark path, stable stance, and two-hand grip where required | Kickback, dropped work, fire, and cuts |
| Use Layered PPE | Impact-rated eyewear, face shield when needed, hearing and respiratory protection | Fragments, sparks, dust, and noise |
Choosing the Right Abrasive Wheel
A wheel that is safe for one task can be dangerous on another. Match all of the following before use:
- Grinder type and approved accessory category
- Wheel diameter and thickness
- Arbor hole, thread, hub, or mounting system
- Wheel maximum operating speed
- Material being cut or ground
- Cutting, grinding, sharpening, finishing, or surface-conditioning application
- Required guard, flange, backing pad, or adapter
- Dry-use or approved wet-use conditions
A thin cut-off wheel is designed to cut with its edge and can break when side-loaded. A depressed-center grinding wheel is made for a different contact pattern. Cup wheels, straight wheels, mounted points, flap discs, and reinforced cutting wheels each require the correct machine, guard, and mounting arrangement.
Do not assume that a wheel marked for “metal” is suitable for every metal. Stainless steel, aluminum, cast iron, masonry, and nonferrous alloys may require different abrasive formulations. The wrong product can load, glaze, overheat, contaminate the workpiece, or cut unpredictably.
The UAMA grinding-wheel safety guide instructs users to read the wheel information, machine manual, operating instructions, warnings, and safety data sheets before use.
Products Worth Considering

【High Performance】flap discs 4 1/2 for angle grinder are made of hard zirconia material which lasts longer than standard aluminum oxide abrasive material, built for a more robust and economical grinding wheel


These nylon flap discs are brand New,Low noise,Long service life
Controlling Sparks, Dust, Noise, and Fire
Grinding sparks can travel beyond the immediate work area and enter gaps, floor openings, containers, vehicles, wall cavities, or piles of combustible dust. Before starting:
- Move combustible and flammable materials away from the spark path.
- Shield materials that cannot be moved with an appropriate fire-resistant barrier.
- Check the opposite side of thin metal, walls, floors, and partitions for hidden combustibles.
- Do not grind near flammable vapors, fuel containers, gas leaks, combustible dust clouds, or oxygen-enriched areas.
- Follow the site’s hot-work permit and fire-watch procedure when grinding qualifies as hot work.
- Keep suitable fire-extinguishing equipment available under the workplace procedure.
- Inspect the area after grinding because hot particles can smolder before a fire becomes visible.
Noise, dust, and vibration exposure can accumulate even when a single job feels brief. Rotate work, maintain the tool, use sharp and suitable abrasives, and follow exposure-control procedures. Stop if vibration causes numbness, tingling, pain, or loss of grip.
Safe Storage and Handling of Abrasive Wheels
Abrasive wheels can be damaged before they reach a grinder. Store them in a clean, dry, stable area away from vibration, chemicals, impact, standing water, freezing conditions, high heat, and rapid temperature changes.
- Keep wheels in their original packaging until needed when practical.
- Use racks, bins, drawers, or flat supports suited to the wheel shape.
- Do not stack heavy material on thin wheels.
- Protect labels, blotters, expiration dates, and maximum-speed markings.
- Rotate stock so older products are used first when they remain within the manufacturer’s limits.
- Do not use a wheel that is warped, curled, brittle, discolored, wet, impact-damaged, or otherwise questionable.
Wheel shelf life depends on its bond and storage conditions. Some organic-bonded products have limited service or storage dates, while properly stored vitrified wheels may remain usable much longer. Follow the date and storage instructions supplied by the wheel manufacturer rather than applying one universal shelf-life rule.
Training, Maintenance, and Energy Control
Training should cover the specific grinder, controls, guard, wheel types, mounting system, work-rest adjustment, dressing method, hazards, PPE, emergency response, and conditions that require removing the equipment from service.
Before changing a wheel, clearing a jam, adjusting a guard, dressing a stationary wheel, or placing hands or tools near hazardous moving parts, disconnect the energy source. In a workplace, follow the required lockout or energy-control procedure when servicing or maintenance could expose a worker to unexpected startup.
Maintenance should include:
- Verifying spindle speed with suitable equipment at the required intervals
- Inspecting bearings, spindles, guards, flanges, switches, cords, hoses, and handles
- Removing dust from ventilation openings without blowing hazardous dust into the air
- Checking that the grinder remains securely mounted where permanent mounting is required
- Maintaining local exhaust, shrouds, hoses, and dust collectors
- Tagging and isolating defective equipment until it is repaired by a qualified person
Common Mistakes to Avoid With Abrasive Wheels
- Using a wheel without reading its label and warnings
- Using a wheel after it has been dropped or damaged
- Mounting a wheel rated below the grinder’s speed
- Installing the wrong diameter, thickness, arbor size, thread, or wheel type
- Forcing the wheel onto the spindle or altering its hole
- Using makeshift, damaged, dirty, warped, or mismatched mounting hardware
- Leaving out blotters that were supplied or required
- Over-tightening the mounting nut
- Removing or modifying the wheel guard
- Failing to readjust a bench-grinder work rest or tongue guard as the wheel wears
- Adjusting a rest or guard while the wheel is moving
- Using a cut-off wheel for side grinding or curved cuts
- Twisting, bending, jamming, or forcing the wheel
- Starting work before the wheel reaches operating speed
- Standing directly in the wheel’s plane during startup
- Using a face shield without impact-rated safety eyewear underneath
- Using loose gloves, clothing, jewelry, or hair near an entanglement hazard
- Grinding without controlling sparks, hazardous dust, noise, and nearby people
- Continuing after vibration, wobble, smoke, burning, or unusual sound appears
Abrasive Wheel Troubleshooting
| Symptom | Possible Causes | Safe Response |
|---|---|---|
| Vibration or Wobble | Damaged wheel, dirty or mismatched flanges, incorrect seating, spindle damage, bearing wear, or out-of-true wheel | Stop, isolate power, and inspect the wheel and machine. Do not try to grind the vibration away. |
| Poor Cutting or Heavy Pressure Needed | Wrong wheel, glazed surface, loaded wheel, worn abrasive, low machine power, or incorrect technique | Stop and verify the wheel, material, speed, dressing requirement, and machine condition. Do not increase force until the motor stalls. |
| Burning or Discoloration | Excessive pressure, wrong wheel, blocked dust extraction, loaded abrasive, or poor cooling on an approved wet system | Stop, allow the work to cool, and correct the wheel, pressure, extraction, or approved cooling setup. |
| Wheel Grabs or Binds | Unsecured work, closing cut, side pressure, curved cut, misalignment, or incorrect wheel | Release the switch, hold the tool securely until it stops, isolate power, and correct the support and cutting path. |
| Unusual Noise or Rubbing | Wheel contacting guard, loose parts, bearing failure, incorrect mounting, or foreign material | Stop immediately and inspect after the wheel has fully stopped and the energy source is disconnected. |
When to Remove a Wheel From Service
Remove an abrasive wheel from service when it is damaged, contaminated, expired under the manufacturer’s instructions, worn beyond its permitted size, or no longer operating normally.
Stop using the wheel when you find:
- Cracks, chips, missing pieces, or crushed edges
- A damaged arbor hole, thread, hub, or mounting surface
- Warping, distortion, severe glazing, loading, or uneven wear
- Heavy vibration, wobble, rubbing, or repeated chatter
- Burning, smoke, unexplained odor, or unusual noise
- Missing or unreadable speed and identification markings
- Moisture, chemical, impact, or storage damage
- Wear that prevents the guard, rest, flange, or machine from functioning correctly
Do not try to get one more cut from a questionable product. Mark or isolate rejected wheels so another person cannot use them accidentally. Follow the manufacturer’s disposal instructions.
If the grinder causes the problem, remove the machine from service. A good wheel cannot make a damaged spindle, bearing, guard, flange, switch, or speed-control system safe.
Warning: Never try to “wear in” a vibrating wheel. Stop the grinder, wait for a complete stop, disconnect the energy source, and inspect the complete mounting system and machine.
Frequently Asked Questions
What is ANSI B7.1?
ANSI B7.1 is an American National Standard covering safety requirements for the use, care, handling, storage, inspection, mounting, guarding, and operation of abrasive wheels. The edition currently listed by UAMA is B7.1-2017.
Is ANSI B7.1 a law?
ANSI B7.1 is a voluntary consensus standard rather than a federal regulation by itself. Applicable OSHA regulations, state rules, employer procedures, and contract requirements may be enforceable. Some regulations also reference editions of abrasive-wheel standards.
What is an essential requirement before using an abrasive wheel?
Confirm that the wheel is undamaged, approved for the machine and task, correctly sized, properly guarded, and rated at or above the grinder’s no-load speed. Check the mounting hardware and product instructions before operation.
Do all grinding wheels need a ring test?
No. Ring testing is mainly used for suitable vitrified bonded wheels and is not appropriate for every abrasive product. Follow the wheel manufacturer’s inspection instructions for thin cutting wheels, organic-bonded wheels, mounted points, diamond wheels, CBN wheels, and other specialized products.
How long should a newly mounted grinding wheel run before use?
Run a newly mounted wheel at normal operating speed for one full minute with the guard installed and no load. Stand outside the wheel’s plane and keep other people away during the test.
What are the main safety rules for grinders?
Use the correct undamaged wheel, match its speed to the grinder, install the proper guard and mounting hardware, secure the workpiece, control sparks and dust, wear task-specific PPE, avoid side-loading cutting wheels, and stop when vibration or unusual noise appears.
Can I use a grinding wheel without a guard?
Do not remove the guard during normal grinding. Use the guard specified for the grinder, wheel diameter, and wheel type. Narrow regulatory exceptions do not justify routine unguarded operation or the use of an incompatible accessory.
How close should a bench-grinder work rest be?
On applicable offhand grinding machines, keep the work rest no more than 1/8 inch from the wheel. Secure it after adjustment and never adjust it while the wheel is moving.
How close should the tongue guard be to a bench-grinder wheel?
Where an adjustable tongue guard is required, keep its opening no more than 1/4 inch from the wheel. Recheck the gap as the wheel wears.
Is a face shield enough for grinding?
No. A face shield provides added face coverage but does not replace impact-rated safety glasses or goggles. Wear the face shield over suitable primary eye protection.
Should I wear gloves while grinding?
Snug protective gloves may be appropriate for portable grinding when the risk assessment and tool instructions call for them. Avoid gloves around stationary grinders when they could be caught by the wheel, work rest, spindle, or another moving part.
Sources
- Unified Abrasives Manufacturers’ Association — Publications — identifies B7.1-2017 and its publication date.
- UAMA Safety Guide for Grinding Wheels — supports wheel inspection, speed matching, guarding, mounting, one-minute testing, PPE, and operating practices.
- OSHA 29 CFR 1910.215 — Abrasive Wheel Machinery — supports machine guarding, work-rest clearances, inspection, and speed requirements.
- OSHA 29 CFR 1910.243 — Guarding of Portable Powered Tools — supports portable-grinder guarding, inspection, wheel mounting, and speed checks.
- OSHA 29 CFR 1910.133 — Eye and Face Protection — supports appropriate eye and face protection for flying-particle hazards.
- NIOSH — Safe Work Practices for Silica — supports local exhaust ventilation, water suppression where approved, and source control for silica dust.
Conclusion
Safe grinding depends on a complete system rather than one inspection or one piece of PPE. Select the correct abrasive wheel, verify its maximum speed, inspect and mount it correctly, install the proper guard, control the workpiece and environment, and use the technique specified for that product.
Before each job, check the wheel, grinder, guard, mounting parts, work rest, tongue guard, work area, dust controls, and PPE. After mounting a wheel, complete the one-minute protected test run. Stop immediately when vibration, wobble, rubbing, smoke, damage, or unusual noise appears. Small checks performed every time are what turn ANSI B7.1 principles into safer daily work.